• Hi Guest!
    You can help ensure that British Car Forum (BCF) continues to provide a great place to engage in the British car hobby! If you find BCF a beneficial community, please consider supporting our efforts with a subscription.

    There are some perks with a member upgrade!
    **Upgrade Now**
    (PS: Subscribers don't see this gawd-aweful banner
Tips
Tips

TR6 TR6 Rear Sway Bar Install ??

cyaker

Senior Member
Offline
Finishing up frame and suspension bits. Have Moss Motors rear sway kit and think I understand the directions, but would love to see pics of installed setup. I would appreciate someone posting a couple of pics. Particularly interested in setup at trailing arms. Also wondering if I should hold off this piece of install until I get body back on so suspension will have load on it for most accurate positioning.
Thanks
 
I have a couple of pictures on my web site (see my signature block) in the TR4A restoration section. I put mine on while the frame was still out of the car (or you could say the tub was off the frame). One 'problem' this gave me was the mufflers were not on yet and it turned out the bar was in the way of the mufflers so I had to remove it when I installed the mufflers. I now have to build some spacers to lower the bar to clear the mufflers.
 
I have an Amco rear swaybar on my six. I mounted the ends in the large holes beneath the springs. Using approx. 3/16" plates, I shaped the outer diameters to fit into the hole so that they would not spin. Drilled holes for mounting bolts. Needed to make plates for top and bottom of hole as I remember. A little bit of work, but the resulting handling is well worth it.
 
Have a friend that recommends adding a reinforcing plate to the frame where the bar mounts with the u-bolts. Under hard cornering his ripped out of the frame before he added the plate.

Just add a plate on the bottom of the chassis before driling the holes for the u-bolts. Don't forget to seall all the way around the edges of the plate to keep water from getting between it and the chassis. This may be and ideal place to use a bonding sealer instead of weld.
 
No I don't think so. The U-bolts for the frame connection install through two holes; you tip one end in the 1st hole and out the second hole. This is the only attachment for the part of the bar that bears the most torque. From what he told me, it was just hard cornering (73 TR6) and he warned me when I installed mine. This area of the rear frame is prone to rusting inside out so I'm sure that the thickness of the metal was already reduced somewhat. But I heeded his advice on my 4A and put in stress pieces about 5" long along the frame where the bar mounts.

Maybe Tim will chime in on this; I think that he's on this forum too sometimes.
 
Thanks for the tips. The instructions that come with the Moss kit talk about square washers being used where connecting to the trailing arm at springs, but did not include "square" washers but two large heavy round ones. I was concerned they would shift. Think I will find or create alternates, so they stay in a fixed position. Also the directions do not talk about a backing plate where you tie into the frame, but does include backing plates. Would have to assume more than one person had a similar problem. Would be nice to back it from inside, but do not want to make an unnecessary frame patch.

Side note, Liked the “toys” on Adrio’s site. Ran across a ’06 limited edition Miata this weekend with 8000 miles. Drove it a couple of days trying to find a good excuse to add it as a “toy”. Just to keep the wind in my hair until the 6 is ready to roll. Afraid I might get use to smooth reliable comfort going with the wind blown look.
 
I skipped the U-bolts and went with bolts all the way through the frame and used plates top and bottom, much stronger and will not rip out.
 
Hey guys, I'm installing an Addco front bar 7/8 and a rear 3/4 bar on my TR6. I'm having a heck of a time clearing the Monza exhaust system with the rear bar. Has anyone had a problem in this area? I can either modify the exhaust or use some sort of spacer on the frame for the lateral swaybar bushing brackets. I'm reluctant to use a spacer since that may weaken the mounting area. Also, my front bar did not fit so well either. Sitting on the suspension on level concrete in my garage, the front antisway bar will angle about 10 degrees from the front mounting point in order to reach the supplied links which attach to the "A" frame (whishbone as they say in GB). I thought the front antisway bar was supposed to be level with the surface. Does anyone here have any experience in these areas?
 
Sherpapilot, I have run into the same issue installing an Addco rear sway bar on my 76 TR6. The resonator on the Ansa exhaust is preventing installation of the brackets. Did you find a solution to the problem? Any help would be much appreciated!
 
Allan,

I did the same when I installed my rear bar. Knowing how thin the metal is in the are where the Ubolt would mount I wanted better support.

The comment about ripping the frame is not out of line. The metal is thin and could be even thinner after corroding over the years. If you peruse enough threads about TR6 frames you will find numerous owners who experienced problems in various places. Trailing arm pivot mounts, differential mounts... The insides of the frames were not treated to prevent corrosion. It is easy for moisture to get in and start its dirty work.

Check this link to see an extreme case of corrosion.
https://www.mg-cars.net/triumph-tr6-bbs/frame-condition-2010120301295231932.htm

BOBH
 
Sherpapilot, I have run into the same issue installing an Addco rear sway bar on my 76 TR6. The resonator on the Ansa exhaust is preventing installation of the brackets. Did you find a solution to the problem? Any help would be much appreciated!

Sir, I want to install a rear sway bar on my 1974 TR6, and I also have the Ansa exhaust. Did you find a way to install the sway bar around the Ansa system. I am looking to put the Good Parts
front and rear bars on my car. thanks. richards@hollywoodcenter.com
 
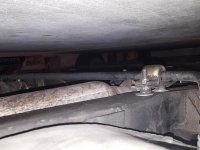
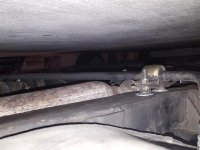
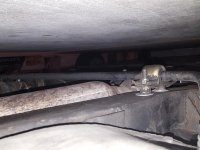
I have a custom exhaust on my TR250, twin pipes, similar to the Ansa I believe. I used big washers and or plates top and bottom and used nuts and spacer plates to make the bar mount slightly lower. If this sounds like it might help I can try to get a picture or two. I didn't use the U bolts supplied either.

I have 205/60s on the car and have autocrossed it quite a bit with no issues.
 
20160613_223817.jpg
 
Thank you very much. I am going to look at a TR6 this weekend that has the Good Parts rear bar. Maybe I can figure out how to do it.
PS Photo upside down is OK, it indicates where we (me) might be financially on these cars...which is OK, because the Fun value is priceless.
I run 215/70 tires, no rubbing, and I do have the Good Parts shorter springs front and rear.
 
Back
Top