• Hi Guest!
    You can help ensure that British Car Forum (BCF) continues to provide a great place to engage in the British car hobby! If you find BCF a beneficial community, please consider supporting our efforts with a subscription.

    There are some perks with a member upgrade!
    **Upgrade Now**
    (PS: Subscribers don't see this gawd-aweful banner
Tips
Tips

TR6 TR6 Rear Suspension

Aldwyn

Jedi Warrior
Offline
Hey folks!

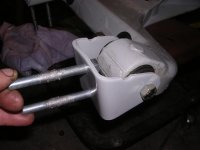
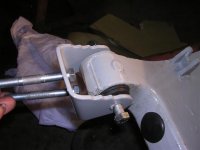
The camber on my '76 TR6 is out of whack. Looking at the rear of my car, my wheels lean in at the top...

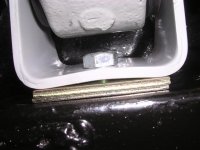
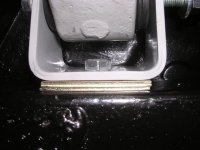
So I was thinking about replacing all of the rear bushings to see if this would help. Visual inspection shows most of them to be dry rotting and cracked anyway, so if I am going to replace the trailing arm bushings to correct camber, might as well do em all, I suppose.

As someone with very little mechanical experience, is this something I can/should attempt on my own? Or should I call in the local club gurus for help?

How difficult is this job? And about how much time does it take to complete? Any gotchas to look out for?

Thanks!
Aldwyn
 
Check the WIKI. Dale did a whole thread on this and how to make a tool to remove/install the bushings as well.

Get new spring cushions for your rear springs while you're ordering parts.

Also check with your club guys. They may have bushing tools and/or large Pitman Arm puller which works great for these bushings.

Goodparts makes adjustable brackets to go on the rear for more finite alignment adjustments.
 
I almost forgot. In case you don't use the adjustable versions, the rear brackets have an installation requirement shown below. The bracket with (3) notches is always installed as shown on the side near the emergency brake cable bracket and the (1) notch is installed as shown on the opposite side.
 

Attachments

  • 11681.jpg
    11681.jpg
    32.4 KB · Views: 741
  • 11682.jpg
    11682.jpg
    32.1 KB · Views: 727
It's not hard to do, but since you will be taking a lot of the car apart, I would recommend getting the most out of it.

1. Check the diff mount bushings and replace if needed or might be needed.
2. Check the u-joints and replace if needed.
3. Consider doing a shock tube conversion
4. Consider putting in the grease fittings on the bushings
5. Check the springs and replace if needed.
6. Everything Brosky said.
7. Make sure you don't loose or miscount the shims on the brackets.
8. If you don't go with the adjustable brackets, the moss catalog has a nice chart that shows all of the different combinations of the brackets and the resulting offsets.
9. Check the boots and replace if needed.
10. Consider a grease fitting on the half axles.
11. Also a good time to do a rear brake job.
12. Also a good time to change your diff fluid
13. Check the diff mounts and make sure they don't need to be replaced or braced.

I am sure there are others.
 
<div class="ubbcode-block"><div class="ubbcode-header">Quote:]7. Make sure you don't loose or miscount the shims on the brackets.[/QUOTE]

Said Brackets/Shims before and after torque down.
 

Attachments

  • 11684.jpg
    11684.jpg
    43.9 KB · Views: 735
  • 11685.jpg
    11685.jpg
    43.7 KB · Views: 742
Aldwyn said:
Hey folks!

As someone with very little mechanical experience, is this something I can/should attempt on my own? Or should I call in the local club gurus for help?

Aldwyn

<span style="color: #CC0000">Hey Aldwyn!!

I'm the know-nothing Triumph guy, originally from Columbia, MD,
who managed to rebuild the rear suspension of my TR6 with much
help from the kind folks here at BCF. If ten thumbs Dale can
do it..........YOU can do it. Here's a full color of how I managed
to accomplish the task.

best wishes,

dale</span>

https://www.scribd.com/doc/92509/TrailingArmBushingsFinal

Edit: I replaced ALL the fasteners with new grade #8 and new nyloks
 
3 more things that dale's write up reminded me of.

14. Check the brake lines and replace, if needed
15. Check the bump stops and replace, if needed
16. Since you are taking off all of the nyloc nuts, it's not a bad idea to replace them.
 
two more things.

17. spend the money or build a spring compressor. I did the jack trick the first time and it is a little scary

18. inspect and replace if needed, the shock linkages.

Basically, here is what I would do, if I had to do it again.

1. plan on spending one weekend taking it apart, figuring out what you need to replace.
2. order the parts you are going to need to replace
3. spend the time waiting for the parts to come in cleaning, painting and refurbishing what you won't need to replace
4. spend the next weekend putting it back together.

You can order all of the parts at once, but you will most likely end up needing to order a few parts that you didn't think you would need. So twice the delay and twice the shipping cost. Plus, you might end up striping out a bolt hole or two.

Incidently, I went urethane from TRF on spring pads and the shock linkages. And I went with the Nylatron bushings and adjustable brackets from goodparts.

Happy with the quality all the way around.
 
A suggestion, Brosky mentioned the adjustable brackets.

I second the recommendation, even if he didn't recommend them. As they make setting the rear alignment soooo much easier.

Another thing, I recommend putting a flat washer under the head of the bolt that goes through the bracket back through the frame. It will help spread the load born by just the head of the bolt.... Helps keep the brackets from cracking/splitting.
 
Lots of info, thanks guys!

Not sure I am up for all of this! :laugh: All the extras are intimidating me! :smile:

Just did brakes this past spring, so I should be good on those (though will check them). I know the hoses need to be replaced. When I did the brakes, the hoses still had tags with the date "1976" on them! Bought the hoses... just need to drain the brake fluid and replace.

Just dropped the diff this past fall, so new fluid is in there. Mounts looked great. Bushings will last a little bit longer, but are starting to dry rot a little.

How do I know if my springs need replacing? They are the origional... maybe I should just replace them, period.
 
Aldwyn....I just went through this over the winter and like Dale, I'm another know nothing Triumph guy, who just picks and chooses what he thinks he's capable of and won't do harm to himself and others. I rely on help from Friends, the Forums and the Mail Lists. My TA refurbishing is here https://tr6.danielsonfamily.org/TrailingArmBushings.htm and it really wasn't that bad to do. As others have said, keep track of the number of shims behind each bracket AND keep track of the brackets, the # of notches in them and their orientation. Do that and you'll maintain your alignment and camber. I take lots of pictures before pulling stuff apart and while pulling it apart.

If you want to go nuts on brackets and adjustments, here's the link to the chart explaining the gazillion combinations. https://members.visi.net/~kohout/trailarm.html

Dale,
Those are awesome write-ups! I feel like I've got modern version of Haynes or Bentley only better. You need to build yourself a web site so it's easily available for all of us to steal from!
 
Aldwyn said:
BTW, thanks for sharing, Dale! I had completely forgot you did a write up, complete with pictures for this job! Thanks!!

<span style="color: #990000">Really, Aldwyn- you are capable of this task.

Prior to owning this TR6 bucket of bolts, I had never changed the
oil in a car I owned. I had no automotive skills and owned no
automotive tools.

If you have a Bentley Blue Book and use my parts board concept;
you can accomplish this project --with time.

Pretend you are on a desert island like me, and plunge into it!!

dale</span>
 
I changed out the rear springs at the same time I did the bushings.
Got my stock replacement springs from TRF; they're a bit taller than the old ones and the rear of the car sits a bit higher.
Good and bad to that; I can actaly get over the curb on my driveway without scraping now, but the higher spring gave a bit more gap above the rear tire that I don't really care for.
So I fixed that at even more expense by putting larger 205/70 tires on (replacing the 185/60's) and it looks great now and has a more aggresive tail up stance.
The toughest part of the bushing job is squeezing those rubber bushings in, but overall not a tough job.
 
To second what Tinster said, this is a job an inexperienced amateur like myself can do. I replaced my springs because one was broken. I used BPNW's uprated springs. I also used their urethane bushings which were easy to put in. It's really a straightforward project despite some surprises you might find along the way. You can spruce it up in the process for fun, or take the quick route and just replace the needed bushings. It transformed my ride (but since I had been riding on a broken spring, that was even more of a change). Have fun with it!
Before:
P3120052-1.jpg

After:
rightsideflipped.jpg
 
Very nice work John.

Dale, how about the nice color selections? I like his choices.

Does your parking brake works a lot better with the new cables, John?
 
Thanks Paul! I referred to your site often for inspiration! I'm ashamed to admit this, but I only replaced one parking brake cable because I broke it while removing it! :blush: I'll replace the second one when this summer is over. But the e-brake system seems to work reasonably well. I'm sure it would be better if both cables were new.
 
Hey, you fixed what you needed to in order to get the job done. As long as it works, who cares? Do the rest when you can.

The important thing is that it's safe and rides well.
 
Back
Top