• Hi Guest!
    You can help ensure that British Car Forum (BCF) continues to provide a great place to engage in the British car hobby! If you find BCF a beneficial community, please consider supporting our efforts with a subscription.

    There are some perks with a member upgrade!
    **Upgrade Now**
    (PS: Subscribers don't see this gawd-aweful banner
Tips
Tips

TR6 TR6 Alignment / Suspension help

Gliderman8

Great Pumpkin
Gold
Country flag
Online
Hello everyone....
Having just completed my restoration of my '73 TR6 in February, I am now facing a setback :eeek:
Yesterday I took the car in to get new tires and a four wheel alignment. The guy who does the alignment told me he worked on my car but was not able to set the alignment.... he told me that the height is different; the drivers side is lower than the passenger side. He asked if I installed new springs when I did the rebuild--- unfortunately, I used original springs.
OK, so now I am faced with installing new springs and my questions are:
<span style="font-weight: bold">Where to buy them from?</span> Rimmers currently has them on sale and are quite a bit less than the typical vendors here.
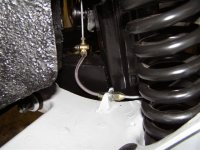
Now that the body is back on the chassis, <span style="font-weight: bold">how big a job is it to replace all four springs?</span>
I have the Bentley manual, <span style="font-weight: bold">is there something better I should consider using for this process?</span>
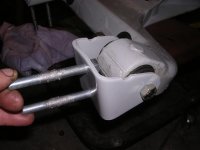
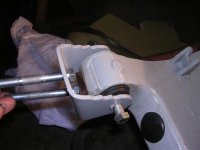
Lastly, <span style="font-weight: bold">how can I set the trailing arm brackets correctly?</span>
I put them back in the same way they came out but obviously, that is not right.
Thanks for any asistance in helping me do the job correctly!
 
Elliot,

I used TRF original height springs in mine and they are fine. Rimmer sells quality so that is not an issue, if the price is better, so feel safe using them.

The rear are a bit easier than the front, but just follow the manual and you'll be fine on the rear, making sure that you keep the shims all together from each side of the arm on both sides.

I'll see if I have a picture of the position of my brackets, because there is an up and down/right and wrong way to do it.

You will definitely need a spring compressor for the front springs, so get a good one and get a helper and a good floor jack for that job.

I'm sure that many others will chime in here with good advice as well.
 
Paul-
I'm afraid I missed the boat on the shims as I removed them when I did the frame and did not install them when I put the brackets back onto the frame. I knew I was going to have it aligned anyway, so I just took the shims with me to the alignment shop.
A photo of the correct bracket orientation would be helpful. My email address is on my profile... thanks!
If I am reading the Bentley manual correctly, it says to use a floor jack to compress the spring under the pan, then remove the bolts that hold the pan onto the lower arms, then SLOWLY let the jack down. Is the spring compressor used after the spring is compressed with the floor jack?
Thanks again Paul for your help.
 
Elliot. The way the Bentley book says is how I did it. The members here don't like that way as it is dangerous if the spring comes loose.Look out!.
They recommend the spring compressor before you lower the pan.
There are drawings on how to make one in the archives I bet. In fact it was just discussed.
 
Thanks Don... I'll see if I can find the thread of the drawing in the archives. I guess it is better to be on the safe side.
 
Elliot,

This will show you the front of the rear arm with the one notch facing up and the rear (where the hydraulic line bracket is shown) with the three notches facing up.
 

Attachments

  • 16161.jpg
    16161.jpg
    32.4 KB · Views: 230
  • 16162.jpg
    16162.jpg
    32.1 KB · Views: 234
  • 16163.jpg
    16163.jpg
    52.7 KB · Views: 216
Paul-
Now I wonder how my brackets are installed.... tomorrow I will have a look.
Thanks for the photos; they will surely help.... I owe you a :thirsty: or two!
 
Gliderman8 said:
Thanks Don... I'll see if I can find the thread of the drawing in the archives. I guess it is better to be on the safe side.

Here's a design for the bottom plate of the spring compressor that was designed by one of the guys over in 6-Pack. All that's needed is a length of ACME threaded rod, nuts and washers. It will cost you about $25 instead of the $65 that Moss charges. McMaster carries ACME rods and nuts in 3/8-12 for $18. Some guys use regular threaded rod but ACME threads are made to carry a load unlike a regular V thread. You need the compressor on the front springs but the rear ones can be easily removed using a jack to compress and then lower them.
 
Tell you what Elliot. If you ever make it to RI or MA, the beers will be on me.
 
Front:

Pull the springs and measure them. If one is short, replace them. If they are the same length, you may have left out the donut on one side or one spring (indicated longer) was not fully seated on the donut.

Spring pans seated and tight?

Rear"

no experience with IRS.

Jim
 
Also, do not forget the possibility of not having to replace the rear springs(and maybe even the front) There were spring seats that were made of aluminum that were used for the rear(stock was rubber) to compensate for slight spring height difference. Be sure you do have spring seats under your springs...
 
Thanks Paul.... Three years ago, I lived in Brookline for a job (before it dried up!) and went to the Lars Anderson (sp?) museum for one of the British car days.... I'll be back!
 
I was there at all British cars days three years ago. We probably passed in the crowds. Look forward to meeting you if you ever get back.
 
Jim-
Thanks for the info... unfortunately, I do have the rubber spacers on both the top and bottom of the spring. I think new springs are in going to be installed.
 
Bob-
The link for the spring compressor is appreciated. I do have a threaded rod (if I can find it!) from when I originally took the springs out at the start of the restoration so that should help.
 
I just did mine and used Goodparts Springs and spacers. I used a length of all thread as a spring compressor but not really as a compressor. I used a jack to compress the springs and just kept tightening the all thread nut by hand, way to much work to try and compress it turning the nut on the all thread. I would also suggest that you use a chain lopped through the spring and around the frame so if the spring dose escape it can't go anywhere. Be carful with the upper fulcrum attachments, I reversed one and have to flip around this weekend. Discovered this when the I couldn't get the camber on the wheel correct.
 
Safari-
Thanks for the info. The chain sounds like a good plan "B" just in case!
 
Question:

If there is a spring compressor (commerciial or home made) involved, with or without a jack, what is the addition of a chain for? Spring compressor thread rod is running through the spring so that it cannot escape.

Maybe it's that belt AND suspenders thing.

Jim
 
That's exactly what it is, Jim. Those things can store a LOT of energy. Enuff to break an arm or worse.
 
bgbassplyr said:
Question:

If there is a spring compressor (commerciial or home made) involved, with or without a jack, what is the addition of a chain for? Spring compressor thread rod is running through the spring so that it cannot escape.

Maybe it's that belt AND suspenders thing.

Jim

Safety, Redundancy, Safety. It is just a matter of choice like adding an extra jack stand or sliding the removed tire and rim under the frame just in case the car shifts. Losing you pants may be embarrassing but taking a spring in the face can kill you.
 
Back
Top