Hey Guest!

 Hey - did you know if you click on the title of a thread it will take you to the first unread post since you last visited that thread?
 but were afraid to ask:
  STOP!! Never post your email address in open forums. Bots can "harvest" your email! If you must share your email use a Private Message or use the
  smilie in place of the real @
 Pretty Please - add it to our Events forum(s) and add to the calendar! >>

Offline
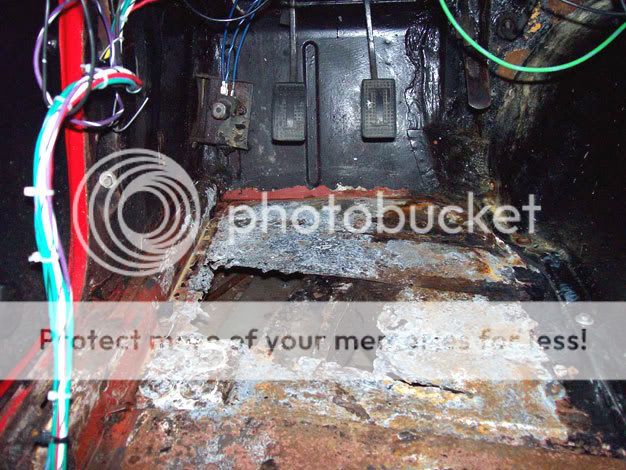
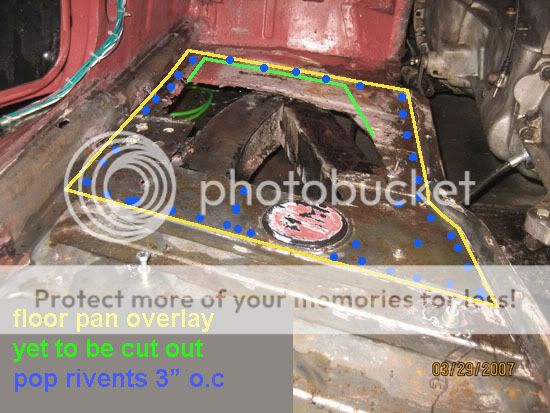
Pulled the passenger seat and carpet/padding. Obvious small holes in the far corner, in a few depressions, and along the side. Other than these holes, metal seems same thickness in front and in back (under seat). Area in front of seat sliders has surface rust; area under seat no surface rust.
Pictures are (1) carpet out, (2) corner holes, (3) side holes, (4) after wirebrush. Wirebrush revealed a few small holes in some of the depressions.
After using wire brush on my drill, much surface rust is gone. Appears to have some kind of black coating over the original red paint - anti-rust?
I'd appreciate any comments or thoughts on my next step(s). I hand and eye checked the inner sill, and it's solid. I wonder if I should just "patch" those small holes, and put some kind of rust-encapsulator over the entire surface?
Thanks all.
Tom