• Hey Guest!
    British Car Forum has been supporting enthusiasts for over 25 years by providing a great place to share our love for British cars. You can support our efforts by upgrading your membership for less than the dues of most car clubs. There are some perks with a member upgrade!

    **Upgrade Now**
    (PS: Upgraded members don't see this banner, nor will you see the Google ads that appear on the site.)
Tips
Tips

TR2/3/3A TR3A Rear Body Mount/Spare Tire Compartment Repair

M_Pied_Lourd

Darth Vader
Country flag
Offline
Hi Guys,

I have continued to strip the body and have started with a couple of suspect areas that I knew about when I purchased the car as opposed the the inner sills that I didn't know about....

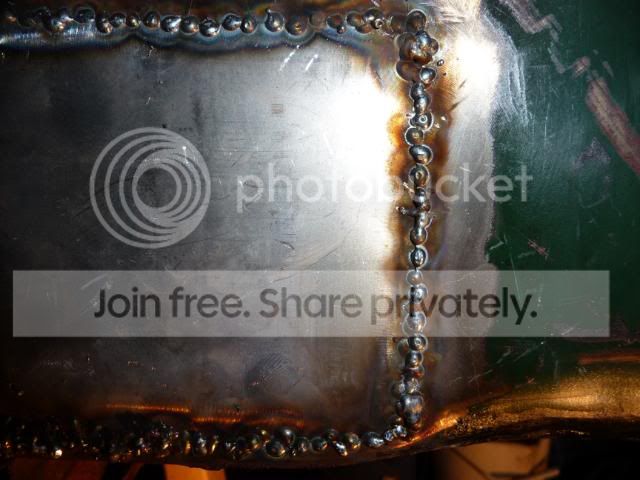
I work a little bit each day on stripping the body and practice a little welding when I can.

Anyway, here is tonights record.

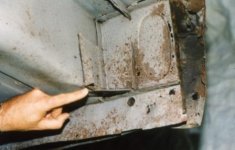
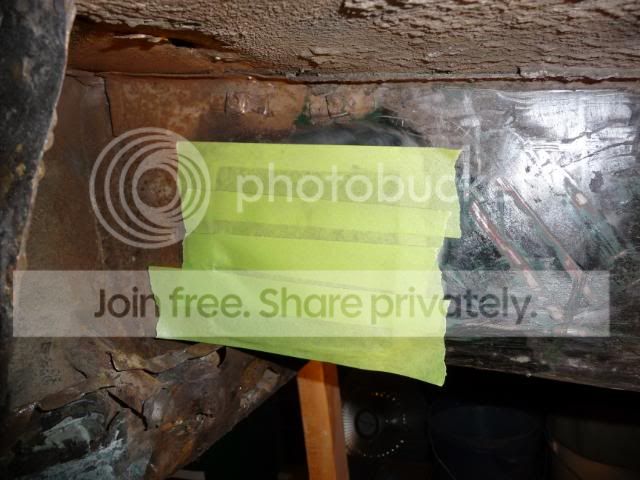
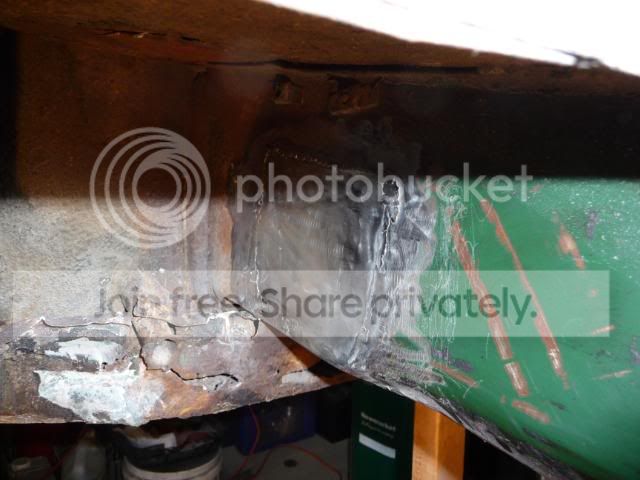
Here are two areas that I knew would need to be addressed when I purchased the car...

Passenger Side Spare Tire Compartment
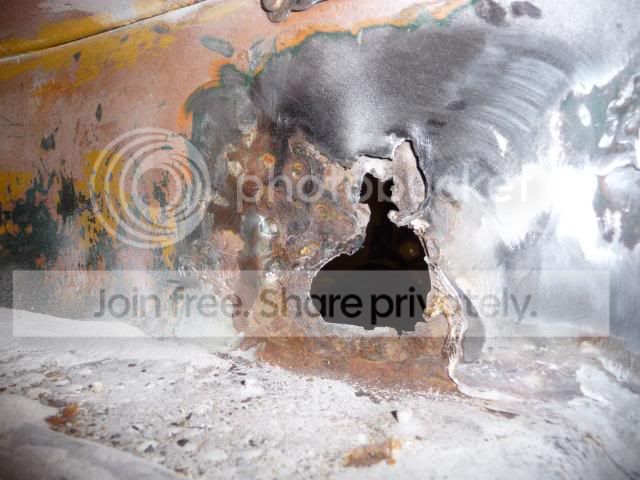
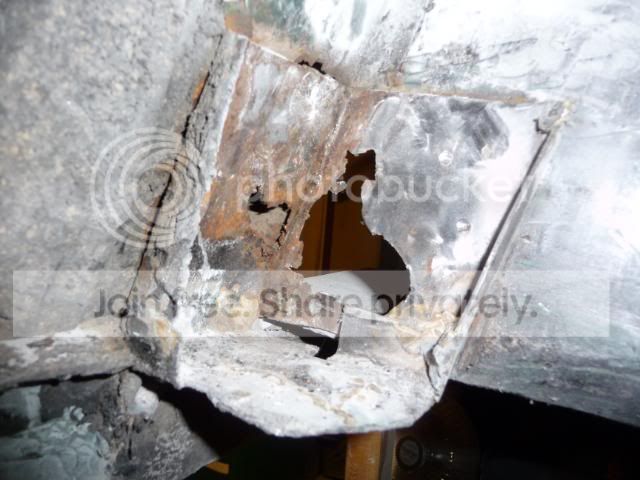
P1070064.jpg


Drivers Side

P1070069.jpg


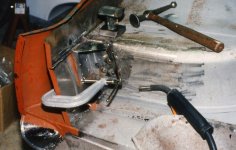
Pretty bad cover up with fiberglass much like I found in the battery box and inner sills.

So I started to strip out the fiberglass to see how bad.

P1070071.jpg


P1070073.jpg


P1070081.jpg


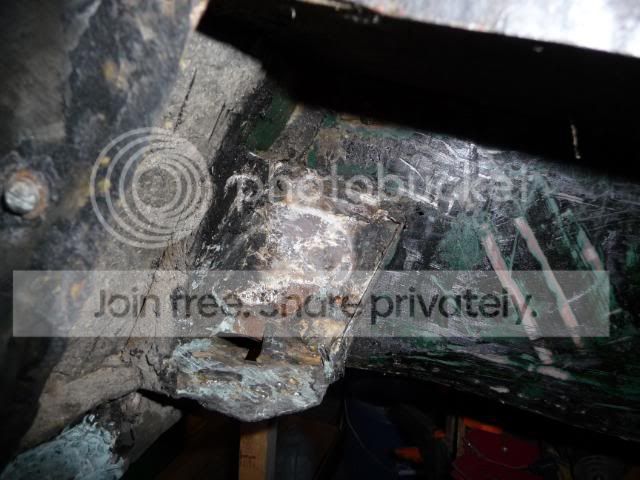
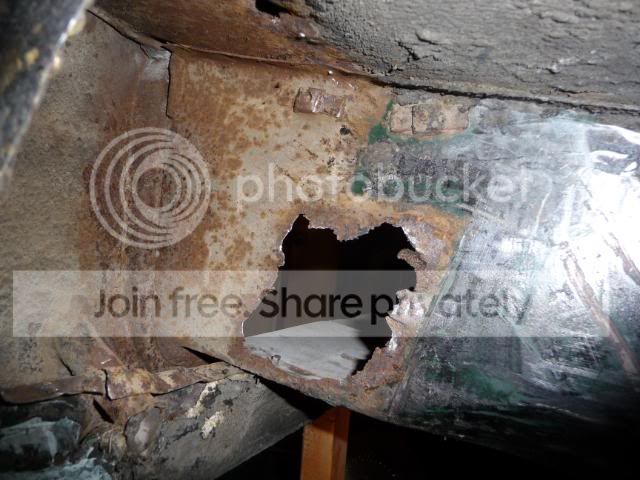
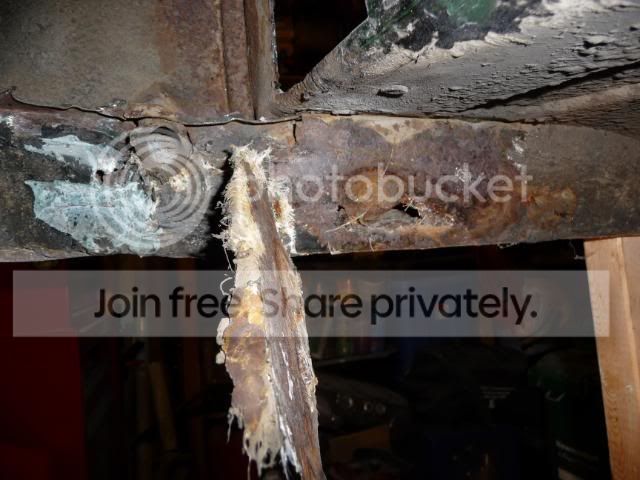
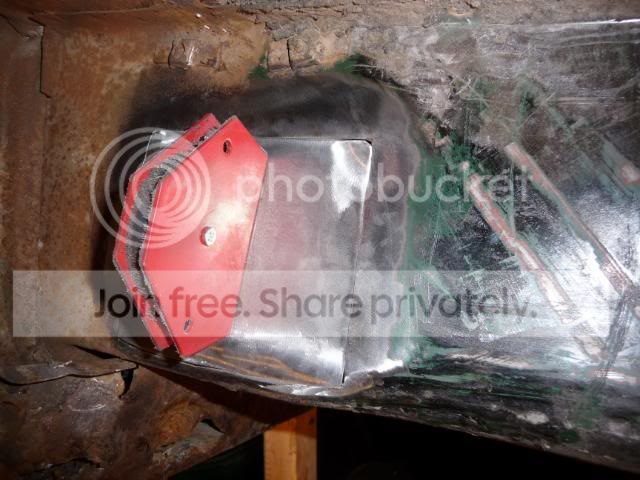
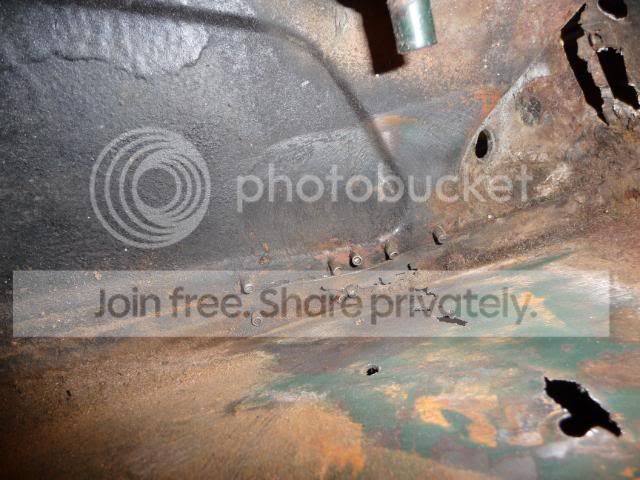
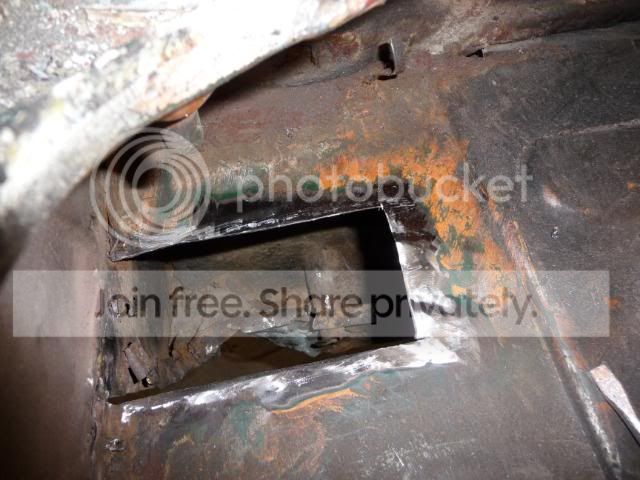
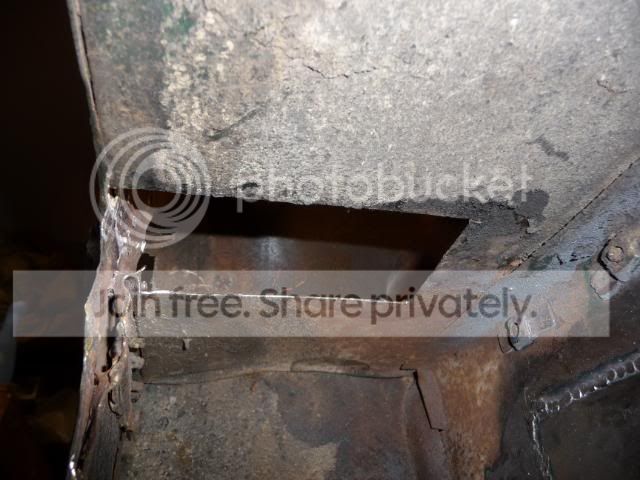
I am going to remove the body mounting bracket tomorrow. Looks like it is spot welded and I should be able to drill out the welds or get an air chisel in behind it.

Question for the sidescreen guys...are the brackets still available to purchase or will I have to fabricate some new ones?

Looks like I will be doing repair on the rear close in panel as well as the bracket on that side is rusted through as well. Will know more once the bracket is off.

Cheers,
M. Pied Lourd
 
Might be able to get you some patches from Dan's (Tinman58) old wrecked car. I'm going to be cutting out patches for "Statler" over the next few days. Get me some exact measurements and locations and I can cut them out and send you them. It should save some time in fabrication. The good news is my car went to school today and 3 students in the industrial arts advanced welding class are real excited to get to work on the car. I think by the time they get done we'll have some new LBC nuts.

Paul
 
I just might have those patches too. When I cut up the 60 tub I saved the rear valance with the thought of possibly making a wall hanging for the garage. Not sure if the brackets are there, but if Dan's isn't an option I can dig it out of storage and look for you.
 
Moss shows those brackets available as part numbers 803-760 & 803-750 @ 21.80 per.
 
I bought brackets about 10 years ago. I removed what was left of the old ones, ground back to new steel, cut cardboard patterns then made steel patches for the holes in the rear sidewalls. When this was "new" again, I drilled holes in the new angle brackets, pre-painted them and "plug-welded" the holes I had drilled.

The photo is "before" I did my own 1958 TR3A in 1988.
 

Attachments

  • 20607.jpg
    20607.jpg
    19.4 KB · Views: 553
Hi Guys,

Thanks for the offer of patches but I think that I am ok in that regard. I do have a spare body tub that will help in some regards. Unfortunately, the parts car was in a bad accident and was hit from behind. The brackets were unusable on the parts car. Art, thanks for the part #'s. I will be ordering them. Don, thanks for the photos. Always good to get advice from those that have BTDT.

Cheers,
David
 
Ok,

In from the garage and a bit of a progress report.

Removed the bracket that also included removing the rear close out panel as well since it was in bad shape and was actually in two pieces that were riveted together. You can actually see a small hole in the floor as well that will need to be repaired.

P1070083.jpg


Found more fiberglass and more areas that need to be repaired but I am confident that I can do this so no worry.

P1070089.jpg


Cut the rust out of the tire storage area.

P1070093.jpg


This seemed to work pretty well....tape over the hole. Cut the tape around the hole with a razor blade. Tape the tape to the repair panel and trim around it.

P1070095.jpg


Repair patch in place ready to be welded in

P1070097.jpg


Stopped there for the night.

Question. Looks like I am going to have to buy a magnetic ground for the MIG in order to get this piece welded in as there is no where to clamp a regular ground clamp. Does that make sence?

Cheers,
M. Pied Lourd
 
Hey thats a great idea about using the tape, I have 2 rusted areas left on the 6 to fix, I patched them with fiber glass but that was before I purchased my mig welder so now at the end of the painting project I am fixing my glass jobs the right way with STEEL, I could have used the tape idea too

keep up the work and the welding gets easier the more you do. I got one hole finished with out blowing thru and I even filled a hole up just by welding, just go round the hole in a circle and keep getting smaller until the last weld to fill it in is the very middle and grind it smooth

Hondo
 
You can ground you MIG to anywhere that is a clean spot on yout TR3A tub.

My neighbour made me a flat die and pressed the square closures for me on his press. See photo for the die.

If you can't find the square panel and if you want the dies to make your own, let me know.
 

Attachments

  • 20630.jpg
    20630.jpg
    28.5 KB · Views: 477
BYW, it's easy for a sheetmetal shop to make you the vertical piece like I had to do. The hard bit is getting the tubes in at the correct angle and location so the tubes line up with the holes for securing the rear bumperettes.


Also the long natrrow bottom panel that closes the rear box section. I had him make the 90 deg. bend and then I trimmed the long double "S" curve so it fit correctly under the flange below the rear valance.
 
Hi Don,

Thanks for the guidence. Makes me feel better kwowing that you and the others are out there if I ever run into trouble.

Cheers,
David
 
Tush - Pat might have those sections. Drop me a PM.

Just keep in mind that the ground for the MIG works best when it is close to what is being welded...
 
K time for an update.

So, managed to get two patches welded in. Go easy on me, they are my first ones. They could be better. I has some issues blowing through the metal and had to play around with the settings on my machine. I am getting to figure it out a little at a time.

So, here is the first patch.

I was doing ok (I think) on the right side of the patch...the left side, the metal was a little thinner and more of a challenge.

P1070105.jpg


Finished patch. You can see how much damage there is on the lower section and rear close out area

Here is what I took out

P1070102.jpg


P1070117.jpg


So, I decided to tackle the trunk floor. You can see, the PO had been here before. I think that the car must have rear ended a wall sometime in its racing career...

P1070124.jpg


Section cut out

P1070131.jpg

From below

P1070134.jpg


The patch

P1070138.jpg


Welded in...again some problems in the top rear corner....

P1070142.jpg


P1070151.jpg


I went out and bought some copper piping that I cut in half and pounded flat to make a heat sink/backing for the area I was blowing through. Worked very well and I will use it again. Thanks for the suggestion.

Cheers,
M. Pied Lourd
 
Good work Tush! That will hold and it looks like you put the strength back in that section. Blowing through the metal is pretty much inevitable with panel like this as you figure out the setting and the original metal changes thickness.

When you grind the welds flush you should expect some pin holes, just hit them with a bit of weld and then flatten then down again.

Good feeling to be able to make metal do what you want, eh?
 
I noticed in your 4th photo down that the half-shell and top oval plate for the tail-light look a bit like french lace. I suggest that you look back up at my photos above (or the page before) you will see how I hammered out a very nice repro part with my hammer and a block of wood to make the half oval for the tail light. The oval bit was a snap.
 
Hi Don,

Yes, I noticed that when you posted. I am going to try and make a custom piece there as well. Looks like the bottom 1/2 bullet piece is ok, but I will make the top oval piece (looks like a light switch cover).

In another one of your photos Don I also see that you had the sides of the rear valence off the car. I have a badly damaged one on the passenger side so I am going to take a look at it today and possibly remove is so I can hammer it back out to shape. Unfortunately, it can't be done while it is on the car.

FYI, I am going to be ordering the close out panels,body to frame brackets and the lower inner valence section from TRF. I am going to go as far as a can cleaning up the area to get it ready for the new metal.

Will post some more photos of the areas in question later today.

Cheers,
David
 
When installing the close out panel spot weld only to a couple of places, then trial fit the fender.
 
Thanks for the tip Keith.

Cheers,
M. Pied Lourd
 
Back
Top