• Hi Guest!
    If you appreciate British Car Forum and our 25 years of supporting British car enthusiasts with technical and anicdotal information, collected from our thousands of great members, please support us with a low-cost subscription. You can become a supporting member for less than the dues of most car clubs.

    There are some perks with a member upgrade!
    **Upgrade Now**
    (PS: Subscribers don't see this gawd-aweful banner
Tips
Tips

TR2/3/3A TR3A Dash Capping

Tinkerman

Darth Vader
Offline
I have two dash capping pieces. One has 4 holes in it like the hole in the picture and the other does not. Does have some screw holes in approximately the same location on one end of it.
Anyone have any idea as to why they are there on the one and not on the other? And what they might be for?

Thanks, Tinkerman
 

Attachments

  • 23192.jpg
    23192.jpg
    118.3 KB · Views: 476
I'll take a shot at this, as I ran into a lot of "different stuff" when I put a post 60k body on my earlier chassis. I believe this is one of those instances. The earlier cars had a piece of wood under the scuttle where the capping etc. got attached to. The holes you are pointing out look like they are where the grab handle screws would mount through, as there are threaded fasteners in the post 60k scuttle for this. Four of them to accommodate left and right hand steering. Of course, you would only cut away where you needed to. Since the earlier cars just used wood screws and location of the handle wasn't critical, they just drilled and screwed where they decided to mount the handle.

On my car, since I had the early type capping that was going on a post 60k body, I had to fill in all of the holes (including the tonneau peg holes) and start from scratch.

BTW, I used these aluminium brazing rods for the repair. It works very well.

Edit: I never knew there were two different cappings. Learn something new every day. :cheers:
 
There may be even more than two different cappings. TS39781LO does not have wood in that area, instead it has "clip nuts" that fit into a slot in the body sheet metal. I tried to use the capping from it (which has slots similar to those shown on the left in Dick's photo) on TS13571L, but the slots are so badly out of place that I can't put screws through them into the wood.

I haven't yet stripped the original leather off, so I don't know if the capping from TS13571L matches the other one above or not.

I'm glad to hear that someone was able to actually do something with that aluminum solder. I bought some at a swap meet years ago, with the intention of repairing a thermostat housing with it, but could not get it to stick. Apparently my propane torch just couldn't get it hot enough (and the OA needed a new regulator).
 
You really have to follow the instructions carefully, especially the part about using a stainless steel wire brush to clean the surface.

Since I had such good luck with the capping, I introduced the the zinc brazing in the shop as an alternative to the TIG welding aluminum repairs we were doing on items that needed only cosmetic repair, which is most of the repair work we do on aluminum. The guys doing the repair work like this stuff, and use it whenever they can.

Oh, and BTW, I was introduced to this stuff when I got a couple of rods of it from one of the club members that got it at a swap meet... :smile: I couldn't get it to work right until I found out about the stainless steel brushes.
 
Here is a picture with my pre 60k 3A capping removed showing the "j-nuts" (or spire nuts or whatever they are called) fit in the capping cutout.
 

Attachments

  • 23195.jpg
    23195.jpg
    78.9 KB · Views: 431
I can only add 1 attachment at a time. The passenger side cut-outs are clearly for the grab bar screws. On my car, I had one interior screw in the cut-out over the tach. I wonder if the capping may have been rattling and a previous owner shot a screw in there for some sort of anti rattle purpose. (Not knowing the trim washer for the screw was smaller that the size of the cutout. But it nicely screwed down the vinyl.) Or there is a purpose for the screw I have not encounter yet. There was no screw in the vinyl of the cut-out above the speedo.
 

Attachments

  • 23197.jpg
    23197.jpg
    85.8 KB · Views: 422
Here is a third picture of the other side with the capping removed. Those same j-nuts are there but unused on my LHD car.
 

Attachments

  • 23198.jpg
    23198.jpg
    87.8 KB · Views: 402
Is the capping with the large oval shaped holes the one that fit the post 60k series? And are the capping interchangeable? My experience has been that the openings are different sizes where they push over the edge. I am guessing that the later capping has the larger opening, but I am not sure.
Steve
 
You might be right, as I had to use the early capping on a post 60k body. I had to struggle to get the capping into place. It seemed like it should have had a larger opening.
 
Mine is a post 60K car so I will try both cappings and see which one fits the best. I'm almost through cleaning the old contact cement off of the one that had a piece of vinyl on it. I have to do a little hammer work on one of them but again I should be able to get it done today.
Thanks all, for the pictures, they really help.

While we're talking about it what kind of "lift the dot" pegs go on. I see the wood screw types in the Moss catalog but I really don't see anything else that would fit on my dash top. There is no way for me to get in there with a nut and washer and there are no captive nuts there.

Tinkerman
 
Hi Dick it looks like the post 60k cars used a sheet metal screw stud that just goes right into sheet metal. If you look closely at the Moss part numbers, you will see that there is a common sheet metal screw stud that is used. I am kinda right where you are at with my 61, but work has slowed because I moved. Please let us know what you find out with the cappings.
Steve
 
Well the capping with the large cut outs did not fit on my post 60k car. I didn't try the hammer method though. The one without the cutouts fit quite nicely. Might have to drill some new holes but other than that it was a good fit.

Tinkerman
 
Well that is what I thought in the beginning when I was looking at the dash pieces. I figured the post 60k cars would only have holes on the one end because by that time the cars were made chiefly for export to America. I thought that because somewhere in that time frame they dropped off the conversion plate for the clutch and brake pedals. So I went ahead an upholstered a capping piece without the large holes on both ends to fit on my post 60k. However, when I tried to fit the piece it was too tight. Clearly, I should of test fit the piece, but I trusted my ever-knowing logic instead. Now I have the car painted and a kinda bent up capping piece that needs to be cleaned before I can test fit it. There is still a bright spot in the work because for some interesting reason, I do not mind cleaning old car parts. Perhaps there is a meditative therapeutic quality to it all.
Steve
 
I agree cleaning parts is rather therapeutic to me as well. However the most challenging thing to this point has been factory contact cement on aluminum. Especially where there was never any covering on it, just over applied and let dry 50 years.
capping061.jpg
 
I see the picture Eric, have you started on the cleaning of it yet? Mine is about 50% clean. I tried any number of solvents and was getting nowhere until my wife wandered in and saw what I was doing and said "oh why don't you use WD40"? So I tried it and it softens it up enough that it can be scraped off. I had to put it on rather heavy and let it set for 5 or 10 minutes. Not quite sure how I'm going to scrape the inner section yet, but I'll figure something out. If you have any thoughts on what to use I'm all ears.
I tried mineral spirits, lacquer thinner, Alcohol and goof off. So far the WD40 works the best

Just thought I would pass along the tip.

Cheers, Tinkerman
 
I used a number of things as well the wd-40, it's also a good option. On aluminum where I couldn't use a wire wheel, I used some emery cloth and just sanded it down. I got most of it off but where it wasn't going to be recovered I didn't worry about getting every last bit. You can see that in the pic here I made sure that the edges where glue was going were clean.
SDC10764.jpg
 
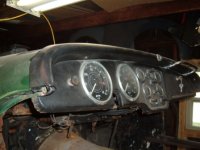
I have TS2784l -with TS44025 engine -probably a mix of at least 2 cars, but before 60k. My car came without any cappings so I have been watching this thread.

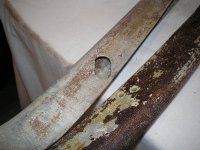
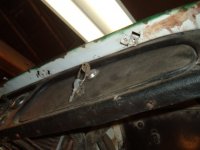
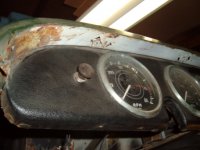
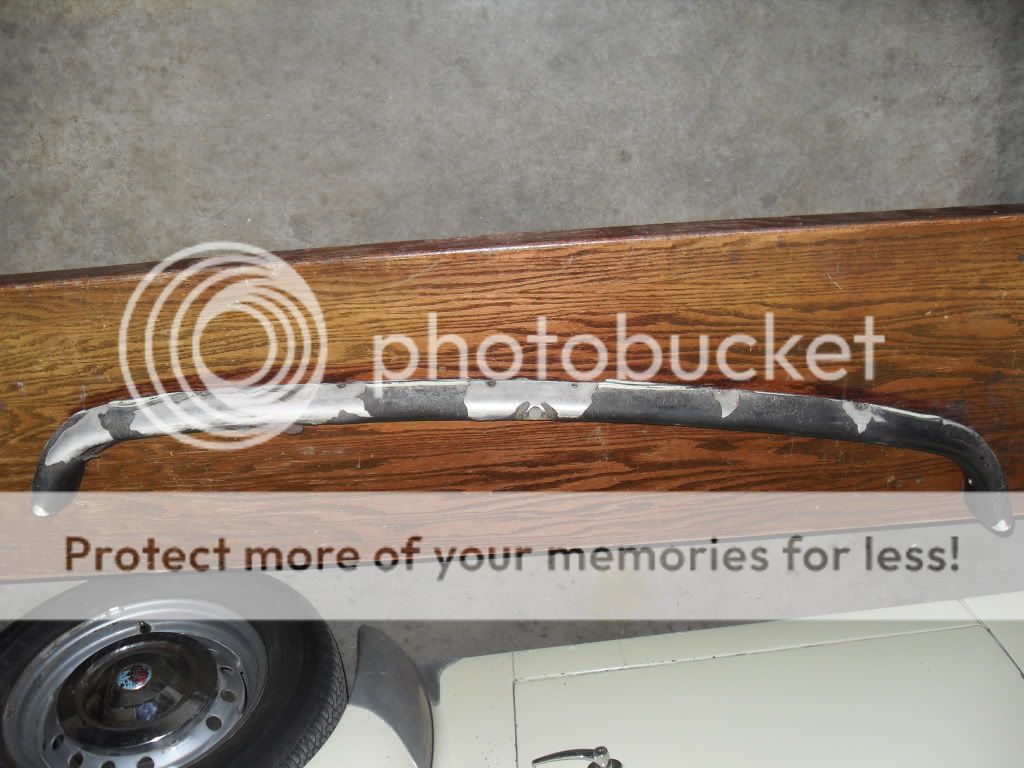
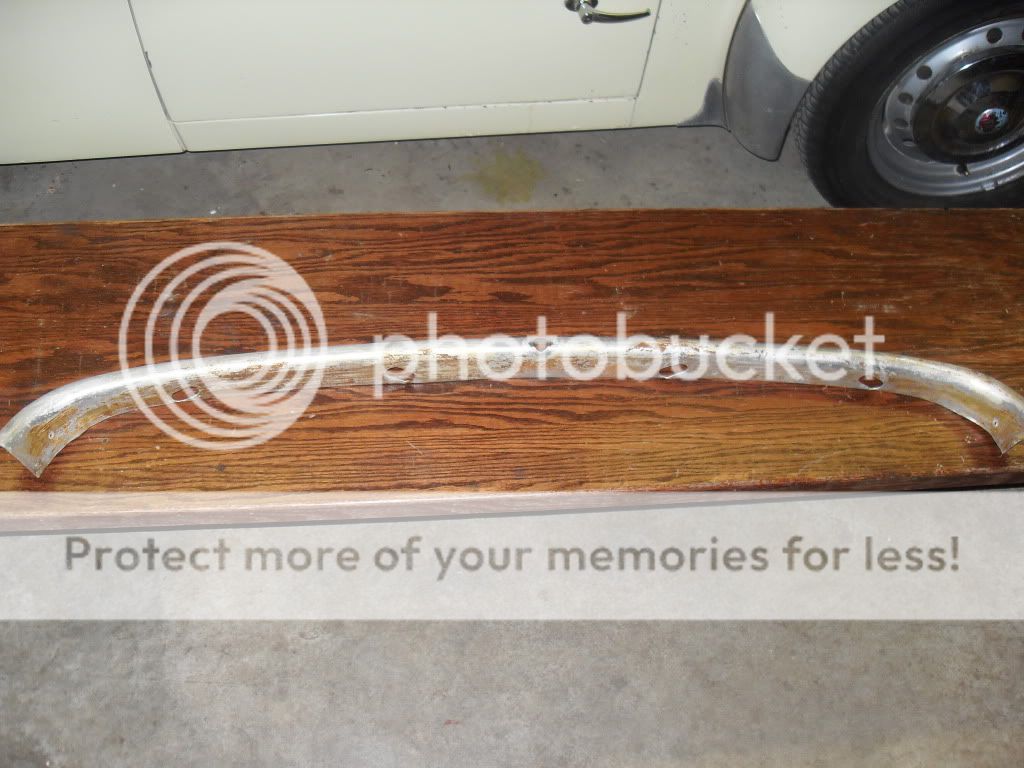
I have 2 dash rails from ebay. One has a pair of elongated holes on both sides (for the handle). It has been recovered over top what might be original leather. The mounting holes seem to line up perfectly with the holes in the body of the car.

The other dash capping has no elongated holes, (is a little bent up) has glue on the inside and the covering removed, but the holes all seem to be off about 1/2" towards the right side of the car. It has 2 sets of 2 holes where the crash handle screws would go (on the right side only).

I thought the one with elongated holes was made of plastic, but it appears to have been painted black on the inside, and the added stiffness of the dried leather and glue makes it sound and feel like plastic instead of metal.

I'll be sure to know which fits before I paint, or recover, and I'm glad it came up.
 
It would be my guess that you are going to need to use the one with the elongated holes. Pull the covering off and I suspect you will find aluminum under there. To my knowledge, spotty at best heh, they used no plastic in that time period on the TR2-4B. Someone may slam dunk me on that, but that's my thinking. When you pull the covering off be firm but gentle and you should find that it comes off quite readily.

Good luck, Tinkerman
 
My TS53854L has the elongated holes on both right and left sides. made from aluminum and covered with the original leather, I would have to say that this is the one for your car.
cappings039.jpg

cappings044.jpg
 
Back
Top