Hi Guest!

 Hey - did you know if you click on the title of a thread it will take you to the first unread post since you last visited that thread?
 but were afraid to ask:
  STOP!! Never post your email address in open forums. Bots can "harvest" your email! If you must share your email use a Private Message or use the
  smilie in place of the real @
 Pretty Please - add it to our Events forum(s) and add to the calendar! >>
Has anyone used the replacement rear apron panel offered by any of the big 3? If so what was it like
1)getting the old one off? 2)fitting the new one?
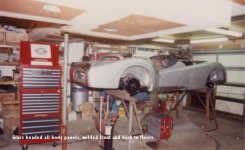
On mine, both sides within the curve between spare tire cover and tail=light are badly rusted(The top half is great).
I have had no replies to looking for a used one and my sheet metal skills are short of what is needed to successfully make the two-way bend needed.
OF course if anyone out there can make those for me I would gladly pay.
Sorry for rambling!
Griff
"They don't make em like they used to, They never did"
1)getting the old one off? 2)fitting the new one?
On mine, both sides within the curve between spare tire cover and tail=light are badly rusted(The top half is great).
I have had no replies to looking for a used one and my sheet metal skills are short of what is needed to successfully make the two-way bend needed.
OF course if anyone out there can make those for me I would gladly pay.
Sorry for rambling!
Griff
"They don't make em like they used to, They never did"