• Hey Guest!
    British Car Forum has been supporting enthusiasts for over 25 years by providing a great place to share our love for British cars. You can support our efforts by upgrading your membership for less than the dues of most car clubs. There are some perks with a member upgrade!

    **Upgrade Now**
    (PS: Upgraded members don't see this banner, nor will you see the Google ads that appear on the site.)
Tips
Tips

TR2/3/3A TR-3 Rear Seat Millboard

TR-3rg

Jedi Hopeful
Country flag
Offline
HI,
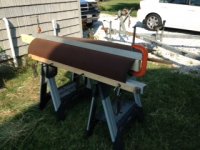
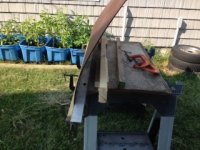
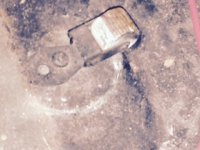
When I purchased my TR-3A the rear millboard panel was broken. It is covered with the same vinyl as the rest of the interior and I want to reuse the covering. I have read a new one can be cut from a sheet of Masonite. If thats true, is the bend put in head of time? If so, what's the bend radius? Any special processing to make the bend like steam or soaking? Any help is appreciated. Its pretty much the last "problem" from the PO that I need to fix.

Thanks, Roy
 
The boards were different at different commission numbers. I'm guessing the article you read was talking about one of the versions where the board is flat and there is a metal insert to fill between the board and the back of the cockpit.

If you really need the curved one, my suggestion would be to just buy one. I believe TRF sells them separately.
 
Hi,
I checked with TRF prior to this and they do not sell the boards loose anymore. The have the one that fits between the tank and the trunk on sale, but not the other one. I will try forming the Masonite and see what happens.

Thanks,
Roy
 
If I were to attempt this, I would start with standard (non-tempered) Masonite and introduce moisture somehow (steam or mist). I would also bend before cutting to shape.
 
Last edited:
Roy,
When I did my car I did not have that rear piece. I found an original example of the type with the 1/8" plywood and tin upper curved section riveted to the plywood. I made paper patterns of both the plywood and tin sections. I bent the tin section so that the bend radius was not sharp and the fit into the rear tabs was good, just a little trial and error. I can send you a copy of the pattern if you want to make your own. Let me know and have a good day!

John
 
Well that was easy! I found an article on forming Masonite dry, soaked or heated. A piece of 1/8" can bend to a 4" radius, by soaking in water for 2 hours. I made up a fixture to clamp one end and to bend it to a 5" R. It worked great. Next step is to trim and cover. I have enough of the original mill board to make a pattern. If I can get my cell phone to work, I will post a couple of pictures.

Roy
 
I'll look forward to some photos. After checking mine, I might just make a new one this winter.
 
Hi, I am working on the backseat millboard this weekend and have included a couple of photos of the bend fixture I made. I have a piece of 2x4 mounted on a sheet of plywood. The 2x4 is set 5" back and 5" up to create a 5" bend radius. The Masonite clamps to an Al angle I bolted to the edge of the plywood. I have the new piece fitted. I used the old covering for a pattern, the original millboard was in to many pieces to be useful.

I now have a new question. Two rollers are mounted to the floor and they line up with two holes in the original millboard. I assume they are for securing the it. Does any one have a photo of this? Do the roller face fwd or aft? Is there a strap that loops around the roller?

Here's a link to the info on forming Masonite: www.[B]masonite[/B].co.za/products/downloads/bending.pdf
Thanks, Roy


attachment.php
attachment.php
attachment.php
 

Attachments

  • IMG_0640.JPG
    IMG_0640.JPG
    45.2 KB · Views: 156
  • IMG_0639.JPG
    IMG_0639.JPG
    48.4 KB · Views: 143
  • roller.jpg
    roller.jpg
    38 KB · Views: 145
Back
Top