• Hi Guest!
    You can help ensure that British Car Forum (BCF) continues to provide a great place to engage in the British car hobby! If you find BCF a beneficial community, please consider supporting our efforts with a subscription.

    There are some perks with a member upgrade!
    **Upgrade Now**
    (PS: Subscribers don't see this gawd-aweful banner
Tips
Tips

TR6 Seat belt reinforcing plate question

nichola

Jedi Hopeful
Country flag
Offline
Hello and (soon) Happy New Year!

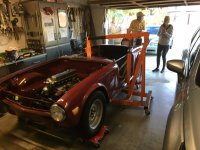
I am about to put the body back onto the chassis of my TR6. I don't recall where I bought the mounting kit but it did not have the reinforcing plates for the seat belt attachment near the tunnel, so I'm looking for metal in the garage to make them. Anyone happen to recall the dimensions? I'm guessing they are at least 1/8" thick. Looking at the catalogs it appears that they sit on top of the u-shaped aluminum spacers between frame and floor. Or does the reinforcing plate fit on top of the floor?

Thanks in advance for any advice.
 
I’m going from memory but on my ā€˜73 Tr6 as I recall the reinforcing plates were built into the body.
 
These are replacement floors and they are not reinforced. Thanks for the info, though, I'll look through my rusted discard pile and see what I find.

AHA... looking at Google images of the TR6 floor pan, it looks like the reinforcing plates I am referring to go on top of the floor pan and ahead of the holes where the seat belts attach. Not sure why they are there, to be honest, unless as a little additional security if the seat belts bolts pull out or fail in an accident.
 
Last edited:
I have the org. floor 1973 TR 6 but when I got my new seatbelts they came with 2 1/2 washers and about 1/8 thick for backing on say new installation. The seatbelt would brake before that could fail.
I had a friend that was in a small aircraft crash and his seatbelt broke. The doctor told him if it had not broken he would not have lived just lap belt. Madflyer
 
Raced formula cars for years and we strapped in so tight and secure you couldn’t help but become ā€œoneā€ with the car. No plans to go more than fifty percent with this flexxy relic. In fact, just going with lap belts on the TR6. But I do want to hear that in-line six and take it through the gears on a nice Saturday morning cruise, up Old Castle Road to Valley Center or twisting along Camino Del Rey to Fallbrook.

Body is back on after a year separation.
 

Attachments

  • 8FB2FC95-11E1-411D-8E57-C3EE41931BD2.jpg
    8FB2FC95-11E1-411D-8E57-C3EE41931BD2.jpg
    75.8 KB · Views: 218
Coming along fine Fitting doors and hood can take some time with the shimming but it all works. I did my car 27 years ago but the memoirs persist. I have been to many LBC meet up and down the West Coast. The one thing I see many times is installing the the hinge to hood ( three bolts ) in the wrong holes as they are two lengths and putting short one in the right hole or you can dent the hood. Where is Hidden Meadows in Ca. Madflyer
 
Coming along fine Fitting doors and hood can take some time with the shimming but it all works. I did my car 27 years ago but the memoirs persist. I have been to many LBC meet up and down the West Coast. The one thing I see many times is installing the the hinge to hood ( three bolts ) in the wrong holes as they are two lengths and putting short one in the right hole or you can dent the hood. Where is Hidden Meadows in Ca. Madflyer

Thanks Madflyer, I will watch out for that hood hinge issue. Hidden Meadows is in northeast part of San Diego county, north of Escondido, on a hill just east of I-15. There are some nice twisty roads around. Camino del Rey seems to attract car manufacturers testing new models on the curves from time to time. Gopher Canyon is pretty good and nearby, as is Old Castle Road up and over the hill to Valley Center. Those roads are all close to Hidden Meadows.
 
We have been in the area a number of times to Triumph Meets and my wife family years ago they have all past now. We drove my TR 250 on our Honeymoon from Sacramento into Mexico 1971. Did Marine park and the Zoo on the trip. British Car Day in Del Mar I think the first big meet we did in 1994 from Reno NV. with the TR 6 . In short I hope you drives the tires off your car when complete. ( NOTE ) I did my 1973 TR 6 in one year a frame up. How long have you been on your car. Not judging but it helps other when they have an idea of the time it takes to complete the work. I also worked part time at a British Car shop at the time so I had a helping hand and all tools and space. I worked for free for shop time.

Madflyer
 
Hey Madflyer, I bought this about eighteen months ago and began working on it right away. But my definition of "working on it" is a couple hours a day, four or five days a week; more like hobbying on it. I figure another three months minimum and I'll take it for a drive. Have spent north of $12k on the rebuild so far. Replaced/rebuilt/improved just about everything underneath the skin, but I didn't do the diff or the trans except for seals and new fluids. Just crossing my fingers on those. I painted the trunk interior and the engine bay in original color but will not be touching the exterior. Replaced both interior floor pans and the trunk pan. Other than that, no rust. It is going to be a stripped down sunny weather short trip toy... no top, no heater, no radio, no etc. etc. With a lumpy cam and a lightweight flywheel and a nice exhaust system, who needs a radio, anyway.
 
Sounds great and your in the right pace. we all need a day or two to let the cuts heal and sore back a rest from being on the ground for any time. As for dollars I did my TR 6 in 1993 and stopped adding up at
$ 10.000.00. As for the Trans and Diff. if your shifting forks are not worn as in you still have good flats your good to go. The Diff. the book says fill as needed so if you check gear lash a .003 to .006 you do not need anything. ( Note ) if any of the drive axles flanges as in trans or Diff fell off then they are broken at the key way and will cut a new seal. The only parts I recommend is an oil line to the top of the head and not use an old clutch plastics line. I had a braided line made. If you have the gas tank out a cleaning and real seal is a good idea. REASON the tank is of clam shell type and the bottom seam will collect water and rust. I got the kit from the motorcycle shop that cleans and seals it is a three step system and the final seal has a hardener so is done quickly. It lets the last bit to settle in the grove. 27 years latter I have never had a gas tank problem or fuel line clog. I would not use a radiator shop boil out the kit did a great job for under $ 20.00
Keep us it the loop Madflyer
 
nichola Note I do not wish to tell you how to build your car only to tell you of things I have run across either in my car or TEC help I have given to others over my years.
If wisdom comes with age I am 74 if it comes with mistakes I have been there also. I have found this site gives one the best of both. Madflyer

I'm only a year behind you! My wife and I feel like together we nearly have one complete human brain. Yesterday I caught us both standing with blank looks wondering why we were standing there... it usually comes to us if we just stand long enough. That's another reason my TR6 build is taking so long. No worries on the advice. I bought new radiator and new gas tank, fyi.
 
Looks like a good team you have . We just had our 50th in Nov. She is a top down girl rain or snow as we ran up and down the West Coast. One year she took the TR to Portland and back from Reno. I was working in California at the time and meet her up there. She traveled with another TR 6 with her girlfriend. Two girls two TR 6's up and back no problems. On another TR meet to Big Bear CA, she went one way from Reno and I took the TR home.

I would like to hear how many others wires have done the same. Madflyer

The previous owner is a friend, Wendy, who lives in the neighborhood. She said the other day her chick car is looking good. I had to let her know that it's the blokiest blokes car, according to James May.
 
The TR6 should have mounting points for the belts on the B pillar just above floor level, on the transmission tunnel near the rear bulkhead, on the face of the wheel well where it meets the rear ā€œseatā€ and on top of the wheel well. The inertia reel bolts to the ā€œseatā€ and the wheel well. The belt runs from there through the top mount then over your shoulder to the stalk which is mounted to the transmission tunnel. The other end is mounted to the B pillar. No way would I drive a car with just lap belts.
 
The TR6 should have mounting points for the belts on the B pillar just above floor level, on the transmission tunnel near the rear bulkhead, on the face of the wheel well where it meets the rear ā€œseatā€ and on top of the wheel well. The inertia reel bolts to the ā€œseatā€ and the wheel well. The belt runs from there through the top mount then over your shoulder to the stalk which is mounted to the transmission tunnel. The other end is mounted to the B pillar. No way would I drive a car with just lap belts.

Probably right about that. May rethink the lap belt plan.
 
Back
Top