-
 Hi Guest!
You can help ensure that British Car Forum (BCF) continues to provide a great place to engage in the British car hobby! If you find BCF a beneficial community, please consider supporting our efforts with a subscription.
There are some perks with a member upgrade!**Upgrade Now**
(PS: Subscribers don't see this gawd-aweful banner

Tips
- We have a special forum called "Member Articles" where you can submit actual articles for consideration for publication. Learn More
- Don't have an Avatar? If not, your avatar will default to the 1st character in your username. Go into "Account Details" to change your Avatar.
- Some basic forum navigation info: click
Hey - did you know if you click on the title of a thread it will take you to the first unread post since you last visited that thread?
- Hey Guest - Is your British Car Club in our Clubs database? If not, send me a PM - Basil

- Looking for a local club? Click the "Clubs" tab above and browse hundreds of clubs world-wide.
- Add Android or iPhone APP: click
- Did you know - any picture or video you add in your posts in any marque-specific forum will also get added to the Media Gallery automatically.
- A few more tips about posting and replying: click
- Hey there Guest - be sure to keep your profile page up to date with interesting info about yourself: learn more
- More tips and tricks on Posting and Replying: click
 STOP!! Never post your email address in open forums. Bots can "harvest" your email! If you must share your email use a Private Message or use the
  smilie in place of the real @
- Want to mention another member in a post & get their attention? WATCH THIS

- So, you created a "Group" here at BCF and would like to invite other members to join? Watch this!
- Hey Guest - A post a day keeps Basil from visiting you in the small hours and putting a bat up your nightdress!
- Hey Guest - do you know of an upcoming British car event?
 Pretty Please - add it to our Events forum(s) and add to the calendar! >> Here's How <<
- Hey Guest - you be stylin'
Change the look and feel of the forum to fit your taste. Check it out
- If you run across an inappropriate post, for example a post that breaks our rules or looks like it might be spam, you can report the post to the moderators: Learn More
- If you would like to try some different "looks" or styles for the site, scroll to the very bottom, on the left and click the Style Selector.
You are using an out of date browser. It may not display this or other websites correctly.
You should upgrade or use an alternative browser.
You should upgrade or use an alternative browser.
Restoring Horn Push Button
- Thread starter Kainopong
- Start date
Consider replacing the horn push. The original one on my BJ-7 was everything you described and needed to be replaced IMO. The usual suppliers have them and they look decent (Victoria British featured them in their on-line catalog). Pop the chrome retention ring and replace with new. it's been 10+ years and still holding up. I kept the original one for sentimental reasons. Gonzo
Offline
I found that spraying clear on the bakelite plastic brought it back. It then gets buffed out to remove any orange peel from the clear.
Take a look at p. 16 of this document: https://www.healey6.com/Technical/Trafficator Repairs.pdf
You can also check this website out: https://healey6.com/Technical/Austin Healey-AC Trafficator Restoration Flyer-VII.pdf
I purchased a restored trafficator from Curt Arndt, looks terrific!
You can also check this website out: https://healey6.com/Technical/Austin Healey-AC Trafficator Restoration Flyer-VII.pdf
I purchased a restored trafficator from Curt Arndt, looks terrific!
Offline
I authored the control head/trafficator paper on John's site. Edited is probably a better term because there are contributions from a number of Healey people which I acknowledge. On page 17 there is discussion of refinishing the bakelite. I used this process on my own unit and ten years later, with a bit of polish from time to time, it still looks great. I hope that Curt Arndt will chime in here as I think his advice might have been what I followed though as I said in the article, I really wasn't sure.
Good luck.
Lin
Good luck.
Lin
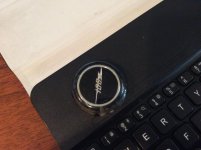
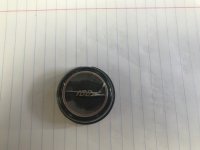
So for the benefit of those interested, I took the horn push and removed the black paint and silver paint with a small plastic item to not scratch the back of the horn push. Once removed, the acrylic can be polished with a dremel tool and rouge but be careful and go slow and steady. Once it’s crystal clear smooth I repainted the back with gloss black testers model paint..and it looks pretty good vs where it was! Topped off the back with metallic silver paint and I’m in the beep business with the correct horn push. 

Offline
Looks good!:eagerness:
pkmh
Jedi Warrior
Offline
Very good finished appearance. Congrats, Kainopong!
I'm going to throw the following alternative solution on the table for clear plastic elements having fractures/cracks and or chips. If this was mine, the following is what I would do, especially if no replacement parts can be had.
I would first use a dremel having a very fine drill bit (like what dentists use when drilling teeth), drill into and only along the fractured area visible. So, for example, if the crack is linear about a 1/4 inch long and say, 1/8 inch deep, then I would dremel the 1/4" linear path along the crack and drill 1/8" deep groove, enough to rid all signs of the crack. I'm going to note here the depth should not be where any lettering or other design features occur--for this topic, we are just talking clear plastic issues and just removing the clear visible crack. Then, I would use a two part "clear" epoxy resin (brand name "Parks Super Glaze" is what I used to refurbish my wood dash) and fill the created void (cleaning the groove prior is a good idea, but no need to polish the interior areas dremeled prior to adding the epoxy resin). Let set (usually 24 hours), then sand (ultimately using 1200 grit or higher) and buff out (use of a dremel for sanding and buffing would be the best to keep the finishing specific). Then, if necessary, white rouge and high speed buff the whole thing (lightly so as to not burn any surfaces).
To me, even this little process is an art, so its a good idea to practice on a sample specimen first. And I will leave this as a suggestive alternative method if all other options fail.
Please note I emphasized earlier on "clear" because I have yet to figure out, or even having the need to, repair damaged opaque or colored plastic surfaces. Maybe clothing dye as an admixture to the resin??
Paul
Last edited:


