• Hi Guest!
    If you appreciate British Car Forum and our 25 years of supporting British car enthusiasts with technical and anicdotal information, collected from our thousands of great members, please support us with a low-cost subscription. You can become a supporting member for less than the dues of most car clubs.

    There are some perks with a member upgrade!
    **Upgrade Now**
    (PS: Subscribers don't see this gawd-aweful banner
Tips
Tips

Restoring a Healey is Easy

HealeyRick

Yoda
Silver
Country flag
Offline
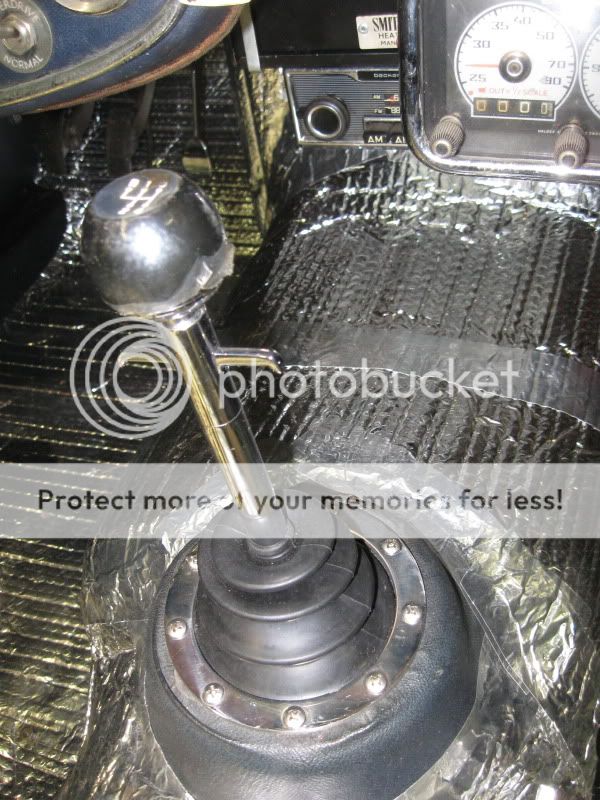
Until you start screwing around with it. Take the shifter boot, for instance. With a standard Healey resto, try to remember whether the nipple goes up or down, fit the chrome trim ring, fit the boot into the shift tower and you're good. But when you fit a Ford T5Z transmission, Steeda TriAx short throw shifter and an old school Ford trigger lock toploader shift lever, it takes a little longer. Figured out I could use a 289 Cobra shift boot and a stainless trim ring that matches my steering wheel hub. All in all. this took about six hours of work to get everything aligned and looking good:

IMG_0223.jpg


More updates at the link in my sig.
 
I've been saying it for years; there's no twenty (20) minute project on a Healey that can be done in less than five (5) hours.

That's certainly been the case with my own car, as well as the couple others I've worked on in recent times.

And yes, changing them up complicates things, but looking at the bright side, gradually changing them back (as I've been doing) twenty (20) years later allows you to revisit those old and create new complications.
 
Working on Healey's is like buying an old house and saying "I can fix this up for X dollars, knowing full well it is going to cost you 2X or 3X by the time you are done! I think it is my version of rock climbing with no ropes - make a mistake and it's gonna cost ya !!!!
Regards,
Mike
 
Rick,

It does take a lot of extra effort to not only make things work, but make them look like they belong. I can appreciate the attention to detail. Nice job!

Ken
 
Healey_Z said:
Rick,

It does take a lot of extra effort to not only make things work, but make them look like they belong. I can appreciate the attention to detail. Nice job!

Ken

Thanks, Ken. Actually finding solutions to the challenges in a drivetrain swap are a big part of the fun of the whole adventure. Probably the same thing that drives concours guys to find the right Hardura or count the number of stitches per inch on the seat covering. Same thing, but different targets.
 
I'm with you Rick. My current project is to smooth out the balance tube between my two SU's. There are too many extra stands and plugged holes for my liking. The top pic is the motor in the car. The second is the balance tube purchased for $20. The third is with the first few features removed. On Wed I am borrowing a guy's MIG, set up for aluminum, to plug the holes. I think this will go a long way to make the motor look like it belongs, which is probably important to very few people, but it is important to me and I know you would appreciate it also.
tube%252520smooth4.jpg
 
Clean is where its at. Good going. That Datsun's a great 6 alternative. I had a pal with a tricked out 292 Chevy 6 in his when I was at Poly but it came to a bad end. Had I known then what I know now I would have salvaged it. We were into Minis then. Keep up the great work!
 
I'd be thinking "are you sure you won't want to use some of those stands and holes to mount things in the future?" and never get around to doing it.
 
Back
Top