• Hi Guest!
    You can help ensure that British Car Forum (BCF) continues to provide a great place to engage in the British car hobby! If you find BCF a beneficial community, please consider supporting our efforts with a subscription.

    There are some perks with a member upgrade!
    **Upgrade Now**
    (PS: Subscribers don't see this gawd-aweful banner
Tips
Tips

TR2/3/3A Removing the front frame section of the hood on a tr3 or tr2

sp53

Yoda
Country flag
Offline
I am trying to remove the front brace piece on the hood and I see 3 spots where it is welded. I cut the welds free, but cannot get the brace to come out. The brace moves on both ends about a ¼ inch back and forth. The center of the brace seems stuck in between the hood which is pinching down on the brace. If anyone has removed one of these, I would like to hear how you did it. I remember John removed the back brace on his tr2, but I do not remember if he removed both hood frame braces.
thank you steve
 
Thanks John I think so two. I will keep working at tiring separating the 2. The hood metal is in very nice condition, but someone took a pry bar and tried to open up the hood from a front corner and bent the front frame piece. The hood bent on that valley close to the edge. I was able to get much of it out while it is still together, but the bent brace prevents the damage from moving.

I do have another hood that fits the car nice, but the metal is kinda rusty with a small hole at the top by the hinge where water got trapped.

steve
 
Take a gasket scrapper and tap it into the seam to spread the metal apart. I recall some smallish spot welds that
will fight you. When you locate a weld break, it with a Sharpened scrapper by hitting the welds from several angles .
Work carefully. When going back together, use metal bonding epoxy in the seam.
Mad dog
 
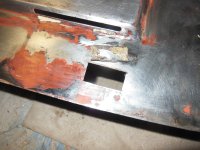
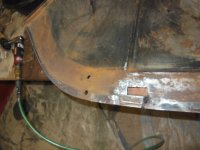
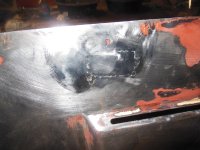
thanks you guys. I went ahead and repaired the rust spot in the yellow hood. The hood is an early one with no fold on the back edge probably a 1956 hood, so it does not have folded edge.

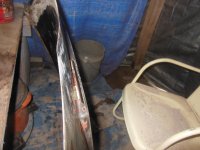
Things were going good until I went to the backside to weld. I had a burn through on one of the holes and then noticed the hood had warped and is oil canning.

I still need to put back on the front brace plus there is a small piece of the brace that had rotted away leaving a piece still on the hood. Repairing those pieces might help with the warped section because it would add some reinforcement.

My thoughts are I put the patch in and expanded the area with metal making the whole thing bigger and thus the warp. I remember people talking on the forum about shrinking metal, maybe that would help or I could cut the patch out and start over. I have never shrunk metal and dealt with a warp. Ideas for a solution would be much appreciated.

steve
 

Attachments

  • DSCN0271.JPG
    DSCN0271.JPG
    3.3 MB · Views: 25
  • DSCN0272.JPG
    DSCN0272.JPG
    3.3 MB · Views: 26
  • DSCN0282.JPG
    DSCN0282.JPG
    3.3 MB · Views: 27
  • DSCN0284.JPG
    DSCN0284.JPG
    3.3 MB · Views: 29
If you remember (or follow post 70 in the thread above), I had the bonnet finished, but was not happy with one little spot. I started smoothing and got oil canning that moved all over the bonnet for 3 weeks!

For oil canning, heat the center of the area that pops to red hot. Then remove the heat and quench with a very wet rag before it cools. The fast cooling pulls in the metal around it and slightly reduces the extra metal that is causing the oil canning. It may take a couple or three times to get it under control. The fast cooling also has the side affect of hardening the metal, which also decreases the likelihood of canning.

If the patch left a lot of extra metal that left a "bump", then you can shrink the area similar to above. In this case, heat the middle of the bump, and work the bump down while still red hot. Then quench as above. It helps if you have a helper to add and remove the torch as you work.
 
There is a magic tool , it is a stud gun. This tool can also heat a small spot enough to shrink out an
oil can in a flat panel. You omit the stud , and adjust the time of the heat pulse. Takes a bit of practice,
but where you are able to work either side of a panel its way cool. It does leave small burns on the steel
that are easy to fill,once the metal is tight. You only get a few seconds to dolly the heated spot so work quickly
then cool wit a damp rag.
Mad dog
 
Thanks you guys, I am still perplexed about how to go about this shirking of metal business . I always make a big deal about things that I have no experience with plus I was dramatically affected by the sight of the warp, but will survive.

Should I hold the area in question where I want the area to stay while I cool the area down quickly? I am able to move the area in question around so much I am afraid I am going to harden it wrong spot.

Thanks Steve
 
You heat a high spot, tap it down(while hot) then cool it. The metal stresses are realigned and it can then be
brought into shape with a dolly/hammer. Work carefully this can get out of control if over done. It only takes
years and years of practice to get good at.
Mad dog
 
Back
Top