• Hi Guest!
    You can help ensure that British Car Forum (BCF) continues to provide a great place to engage in the British car hobby! If you find BCF a beneficial community, please consider supporting our efforts with a subscription.

    There are some perks with a member upgrade!
    **Upgrade Now**
    (PS: Subscribers don't see this gawd-aweful banner
Tips
Tips

Paint buffing

NutmegCT

Great Pumpkin
Bronze
Offline
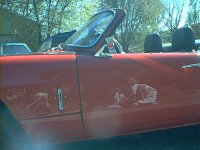
To eliminate the many dust "bumps" in my paint (about 5 years old), I wet-sanded with 1500. I then hand-buffed with 3M Perfect-it II. See picture below. The surface is now smooth (no bumps), but it's very dull and my hands are TIRED!

What's the next step? I (naively?) thought that the Perfect-it would result in more of the pre-sanding reflectivity, needing only a coat of wax. What procedures do I follow to get back the original "mirror-like" surface?

Thanks all.
Tom - totally new at working with old paint.
PS - I did try a small area with the Perfect-it on my electric buffer with terry cloth cover, but absolutely no difference.
 
I have always been scared to wet sand for fear of ending up where you are now. I just don't seem to have luck with paint so I avoid tempting fate. For this reason I am very keen on reading what others have to say as a solution to your issue.
 
If you were over here I would tell you to use T-Cut. I'm not sure if you can get it there. It is sold as a paint restorer and it is abrasive like rubbing compound, but less so. If you rub it in hard you will end up with a nice shiny surface ready for waxing.
 
My rather limited experience has showed me that first of all, 1500 grit is a bit rough for final polishing. At least 2000 grit, then you should be able to buff that out real nice. I've used that 3M Perfect-II after 2000 grit sanding with excellent results. However, I used a variable speed buffing wheel with the 3M foam eggcrate type pads. I don't see why you couldn't do it by hand, it would just take more elbow grease.

I think you need to go to a finer grit before you try to compound it.
 
I'm not sure what kind of old paint you have but assuming that it is either lacquer or a catalyzed paint, the problem is probably that the Perfect-it II is too fine a compound.

I generally sand with 1000 or 1500 grit paper and then use Meguire's #4 Heavy-cut cleaner. The #4 will give some shine - much better than the 1500 grit. Then I go to the Perfect-it II followed by a swirl-mark remover.

The #4 is a fairly aggressive compound. That's what you need to get the 1500 grit scratches out. I always do the #4 by hand. You will probably have to look at on the web, etc. for the #4 since they generally won't sell it at common auto parts stores (I haven't bought any in a while - I guess they still make it). Because it is aggressive, you can mess up a finish with it - so lots of auto parts stores won't sell it. There are probably other, equivalent compounds that you can use but you probably won't find any of them at the local Auto-Zone, Pep Boys, etc.

Bryan
 
You can visit a local auto paint supplier and see what 3M says about your next step. It is an expensive process because it is done in steps. WHen completeing a freash paint job you use heavy then light rubbing, then polish then swirl remover all using a real nice variable speed polisher. Since this is older paint and perhaps not base clear you should consult the local paint supplier for all the recommended step materials.
Just to let you know clear should be polished with in two days of spraying otherwise it hardens and you can not get the best shine.
 
NutmegCT said:
What's the next step? I (naively?) thought that the Perfect-it would result in more of the pre-sanding reflectivity, needing only a coat of wax. What procedures do I follow to get back the original "mirror-like" surface?

Tom,

I use 3M Imperial Microfinishing compound liquid P/N 051131-06011 after sanding and then switch to the 3m perfect it pro formula swirl mark remover P/N 05131-39009.

While using these or any other finishing compound after you get the deep sand paper scratches out you gradually press down lighter and lighter to produce a sheen finish. The swirl mark remover above should result in a semi-shine to a almost finished shine when the process is completed properly as described. Read the bottle it gives complete instructions on use. Then it is just a matter of using your favorite wax to get the original shine back. This finished shine look may take a few applications of wax and some rubbing.

If you cannot get the shine back;

You may be pressing too hard with the finishing compound

OR

You didn't buff out the scratches enough.

OR

You used too coarse of a compound or sandpaper to begin with. That is why sometimes it is better to use a 2000 grit or higher because the scratches from the 2000 paper come out a little easier during the buffing process. Especially if you don't have a lot of experience in this.

That experience part is why I can say for a fact that I've rubbed off more paint than applied in my lifetime.
 
And of course the worse thing you can do is rub through to the primer. Ouch!


Wax?
 
There are varying degrees of coarseness in the foam pads. Many people may suggest using a wool pad to cut through to a shine. I have had good results with the foam.
I sanded my TR6 to 1000 grit. I was going to take it to 2000, but got anxious and tried an area with the buffer. It came out looking good so I continued on.
I started out with a yellow coarse pad using a high cut 3M compound. Don't recall the number. The color pad may vary between manufacturers, but your local retailer should be able to set you straight. This left a dull shine with no evidence of scratches.
I then moved onto to a Perfect It light cut or finishing compound with a low abrasive pad. This brought up the final shine.
If your experience with buffing is limited, like mine was, I worked on old crappy paint jobs on cars owned by people I knew. They were happy to get the results, and I got the practice. I stuck with foam pads because they are more forgiving, though they will burn paint in an instant.
When working toward an edge, always have the pad moving from the panel to the edge. Never approach the edge with the pad rotating toward the panel. With beading or other obstructions in the bodywork, I always keep the pressure light and the pad moving horizontal to the obstruction and get as close as possible to it. The actual obstruction, I always do by hand.
Always keep the pad moving. The buffer is actually melting the paint to a small degree when working properly. You can feel the heat generated by the friction between the pad and the panel after you have buffed it.
I also avoid buffing pads with plastic reinforcement backings. I once knicked the headlight on my 3 with one of those. Never again.
But practice before you advance to good paint.
Good luck.
 
Find a used car dealer and have them buff it for you. They will have everything plus the experience. It will not take long and probably will not cost much. How do you think all those shiny old jalopies on their lot get to looking so shiny?

If you try it yourself you probably will not like the result with cutting through on the edges and bumping the trim.
 
I was going to suggest 3000 grit sanding - that is what I used on mine followed by hand buffing with Perfect-it II and my finish came out real nice. (Granted mine is a driver and not a show car). The only problem now is if you've already sanded with 1500 grit then you do stand a good chance of going through to the primer. You have to be extremely careful, take your time and be careful with the pressure on the sandpaper.

Like Tomshobby stated, a good auto detail shop can do the job for you for not much cost.
 
you used the right paper,now go get 3M finesse-it.Work in cool shaded place.lots of goop and elbow grease,in small areas 8x8 over lapping areas.Polish till almost dry.One soft towel for application,one for wiping to shine.Constantly changing to clean areas of the wiping towel.When you have the shine(and you will) then get 3m hand glaze for a final gloss. Read the back of the finnesse-it bottle. You now have just opened a can of worms,you wont be happy until the whole car looks as good as your first spot.Just for the heck of it one day,I was telling a friend who had a new Chrysler 300 that I could make his rear fender smoother and shinier. I made a believer out of him.New car paint jobs are nice but they wont win shows.
 
It’s easy to talk about removing sanding scratch in terms of “grit” but the problem is that the numbers don’t tell the whole story. Besides the variation in different paints’ sensitivity to scratching there are huge variations in abrasives and techniques.

Gloss comes from smoothness. When removing defects like sanding scratch, the goal is always the same, to abrade the surface until the entire area is smooth and level. To level a surface you need to cut it down to the bottom of the deepest defect. That’s the critical part. It doesn’t matter how shallow or fine most of the scratches, or the average scratch are. You need to work to the deepest to achieve high gloss.

It’s common to assume that sandpaper is sandpaper is sandpaper. It’s not. Sandpapers are graded more or less by their average grit. Two papers can have the exact same numerical grade but leave very different scratch patterns. If one product has a slightly higher percentage of larger particles than another but averages the same, it can be graded the same but will leave deeper scratches that are harder to buff out.

Abrasives like Meguiar’s Unigrit, Mirka Abralon and 3M Trizact (not 3M’s standard papers!) have far more uniform grit structures and leave much more uniform scratches that buff out cleaner and easier.

And the exact same piece of paper on the exact same piece of paint will leave completely different scratches if you use it with a foam sanding block, rubber sanding block or just your hand. Your hand will leave the worst, hardest to remove scratches because it’s impossible to apply uniform pressure with your fingers or palms.

Even with very high quality finishing abrasives, 1500 grit is fairly coarse, especially on clearcoats. The finer you sand, the easier, faster and cleaner it is to buff out. Abrasive manufacturers recommend going finer for highest quality finishing. 2000 and 2500 are common but 3000 and 4000 aren’t unreasonable. Most body shops stop at 1500, but their practices are based on maximum throughput and minimum cost, not high quality. (And an awful lot of them do truly miserable work.)

While 3M says Perfect-It II can be used for 1500 scratch, it’s meant to be used with a rotary buffer. If a machine can work a hundred times faster than you can, they can make the chemicals twenty five times less aggressive and still get twice as much work done in half the time. Use that chemical by hand and you’re looking at twenty five times more work. (It’s actually more complicated than that but you get the idea.)

Rotary buffers are powerful tools and I wouldn’t recommend anybody use one without training and practice. But that’s what the industry uses after sanding and for correcting deep defect so that’s what all of the professional chemical product lines are optimized around. There are fine grade products that can be use with orbital machines and by hand but they aren’t formulated for deeper defects.

Professional grade orbital machines like the Porter-Cable, Makita or Festool can remove significant defects (oxidation, swirl marks, water spots, ...) but they aren’t up to large areas of sanding scratch. On small areas that have been sanded with very fine abrasives using good sanding techniques they may be adequate, especially with small diameter pads that let you concentrate the applied work.

Consumer level orbital machines almost always lack the power or speed to remove any but the lightest defects.

If you’re going to continue by hand you’ll probably want to step to a finer paper (at least 2500, using finishing specific abrasives as I mentioned before) with a foam sanding block, keeping your sanding area as small as possible and be prepared for lots of work polishing it out.


tomshobby said:
Find a used car dealer and have them buff it for you. They will have everything plus the experience. ...

RedTR3 said:
...Like Tomshobby stated, a good auto detail shop can do the job for you for not much cost.
I will agree with finding a good detailer. A detailer who knows what he’s doing will make quick work of it and produce excellent results. (The trick is to find a good one. They aren't exactly common.)

I disagree with the used car dealer. A detailer who does excellent work makes his customers happy. A dealer prep guy who does good work makes his boss mad for taking too much time.

Dealers give dirty work, like buffing, to the least experienced, lowest paid guy on the lot. Their job is to get it out the door fast and cheap. Their favorite trick is to swirl the snot out of a finish, slap on a high filler glaze and call it done. The car will look fairly shiny on the lot, for a little while, but the first time you wash it the swirls all come back.

The professional detailers I know spend a large percentage of their time fixing dealer work.


PC.


.
 
I've learned more about paint refurbishment in the last week than I ever expected. Both from the excellent suggestions here, and from my own local School of Hard Knocks.

After getting rid of the "dust specks" by wet sanding with 1500 and later 2000 paper (3M wet or dry), I've tried several "techniques" on several areas on the surface.

You can see in the attached picture some of the fun I've been enjoying. So far, I've had the best results by continuing with 2500 grit, then going to 3M Perfect-it II. At least that way I end up with a rough semblance to original reflectivity.

Each step of sanding was by hand and/or by padded block, wet with a little dish detergent, then rinsed well; the Perfect-it was applied by hand using terry cloth toweling to rub in, then different terry cloth to wipe off.

I did try the Perfect-it with my buffer/polisher, but using the terry cloth cover, I saw less improvement than when done by hand-held cloth.

I went to an area auto paint shop, where I was told I needed to buy a special buffer ($75), foam pad ($39), rubber backer plate ($12), and several 3M buffing compounds (around $25 each). As the two guys I spoke with couldn't agree on which buffer I needed, or on which pads and compounds I should use, I smiled and nodded my head a lot. But bought nothing.

Next I went to two area professional auto paint shops. Both said I needed to have a complete blasting, primer, and repaint, around $4500. Oh yes - and they only work on insurance jobs - no private work.

Now keep in mind I had removed the "dust specks" all over the car ... so there's a goodly amount of finishing to do. Unless there's a reliable and experienced detailer around, this is all going to result in my hands being *very* tired.

Next week will be interesting.

Onward through the fog.
Tom
 
Speaking of the proper grit paper brought back the memory of an incident at a hardware store in Pompano Beach FL several years ago.
I was standing in line behind this uppity younger blonde woman, quite attractive I might add. She was sent to the store to buy paper to sand out scratches in her BMW.
Her male friends told her what to buy and in no way was she going to listen to these lowly store employees who were telling her that 150 grit was going to make a mess of her paint. Her friends knew what they were talking about.
After at least 5 minutes of their trying to convince her, she bought her 150 and stormed out of the store.
Every person in the area had a bewildered smile on their face as she left.
She definitely fit the mold.
 
PC,lots of good info,but having nutmeg start with 2500 is a waste of time and paper. At appx a buck a sheet it gets expensive. I agree that you always start a fine grade and if that wont cut it you go to a bit coarser then back up the scale.Its the do know harm thing. But you also must know how to read the finish to decide what steps are required.
A in the backyard/garage paint job shot dry as a bone cause the painter was afraid of runs,or laid on improperly reduced and thick as a brick is no place for 2500 grit. A semi-smooth orange peeled econo bodyshop paint job is also no place for 2000 grit.For crap jobs such as those nothing beats a wool pad,and lite cutting compound after a 1200 sanding.Now that you have leveled your paint with the proper blocks and paper,and the correct compound,now the polishing starts Think of the prior procedure as floating out the concrete. On todays ultra thin factory paint jobs, there is little to work with,thats where 2500 comes in.It is also very helpful to know what type of paint you are working on and its age.It was mentioned some where here that its best to wet sand within two days of of the finish being applied.OK if you want easy...not OK if you hate shrinkage.With the proper techniques, primer can be brought to a good shine.
 
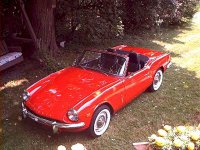
Pardon me for honking my own horn,but some of my jobs have won regional 1st place awards.These are all I can find right now.Not a single ounce of clear coat.
 

Attachments

  • 6924.jpg
    6924.jpg
    80.7 KB · Views: 239
  • 6925.jpg
    6925.jpg
    63.6 KB · Views: 223
Back
Top