• Hi Guest!
    You can help ensure that British Car Forum (BCF) continues to provide a great place to engage in the British car hobby! If you find BCF a beneficial community, please consider supporting our efforts with a subscription.

    There are some perks with a member upgrade!
    **Upgrade Now**
    (PS: Subscribers don't see this gawd-aweful banner
Tips
Tips

Order of Assembly? Do and don'ts?

christophe

Jedi Trainee
Offline
I am about to start the reassembly of the 1960 3000 austin healey and I'm trying to get a game plan before I just start throwing parts on the car. Any advise would be greatly appreciated. I hate when I bolt an item on only to realize i need to remove it before I can install another item.
My thoughts are that the #1 item to be addressed is to make the car into a roller, so i should start with the suspension, then the brakes, brake lines, and steering.

After the car is a roller with operating brakes and steering, then i plan to drop the engine and transmission into place. Next i will install the fresh air ducts and any other items that appear to be near impossible to install once the fenders are in place.

Once all of this is finished, the car will go back to the paint shop for final fitment of the exterior panels and after that is finished, they will be painted. Normally I would not start installing parts until after the entire car was painted, but due to the complexity and tight fit of the healey components, there is no way i want to install the engine and transmission over top of freshly painted fenders.

Ok, so if you have any suggestions on items that should or should not be installed or a link to a thread that shows a nice progression of assembly on a superstructure, that would be great.
Thanks
 
Wiser, more experienced people than I will join in I'm sure. I would suggest painting the inner side of all panels before bolting on. I'd think that everything, like air ducts that you mentioned would go on before the engine install. That said I've heard folks on this forum speak of plenty of engine installs with the shroud in place. It would be nice if someone had a step by step process.
 
Are you putting in a new wiring harness? That should go in first, along with the battery cable. Then the suspension and then the brake lines. The instrument panel and gauges are easier to work on without the steering column in place. Air ducts next. Engine/gearbox next, then body panels including shrouds. The rest of the interior is next to last. Last is the top (hood). Chrome trim, etc. as appropriate. You may want to attach the fender spears to the fenders before you mount them unless you have thin arms like me!
 
Are you putting in a new wiring harness? That should go in first, along with the battery cable. Then the suspension and then the brake lines. The instrument panel and gauges are easier to work on without the steering column in place. Air ducts next. Engine/gearbox next, then body panels including shrouds. The rest of the interior is next to last. Last is the top (hood). Chrome trim, etc. as appropriate. You may want to attach the fender spears to the fenders before you mount them unless you have thin arms like me!

This is a good order of operations, but before you dig in, now's the time to consider what, if anything, you're going to do about rustproofing, heatproofing and soundproofing. It will make it a much more comfortable car in the long run. If I was using the car as a regular driver, I'd apply the heat and sound Lizard Skin materials now. https://www.lizardskin.com/ or if you want to save a few bucks, you can do the DIY stuff I did: https://forum.britishv8.org/read.php?13,8264. Using something like Waxoyl in the chassis and sills will keep rust at bay. While you're putting the wiring harness through the firewall, look for ways to seal up any holes from the engine compartment into the interior (even the small ones where the wiring harness passes through the grommets. Then you can start on the suspension. I think I'd send my brake drums out for balancing now, just because I'd do it as a matter of course on any car since they all seem so far out. If you're doing any chrome work, that should probably go out now as well so it will be ready when the car is done.

Whatever you do, make sure the air hoses go in before the shroud and fenders or you'll hate yourself for ever!
 
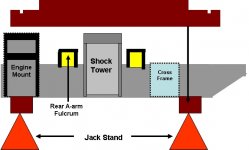
I do agree with what has already been suggested. I would add that when addressing rusted repairs, make sure that the frame is well supported, squared, and reinforced at key locations to reduce the risk of deformation when cutting out sections. Along with welding bars to maintain proper positioning, I have cut some 4X4 beams that can be fitted at strategic frame sections.

Frame%u00252520Support.jpg

Also, when reinstalling outer panels, I start at the front and work back. My first application is the front shroud followed by the front fenders and then the doors. This allows me to properly set the spacing between the fender and door. Continuing, I would suggest fitting the rear shroud followed by the rear fenders.

Although others may have a different procedure, I have tried a few and always come back to this approach.

Good luck and enjoy your project
Ray (64BJ8P1)
 
Last edited:
Im on my second restoration and Im following the same pattern on both . Turn it into a full rolling driveable chassis first all painted and pretty with no body panels . Do any major exterior body panel prep with the body panels off the car . once they are lets say 80% ready . paint and finish the inside of the doors , wings , shrouds etc . Fit all the body panels and finish the exterior prep and paint it . Do the interior then all the pretty stuff .
Finally drive it everywhere you can with the biggest grin you can and watch all the heads turn as you drive by .
 
I was told to install the Hand Brake assembly first and I'm glad I did. I had it rechromed and then I wrapped the chrome with protective wrapping and I'm really glad I did that!
 
As long as the hand brake assembly goes in before the driveshaft, which gets in the way almost as much as the steering column does. On the other hand, the brake lever sure gets in the way when you're doing carpeting!
 
Christophe,
I chronicled the week-by-week assembly of the restoration of my 1960 BT7 here: https://valvechatter.us/?cat=528

it is not the easiest site out there to manuever around in as I developed it when web-based blogs were just getting going. You can find a component that you are interested in in the assembly components list and it will tell you in which weeks the component was referenced. I am a hobbyist, not a professional restorer, and most of what I learned along the way I picked up from the great people on this Forum. Your tub looks wonderful. Now the fun starts!
Lin
 
Thanks for the replies. I have read all of them and I really appreciate the help.

Lin, i will check out your link! thank you!
 
Back
Top