• Hi Guest!
    You can help ensure that British Car Forum (BCF) continues to provide a great place to engage in the British car hobby! If you find BCF a beneficial community, please consider supporting our efforts with a subscription.

    There are some perks with a member upgrade!
    **Upgrade Now**
    (PS: Subscribers don't see this gawd-aweful banner
Tips
Tips

Oil Pan Gasket

Deamaker 5

Senior Member
Country flag
Offline
So I will toss this out there to the community to see what people have had success with when it comes to replacing the oil pan gasket.

Do you prefer the old cork gasket with maybe a small film of silicone, or the newer nitrile rubber gasket?

Please let me know your thoughts as to the best way as to reduce as much leakage as possible because we all know they leak; I just want to minimize my leakage!

Thanks.
 
cork gasket Blue Hylomar , no leaks .
 
cork gasket Blue Hylomar , no leaks .

...times two.

Oil pans and valve covers should not leak if gaskets are properly installed. You might want to place yours on a flat surface such as a glass table or table saw and use a feeler gauge to check for gaps.
 
Last edited:
Yes, both Healey Nut and Michael are spot on. Maintaining a big Healey 6-cylinder racer, my oil pan often has to be R & R'd multiple times throughout the race season and the system described always provides the perfect seal.


Crank Open sump.jpg
 

Attachments

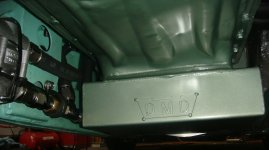
  • DMD Hi-Pro Oil Pan.jpg
    DMD Hi-Pro Oil Pan.jpg
    362.9 KB · Views: 19
Ok thanks
Do u reccomend to apply seal to one side of the gasket first to the pan and let dry then apply seal to other side before mating ? Or does it matter - should clamps be involved to apply gasket to pan first ? Thanks just want to do this the right way because nobody I am sure wants to do it twice - thanks
 
Apply Hylomar to mating surfaces and assemble everything . Don’t overtighten it or it will leak because you deform the pan edges . Make sure the bolts have those fancy oval washers on them .
 
So I am working on an aluminum heavy duty oil pan not the original steel one
Deamaker--

Nothing changes--just make sure the pan is flat before you start.

I find it easiest to first coat both sides of the gasket, carefully line it up and put it onto the flange of the pan, perhaps giving it a few minutes to tack off. Then, while holding the pan in place with one hand, with the other hand--or a helper--start (not finish) one screw in the middle of each long side, then do the rest of the screws, tightening them gradually so as not to distort anything.
 
Last edited:
Deamaker--

Nothing changes--just make sure the pan is flat before you start.

I find it easiest to first coat both sides of the gasket, carefully line it up and put it onto the flange of the pan, perhaps giving it a few minutes to tack off. Then, while holding the pan in place with one hand, with the other hand--or a helper--start (not finish) one screw in the middle of each long side, then do the rest of the screws, tightening them gradually so as not to distort anything.
Ok thank you
 
If you are working from underneath the car, that aluminum oil sump can be a little heavy making it difficult to line things up without disturbing your gasket or sealant. I made a few alignment studs that made the job quite a bit easier. Very simple to do.
IMG_0219.jpeg
IMG_0220.jpeg
 
If you are working from underneath the car, that aluminum oil sump can be a little heavy making it difficult to line things up without disturbing your gasket or sealant. I made a few alignment studs that made the job quite a bit easier. Very simple to do.View attachment 103687View attachment 103688
I appreciate that as I have the locator pins in hand and just waiting for my gasket to arrive - thanks you look like u got a nice Jules frame there -
 
so while I have you guys on the line here , do u think I can take this brake line off to get the forgotten bolt in and not lose too much brake fluid ? Or just bleed the whole system again
IMG_7648.jpeg
 
Back
Top