• Hi Guest!
    You can help ensure that British Car Forum (BCF) continues to provide a great place to engage in the British car hobby! If you find BCF a beneficial community, please consider supporting our efforts with a subscription.

    There are some perks with a member upgrade!
    **Upgrade Now**
    (PS: Subscribers don't see this gawd-aweful banner
Tips
Tips

New guy with a carpet question

alfstr7

Freshman Member
Offline
Hi All,

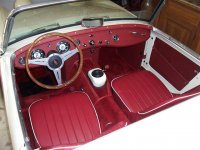
My name's Alan. I'm a British car fan and have just recently joined the forum.

Currently in my garage I have a 69 MG Midget and a 80 TR7 convertible.

The Midget is mobile and is in the process of getting new carpet and interior tidy up. The TR7 is not currently mobile, but hopes to be someday.


Any tips on installing the Midget carpets onto the wheel wells and frame rails with adhesive?


Thanks in advance for your help and encouragement.
 
I've just recently done a little carpet work. Do you plan to use a carpet kit or cut your own pieces? I used a pre-cut kit. I worked with 3M Super Trim Adhesive bought from Amazon.com, (I'm guessing its available locally for many regions as well). I like this adhesive. It sprays pretty true without side splatter. It gives a few minutes of time for placement. It gives a second chance or two for a 'pull-up', if you want a reposition. Its on for good once it dries, The carpeting I fit up completely before any glue is sprayed. I position the pieces with edge pressure to get an accurate idea of how they will look. I do one piece at a time, and contiually re-fit the pieces as I go along for prooper placement and alignment. The glue is best when both faces are sprayed and allowed to dry a few minutes before contact. I mask some areas with a cardboard shield during the spray, and I lay the carpet on paper for some of the pieces to get a good cover of spray. A few edges will probably need trimming, but not until the piece before it is glued and solid, and all is repositioned and refitted a few times. Specifically for the wheelwells, with the arched contour and 'bending' of the carpet piece, I cut a couple of 'darts' or 'seam lines' to allow a better fit, thereby avoiding a heaped up ridge at certain bends and twists on the wheel well. If you try it with old cloth first you will get the idea.
I have a few examples of trunk and cockpit carpet gluing in the photo album. Good luck, this is usually rewarding because it looks so good when you are finished.
 
If you cut your own, use 3M #74 for the carpet, it holds very well yet you can remove the carpets without having the loop stay stuck to the metal and unravel your new rugs. This is especially great when you have to get to the transmission filler plug like I did tonight.
 
Thanks for the advice on adhesives. I have the pre-cut kit. I figure this is a project that will take lots of patience (measure/fit many times, glue once) - maybe this weekend.

Good point on the filler access. I'm thinking for the the front piece of the trans tunnel I may use some velcro or the snaps for a more serviceable solution.
 
When I put my carpet in, I didn't use any adhesive <span style="font-style: italic">at all</span>: snaps everywhere. Not original, but I figure it'd come in handy if the carpets ever got soaked or I'd have to take 'em out for some reason.

Here's what the snaps look like over the wheelwell.
IMAGE_01257.jpg
 
Alan,
I did my carpet this year using the 3m adhesive. I think is was the type 90 from a can and used two cans. If you use this and it tacky enough that you can reposition and move it. The really important thing is that you need to have plenty of ventilation, when doing it. This stuff is nasty and when you are working in the footwells, you will be breathing this stuff. Use a mask. I did it outside and after finishing I felt quite sick for the rest of the day.
Be careful, but I do recommend it.
Allan
 
I used both 3M and snaps. Worked out great.
 

Attachments

  • 18341.jpg
    18341.jpg
    53.4 KB · Views: 248
I redid Bugsy's Carpet on my 68 many years ago with a roll of carpet from Pep Boys. Enough there to do 3 Spridgets for < $20.00. When I got to the fenders I shrugged and did it the simple way and painted it black. Doesn't look at all out of place.

A tip for carpeting around shifter. All goes fine in fitting until you get to the shifter. Lay edges and gather up the extra carpet in that area and simply put a single cut through the middle of the gathered material. Now overlay the cut edges on top of one another. With a sharp blade and a straight edge cut through the two layers of overlaid carpet. Cut at a 45 degree angle out from the bottom corners of the shifter hole. Glue down both sides , fluff the carpet, seam disappears. Has looked fine for the past 10 years.
 
Interior.JPG


This was the weekend for the carpet install.

Overall I'm quite happy with the install. I might even get the wife to ride in it once in a while.

I'll have to admit I ended up using a gel-type contact adhesive. I thought it would be easier to control - it was quite easy to apply with a brush. 1 pint did the whole set.

The frame rails next to the wheel wells and in front of the seats worked out great!!

Tunnel and gear shift look good. I scraped the factory goo off the snaps on the trans tunnel and snapped down that piece.

The wheel wells turned out OK - but next time I'll cut a few more gussets to smooth it out a little.

Thanks for the advice!
 
looks fabulous - too bad you have to cover it with seats
 
Cover that with seats?? It's lovely.
 
Back
Top