• Hey Guest!
    British Car Forum has been supporting enthusiasts for over 25 years by providing a great place to share our love for British cars. You can support our efforts by upgrading your membership for less than the dues of most car clubs. There are some perks with a member upgrade!

    **Upgrade Now**
    (PS: Upgraded members don't see this banner, nor will you see the Google ads that appear on the site.)
  • When posting a classified ad, you MUST select a prefix from the drop-down next to the subject line. If you don't you will get an error and your ad will not be posted!
Tips
Tips

New bulkhead panel is in

tdskip

Yoda
Country flag
Offline
Now mind you, this is the car I'm not supposed to be working on so I can focus on the '74 TR6..

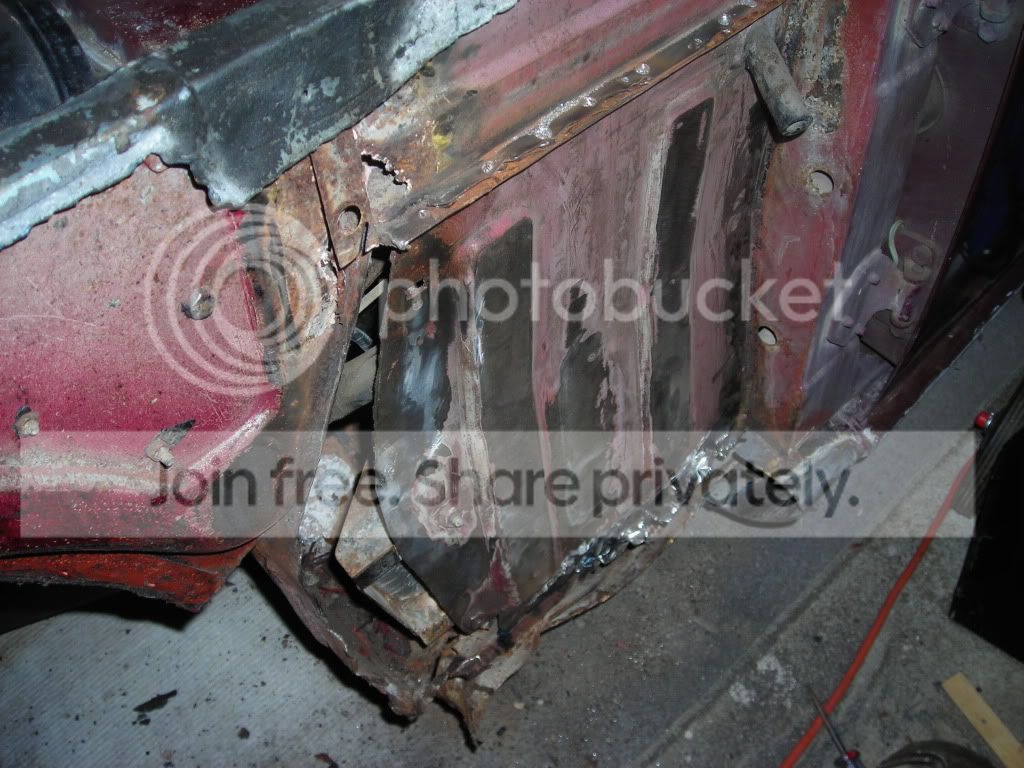
Here is what it looked like when I pulled the fender off. Much worse in fact than it looks in the picture;

71TR6bodyrepair12-31-081.jpg


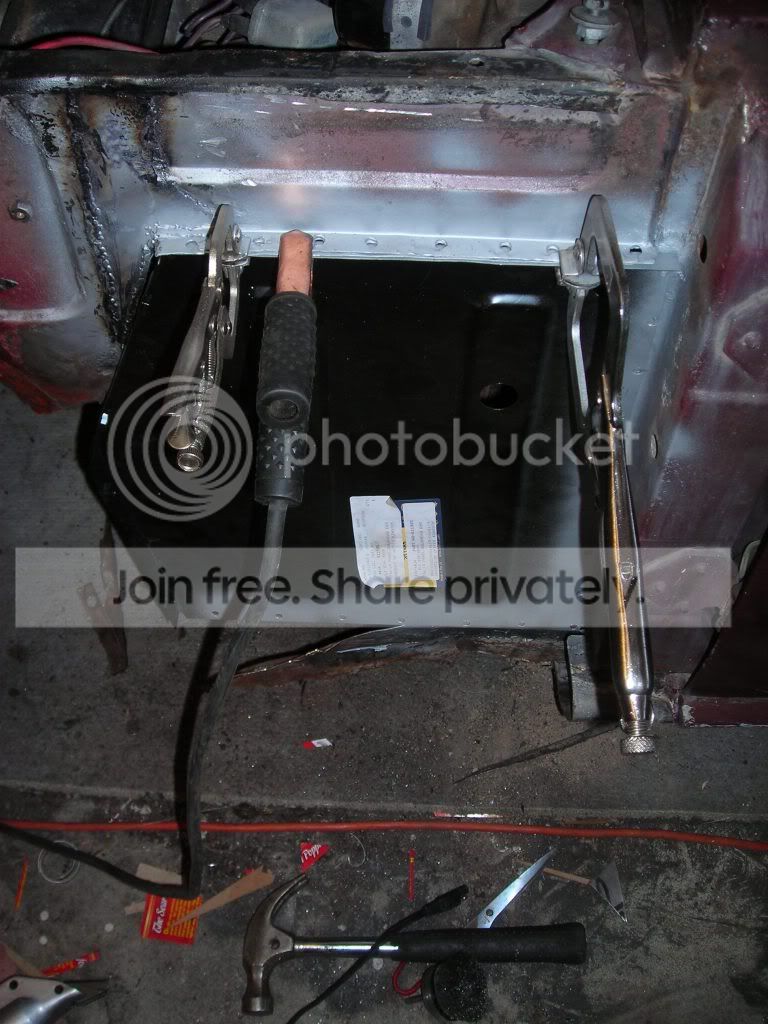
Then this happened, which didn't exactly help the panel alignment much;

DSCN2820-1.jpg


Once I cut the outer sill out the bottom of the bulkhead was toast, as was the inner sill and part of the floor.

1971TR6driversidebulkhead8-26-09-1.jpg


I'm skipping some steps here like fixing the floor and the inner sill, but I've posted those repairs before already.

1971TR6bulkheadpanel12-1-09.jpg


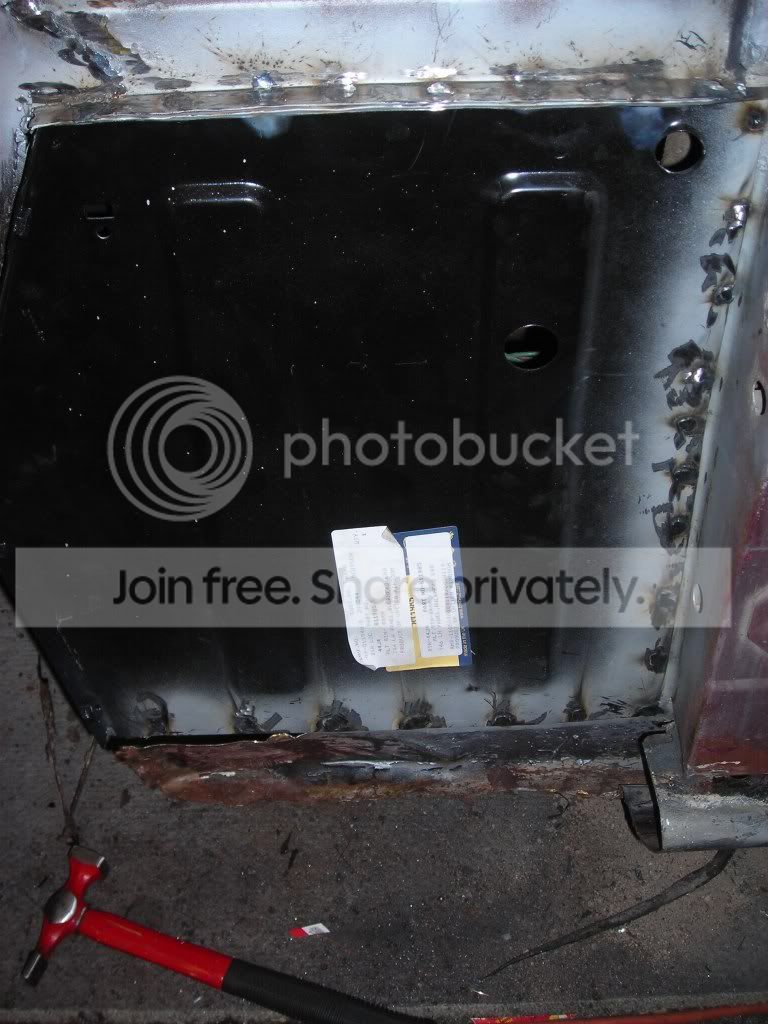
So after much prep and another repair to the area immediately on the left here comes the panel;

1971TR6bulkheadpanel12-1-095.jpg


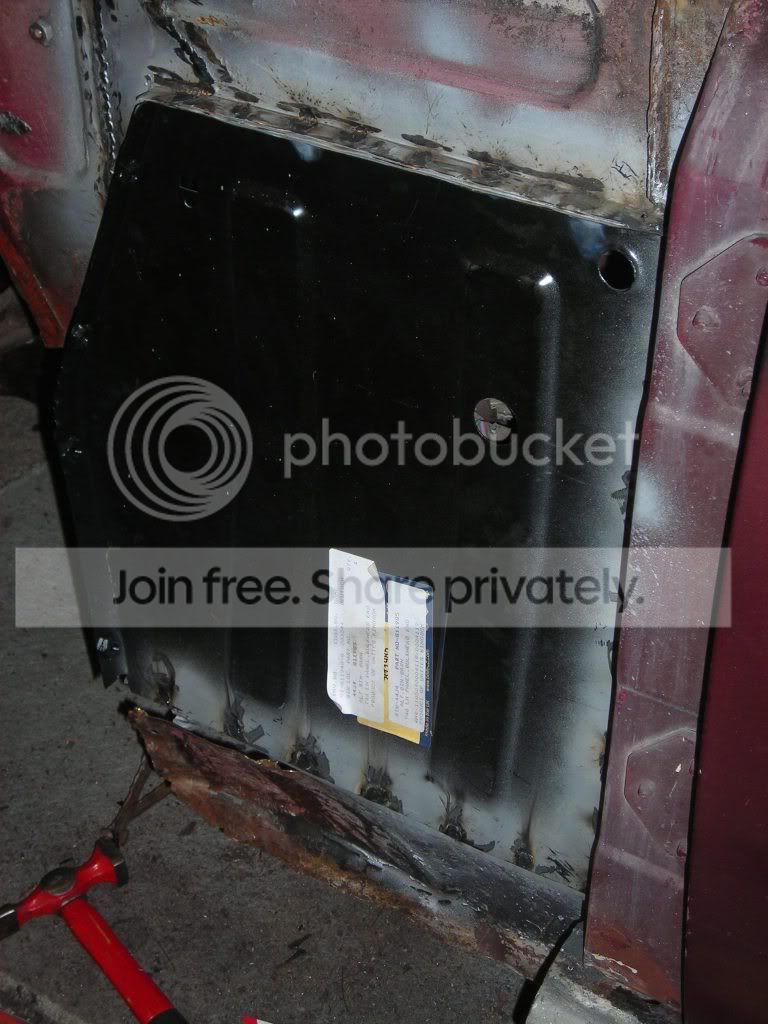
I still have some touch up work to do, but once painted I don't think it will look too far off the original welds. (Don't mind the mangled sill part down below)

1971TR6bulkheadpanel12-1-094.jpg


Kerry & MD - your welding tips. Welding a spot and then grinding it down before hitting it again made a <span style="font-weight: bold">big</span> difference. Thanks!
 
I am amazed at you guys who do metal work.
tdskip said:
Now mind you, this is the car I'm not supposed to be working on
How do you keep em all straight. If I knew how to weld I'd probably put the wrong piece on the wrong car.
 
Nice work. I love looking at stuff like that!
 
Since this has been my "learning place" for the past 5 years, I guess I should ask how all that is done, but I know it would take volumes and still leave questions.

Nevertheless, even in abbreviated fashion, and because that's so impressive, I'd like to know how you cut and fit that piece so well, how you cut out the damaged or old areas without making worse problems, what it means to grind down the welds (and with what tool and how carefully)--and how you get the confidence to challenge it all if you're not already an accomplished welder.
 
Kentvillehound said:
Nevertheless, even in abbreviated fashion, and because that's so impressive, I'd like to know how you cut and fit that piece so well, how you cut out the damaged or old areas without making worse problems, what it means to grind down the welds (and with what tool and how carefully)--and how you get the confidence to challenge it all if you're not already an accomplished welder.

I really think it just comes down to "just doing it". None of this is really that hard, and personally I've found that jumping into the deep end is effective motivation in learning to swim. <grin>

I use a cutting disk to make as straight cuts as possible, and then trim whatever the cutting disk can't reach with a cutting wheel on a Dremel.

Fabricating the replacement metal is a function of cutting a piece to size with the same cutting disk, Dremel attachment and metal sheers. Lots of trial and error in doing this for me anyway, as I've not had great luck making templates out of card board. I'll make a template out of cardboard for the rough cut and then use the sheers to cut away whatever doesn't fit into the gap I opened up to remove the rust. Lots of little trimming and test fitting, but it isn't difficult to do. Expect to throw away your first couple attempts but no other way to learn, and the sheet metal is cheap anyway.

Grinding the welds out isn't hard either, I use a grinding disk on an angle grinder and then a cutting (not grinding) disk on a Dremel. I've found the grinding attachments on a Dremel to be fairly useless on MIG welds but you can use a cutting disk to shape and shave remaining metal effectively. The tips from the guys to weld / grind / weld was a great one. Don't just blob a bunch on and then try to grind it back. Takes much longer and it makes it harder to have a good end result.

I've personally found the hardest part is welding the replacement panels in place without burning through the metal. Getting enough heat to melt everything together without burning a hole in the original panel takes practice / skill / luck / offerings to what ever Patron Saint of car restoration you choose to believe in. Practicing on scrap metal helps but it never is the same on the actual car. You kind of get a feel for it, but I'm still learning that for sure and tend to put too much metal down.

I should also point out that I'm doing all of this on the 1971 TR6 first before attempting to fix the TR3 or TR4. I bought the 1971 for about what the O/D and misc bits were worth so I'm OK with the fact that I'm going to make some mistakes as I go. I've gotten my head around ugly but strong, and that approach seems to be working. Don't think for a second that I'm not trying to make it "right" and I'm sure I'll go back and rework anything that isn't "right", but finding some points to get started where mistakes won't be too obviuosu or structurally critical probbaly is a good way t0 approach it.

No sure where you are in AZ, but if I do make it out there for the auctions we could connect and take a look at what you are thinming about doing. As long as you are cool with the fact that I've still got a TON to learn and have marginal skills I'd be more than happy to help.

Hope this helps.
 
Back
Top