Hey Guest!

 Hey - did you know if you click on the title of a thread it will take you to the first unread post since you last visited that thread?
 but were afraid to ask:
  STOP!! Never post your email address in open forums. Bots can "harvest" your email! If you must share your email use a Private Message or use the
  smilie in place of the real @
 Pretty Please - add it to our Events forum(s) and add to the calendar! >>
SNClocks
Member
Offline
It's amazing how that first drive makes all the work worth it. Installing the new T9 (well, new to our bugeye) from Moss Motors had it's challenges, not the least because the instructions that come with it are pretty vague at times. I figured I'd post a few pictures in the hopes that someone down the road will have an easier time.
The first big-gulp moment is when one has to cut out the original cross member/trans support. What would we do without the oscillating multitools? After marking where I thought the cuts should be the carbide blade made pretty short work of the sheet metal and cross member. Here is a really poor shot of the tunnel after removing the cross member.

And a shot of the piece that was cut out:

With that done it was no big deal to slide the two box-sections provided in the kit into the cut-off cross members. I powder coated the two box-sections, and then sealed them into the cross member with RTV to keep water out. Here are two shots of the final install with the new trans in place. You can see the inserted box-section on the right side, along with the sealant.


The speedometer cable comes out the passenger side of the T9, down fairly low, and close to the tranny tunnel. Here is a shot of the cable after I routed it through the tunnel wall:

I spent a bit of time scratching my head on where to route the cable - finally concluded the best was to send it right back into the tunnel, a bit farther back, so I could then find someplace to get it up under the dash.

You can see two of the bolts holding new transmission mount plate just in front of the speedo cable loop.
I was able to route the cable above the throttle pedal and the steering column by drilling up near the driver-side heat vent flap. Hopefully this shot makes some sense:

Worked slick.
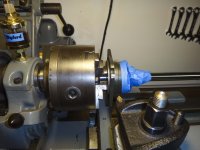
Next I focused on cutting the tunnel up around the gear-shift opening so as to move the opening back about an inch. Probably the most challenging part of the install. But, it's done. Next I shortened the gear-shift lever that came with the box by 1 1/4 inch. Here is a shot of the shorter lever in place:

I'm now reinstalling carpet. Sort of neat - if I install the painted shifter cover over the carpet, instead of having the carpet cover the flange on the cover, it will just cover the opening!
Hopefully this will help someone in the future. I have to admit, I love the final result, but it is a bit of work.
The first big-gulp moment is when one has to cut out the original cross member/trans support. What would we do without the oscillating multitools? After marking where I thought the cuts should be the carbide blade made pretty short work of the sheet metal and cross member. Here is a really poor shot of the tunnel after removing the cross member.
And a shot of the piece that was cut out:
With that done it was no big deal to slide the two box-sections provided in the kit into the cut-off cross members. I powder coated the two box-sections, and then sealed them into the cross member with RTV to keep water out. Here are two shots of the final install with the new trans in place. You can see the inserted box-section on the right side, along with the sealant.
The speedometer cable comes out the passenger side of the T9, down fairly low, and close to the tranny tunnel. Here is a shot of the cable after I routed it through the tunnel wall:
I spent a bit of time scratching my head on where to route the cable - finally concluded the best was to send it right back into the tunnel, a bit farther back, so I could then find someplace to get it up under the dash.
You can see two of the bolts holding new transmission mount plate just in front of the speedo cable loop.
I was able to route the cable above the throttle pedal and the steering column by drilling up near the driver-side heat vent flap. Hopefully this shot makes some sense:
Worked slick.
Next I focused on cutting the tunnel up around the gear-shift opening so as to move the opening back about an inch. Probably the most challenging part of the install. But, it's done. Next I shortened the gear-shift lever that came with the box by 1 1/4 inch. Here is a shot of the shorter lever in place:
I'm now reinstalling carpet. Sort of neat - if I install the painted shifter cover over the carpet, instead of having the carpet cover the flange on the cover, it will just cover the opening!
Hopefully this will help someone in the future. I have to admit, I love the final result, but it is a bit of work.