
 Hey Guest!

 Hey - did you know if you click on the title of a thread it will take you to the first unread post since you last visited that thread?
 but were afraid to ask:
  STOP!! Never post your email address in open forums. Bots can "harvest" your email! If you must share your email use a Private Message or use the
  smilie in place of the real @
 Pretty Please - add it to our Events forum(s) and add to the calendar! >>
Offline
Recently I posted that I had purchased new upholstery from ebay UK - was stunned that it arrived so quickly.
Thought I would recount the reupholstering process.
Of course I forgot to take proper "before" pics - so, here goes.
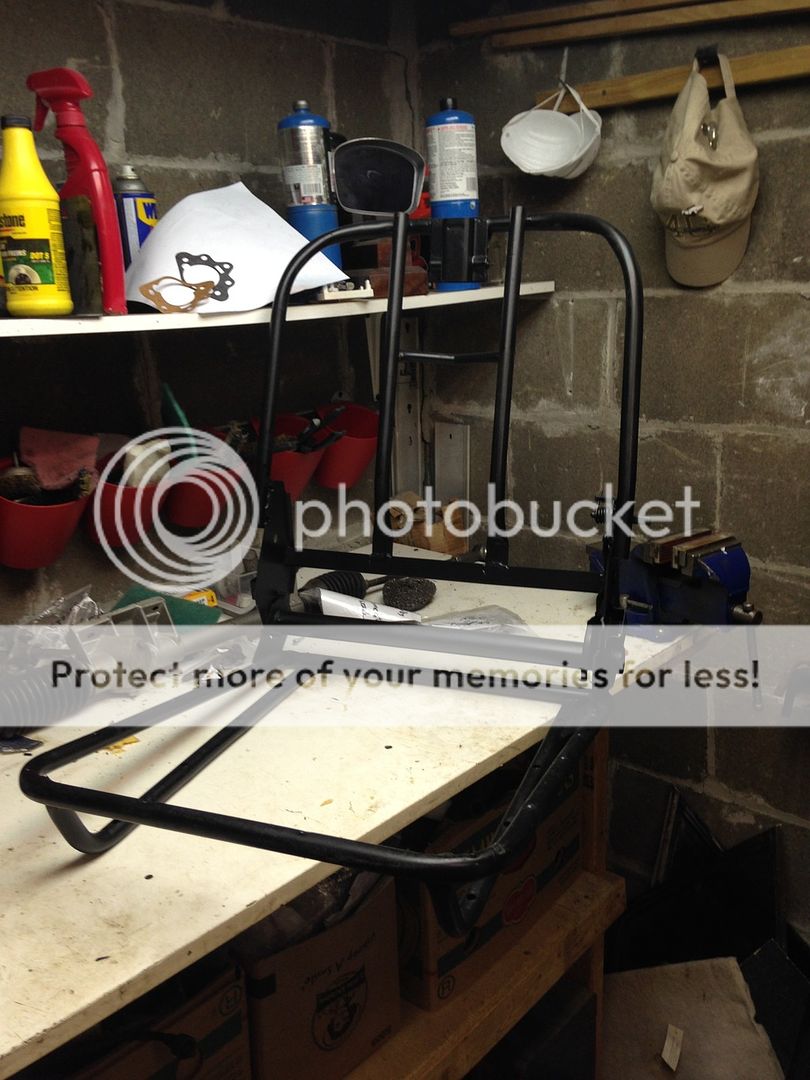
1. The seats on a Midget are much simpler than I would have guessed. Here is the frame - in very good shape though I repainted a bit.
2. Everything to do with the back of the seat attaches to this piece of wood - with many many small staples - the new seats will not have them quite so small.
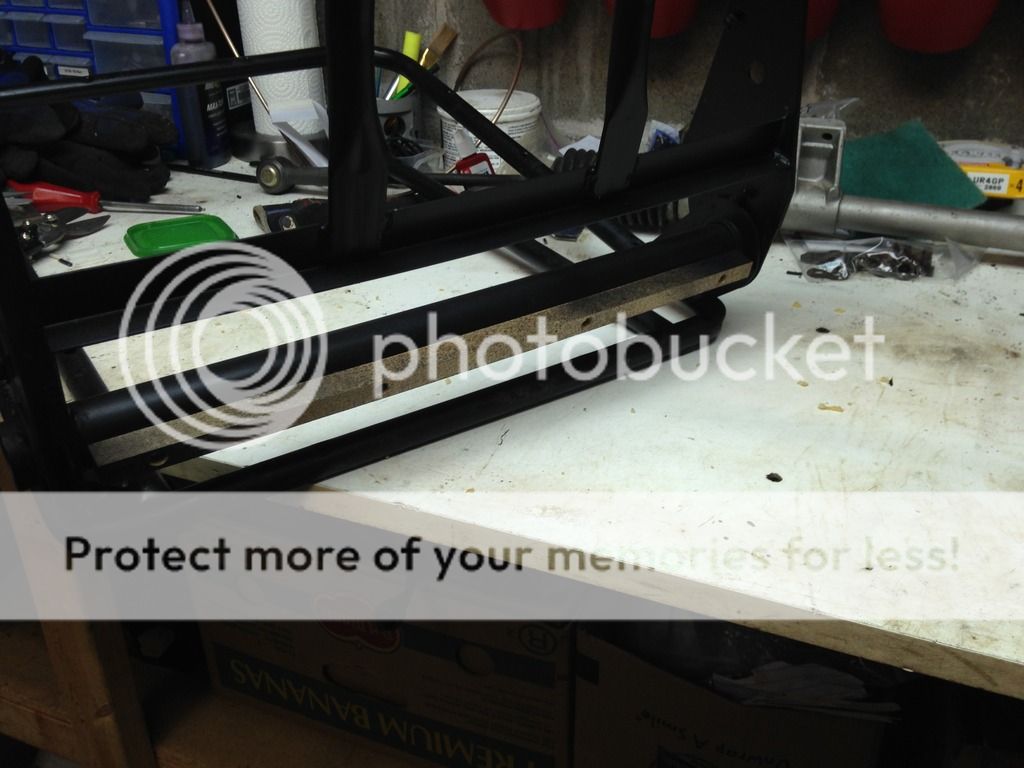
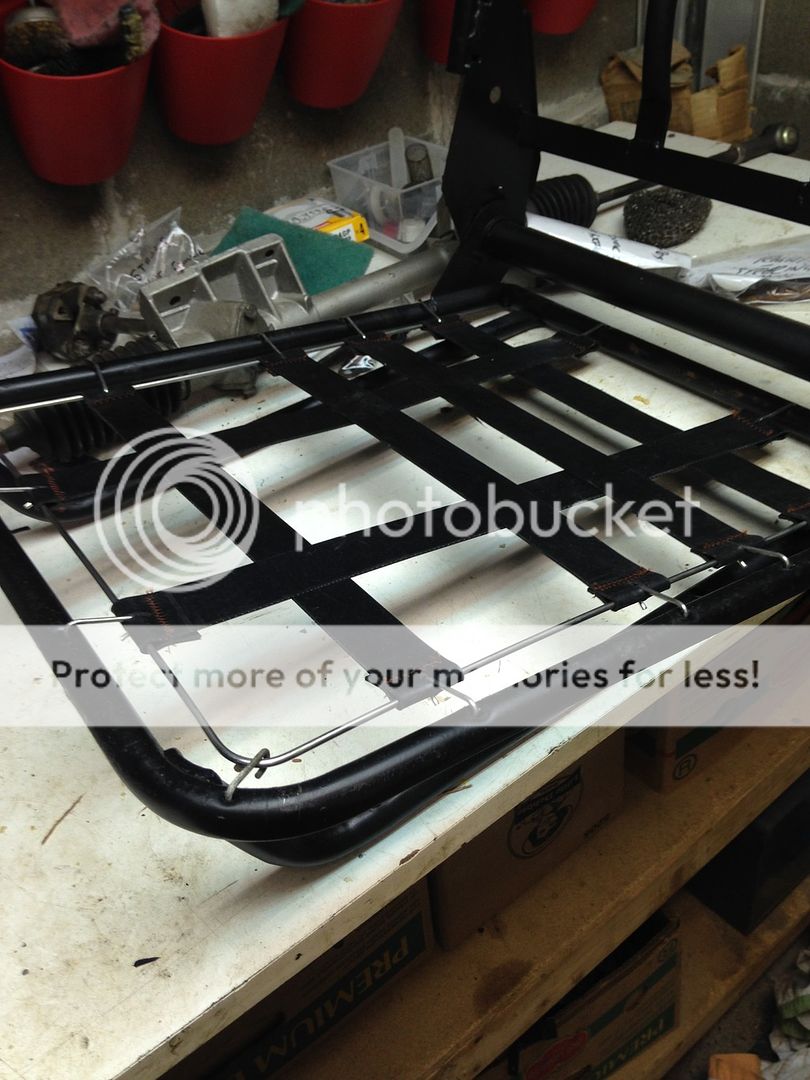
3. When I took the old seats apart, the webbing was shot - so, I bought new webbing - it is easy to install, just start at the back of the seat and work your way forwards and not the other way around.
4. When it came to reupholstering, I decided to reuse the foam - but at the advice of Mark (Abarth69) I swapped foams - this the drive now sits on the passenger foam and vice versa - it was in pretty good shape though.
No pics
5. I then trial fitted the seats and consulted SWMBO about whether headrests
or not

since I would have to cut a hole if I wanted headrests. After explaining to her that safety was not really relevant in an accident in a Midget, she chose no headrests as it suited the look better. (that and likely my life insurance policy)
6. This is where I get to express slight dissatisfaction with the seats - they were from a reputable dealer and the price was much more than right, but, the tabs to staple to the wood strip didn't quite line up - and even with SWMBO's help (she is a seamstress of considerable talent) we were starting to tear the fabric to get the tension correct. Also the left side panel was just a little wider than the right hand side panel, so, a cunning solution was proposed - this is crucial!
Thought I would recount the reupholstering process.
Of course I forgot to take proper "before" pics - so, here goes.
1. The seats on a Midget are much simpler than I would have guessed. Here is the frame - in very good shape though I repainted a bit.

2. Everything to do with the back of the seat attaches to this piece of wood - with many many small staples - the new seats will not have them quite so small.

3. When I took the old seats apart, the webbing was shot - so, I bought new webbing - it is easy to install, just start at the back of the seat and work your way forwards and not the other way around.

4. When it came to reupholstering, I decided to reuse the foam - but at the advice of Mark (Abarth69) I swapped foams - this the drive now sits on the passenger foam and vice versa - it was in pretty good shape though.
No pics
5. I then trial fitted the seats and consulted SWMBO about whether headrests

or not

since I would have to cut a hole if I wanted headrests. After explaining to her that safety was not really relevant in an accident in a Midget, she chose no headrests as it suited the look better. (that and likely my life insurance policy)
6. This is where I get to express slight dissatisfaction with the seats - they were from a reputable dealer and the price was much more than right, but, the tabs to staple to the wood strip didn't quite line up - and even with SWMBO's help (she is a seamstress of considerable talent) we were starting to tear the fabric to get the tension correct. Also the left side panel was just a little wider than the right hand side panel, so, a cunning solution was proposed - this is crucial!


