• Hi Guest!
    You can help ensure that British Car Forum (BCF) continues to provide a great place to engage in the British car hobby! If you find BCF a beneficial community, please consider supporting our efforts with a subscription.

    There are some perks with a member upgrade!
    **Upgrade Now**
    (PS: Subscribers don't see this gawd-aweful banner
Tips
Tips

TR6 Installing new lower crash pads - TR6

tr6web

Jedi Trainee
Country flag
Offline
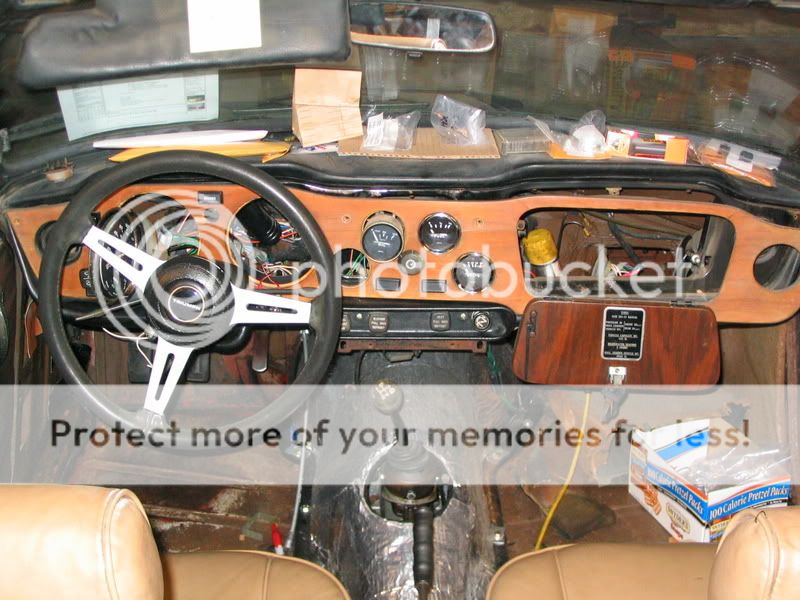
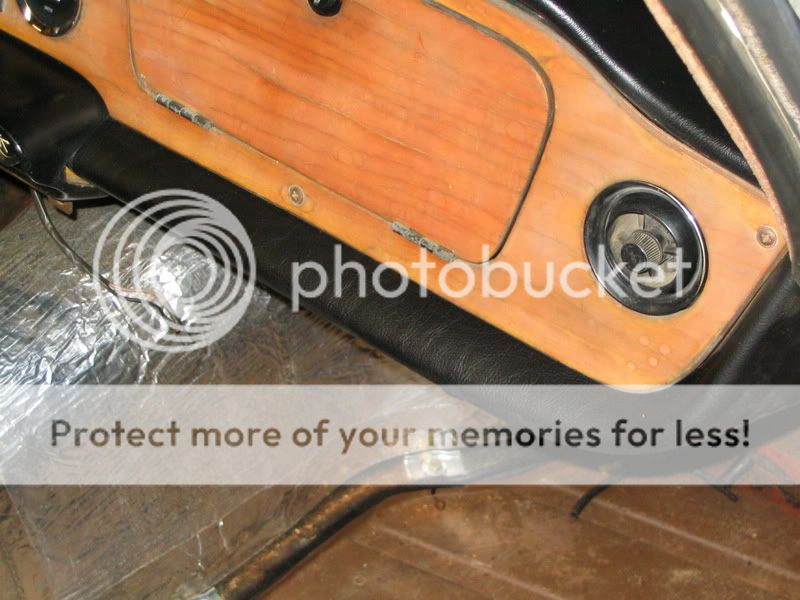
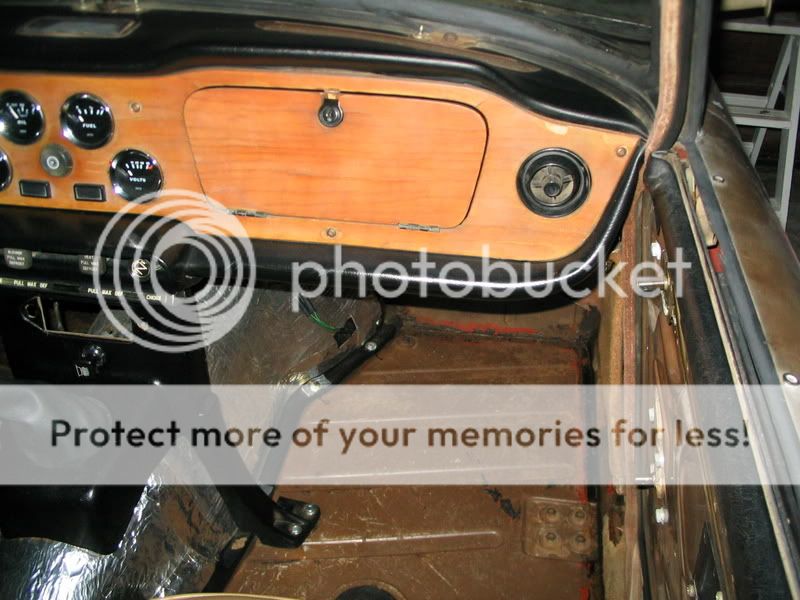
For my 72 TR6, I was wondering if it was possible to install new lower crash pads without taking the metal fascia off? I really don't want nor know how to take the steering column off just to remove the metal fascia. It looks very complicated.

Is it possible to loosen some of the screws to get the edges of the pads under the fascia or something like that? I have the wooden fascia off as well as the upper crash pad (those were easy...just time consuming!)

I would appreciate any help. Thank you!
 
I just did this on my '74, on the passenger side... don't know about the driver's side. ISTR there are 3 nuts on the back of the crash pad, and I loosened, but didn't remove, the large nut under the dash, by the glovebox. By looking under there, it'll be obvious what needs to be be removed or loosened. BTW, my glove box was already out. I think I posted a topic on this a while back, you might check. This is one place where the Bentley can be superseded; it can be done, saving yourself a lot of grief.
 
Yes, I saw the nuts as it said in the Bentley. I would love to skip it since you said it can be done. I have to replace the passenger side since it's cracked. I don't have to replace the driver's side, but I do have a new one.

I'll try what you said and we'll see how it goes. Any other help would still be appreciated. Thanks.
 
Here's my post from 7.25:

Yikes! According to the Bentley, one has to remove the wooden and metal fascias to replace the passenger side crash pad. I'm happy to report this isn't so. I removed the 5 dash wood screws, loosened the right side metal fascia bolt, (by the windscreen hold down), loosened the dash-top bolts, loosened the vinyl center plinth, and removed the 3 bolts holding in crash pad. There is also a metal tang on the upper corner of the crash pad that has to be bent straight out.

Thankfully, not too difficult to then remove the crash pad. Having the glove box cubby, and center support already out made this job easier.

I had a nasty, sun eaten crash pad that I was able to replace w/ a decent eBay original in about 30 minutes. Oh, happy day! BTW, the repro lower dash parts don't match the originals, To my eye, they're not as glossy, and w/ a more raised grain. I was happy to find the eBay original part to better match the rest of the instrument panel.

Here's some pix from the archives:
IMG_0849.jpg


I'm pretty sure I only loosened the wooden dash here... I was in the midst of cleaning the grungy old gauges and replacing bulbs...

IMG_0865.jpg


This shows the aftermarket reprduction; not glossy enough finish, and much more pebbled surface. Since I wanted to match the original pieces, I found a decent one on eBay:

IMG_0904.jpg


Hope that helps!
 
mrv8q said:
...BTW, the repro lower dash parts don't match the originals, To my eye, they're not as glossy, and w/ a more raised grain...

Ditto. As I mention on my website:

"New 'crash' pads (from Moss) were also fitted and well made. Though the pads were an exact fit they did not look quite right to my eye. Modern vinyl seems to have less gloss and be not as black as the original. Modern vinyl probably looks more like leather than the 60s stuff which looked, well, like vinyl. To get a more period look I used a gloss black vinyl dye from SEM."
 
Back
Top