• Hey Guest!
    British Car Forum has been supporting enthusiasts for over 25 years by providing a great place to share our love for British cars. You can support our efforts by upgrading your membership for less than the dues of most car clubs. There are some perks with a member upgrade!

    **Upgrade Now**
    (PS: Upgraded members don't see this banner, nor will you see the Google ads that appear on the site.)
Tips
Tips

I pulled the trigger and ordered new floors

jackag91

Jedi Warrior
Offline
along with rocker panels. I fear that I may be over my head.

I hope to have to car taken apart by next month...depending on the rain.

Any help will be appreciated.

Also, I am going to need to make a few patchs. What gauge/type metal will I need to learn how to work?
 
The fenders, as most of the car are 20 gauge. I suggest that you go to a wrecking yard and pick up an fender or two to learn and practice on. A whole lot less expensive the the ones on your car. Lay out a good plan, stick to it, and go slow and carefully, and it will work out.
 
Thanks, the fenders are fine. I have a few rust holes where the rear wheel well connects to the the boor pilar.

Are there any tools I need to get? I have a set of hammers and dollies. A buddy of mine will do the welding or teach me on his equipment.
 
Best of luck with your project!

Once again I show my total ignorance of things
auto mechanics.

What are "hammers and dollies"? I have seen these
two words numerous times. Not a clue on this one.

Hammers pound nails; dollies are used to move washing machines.
d
 
Hammers are well hammers but they are shaped a little differently.

The dollies are little hand held anvil like things
CP07K.jpg
 
Hammers are hammers but designed to work sheet metal with a dolly. The dollies come in various forms and shapes to fit the work at hand.

The shape of the dolly is not meant to match exactly the desired form of the work being done. They are not forms. The body worker will either use an off or on dolly technique to work the metal.

On dolly means the hammer strikes the metal with the dolly directly under the point of impact. On dolly work stretches the metal.

Off dolly simply means the dolly is slightly off the point of impact of the hammer. This technique allows the body man to raise or lower dents or creases. For instance to raise say a small dent, the crown of the dolly would be placed directly under the dent. The hammer strokes would then be applied around the perimeter. A few strokes and the dent is gone.

Takes a while to learn, but can be fun as a hobby.
 

Attachments

  • 6068-p23043.jpg
    6068-p23043.jpg
    10.7 KB · Views: 90
Hammer and dolly work was some of the most rewarding things that I've done on my TR3 restoration. I never did this kind of work before, but with some reading and a friend that has worked in auto body repair his whole life show me a few things, I was able to really get the hang of it.

I also found that there is a huge difference between good hammers and those bargain basement items that sell so cheaply. There is a balance that the good hammers have that make them feel like an extension of your mind. Buy the hammers seperately as you need them...but get good ones. I have three hammers, but probably could've gotten away with two.

Dollies are dollies. Cheap is OK here. Again, two or three are all you need. Both the dollies and hammers have to be whipped into shape before they are used. All of the grinding marks on the faces of the hammers and dollies must be sanded out to perfection. Any marks left on them, especially the hammers, will leave marks on the sheet metal. Get them in shape and keep them there. And don't use them for driving nails!! These are precision instruments. /bcforum/images/%%GRAEMLIN_URL%%/cheers.gif
 
I think Ray was referring to getting some fenders from the junkyard to practice on. Too, the sheet metal gauge on the TR6 is closer to 22 gauge, hence much thinner and harder to weld. Good idea to work over some scrap metal with those hammers. Thin gauge will stress harden easily and the more you work it, the worse off you are. Really shouldn't be a whole lot of metal forming, Heritage parts are pretty good. If you are cutting out your rockers and leaving the body on the frame, make sure you weld a good door brace and cross brace if you can. The rockers are an important part of the integrity of the body-on-frame convertible.
 
Thanks Bill. I figure if I am going to do this, I am just going all the way. I am planning on following the "How to restore a tr6" book method and cut it in half. I don't want to get done and find out that the frame is worse than I thought.
 
Wow!

Thanks all, a great addition to my automotive educational
process.

For some reason, PDO Pedro had no dents in the TR6
(excuse me- dents I am aware of. I have found bondo
and paint inside the car covering rust.)

d
 
jackag91 said:
Thanks Bill. I figure if I am going to do this, I am just going all the way. I am planning on following the "How to restore a tr6" book method and cut it in half. I don't want to get done and find out that the frame is worse than I thought.

Whoa, hold your horses. You do not really want to cut the car in half unless you have a really, really, experienced body man working with you. Trust me, aligning the pieces, even just one, is not as easy as Williams makes it look. And yes I know he said you may as well cut it in half. But for a beginner, the best recommendation Williams makes in his book is "Do one panel at a time!"

Give it some thought...
 
jackag91 said:
I fear that I may be over my head.

I know that feeling!

I'll tell you what - I'll get started on the same thing and we both post pictures and reports of our progress to keep us both motivated?
 
When you hammer and dolly, be sure that you tap tap tap not bang bang bang. As a carpenter, when you drive a nail, it's manly to hit it once or twice and drive it home, big oz. hammer and big swing. But hammer and dolly work takes finesse and a light touch.

As far as the method of cutting it in half, I have seen it done by an amateur and have considered it myself. If you are going to replace both the floors along with the inner and outer rockers, you have an advange of being able to mount the floors to the frame and set the rockers in place. Then set the front from the firewall forward and the back from the rear floor and tranny tunnel. You then line up the front to rear, mount the doors to get them right and connect the rockers. One of the caveats is that after all is done the a-post tends to sag so you need to set thing up a little in anticipation. Way over simplified but same concept.

After all you are really driving the chassis and the body is really just a surround, right? YMMV but it is an intriguing approach.
 
TR6oldtimer said:
I suggest that you go to a wrecking yard and pick up an fender or two to learn and practice on. A whole lot less expensive the the ones on your car. Lay out a good plan, stick to it, and go slow and carefully, and it will work out.

Sage advice.

I took an autobody class at the local community college.

One night, the instructor had a dozen oldish fenders laying around the shop. He'd walk up to your fender with a deadblow hammer (and a smile) and whack a dent into yours. Your assignment was to remove said dent with a bumping hammer and an assortment of dollies. You could ask for as much help as you wanted, but he would not touch your panel. I learned alot that night and have immense respect for true panel beaters.

When we learned welding, he handed each of us 5 plates of square shaped flat sheet steel. We were told to weld an open top cube and present it for inspection. At the end of the assignment, he filled each cube from a watering can. If your cube held water, you passed with honors. True story.

Practice on scrap first, then move on to the real thing.
 
Brooklands said:
Was that at LCCC?

Yes, sir.

I can't recall the name of the shop that sponsored the class, but it was just north of Rt 100 on Rt 309 West, near New Tripoli... it was a long time ago. It was a father/son operation. One of the few Glasurit certified shops at the time in PA. We took a tour of the place.
 
Brooklands said:
I will have to watch and see what courses the college offers in the future. I never had time for those when I was working...

I was a new hire at the time, so not much responsibility yet. Wasn't married, didnt have kids yet either. Although I was also studying for an MBA!

Here you go... what are you waiting for?

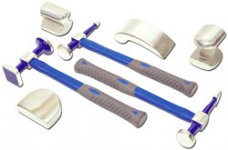
TEC 616 - Auto Body Makeover-Level I
If you enjoy restoring automobiles or are just starting to explore your interest in auto repair, this introductory course is for you. Learn the techniques of dent, rust, and paint repair, proper tools of the trade, equipment and materials. Also, learn spot repairs, how to blend paints, buffing, and polishing. Students are required to bring safety glasses, a respirator and materials for personal projects. Materials fee - $30 - payable to the instructor on the first night.

TEC 634 - Welding I This course is for the beginner or hobbyist interested in learning more about the most popular welding processes available, including SMAW, GTAW, GMAW, and FCAW as well as the cutting processes OFC-A and CAC-A. (Safety glasses, welding gloves, work boots, straight leg pants and a long sleeve shirt required.)
 
I just checked the dallas CC. They have two classes I would want to take. a body welding and a automotive paint repair classes.

The only problem, they are mon-thurs 5:30 - 8:00. On the other side of town. So there isn't really a way I could make it.

I guess, I will need to check the future schedules.
 
Back
Top