 but were afraid to ask:
 I am getting my 62 BT7 ready for new metal and painting. I have run into a problem trying to remove the trunk handle. The Phillip screws came out with no issues, but the slotted screw that threads into the square shaft that runs from the lock assembly is not moving. I have tried spraying WD 40, but it is difficult to get to the threads. My last resort is to drill it out. I believe I read somewhere that this screw is hard to replace. Moss shows the screw and handle as one unit. Any tips appreciated.
-
 Hi Guest!
You can help ensure that British Car Forum (BCF) continues to provide a great place to engage in the British car hobby! If you find BCF a beneficial community, please consider supporting our efforts with a subscription.
There are some perks with a member upgrade!**Upgrade Now**
(PS: Subscribers don't see this gawd-aweful banner

Tips
- We have a special forum called "Member Articles" where you can submit actual articles for consideration for publication. Learn More
- Don't have an Avatar? If not, your avatar will default to the 1st character in your username. Go into "Account Details" to change your Avatar.
- Some basic forum navigation info: click
 Hey - did you know if you click on the title of a thread it will take you to the first unread post since you last visited that thread?
- Hey Guest - Is your British Car Club in our Clubs database? If not, send me a PM - Basil

- Looking for a local club? Click the "Clubs" tab above and browse hundreds of clubs world-wide.
- Add Android or iPhone APP: click
- Did you know - any picture or video you add in your posts in any marque-specific forum will also get added to the Media Gallery automatically.
- A few more tips about posting and replying: click
- Hey there Guest - be sure to keep your profile page up to date with interesting info about yourself: learn more
- More tips and tricks on Posting and Replying: click
 STOP!! Never post your email address in open forums. Bots can "harvest" your email! If you must share your email use a Private Message or use the
  smilie in place of the real @
- Want to mention another member in a post & get their attention? WATCH THIS

- So, you created a "Group" here at BCF and would like to invite other members to join? Watch this!
- Hey Guest - A post a day keeps Basil from visiting you in the small hours and putting a bat up your nightdress!
- Hey Guest - do you know of an upcoming British car event?
 Pretty Please - add it to our Events forum(s) and add to the calendar! >> Here's How <<
- Hey Guest - you be stylin' Change the look and feel of the forum to fit your taste. Check it out
- If you run across an inappropriate post, for example a post that breaks our rules or looks like it might be spam, you can report the post to the moderators: Learn More
- If you would like to try some different "looks" or styles for the site, scroll to the very bottom, on the left and click the Style Selector.
You are using an out of date browser. It may not display this or other websites correctly.
You should upgrade or use an alternative browser.
You should upgrade or use an alternative browser.
Healey Trunk Handle Removal
- Thread starter Gibber
- Start date

Offline
Good morning. Did you try heat? If not try using a propane plumbing torch to heat it for a few minutes, 2-3 or so forI am getting my 62 BT7 ready for new metal and painting. I have run into a problem trying to remove the trunk handle. The Phillip screws came out with no issues, but the slotted screw that threads into the square shaft that runs from the lock assembly is not moving. I have tried spraying WD 40 but it is difficult to get to the threads. My last resort is to drill it out. I believe I read somewhere that this screw is hard to replace. Moss shows the screw and handle as one unit. Any tips appreciated.
a small part like that. If that doesn't work first try then alternate back and forth between heating and soaking with Blaster, or WD40, Blaster is better. Saving these nuts and screws take a lot of patience. It could take a few days. Good luck.
Bob_Spidell
Yoda
Offline
Actual penetrating oil works better than WD40; I've had good results with Kroil, others with PB Blaster and aircraft mechanics swear by Mouse Milk. Some brew their own, with ATF and acetone.
I've had some positive results with an impact screwdriver, though I don't know if it's feasible here (caution required). Screwdrivers with concave tips--as with this impact driver--engage much better than 'old school' with sloped tips. A soldering gun or pencil might be a good way to apply localized heat.
I've had some positive results with an impact screwdriver, though I don't know if it's feasible here (caution required). Screwdrivers with concave tips--as with this impact driver--engage much better than 'old school' with sloped tips. A soldering gun or pencil might be a good way to apply localized heat.
Thanks for the response Ray, I will give the heat a try.Good morning. Did you try heat? If not try using a propane plumbing torch to heat it for a few minutes, 2-3 or so for
a small part like that. If that doesn't work first try then alternate back and forth between heating and soaking with Blaster, or WD40, Blaster is better. Saving these nuts and screws take a lot of patience. It could take a few days. Good luck.
Offline
So there really is a "Mouse Milk." I've heard the term used in various contexts over the years, but always thought it was imaginary.Actual penetrating oil works better than WD40; I've had good results with Kroil, others with PB Blaster and aircraft mechanics swear by Mouse Milk. Some brew their own, with ATF and acetone.
I've had some positive results with an impact screwdriver, though I don't know if it's feasible here (caution required). Screwdrivers with concave tips--as with this impact driver--engage much better than 'old school' with sloped tips. A soldering gun or pencil might be a good way to apply localized heat.
Offline
A quick look at a factory parts manual didn't find the screw. I'll guess that it's a Phillips pan head screw - 2BA threads. A screw with 10-32 threads will work.
Bob_Spidell
Yoda
Offline
So there really is a "Mouse Milk." I've heard the term used in various contexts over the years, but always thought it was imaginary.
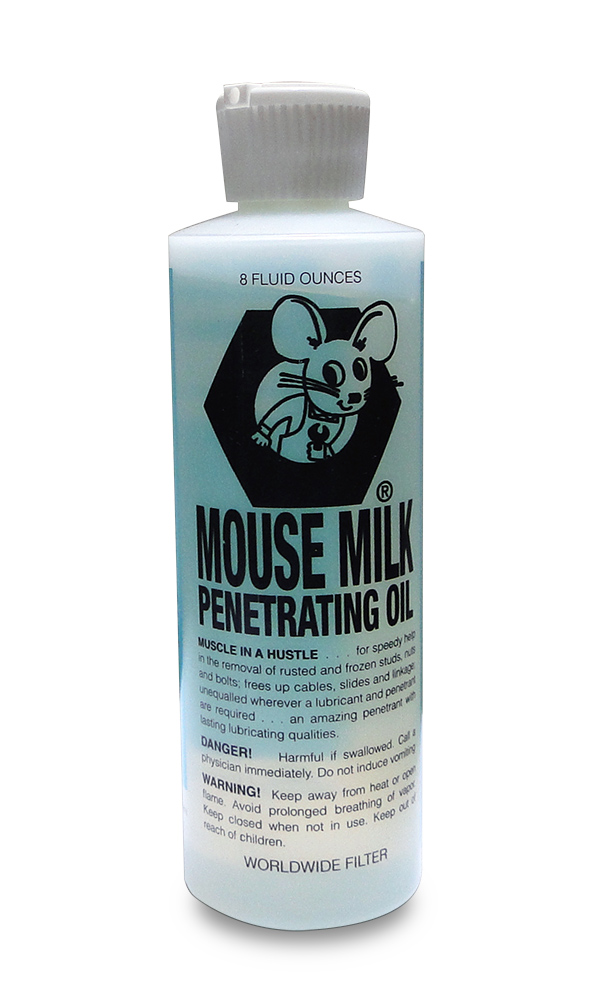
Mouse Milk Oil 8 0Z | Aircraft Spruce ®
Mouse Milk Oil 8 0Z For speedy help in removal of rusted or frozen studs, nut and bolts; frees up cables, slides and linkage; unequalled wherever a lubricant and penetrant are required. Lasting lubricating qualities.
 www.aircraftspruce.com
Healey Nut
Luke Skywalker
Offline
Moose milk in Canada has a whole different meaning ………Mouse Milk Oil 8 0Z | Aircraft Spruce ®
Mouse Milk Oil 8 0Z For speedy help in removal of rusted or frozen studs, nut and bolts; frees up cables, slides and linkage; unequalled wherever a lubricant and penetrant are required. Lasting lubricating qualities.

