Hey Guest!

 Hey - did you know if you click on the title of a thread it will take you to the first unread post since you last visited that thread?
 but were afraid to ask:
  STOP!! Never post your email address in open forums. Bots can "harvest" your email! If you must share your email use a Private Message or use the
  smilie in place of the real @
 Pretty Please - add it to our Events forum(s) and add to the calendar! >>
pkmh
Jedi Warrior
Offline
Folks, My next [possible] ajida in life...
Because my HB8 is negativily grounded, this morning, I finally went ahead cutting and crossing the white [loop] wire to the back side of the tach with hopes that the tach would function again.
I never knew the tach to work since I bought the car a year and a half ago. But according to instructions provided regarding converting the tach, it mentioned how I am to change or convert a ground wire found inside the housing or that which has a resistor.
Just curious to know if any damage is done by performing one task but not the other. No reference to possible harm was mentioned and one conversation I had with another owner, all that was needed was to reverse that one wire.
With that in mind, I only had the car running for a few seconds and then turned it off and reversed the wiring back, until I can get inside the tach housing.
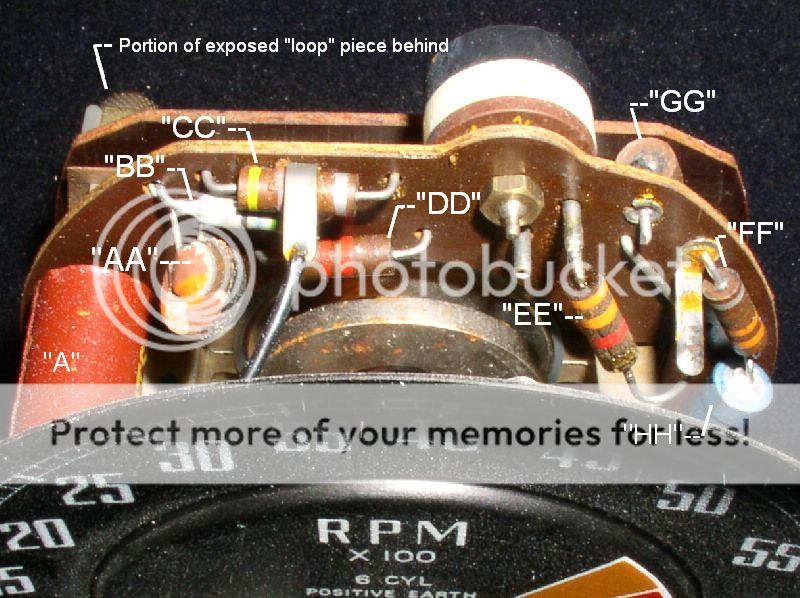
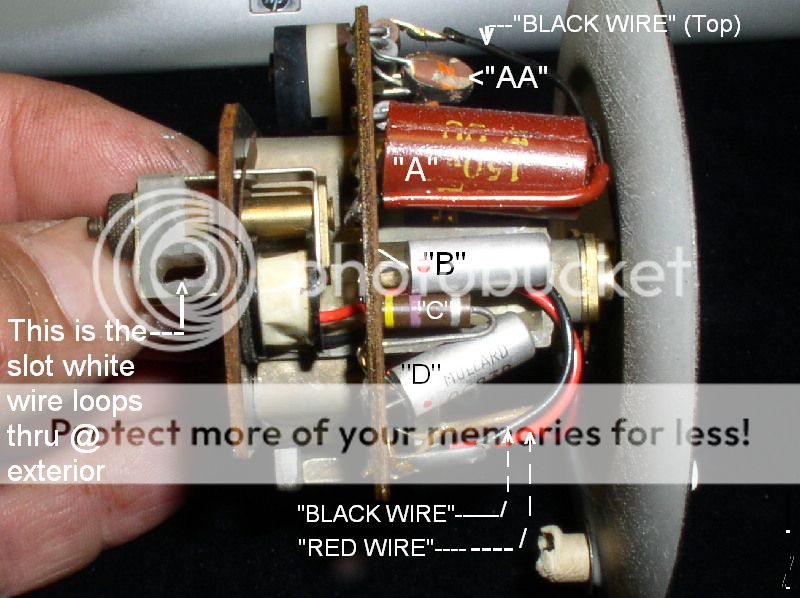
Again, just curious to know if anyone has done this step. I am about to take the glass and dial apart, as the instruction sheet indicates and being careful not to bend the needle they made reference to.
A photo showing the backside of my tach, before having cut and reversed any wires, shown.
Thanks for any input offered.
Paul

Because my HB8 is negativily grounded, this morning, I finally went ahead cutting and crossing the white [loop] wire to the back side of the tach with hopes that the tach would function again.
I never knew the tach to work since I bought the car a year and a half ago. But according to instructions provided regarding converting the tach, it mentioned how I am to change or convert a ground wire found inside the housing or that which has a resistor.
Just curious to know if any damage is done by performing one task but not the other. No reference to possible harm was mentioned and one conversation I had with another owner, all that was needed was to reverse that one wire.
With that in mind, I only had the car running for a few seconds and then turned it off and reversed the wiring back, until I can get inside the tach housing.
Again, just curious to know if anyone has done this step. I am about to take the glass and dial apart, as the instruction sheet indicates and being careful not to bend the needle they made reference to.
A photo showing the backside of my tach, before having cut and reversed any wires, shown.
Thanks for any input offered.
Paul