• Hi Guest!
    If you appreciate British Car Forum and our 25 years of supporting British car enthusiasts with technical and anicdotal information, collected from our thousands of great members, please support us with a low-cost subscription. You can become a supporting member for less than the dues of most car clubs.

    There are some perks with a member upgrade!
    **Upgrade Now**
    (PS: Subscribers don't see this gawd-aweful banner
Tips
Tips

Getting my window back on track...missing?

Healey_Z

Jedi Warrior
Offline
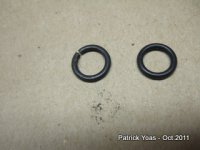
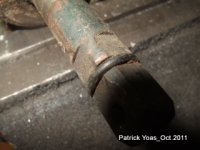
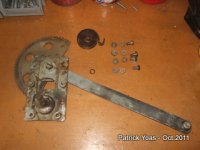
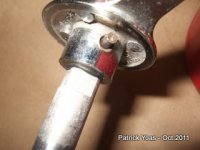
I am finally getting around to all the things that need to be fixed and I'm now on the driver's window. It worked when I bought it then either the glass came out of the holder or the holder came out of the track. Looking at the Moss catalog to see what gaskets and the nylon slide I might need, I see another piece that I might be missing?

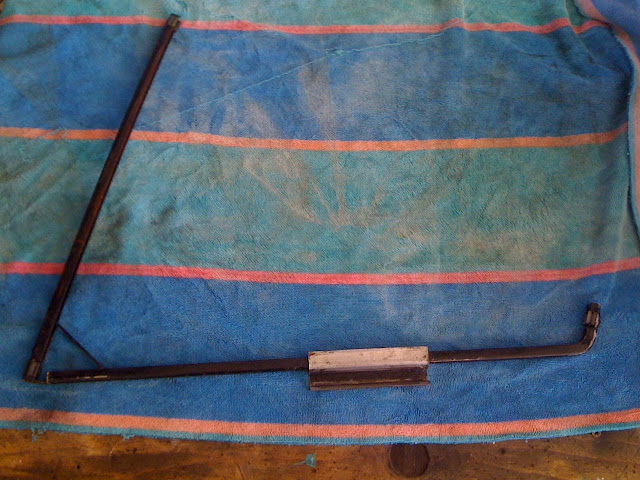
I was going to order new gaskets, nylon runners and then put it back in. I took the glass out the top and the carrier out the bottom. I'm assuming it will go down in to the channel, from the top, once I put the glass in the carrier?

Any tips, hints or instruction?

window.jpg
 
Although I have not worked on my windows for quite some time, I think the most difficult task I can remember was getting the handles off to dismount the panel. As you have already found, the window is heavy so you may need some props while aligning the lift rollers. I also sprayed the channels with silicon to reduce the drag of the new nylon guides, however, most would say that it is not necessary. The only other thing I can think of is the possible need to bend the stop bracket to get the desired window height when rolled down.

Hope this provides some help,
Ray (64BJ8P1)
 
I'd order some extra of the plastic clips that attach to the glass and ride in the channel, they tend to fall off after awhile. I didn't buy the rubber channels that attach to the glass because I was told there hard to get on and tend to not stick to the glass, instead I taped the glass and laid a bead of black rubber silicon gasket maker. When dried the silicon held much better and sealed great without rubbing off. I also had to pinch the rear channel a bit to allow the glass not to rattle. Don't forget the front channels usually has some shims to align properly. Don't rush it and keep opening and closing the doors to check for rattles.

Good luck, let us know how it turns out.
 
Johnny said:
I'd order some extra of the plastic clips that attach to the glass and ride in the channel, they tend to fall off after awhile. I didn't buy the rubber channels that attach to the glass because I was told there hard to get on and tend to not stick to the glass, instead I taped the glass and laid a bead of black rubber silicon gasket maker. When dried the silicon held much better and sealed great without rubbing off. I also had to pinch the rear channel a bit to allow the glass not to rattle. Don't forget the front channels usually has some shims to align properly. Don't rush it and keep opening and closing the doors to check for rattles.

Good luck, let us know how it turns out.
Mine still have the black silicone on them after 25+ years and I "agree", works much better than the rubberish material! I've tried different grease's for the guide channel and they all seemed to wear off after a few years of use..
 
Thank you for the responses. I think what happened was that the glass loss it's grip in the holder and then the bottom clip fell out. I will inspect my clips and use some silicon to hold the window.

So, it looks like I have all the pieces?
 
Healey_Z said:
Thank you for the responses. I think what happened was that the glass loss it's grip in the holder and then the bottom clip fell out. I will inspect my clips and use some silicon to hold the window.
So, it looks like I have all the pieces?
From the photo, it looks like you have the pcs. Be sure you check the other inards of your door while you have it all apart.Grease window crank gear, etc. Check to be sure all the right screws are installed in all of the other parts such as door open/closing mechanisms and window crank assembly. I just found incorrect parts/screws in mine.
 
Just to add my six penny worth, I used silicon to mount the glass in the holder, black would be good I used clear - not so good. It is holding up very well.

Whilst you have the door apart as it were - get the winder mechanism out and grease it up, and check if the winder check strap is there - to prevent overwinding of the window, I also greased the slides lightly and be prepared to adjust the rear slide both side ways in the door and also shim it front to back. The rubbers and the chrome trim at the top of the door go on last once the window operates smoothly.

:cheers:

Bob
 
Bob Hughes said:
Just to add my six penny worth, I used silicon to mount the glass in the holder, black would be good I used clear - not so good. It is holding up very well.

Whilst you have the door apart as it were - get the winder mechanism out and grease it up, and check if the winder check strap is there - to prevent overwinding of the window, I also greased the slides lightly and be prepared to adjust the rear slide both side ways in the door and also shim it front to back. The rubbers and the chrome trim at the top of the door go on last once the window operates smoothly.

:cheers:

Bob
What everybody forgets or is missing is the small rubber "O" rings on the groove in the window crank square peg/shaft. Also the ones on the inside door handle square shaft.
Your this far so might as well check the "rattle" prone stuff too.
 
Regarding those little white plastic guides that go on the front edge... order extra and try to get a parts guy that will look through his stock to give you the ones that are the whitest (is that a word?). If they are yellowish they are already hard and will break much quicker when you are installing them. If when you are putting the glass in you hear a little "click" sound.... the guide clip just broke... pull the glass out, replacing new guide clips for the ones you just broke and try it again. I think I broke three before I got it in correctly.

Best of luck,
Steve
https://stevesaustinhealey.com
 
I inspected the clips and they were a little worn but I checked it in the guide and looked fine. I then siliconed the window in place and let it sit overnight.

I dropped it in last night and it works like a champ. I sure wish they had another design for putting the handles on and off, or I knew the secret, that took as much time as putting the window in and getting it aligned.

Thanks to all, since I drive my toy cars all year round (except in the rain), it is nice to have the windows working as we approach the cooler weather :smile:

P1050170.JPG
 
Patrick, I have never noticed the "o" ring before and I often had the door panel off and mechanisms apart. Guess I don't have them. I looked it up in the Moss catalog and there it was, part 104, marked N/A. Do you happen to know the size. I can get them at my local hardware or auto store. Do they just fit tight to the square shaft? Are they on the door opener shaft as well? I didn't see them the catalog.
 
tahoe healey said:
Patrick, I have never noticed the "o" ring before and I often had the door panel off and mechanisms apart. Guess I don't have them. I looked it up in the Moss catalog and there it was, part 104, marked N/A. Do you happen to know the size. I can get them at my local hardware or auto store. Do they just fit tight to the square shaft? Are they on the door opener shaft as well? I didn't see them the catalog.
They get old, brittle and dirty and are hard to see. I had two fall off and one was missing and the last one I had to cut off. I need to replace mine so I'll be going to the hardware store up the street and post what I found out.
 
Patrick67BJ8 said:
tahoe healey said:
Patrick, I have never noticed the "o" ring before and I often had the door panel off and mechanisms apart. Guess I don't have them. I looked it up in the Moss catalog and there it was, part 104, marked N/A. Do you happen to know the size. I can get them at my local hardware or auto store. Do they just fit tight to the square shaft? Are they on the door opener shaft as well? I didn't see them the catalog.
They get old, brittle and dirty and are hard to see. I had two fall off and one was missing and the last one I had to cut off. I need to replace mine so I'll be going to the hardware store up the street and post what I found out.
No photod because my Picasa Photo software has stopped be nice to me. However, the O ring size is "011" which translates to 5/16" I.D., 7/16" O.D., x 1/16" thick. The shafts grooves are approx .319/.321 and the O ring is .301 and it fits good! I bought what I needed and installed them to check the fit. The handles butt up against the O-rings and do not slide over them. Maybe photos later when I figure out current the problem. I can send emails if you PM me your email address. Don't look for reply once the World Series game starts tonight!
 
Patrick67BJ8 said:
Patrick67BJ8 said:
tahoe healey said:
Patrick, I have never noticed the "o" ring before and I often had the door panel off and mechanisms apart. Guess I don't have them. I looked it up in the Moss catalog and there it was, part 104, marked N/A. Do you happen to know the size. I can get them at my local hardware or auto store. Do they just fit tight to the square shaft? Are they on the door opener shaft as well? I didn't see them the catalog.
They get old, brittle and dirty and are hard to see. I had two fall off and one was missing and the last one I had to cut off. I need to replace mine so I'll be going to the hardware store up the street and post what I found out.
No photod because my Picasa Photo software has stopped be nice to me. However, the O ring size is "011" which translates to 5/16" I.D., 7/16" O.D., x 1/16" thick. The shafts grooves are approx .319/.321 and the O ring is .301 and it fits good! I bought what I needed and installed them to check the fit. The handles butt up against the O-rings and do not slide over them. Maybe photos later when I figure out current the problem. I can send emails if you PM me your email address. Don't look for reply once the World Series game starts tonight!
Here are the photos of the O-ring. I took before and after work.
 

Attachments

  • 26809.jpg
    26809.jpg
    27.7 KB · Views: 142
  • 26810.jpg
    26810.jpg
    28.3 KB · Views: 139
  • 26811.jpg
    26811.jpg
    30.3 KB · Views: 139
  • 26812.jpg
    26812.jpg
    26 KB · Views: 140
  • 26813.jpg
    26813.jpg
    31.3 KB · Views: 139
Patrick67BJ8 said:
Patrick67BJ8 said:
Patrick67BJ8 said:
tahoe healey said:
Patrick, I have never noticed the "o" ring before and I often had the door panel off and mechanisms apart. Guess I don't have them. I looked it up in the Moss catalog and there it was, part 104, marked N/A. Do you happen to know the size. I can get them at my local hardware or auto store. Do they just fit tight to the square shaft? Are they on the door opener shaft as well? I didn't see them the catalog.
They get old, brittle and dirty and are hard to see. I had two fall off and one was missing and the last one I had to cut off. I need to replace mine so I'll be going to the hardware store up the street and post what I found out.
No photod because my Picasa Photo software has stopped be nice to me. However, the O ring size is "011" which translates to 5/16" I.D., 7/16" O.D., x 1/16" thick. The shafts grooves are approx .319/.321 and the O ring is .301 and it fits good! I bought what I needed and installed them to check the fit. The handles butt up against the O-rings and do not slide over them. Maybe photos later when I figure out current the problem. I can send emails if you PM me your email address. Don't look for reply once the World Series game starts tonight!
Here are the photos of the O-ring. I took before and after work.
A better pic of the completed window regulator with O-ring installed. Regulator was CAD plated.
 

Attachments

  • 26814.jpg
    26814.jpg
    31.3 KB · Views: 128
Back
Top