• Hi Guest!
    You can help ensure that British Car Forum (BCF) continues to provide a great place to engage in the British car hobby! If you find BCF a beneficial community, please consider supporting our efforts with a subscription.

    There are some perks with a member upgrade!
    **Upgrade Now**
    (PS: Subscribers don't see this gawd-aweful banner
Tips
Tips

fuel gauge/sender wiring

newmexTR3

Jedi Trainee
Country flag
Offline
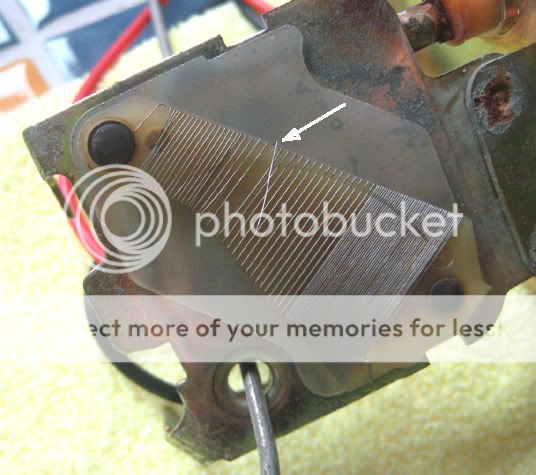
Discovered last night night that the PO did some absolutely crazy things with the wiring. I was trying to sort out my fuel gauge, which is only accurate down to half a tank.

I discovered that there was a wire running from the Green wire post of the gauge to the power post of my heater rheostat (wtf?). So I remove it and now the gauge doesn't work at all. I had it tested by MOMA last year, so I believe that the gauge is functioning correctly. I tried wiring the gauge directly to the fuse box and fuel tank sender, but got either nothing or full tank showing. I did notice that when I turn the key off, the gauge briefly goes to level it should probably be at.

The wiring diagram is not clear on what wires are attached to the top of the fuel sender. On mine, I have the Green/Black wire from the gauge running to one post, and then another black grounding wiring going to the other post (from where I'm not sure yet). Can someone confirm the correct configuration for the sending unit posts?

Two other things:

On the wiring diagram, the hot post of the heater rheostat is says it attaches to A2 on the fuse box. Is this correct?

On the wiring diagram in the top left corner it shows a "ground for dash panel" - where is this exactly?

I'm using page two of this wiring diagram, which is so much better than the Haynes.

Thanks guys
 
newmexTR3 said:
I discovered that there was a wire running from the Green wire post of the gauge to the power post of my heater rheostat (wtf?).
Actually, I believe that is as original. The green wire is switched (by the ignition switch), fused power, which is what the heater wants to be connected to. The factory workshop manual mentions connecting the heater to the wiper switch, but of course that no longer worked on later cars with the "self-parking" wipers. I've never found any factory literature that mentions where to connect the heater on later cars, but I have taken several apart that had it on the fuel gauge.
<div class="ubbcode-block"><div class="ubbcode-header">Quote:]I tried wiring the gauge directly to the fuse box and fuel tank sender, but got either nothing or full tank showing.[/QUOTE]That's a classic symptom of the gauge not being grounded. Although probably not original, I like to add a ground wire with a ring terminal under the nut that holds the gauge to the dash, over to the ground point on the panel. It makes the gauge much more reliable.

Of course it's possible the gauge has failed, but try the ground first.
<div class="ubbcode-block"><div class="ubbcode-header">Quote:]
The wiring diagram is not clear on what wires are attached to the top of the fuel sender. On mine, I have the Green/Black wire from the gauge running to one post, and then another black grounding wiring going to the other post (from where I'm not sure yet).[/QUOTE]That's right, but it matters which post is which. You should be able to look at the sender and see that one post has an insulator around it; that's for the GB wire. Or use your ohmmeter to check; the ground post is connected to the body of the sender (and probably the tank as well). Not sure where the original ground wire went (or even if there was an original ground wire), but mine goes to the bolt where the strap holding the tank connects to the body. My taillights are grounded there too (but that's definitely not original).
<div class="ubbcode-block"><div class="ubbcode-header">Quote:]On the wiring diagram, the hot post of the heater rheostat is says it attaches to A2 on the fuse box. Is this correct?[/QUOTE]No. All of the green wires connect (eventually) to A4 (which is actually two posts on the fuse block, connected by a jumper). However as I wrote above, I believe the original connection for the heater was to the green wire at the fuel gauge, rather than a separate wire to the fuse block. Of course you can run another wire, if you want.

If you connect the heater to A2 as Dan shows, it will run even with the key off, which is definitely not as original.
<div class="ubbcode-block"><div class="ubbcode-header">Quote:]
On the wiring diagram in the top left corner it shows a "ground for dash panel" - where is this exactly?[/QUOTE]On the back of the instrument panel, just above the holder for the RH panel light, is a tie point. There are 4 or 5 ground wires that all go to that tie point, including the wires from the wiper switch, turn indicator lamp, voltage regulator/control box, and speedo/tach.
<div class="ubbcode-block"><div class="ubbcode-header">Quote:]I'm using page two of this wiring diagram, which is so much better than the Haynes.
[/QUOTE]Much better, but still not always right. The OD wiring shown doesn't match the original OD wiring on TS39781LO (although it will work as shown). And the change points for things like the in-line fuse for the tail lights; and the rheostat for the dash lights are not correct. (TS39781LO had the fuse, but not the rheostat.)
 
I had a similar problem with my gauge reading 1/2 full
at maximum. Even after I rewired the entire car.

The problem was finally determined to be a broken
wire inside the sending unit, inside the tqnk.

BrokenWire.jpg
 
Randall, you're the best. Thanks so much. Amazing how much stuff in the car doesn't conform to the "factory" diagrams even though it came off the assembly line that way.
 
Actually the factory diagrams are pretty good, you just have to find the one that matches your car (and transpose for LHD). At one time I was trying to collect them all, but I kind of got sidetracked. There are at least 6 different versions, maybe more. (But they don't show the optional heater.)

Here's the factory diagram that matches the OD wiring on TS38791LO (except for the second isolator switch).
 
Before leaving the subject of the gauge I'd like to mention that there should be clues on the back of the gauge about how to correctly wire it.

Most (pre- voltage stabilizer) Smiths/Jaeger fuel gauges have ID marks stamped next to each terminal. One will be "B" for the switched 'battery' connection, the other will be stamped "T" for the 'tank' (sending unit wire) connection. It matters which is which. As Randall said, it's also very important to have a very good earth connection for the gauge. On a couple I have worked on I've soldered spade lugs to the case and run a dedicated earth wire. In theory you should be able to supply a feed to the "B" terminal from any switched 12V source but it's nice to keep things standard where possible. As mentioned, the green/black wire should go on the "T" terminal.

That's not to say that Dale isn't on to something. You could indeed have a break in the sending unit's resistance windings.

For more on the fuel gauge, Google for "MGA Guru" and on the opening page of Barney Gaylord's web site key in "fuel gauge" in the search field. The first hit/link will take you to several pages discussing how the gauge works and how to calibrate it. It's a good read even if you're not trying to fix a problem.
 
When I re-did the fuel gauge on my TR3, the terminals were marked "B" and "T". I ran a seperate ground wire with a loop connector under one of the knurled nuts that hold the gauge in. I like the idea a soldering on a seperate terminal to the casing.

Edit: BTW, I used that info from the MGA Guru when re-doing my fuel gauge. The info on setting those two coils was invaluble. I used that info to "re-calibrate" several TR3 fuel gauges from some fellows in the Triumph club. They all worked out very well. Great site with a ton of good info.
 
martx-5 said:
I like the idea a soldering on a seperate terminal to the casing.

<span style="color: #660000">Art, that's what I did when I rewired my car. I installed
or soldered dedicated ground wires for every gauge and light bulb
in the car. I used grounding blocks that all then ran ground wires that
terminated onto the engine block.

d</span>
 
Back
Top