Hey Guest!

 Hey - did you know if you click on the title of a thread it will take you to the first unread post since you last visited that thread?
 but were afraid to ask:
  STOP!! Never post your email address in open forums. Bots can "harvest" your email! If you must share your email use a Private Message or use the
  smilie in place of the real @
 Pretty Please - add it to our Events forum(s) and add to the calendar! >>
alphatopher
Member
Offline
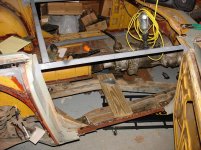
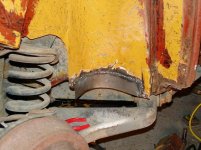
In the process of patching some rust patches on the bottom B post at the connection with the inner sill, also a small section of the inner sill where there's the hole for the seat belt anchor to pass through . The rough patch along the bottom edge of the inner wheel is completed, just needs to be trimmed, heat shrunk, and pounded to get it exact.
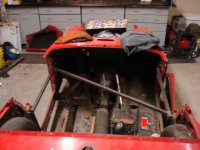
Does anyone have any tips on getting the new floor pan in? Do you slide it forward into the engine bay then back it up? Others have mentioned metal adheasive instead of welding. I leaning toward a combination of both adheasive and spot welding. Metal adheasive on the front edge of the floorpan near the engine compartment and on the trailing edge of the pan near the rear axles, and along the drivetrain tunnel. I would spot weld the sills as I still have the outer sill to mount. Do spot welding and metal adheasive mix when connecting three panel together?
Does anyone have any tips on getting the new floor pan in? Do you slide it forward into the engine bay then back it up? Others have mentioned metal adheasive instead of welding. I leaning toward a combination of both adheasive and spot welding. Metal adheasive on the front edge of the floorpan near the engine compartment and on the trailing edge of the pan near the rear axles, and along the drivetrain tunnel. I would spot weld the sills as I still have the outer sill to mount. Do spot welding and metal adheasive mix when connecting three panel together?