• Hi Guest!
    You can help ensure that British Car Forum (BCF) continues to provide a great place to engage in the British car hobby! If you find BCF a beneficial community, please consider supporting our efforts with a subscription.

    There are some perks with a member upgrade!
    **Upgrade Now**
    (PS: Subscribers don't see this gawd-aweful banner
Tips
Tips

Bugeye Wiring - New Fuse Block

erstearns

Jedi Trainee
Offline
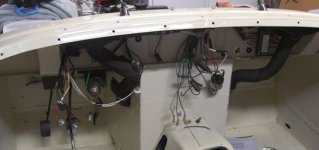
Am at the point in resotration where I am thinking about wiring. Have installed alternator with internal voltage regulator. Seems no reason to put original style regulator back in and am thinking about a larger spade fuse block as a starting point. Have run across various threads here and elsewhere on the net and think it would be a good idea to have a few more fused circuits as room allows on the board.

Is there a resource available that would be helpful in matching up my new harness with a larger fuse block and what circuits would benefit from additional fused connections?

I am pretty good with a hammer and wrench but somewhat outside of my element with things that go spark, sizzle :devilgrin:and smoke. I have a pile of pages printed out from here and elsewhere but have not run across a direct discussion of dropping the VR and putting in a fuse block.

Thanks
 
I use a later Midget fuse block.
It has 4 fuses.
Normally I fuse the horn with any key off added accessories on 1
signals, brake lights, gauges as original on 1
parking lights on 1
And I use the 4th for the radio but I use a 5 amp fuse for it.
 
My Jag was upgraded to a Lucas alternator when the A/C went in in Singapore.
They "deleted" the voltage regulator.
Just didn't look right, so I found an old one to fill the hole.
You might want to re-mount the old one and dummy up some wires to it, just to have a more complete appearance.
 
You don't need the voltage regulator, but unfortunately, many of the descriptions of wiring an alternator still include it.

Here is my experience with upgrading the wiring. I didn't modify the wiring harness, but of course I moved things around a bit.

This kind of thing requires some degree of electrical understanding, so if you are uncomfortable with it all, I'd suggest getting someone to help with it.
 
I saw reference somewhere to fusing the brown? hot wire from the battery while installing and testing wiring circuits but never found where it was fully described. I assume it is simply adding an inline fuse, but what size (10 or 15amp)?

Also, can someone describe how to wire without voltage regulator? Can the "guts" be removed from the control box and the contacts wired as "normal".

I think I will try and wire as original but with the elemination of voltage regulator and necessary changes to negative gground. Once that is effectively accomplished I can work towards any other useful upgrades of fuse block and circuits.
 
There is a great web site hosted by Barney, a MGA "expert"
He has all the information and then some. Here is just one of the links on how to wire your BE for the alternator. https://www.mgaguru.com/mgtech/electric/ac101.htm

He also has information on everything else for the MGA, a lot of which is applicable to our Sprites. As the MGA design was started before the Sprite, a lot of the Lucas electrical was carried over into Sprite.

When I restored by BE last year, I wanted an original look, so I used the original generator and added a fuse and relay box under the dash. I added fuses for battery power, headlights, dash lights, running lights, ignition "on" items, electric fuel pump (I have a 1275), and horn. I added relays for headlights, horn and ignition "on" items.

I was "safe keeping" a friend's big Healey for him when he went of seas, when it burned up in my garage.....electrical short in the old wiring. If you need additional, drop PM.
Scott in CA
 

Attachments

  • 24276.jpg
    24276.jpg
    72.1 KB · Views: 309
Thanks, the mgaguru link was great. Explained exactly what I needed to understand re eleminating the control box, had some other useful suggestions also.
 
erstearns said:
I saw reference somewhere to fusing the brown? hot wire from the battery while installing and testing wiring circuits but never found where it was fully described. I assume it is simply adding an inline fuse, but what size (10 or 15amp)?

Also, can someone describe how to wire without voltage regulator? Can the "guts" be removed from the control box and the contacts wired as "normal".

I think I will try and wire as original but with the elemination of voltage regulator and necessary changes to negative gground. Once that is effectively accomplished I can work towards any other useful upgrades of fuse block and circuits.

To remove the regulator box, or keep it hooked up with the internals in place, see the Wiki.

Well, you can put a large value fuse in series with the battery, but I'm not sure how much good it will do. It might provide some protection against big errors while you're rewiring. It would have to be something like 40-50 amps. It wouldn't be terribly useful for general purposes, as you could easily have failures that wouldn't blow it. Better is a set of low-value fuses protecting smaller subcircuits.

If you have an alternator, you must already have negative ground, correct?
 
So I put together a wiring diagram one can read for Eric which shows how I wired my BE, but mine kept the generator.
If anyone wants a copy, feel free to PM me with an email address. The std. BE generator puts out 22 amps max, so a 25 amp fuse is a good choice in line with the battery. I now have fuses protecting all the circuits, and some more than once. More like a real modern car, well OK, maybe a 90s car.
Cheers,
Scott in CA
 
If you put a fuse in the line from the battery, its value has nothing to do with the generator rating. You can easily pull much more than 25 amps from the battery.

I wouldn't use less than 35 amps, and you may blow that. In any case, it would be a good idea to check it by running the car at idle with EVERYTHING electrical turned on. It's better to blow it now than out on the road far from home.
 
Back
Top