D
Deleted member 21878
Guest
Guest
Offline
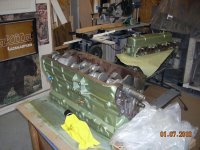
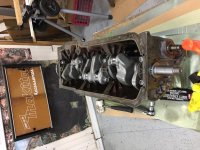
going out today to finish installing my crank. i have been putting this off because it was so cold. i wanted to wait until i could get the block, crank and garage all to the same temp.
yesterday i cleaned out the crank ports, install the top half of the bearings and set the crank in. also installed the top half of the thrust bearings. then i realized i did not have thin enough feeler gauges to check the end play. so i need to get a set today. also popped out the old pilot bearing and installed a new one.
then i came in and made a checklist/procedure to install the bearing caps. i figure i will break down this build in to small jobs and do a procedure for each one just before i go out to do that part. a good way to review. when you don't do builds on a regular basis it is easy to get excited or just plan miss something.
my main concern for today is the 1st and 4th bearing and sliding them down in to place. don't want to scratch or nick anything in the process. they were very tight coming out. so not just sure how i will get them in at this point. other than that i feel i am ready to go, once i get some feeler gauges.
since this is my first Healey engine please chime in with any suggestions you may have on this step or anything i will have coming up. next i plan to install the rear plate so i can get the block back on the engine stand. then the front plate and on to the pistons. my main and rod bearings are .010 over.


 Hi Guest!

 smilie in place of the real @
 Pretty Please - add it to our Events forum(s) and add to the calendar! >>


