• Hi Guest!
    You can help ensure that British Car Forum (BCF) continues to provide a great place to engage in the British car hobby! If you find BCF a beneficial community, please consider supporting our efforts with a subscription.

    There are some perks with a member upgrade!
    **Upgrade Now**
    (PS: Subscribers don't see this gawd-aweful banner
Tips
Tips

BN7 Frame?

HealeyBN7

Senior Member
Country flag
Offline
Happy Holidays.

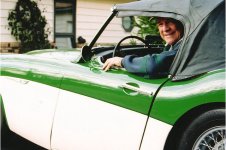
Given our cold weather (now down to the the low 60's) :smile: , I decided to erected the top on the BN7. I don't put it up too often and this time I was once again reminded why.

The top frame, which came with the car many years ago, never aligned properly to the top of the windshield. You can see in the attached photo that the "over-center" hinges won't. I have been using a small hose clamp to keep the frame from collapsing while erected. You can also imagine that if you unhooked the latches and manipulated the "over-center" hinges the header rail would be far too low for to reach the top of the windshield.

I have looked at this a couple times and keep coming back to the same conclusion that the top frame must not be correct for my BN7. What would be helpful would be an illustration or photo to confirm the part mismatch.

You can also see that the bottom of the mail frame is angled forward. This frame does not have "adjustable feet", nor threaded screw holes, which I thought were part of the BN7 design. Adding height to the main bow would make it impossible to secure the top as it is already taught across the tenex fasteners.

Any help in identifying the frame or pointing me to a site for additional research would be most appreciated.

Happy Holidays,

Dean Click Here for Photo of HealeyBN7 Frame
 
Dean,
First off, you have the corrct top frame. However, where you have the clamp applied should be all the way together with the one link stopping right against the other bar. Your main bow is angled much too far forward, preventing the above from happening. The fitting of the top is preventing this.
The details are too dark to see where the top stitching lines are located, but I can see that the top is also either sitting too high, preventing the side flap from reaching all the way down to the cockpit rail, or the cut of the top is wrong, too small, or has been installed wrong.
Normally the top bows were designed to sit at the stitch lines of the top. I'd bet that an external picture of the top would reveal bagging and puckering caused by incorrect installation partly as a result of the top bows being in the wrong position.
I'd suggest undoing the top from the car and try to get the top frame to sit right in the car. Work with sidescreens fitted to make sure the windscreen rake(angle)is in the ball park. If you can do that, then figure out where or why the top is fitted wong. Might need a new top to get it all to work.
 
Rich,

Thank you for such a quick reply. I took and loaded a few more photos into the gallery. Look at the rear window. Is it upside down?

Even with the top loosened, the frame does not lock and wants to engage behind the front windscreen. I can't imagine the screen needs to be raked that much farther back as the feet are square to the shroud, but...

Here are the pics. More pics of the frame

Thanks again,

Dean
 
Dean, You must have your profile set so none of us can contact you. Are you a member of the witness protection program?

My BN6 top bows (both sets) act the same way, but I fabricated a "hook" that pivots to catch them with the same result of your hose clamp. I'll try to find the pictures and post them in this thread. MUCH easier to deal with on a top up/top down situation :wink:

I *think* the problem stems from the angle of the wooden header bar, as I didn't have this problem (that I remember) when I bought the car (San Francisco 1978). Is your wooden header bar a replacement too?
 
Dean,

How does the angle of the windscreen compare with the sidescreens when fitted? That will tell you where the windscreen needs to be. Then the top bows can be dealt with from there. I know it sounds strange but the adjustment screws need to be in the bottom ends of the frame sticks. This is because the frame side sticks are all working with various angles, the more length turned out (making the top frame "taller") the more it changes the angle at which the wood header bar will reach and fit the top of the windscreen. Try it just as an experiment and you'll see what I mean. That should give you some indication as to what you need to do to make those side pieces come fully into place and how they will fit to the windscreen. If the adjustment screws are missing you can use a pair of 5/16" NF bolts that are threaded right up to the heads.
I think that old AMCO top is throwing you off some too. It's bound to be at least somewhat shrunk and the back window curvature does indeed appear upside down, though that was their pattern. If you can get the top bows to fit the car properly, I'd recommend getting yourself a new top made of the correct Everflex material. It has an inner lining of light gray same as your top bows.
Let me know about that sidescreen to windscreen angle.
 
Looks like the window was installed in top upside down, bottom should be horizontal, with top of window slightly curved on otter edges. cheers Genos2
 
I still maintain that it's a problem with the wooden header bar, so maybe they're not shaped correctly for the two-seater (pretty sure mine came from Moss).

Since this was my <span style="font-style: italic">starter top</span>, a cheap Ebay find to see if I liked the tan look, I'm not too distraught. I will spend more time comparing top bows before I finalize plans for the good top :wink:

Well, I couldn't find the pictures that I thought I had, so I wrestled the gorilla, I mean, I put the top up and took some fresh ones.

Anyway, personal opinion of course, but I'm thinking this is a little more glamorous than than a hose clamp.

IMG_6599.jpg


IMG_6600.jpg


IMG_6602.jpg


IMG_6603.jpg


IMG_6604.jpg


IMG_6605.jpg


IMG_6606.jpg


IMG_6607.jpg
 
Nice photos Randy, as usual. Can't see any need for the clamps although you did a nice job installing them.
 

Attachments

  • 19507.jpg
    19507.jpg
    75.9 KB · Views: 291
Johnny said:
Nice photos Randy, as usual. Can't see any need for the clamps although you did a nice job installing them.
Thanks, I try...

You're apparently luckier than at least two (2) of us. Do you remember where you sourced your wooden header bow from, assuming the original was replaced?

The angle at which mine contacts the top of the windshield is definitely off. I never disassembled the top bows themselves, so I couldn't have anything mixed up there...
 
Rich - Thank you for such excellent advise. Agree that the Armco top is horrible. I didn't want to invest in another top until the frame issue was fully sorted.

I will have to dig deep to locate the side screens to check the angle of the windscreen. They are packed away... I have never installed them. Regarding the adjusting bolts, I am certain that the main loop is missing the threaded holes for the feet. It is smooth on the bottom of the hoop. I'll flip it over again and take a hard loop - CSI style. I guess the PO could have removed the screws and cut the feet shorter thinking that he was making progress on the fit. Do you know approximately how far off the deck it is to the forward bend in the main rail? My main hoop pushes all the way down into the deck hole and stops just at the bend. I played with the frame and can see that moving it up does help with the forward fit, but it may take more length than I have available.

Randy - The hook is brilliant, but do you really think it looks better than my hose clamp:smile: I am sure I have a hook like that in my garage - is it a garage door spring keeper?

Dean
 
HealeyBN7 said:
Rich - Thank you for such excellent advise. <span style="font-weight: bold">Agree that the Armco top is horrible.</span> I didn't want to invest in another top until the frame issue was fully sorted.
Back in the day, there were only two (2) readily available choices; Ammco and Robbins. They both fit about the same, with the Robbins being about 1/3 more costly, and a little nicer looking. The Ammco tops were easier to install. Unless you went to someone like Fred Kanter, the only canvas tops were custom made. I never had any problems with (a freshly produced) Ammco, though they did tend to shrink more than the Robbins if left continously in the Sun.

The above would apply to tops fitted to the range of Healeys, MG (Bs, mostly) and Triumph models. I put Ammco & Robbins tops on them all

HealeyBN7 said:
<span style="font-weight: bold">I will have to dig deep to locate the side screens to check the angle of the windscreen. </span>They are packed away... I have never installed them. <span style="font-weight: bold">Regarding the adjusting bolts, I am certain that the main loop is missing the threaded holes for the feet.</span> It is smooth on the bottom of the hoop. I'll flip it over again and take a hard loop - CSI style. I guess the PO could have removed the screws and cut the feet shorter thinking that he was making progress on the fit. Do you know approximately how far off the deck it is to the forward bend in the main rail? My main hoop pushes all the way down into the deck hole and stops just at the bend. I played with the frame and can see that moving it up does help with the forward fit, but it may take more length than I have available.
My sidescreens match my windshield angle perfectly, and there isn't much wiggle room here, at least on mine, so I wouldn't hope for any revelations upon finding/fitting your sidescreens.

Look closely at the bottom of your main topbow, as the bolts may have been broken off and filed/ground smooth (they rusted easily, while sitting in a well of water). One (1) of the legs on one (1) of my sets of bows (I have two__2__sets) had to be drilled and tapped. Not terribly difficult.

HealeyBN7 said:
Randy - The hook is brilliant, but do you really think it looks better than my hose clamp:smile: I am sure I have a hook like that in my garage - <span style="font-weight: bold">is it a garage door spring keeper?</span>

Dean
Nope, completely fabricated, with a combination of shear, mill and grinder. I found it necessary (as it looks like you did) to "hook" only the driver's side to keep everything taut; without the hook, the bows would essentially collapse.

I'm still hoping the Johnny shares with us where he got his wooden header bow, but I figure I'd try (can never remember the business' name, in Modesto?) Norman Nock's place for my next one.

Also Dean, and the reason I wanted to contact you (I saw your pictures before I saw this thread...) is I need something to hold down an oversize spare tire (195/65 x 15) and your belt arrangement looks like the best I've yet seen. Can you tell me where you got it, and do you have any pictures of how/where it's attached, front and rear? Thanks!
 
On the header bow I reused the original, really wasn't that bad. I did sand and fill the nail holes then varnished it.
My top is an Ammco top I bought off ebay also. After warming it in the garage for a couple of days (used an electric heater) it went right on. The side curtains fit right on and match up with the top good.

One advantage of the removable tops is that in the summer I usually leave it at home. As you can tell from the photo it is beginning to stretch though.

BTW, wonder why I can't see your photos anymore??? Never could see Deans off his website also.
 
Rich, it could be the top bow straps aren't long enough.

Just a thought, I remember having to change the length more than once.

I also remember the top frame portion that sits down into the holes on the car had internal threaded tubes inserted inside. I bought new ones from a hardware store, the thread was 1/4 X 20. Then I used carriage bolts after shaping them to the original size. Worked out pretty well. By adjusting the length of each post I was able to tighten the top up pretty well.
 
Crap! My buddy's domain name expired. He said he was going to renew it when he got home last night, but it may take up to 48 hours to be reinstated.

These past few months have been pretty rough from a keeping presence on the web standpoint. I bought my own server (shipped to him) so I wouldn't have these problems, but his dayjob has kept him too busy to get it set up and loaded with all the files I have on his server.

I didn't have these problems twenty (20) years ago... :wink:
 
Dean,

I measured the bottem of the post that has the 5/16" bolts for height adjustment from the bottem to the bend in the front ( not counting the adjustment bolt) was 2 7/8". I also sourced my frame and wooden header bow from Moss and agree with Randy that when the wood is attached to the frame it pitches upward at what appears to be to steep of an angle. One thing I discovered that I was doing incorrectly was the metal finisher piece that screws to the wood . I was wanting to cap it over the wood upside down by fitting the wood inside the metal cap when actually it caps the other way and makes a hooded cover over the windsheild. I am going to try and post some pictures. I would like to see an original top and see how the wood bow fits the frame. I bought my car as a basket case and it had a frame with it but it looks like it is for a BN4. I need to check with the PO and see if he can put me on the trail of the original frame. He purchased the car when he seen the back end of it under a shed at a guys yard sale and ask if it was for sale. The guy said it was his step fathers car and he had passed away so possibly he could lead me to the frame.
Bob
 
After thinking about it for awhile I believe your windshield may need to come back a bit. It needs to match up with the metal and wood header bow as you said. This is easily done by loosening the side braces on the windshield on each side then gently pulling down on the top of the windshield until correct. Snug the side bolts down, then snug the forward brace screws down. The frame is easily bent and can be manhandled to fit, the wooden bow needs to be attached, or at least clamped on to the metal brace. Then by aligning the side braces you should be able to get a good match.
 
Sorry for the delayed response - holiday travels :smile:

I posted a few more photos - this time with the crummy side curtain installed. I can see clearly now that the windshield will indeed need to come back a bit.

I'll see how much I can move the windshield back while using the side curtain as my guide. Funny that I never noticed that the windshield was too upright. I guess it is because I never installed the side curtains.

I still think I will need to raise the main hoop by digging out the adjustable feet.

For Randy I also posted a few additional pictures of the leather spare hold down. I used several belts and a large triangle to catch the three incoming attachment points. Let me know if you need some measurements. Happy to draw something up for you.

New Photos Here

Dean

PS: I think I fixed my profile, so if you are so inclined feel free to PM away:smile:
 
Hi Dean,

Thanks for the pictures! Yes, it looks simple, and does the job; everything you could hope for in a Healey spare tire hold down strap!

I'll test your PM...
 
Okay, this is to back up my theory of the incorrect top bow...

Moss lists only one (1) part number for both BN6/7 and BN4/BT7 as: 806-080

From the Austin-Healey Service Parts List (Series BN7 and BT7):

BN7
Blue AHB5944
Black AHB5799
Grey AHB5800

BT7
Bue AHB8834
Black AHB8835
Grey AHB8836

The colors, I presume, are for the thin vinyl wrap that was around the original header (mine was grey, on an Ice Blue/White car, as originally manufactured).

I'll want to look up header bows from AH Spares, and SC Austin-Healey to see if they list different part numbers for the 2-seaters/4-seaters, but I suspect if they had them, so would Moss (it's not unusual to still see SC or AHS part number stickers on Moss supplied parts).

I also want to talk to someone at BCS (in Stockton) to see if they can source the correct wooden header.

In the meantime, can someone with a Hundred, (and an original parts catalog) look up any of the three (3) colors listed above and post the part number? I expect that the Hundred may have addidional colors, but to compare, we'd only need the ones that match blue, black and/or grey. While I do not expect a header from the 100 to fit the 6-cylinder cars, I'd like to put all the information in one (1) thread (and, I'm curious by nature...). Thank you!
 
Back
Top