Hey Guest!

 Hey - did you know if you click on the title of a thread it will take you to the first unread post since you last visited that thread?
 but were afraid to ask:
  STOP!! Never post your email address in open forums. Bots can "harvest" your email! If you must share your email use a Private Message or use the
  smilie in place of the real @
 Pretty Please - add it to our Events forum(s) and add to the calendar! >>
RCarr
Member
Offline
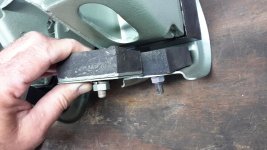
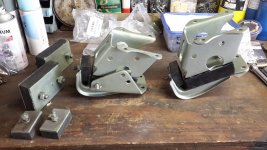
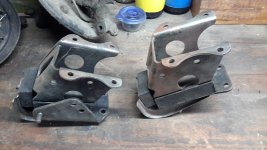
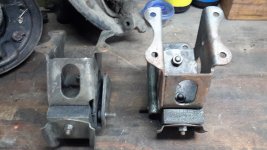
Hello all. I'm working to get my engine back into (what will soon be) a rolling chassis. It's an early BN1 and the rubber parts available at Moss are disappointing. From what I see in other posts I already don't expect them to last very long, but the fit and function are my current concern. The small rubber part, called "Buffer" is smaller than the original part in width and thickness. I will have to build a 1/8" shim to put it close to where the original part was. Shims were used originally, but for only for adjustments of less than .050", not .125". So the question is, what is the correct distance between the buffer and the lower metal part of the mount. You can easily see the difference between the original part and the Moss part in the photo. I don't expect to find a supplier of early BN1 rubber parts so I want to manufacture the right size shim in order to get this engine mount to perform properly without tearing the larger rubber part (which I also had to modify to fit :apologetic:. Thanks for any insight into this engine mount and how critical the clearances are between the buffer and the lower mount bracket.