• Hi Guest!
    You can help ensure that British Car Forum (BCF) continues to provide a great place to engage in the British car hobby! If you find BCF a beneficial community, please consider supporting our efforts with a subscription.

    There are some perks with a member upgrade!
    **Upgrade Now**
    (PS: Subscribers don't see this gawd-aweful banner
Tips
Tips

1956 100 BN2 Fender Beading

  • Thread starter Deleted member 21150
  • Start date
D

Deleted member 21150

Guest
Guest
Offline
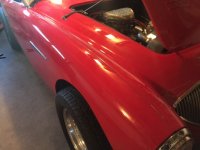
I'm going to be installing new fender beading on my 100 BN2 soon. I haven't received them yet but it looks like the front ones will be one piece. I'm guessing I will have to cut them so the forward windshield brackets can be fitted where needed? Also does the beading need to be bent to go under the aft windshield bracket or does it stop before it? Same for the rear fenders, does the beading go under the rear cockpit moulding or stop before it? If anyone has detailed pictures of the beading installed please post them if possible. Thank you!
 
If you want it to look nice it should not stop at the edge of the cockpit trim or the windshield bracket. I went for going under each piece. I don't know about how others have handled this but I found it very useful to take the old trim, if you have any, and practice making ends that did what I wanted without kinking or looking "forced". It also takes a bit to shape the tip that abuts the headlight ring. I can take some photos of how I did it this weekend if nobody else posts anything. I made several attempts at using various shaped small anvils (pieces of junk, metal or wood), that I used as forming dollies. Once I found a technique that resulted in a good fit I did the new pieces. I had to make a couple of the short pieces more than once. Do not forget that you can cut them shorter all you want but you can't lengthen them even once. Some of my finals aren't perfect but after a few weeks I certainly didn't notice. The concours books have good pictures if you have access. Use what ever works for making the shapes you need. One last note, do not pull on the galvanized tabs too hard when you are fitting the bead to the seams. It is easier than you think to pull one out.
 
Whatever you do, if your new beading comes with black plastic protective covering, make sure you remove it before installing it. Once the beading is on the fender, it's almost impossible to remove the plastic cover. I know this first hand.
 
To do it properly you need to remove the windscreen posts. The pieces I purchased from AH Spares are already finished at the ends and did not need any work on them at all. As Rob says, remove the black plastic before installing.
 
To do it properly you need to remove the windscreen posts. The pieces I purchased from AH Spares are already finished at the ends and did not need any work on them at all. As Rob says, remove the black plastic before installing.

That's good news, I ordered them from AH Spares!

roscoe,
Yes,any pictures will be helpful. Also if you can get a pic of how the tabs are bent underneath that will help.

Thank you for the replies.

I cant wait to replace the red vinyl piping that was installed by a previous owner! I removed them today and it already made a huge difference!

IMG_6759.jpg

IMG_6763.JPG

IMG_6765.JPG
 

Attachments

  • IMG_6764.JPG
    IMG_6764.JPG
    96.2 KB · Views: 174
That's the stock material that is used for seat piping or covering the door pull cable, or at least it looks like it. Never seen that particular modification before. It is probably better than the use of Bondo to fill the bead gap, which I'm sure many of us have seen at least in photos if not in the flesh.
 
Last edited:
Back
Top