Hi Guest!

 Hey - did you know if you click on the title of a thread it will take you to the first unread post since you last visited that thread?
 but were afraid to ask:
  STOP!! Never post your email address in open forums. Bots can "harvest" your email! If you must share your email use a Private Message or use the
  smilie in place of the real @
 Pretty Please - add it to our Events forum(s) and add to the calendar! >>
tosoutherncars
Jedi Knight
Offline
Hi all,
As some of you may have read, I blew my alternator this week. It had been weak for some time, and the addition of electric fuel pump and rad fan were far too much for it to handle.
First and foremost, thanks to Paul T., whose site, https://www.teglerizer.com/alternator/ was a BIG, big help. I have largely followed his procedures.
But, the Midget 1500 is apparently not exactly the same as the Spitfire 1500. So a couple of little gotchas on the way. Here's how I did...
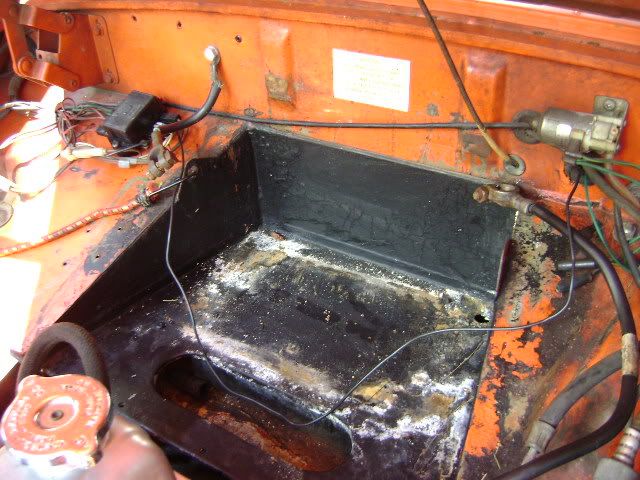
First things first, disconnect the battery. I painted this last year, but the battery acid has done its work. I'll redo it with POR, topcoat it and add a battery 'blanket' to avoid having to do it again.
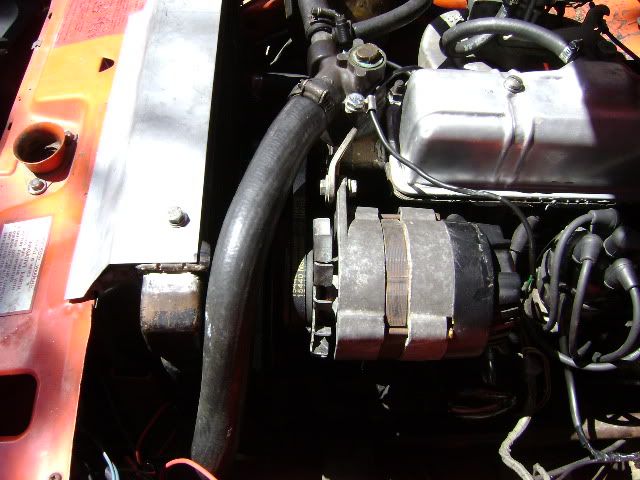
Here's the crappy old Lucas. 30-something amps when new, definitely not up to the task. Out it comes.
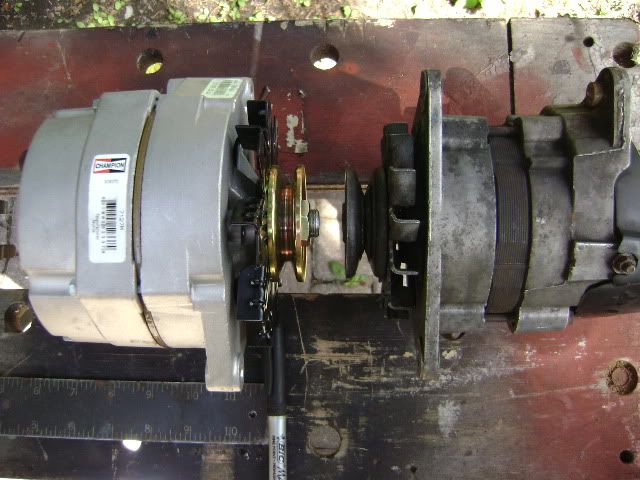
And here it sits next to its replacement. I went to my local parts place, and (true to form) they weren't able, at first, to find anything using 7127 (-9, or anything else.) "Fine" says I, "I have a... umm... 1974 Chevy Nova, 350, no A/C." Parts Guy calls it up on his trusty computer. "Alternator" it says, "7127-9". Parts Guy looks sheepish, and wanders off to find same.
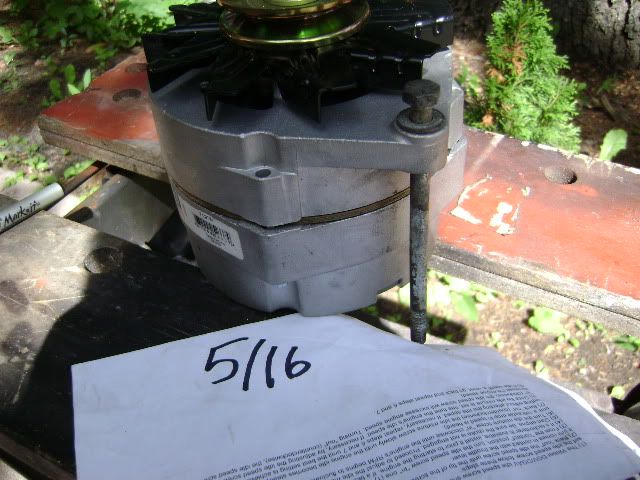
There are many brands, all with slight variations. This one, a Champion rebuild, is 65A, and cost about $100 with the core charge.
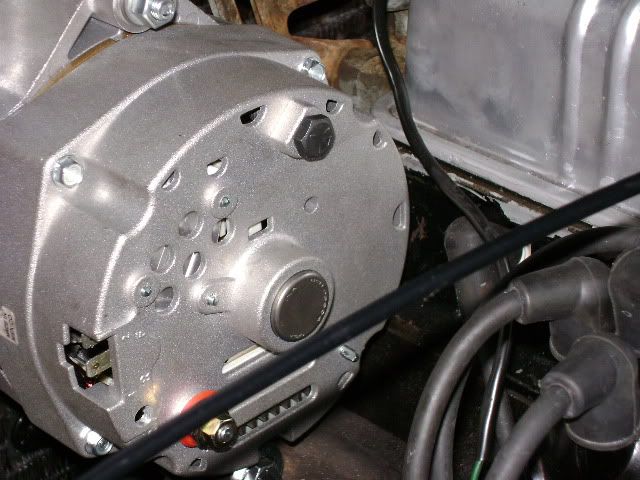
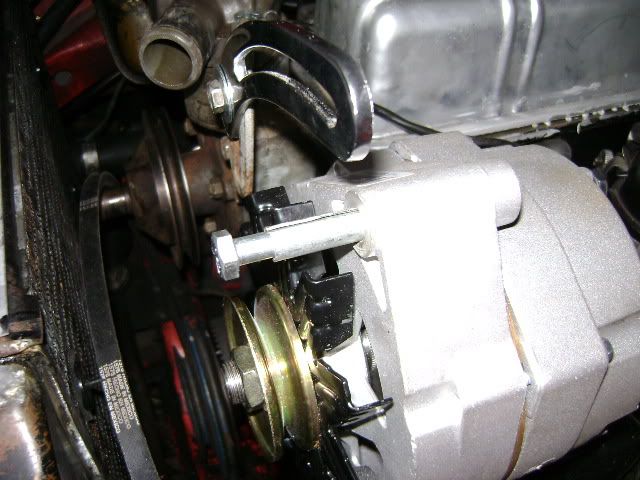
The 7129 has two mounting 'ears' - a thin one, threaded, and a thick one, not threaded. I ended up using the thin one as my bottom mount, and the thick one as my top mount.
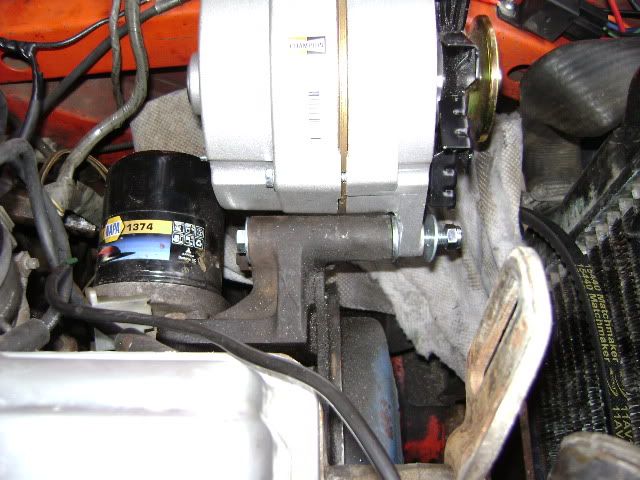
Now, here comes probably the biggest difference between the Spit 1500 and Midget. Where Paul's page shows a spacer at the lower mount, my 1500 had the alternator mount (attached to the block) with a long solid tube, no spacer.
First, I drilled the threaded hole of the thin mount out to 5/16ths, the thickness of both the mount bolts.
Paul's page mentions shaving down the thin ear slightly, and I did, but with the thicker alternator mount, it's not possible to line up all three pulleys just by shaving the alt. It's too far out (forward). The important distance is centre of pulley to rear of mounting tab, and I think the two were about 3/8 different.
What I did in the end, and what I would suggest anyone else do *instead* of modifying their alternator, is take a zip disk on your angle grinder, and take off maybe 3/8" or 1/2" off the front of the lower mount. Take off slightly too much, and then shim with washers; it's easier than trying to shave off 'just enough'. the mount is still long enough that there is little to no wobble. That's what I ended up doing, but with and eighth or two off the ear as well.
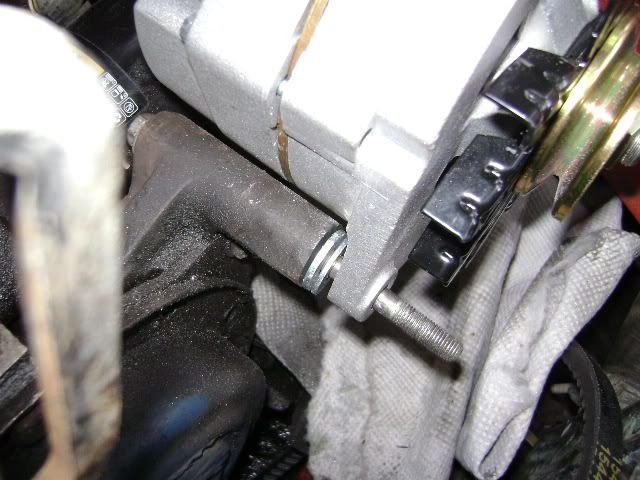
The bolts I'm using are all 5/16ths, but my local hardware store didn't have long bolts in UNF, so the lower bolt is coarse thread. Lower bolt has a nylock nut, since it has to be left just a tiny bit looser (to allow movement). I need to either find a 1/4" shorter bolt, or hack some off this one, as it *just* touches the drive belt when installed.
The top was almost easier. As with Paul's site, I hammered a piece of scrap sheet metal around a 5/16ths bolt, to make a spring pin, which I knocked into the upper mounting ear. Fit great first time.
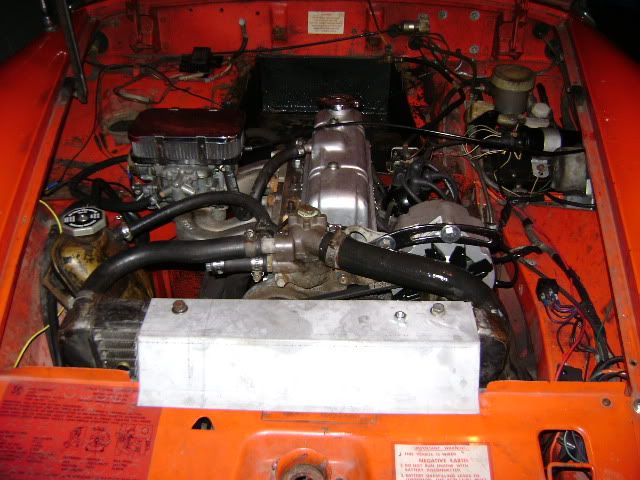
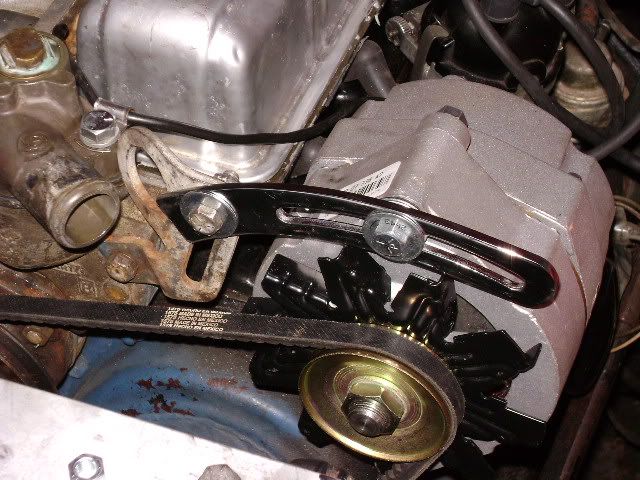
I kept the original alt bracket in place, and turned it up all the way to remove any play. My NAPA store had only one alt bracket in stock, and thankfully it fit beautifully. Drilled a 5/16ths hole in it after test-fitting. Attached it to the existing bracket, and it stood about 3/16ths proud of the alternator, which was taken up by a couple of fender washers.
Continued below...
As some of you may have read, I blew my alternator this week. It had been weak for some time, and the addition of electric fuel pump and rad fan were far too much for it to handle.
First and foremost, thanks to Paul T., whose site, https://www.teglerizer.com/alternator/ was a BIG, big help. I have largely followed his procedures.
But, the Midget 1500 is apparently not exactly the same as the Spitfire 1500. So a couple of little gotchas on the way. Here's how I did...
First things first, disconnect the battery. I painted this last year, but the battery acid has done its work. I'll redo it with POR, topcoat it and add a battery 'blanket' to avoid having to do it again.
Here's the crappy old Lucas. 30-something amps when new, definitely not up to the task. Out it comes.
And here it sits next to its replacement. I went to my local parts place, and (true to form) they weren't able, at first, to find anything using 7127 (-9, or anything else.) "Fine" says I, "I have a... umm... 1974 Chevy Nova, 350, no A/C." Parts Guy calls it up on his trusty computer. "Alternator" it says, "7127-9". Parts Guy looks sheepish, and wanders off to find same.
There are many brands, all with slight variations. This one, a Champion rebuild, is 65A, and cost about $100 with the core charge.
The 7129 has two mounting 'ears' - a thin one, threaded, and a thick one, not threaded. I ended up using the thin one as my bottom mount, and the thick one as my top mount.
Now, here comes probably the biggest difference between the Spit 1500 and Midget. Where Paul's page shows a spacer at the lower mount, my 1500 had the alternator mount (attached to the block) with a long solid tube, no spacer.
First, I drilled the threaded hole of the thin mount out to 5/16ths, the thickness of both the mount bolts.
Paul's page mentions shaving down the thin ear slightly, and I did, but with the thicker alternator mount, it's not possible to line up all three pulleys just by shaving the alt. It's too far out (forward). The important distance is centre of pulley to rear of mounting tab, and I think the two were about 3/8 different.
What I did in the end, and what I would suggest anyone else do *instead* of modifying their alternator, is take a zip disk on your angle grinder, and take off maybe 3/8" or 1/2" off the front of the lower mount. Take off slightly too much, and then shim with washers; it's easier than trying to shave off 'just enough'. the mount is still long enough that there is little to no wobble. That's what I ended up doing, but with and eighth or two off the ear as well.
The bolts I'm using are all 5/16ths, but my local hardware store didn't have long bolts in UNF, so the lower bolt is coarse thread. Lower bolt has a nylock nut, since it has to be left just a tiny bit looser (to allow movement). I need to either find a 1/4" shorter bolt, or hack some off this one, as it *just* touches the drive belt when installed.
The top was almost easier. As with Paul's site, I hammered a piece of scrap sheet metal around a 5/16ths bolt, to make a spring pin, which I knocked into the upper mounting ear. Fit great first time.
I kept the original alt bracket in place, and turned it up all the way to remove any play. My NAPA store had only one alt bracket in stock, and thankfully it fit beautifully. Drilled a 5/16ths hole in it after test-fitting. Attached it to the existing bracket, and it stood about 3/16ths proud of the alternator, which was taken up by a couple of fender washers.
Continued below...