Hi Guest!

 Hey - did you know if you click on the title of a thread it will take you to the first unread post since you last visited that thread?
 but were afraid to ask:
  STOP!! Never post your email address in open forums. Bots can "harvest" your email! If you must share your email use a Private Message or use the
  smilie in place of the real @
 Pretty Please - add it to our Events forum(s) and add to the calendar! >>

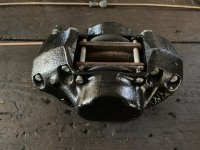
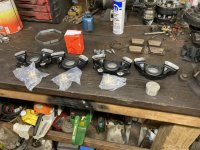
Has anyone made a video of installing new brake caliper pistons? I thought I saw a post where someone had a good method of doing this using a vice? Moss posted a method of heating the caliper and freezing the pistons.....has anyone tried this? What is the best method to do the install? I have the red rubber grease to coat the pistons. I was thinking I would not put any grease in the actual piston seal "groove" but just lubricate the "outer part of the seal that will contact the caliper bore" so as to better keep the seal in place when the piston is inserted. Not talking about the dust boot seal.
Karl
Karl