 Hey there Guest!
 Hey - did you know if you click on the title of a thread it will take you to the first unread post since you last visited that thread?
 but were afraid to ask:
  STOP!! Never post your email address in open forums. Bots can "harvest" your email! If you must share your email use a Private Message or use the
  smilie in place of the real @
 Pretty Please - add it to our Events forum(s) and add to the calendar! >>
M_Pied_Lourd
Darth Vader
Offline
Hi All,
Well, I have been following this forum for some time now keeping an eye on all the ongoing "sidescreen" projects and making notes along the way.
I had purchased two 1960 TR3A's a couple of months ago, TS 69891LO and TS 64870L.
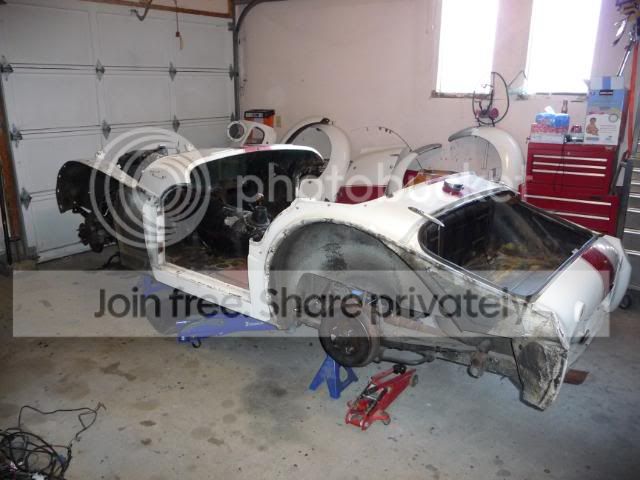
TS 64 unfortunately, was no more than a parts car and over the past two months, it has been stripped of all it's valuable components and the rest (body tub/panels/chassis) will shortly be sent to the scrap yard.
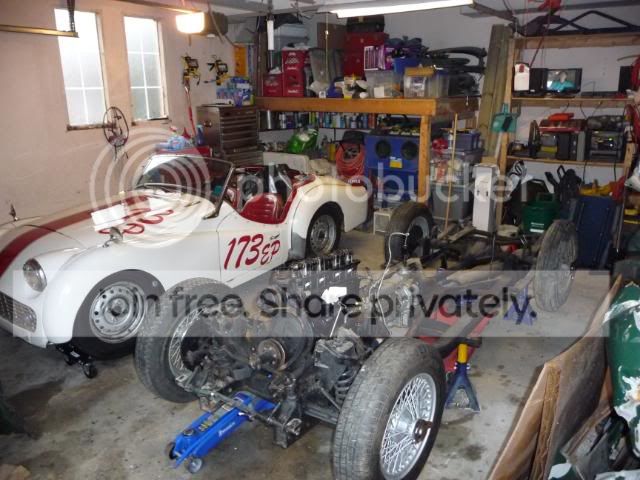
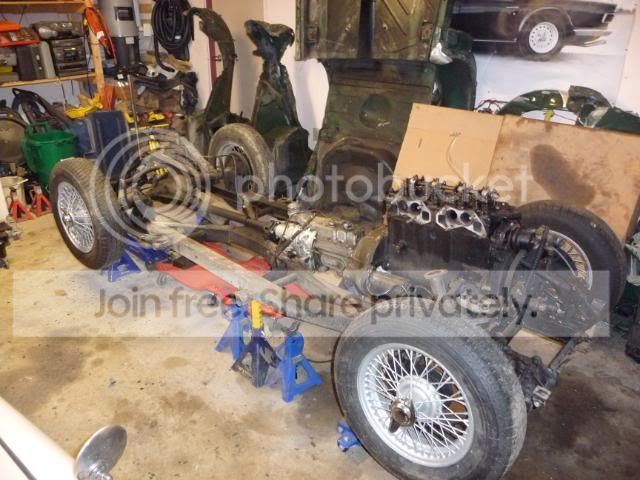
This week, I started on the frame off restoration of TS 69 and fortunately, some of the parts from TS 64 will find a new home and will "drive on".
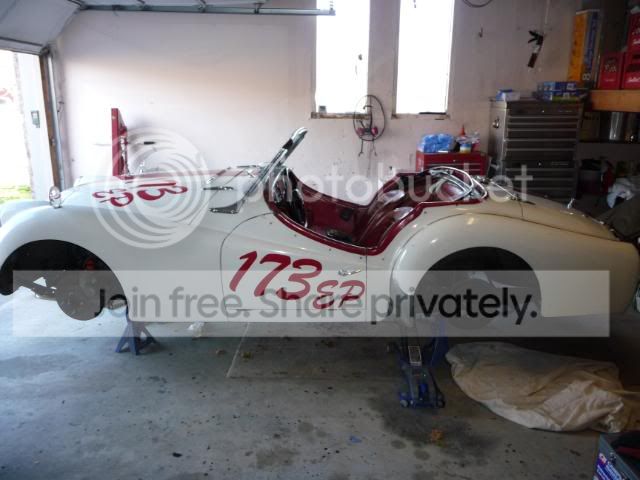
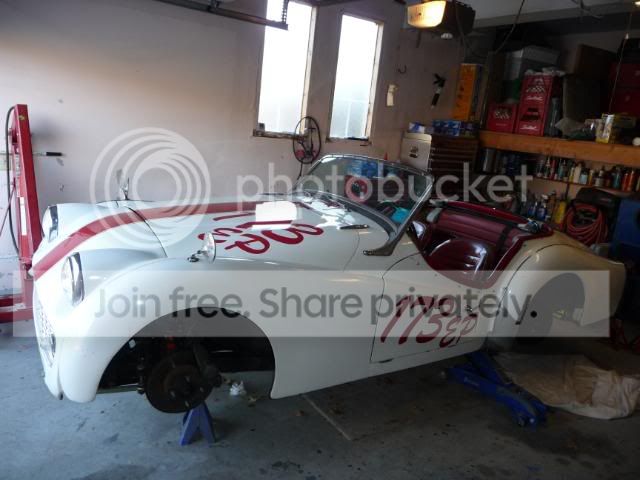
As some of you might recall, TS 69 spent the last 15 years or so of it's life prepared as a vintage racer. It last saw action in about 2006 and has not run since. I purchased this car from the second owner who bought the car in 1968. The first owner of the car, who was forward thinking it seems, ordered the car from the factory with competition springs front and rear along with the optional 411 Diff and Overdrive. As an interesting aside, according to my Heritage certificate, the car was originally shipped to Japan from the factory.
I have found a few more things about the car as I have been poking about it. Some things I might not have necessarily been aware of had I not had the parts car to compare to.
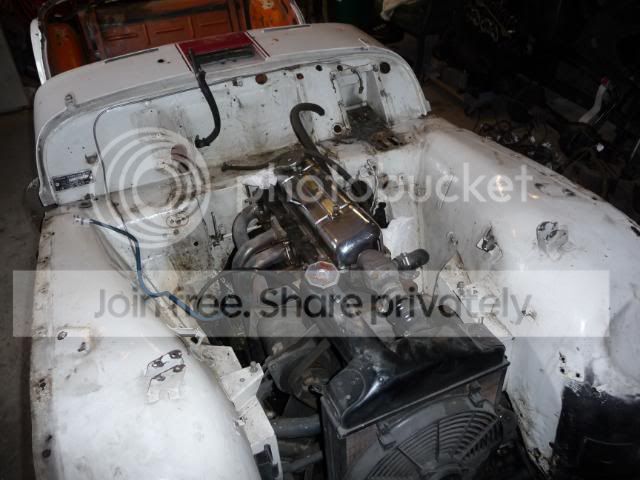
When I bought the car, I thought I remembered the owner saying that there was a TR4 block in the car. While working on the car this week, while shining a light down towards the starter (aftermarket hi torque) I thought I could see red paint streaks on the block. I wiped it down a little and sure enough I could see the scrawled TR3 in red paint on the side of the block. I have read here and there that this was done for easy identification by the factory workers of the time. So, I had a TR3 block in the car after all. A little more digging and removal of the coil bracket to get at the block serial number revealed that not only was it a TR3 block, but according to the Heritage certificate, it is original to the car.
It took me awhile to decide on how I wanted to restore this car. Two choiced I bounced around were a concours type restoration or a "sympathetic" restoration in lieu of its vintage racing history. Incidentally, I managed to get some old photographs of the car in action as well as all the racing inspection log books for each race that it competed in.
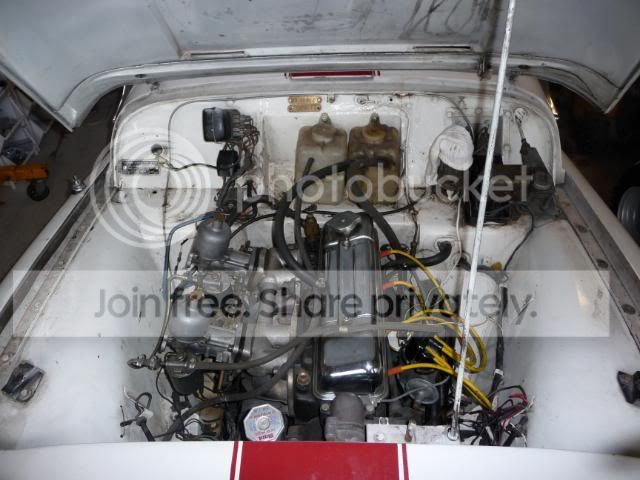
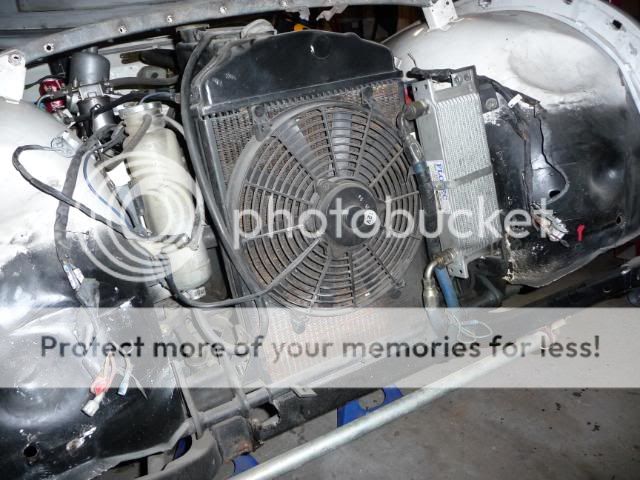
So, I decided to restore it as I bought it. It is not heavily modified like some of the vintage racers I have seen. It does have upgrades to the suspension like the comp springs, koni adjustables, heavy duty levers, oversized sway bars front and rear. It has "upgraded" rear 10 " brakes (will switch back to the 9's from the parts car) and looks to have something other than TR3/TR6 brake calipers up front (I have a 6 as well to compare to). It does have the bigger piston/liner kit along with a shaved head and balanced crank/pistons etc. It has an oil cooler, spin on adaptor, TR4 rad and electric fan. It has the HS6 carbs on it and came with a kit of about 50 different needles and an extra set of carbs. It has a nice 4 into 1 header with a "cherry bomb" style exhaust (I am sure it's loud), and although the header will remain a "quieter" exhaust will be installed (I have the stock SS mufflers from the parts car). It has a Lucas Sport coil and Crane Electronic Ignition. Battery was located to the trunk and it's place on the bulkhead taken by two "ugly" plastic bottles (One for coolant overflow, the other for Oil) It has a TR6 transmission mated to the stock Diff and A Type. One of my favorite things on the car is the really thick, leather wrapped Moto Lita Wheel. It has a "Triumph racing sock" over the Brake and Clutch Master cylinder ( I am told that this was used to soak up and fluid that escaped the cap on hard cornering).
I am sure that I will find out more about the car as I get deeper into it.
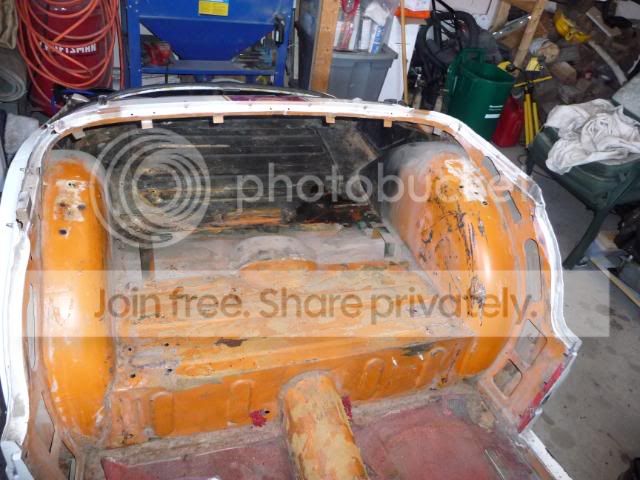
Anyway, here are some photos that I can share. I hope to do some regular updates along the way.


Cheers,
M. Pied Lourd
Well, I have been following this forum for some time now keeping an eye on all the ongoing "sidescreen" projects and making notes along the way.
I had purchased two 1960 TR3A's a couple of months ago, TS 69891LO and TS 64870L.
TS 64 unfortunately, was no more than a parts car and over the past two months, it has been stripped of all it's valuable components and the rest (body tub/panels/chassis) will shortly be sent to the scrap yard.
This week, I started on the frame off restoration of TS 69 and fortunately, some of the parts from TS 64 will find a new home and will "drive on".
As some of you might recall, TS 69 spent the last 15 years or so of it's life prepared as a vintage racer. It last saw action in about 2006 and has not run since. I purchased this car from the second owner who bought the car in 1968. The first owner of the car, who was forward thinking it seems, ordered the car from the factory with competition springs front and rear along with the optional 411 Diff and Overdrive. As an interesting aside, according to my Heritage certificate, the car was originally shipped to Japan from the factory.
I have found a few more things about the car as I have been poking about it. Some things I might not have necessarily been aware of had I not had the parts car to compare to.
When I bought the car, I thought I remembered the owner saying that there was a TR4 block in the car. While working on the car this week, while shining a light down towards the starter (aftermarket hi torque) I thought I could see red paint streaks on the block. I wiped it down a little and sure enough I could see the scrawled TR3 in red paint on the side of the block. I have read here and there that this was done for easy identification by the factory workers of the time. So, I had a TR3 block in the car after all. A little more digging and removal of the coil bracket to get at the block serial number revealed that not only was it a TR3 block, but according to the Heritage certificate, it is original to the car.
It took me awhile to decide on how I wanted to restore this car. Two choiced I bounced around were a concours type restoration or a "sympathetic" restoration in lieu of its vintage racing history. Incidentally, I managed to get some old photographs of the car in action as well as all the racing inspection log books for each race that it competed in.
So, I decided to restore it as I bought it. It is not heavily modified like some of the vintage racers I have seen. It does have upgrades to the suspension like the comp springs, koni adjustables, heavy duty levers, oversized sway bars front and rear. It has "upgraded" rear 10 " brakes (will switch back to the 9's from the parts car) and looks to have something other than TR3/TR6 brake calipers up front (I have a 6 as well to compare to). It does have the bigger piston/liner kit along with a shaved head and balanced crank/pistons etc. It has an oil cooler, spin on adaptor, TR4 rad and electric fan. It has the HS6 carbs on it and came with a kit of about 50 different needles and an extra set of carbs. It has a nice 4 into 1 header with a "cherry bomb" style exhaust (I am sure it's loud), and although the header will remain a "quieter" exhaust will be installed (I have the stock SS mufflers from the parts car). It has a Lucas Sport coil and Crane Electronic Ignition. Battery was located to the trunk and it's place on the bulkhead taken by two "ugly" plastic bottles (One for coolant overflow, the other for Oil) It has a TR6 transmission mated to the stock Diff and A Type. One of my favorite things on the car is the really thick, leather wrapped Moto Lita Wheel. It has a "Triumph racing sock" over the Brake and Clutch Master cylinder ( I am told that this was used to soak up and fluid that escaped the cap on hard cornering).
I am sure that I will find out more about the car as I get deeper into it.
Anyway, here are some photos that I can share. I hope to do some regular updates along the way.
Cheers,
M. Pied Lourd


 A friendly reminder - be careful what links you click on here. If a link is posted by someone you don't know, or the URL looks fishy, DON'T CLICK. Spammers sometimes post links that lead to sites that can infect your computer, so be mindful what you click.