Window Winder Extension
by Mick McGuire
It is my opinion that by using a Window Winder Extension, even on stock thickness door panels, you can eliminate rubbing between the winder and any raised portion of the upholstered panel, to include piping or other types of trim. If you do not use an extension with a, thicker than original panel, you will have rubbing and eventually will rub a circle, portion of a circle, or at least damage any raised area that your Window Winder comes in contact with.
The following is what I did to solve this problem and I share it with you freely. I do not make and sell this item.
 Most any Hardware Store will have the items specified. If you can get a 3/8-16x1/2 set screw that is soft enough to drill then do that. Otherwise you can use Threaded Rod but you will have to buy 3 or feet of it. I just used a Hex Bolt and cut off the head. Most any Hardware Store will have the items specified. If you can get a 3/8-16x1/2 set screw that is soft enough to drill then do that. Otherwise you can use Threaded Rod but you will have to buy 3 or feet of it. I just used a Hex Bolt and cut off the head.
You will need the appropriate drill bit for tapping a 10-32 hole as well as the tap itself. You will also need a permanent type thread locker.
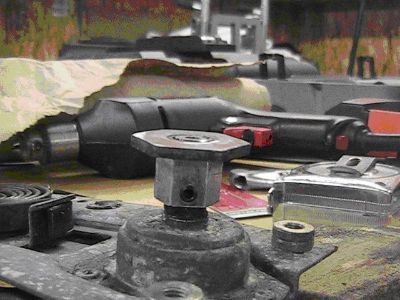
 I don't know what the piece being taken off in this picture is
actually called and I will refer to it as the Window Winder Insert (WWI)
since it does go inside the Window Winder. When you see WWI, this is
the piece I am referring to. I don't know what the piece being taken off in this picture is
actually called and I will refer to it as the Window Winder Insert (WWI)
since it does go inside the Window Winder. When you see WWI, this is
the piece I am referring to.
I realized after starting this project that the easiest way to make the extension would be to have duplicates of the WWI being taken off and simply stack them, fasten them together by welding or with screws, until the desired extension is reached. If you can get or make these pieces it would be much easier and better than the method I used. I didn't have them and proceeded as follows.
Remove the WWI as shown above, or by some other means. This piece will be reused.
 Cut the 3/8-16 SWL to the desired length or extension. I used a Rotary Tool with a thin cut off wheel and cut it to ½ inch. My new door panel is ¼ inch and I wanted a ¼ inch spacer between my Window Winder and my newly upholstered panel. The original panel was about 1/8 inch and that was taken up by the batting I used when I upholstered my panel. It worked out nicely. Cut the 3/8-16 SWL to the desired length or extension. I used a Rotary Tool with a thin cut off wheel and cut it to ½ inch. My new door panel is ¼ inch and I wanted a ¼ inch spacer between my Window Winder and my newly upholstered panel. The original panel was about 1/8 inch and that was taken up by the batting I used when I upholstered my panel. It worked out nicely.
Use the appropriate drill bit and drill and tap each side of the extension close to one end. The threads of the 3/8-16 SWL must be removed on this same end using a 3/8 drill bit and going about ¼ inch deep. If you don't understand what I'm telling you here, don't do anything. It will become obvious when you start to put it together and you can do it then. Sorry I have no picture.
From the other end screw in the 3/8-16 bolt (with head cut off), or the soft set screw, or the 3/8-16 Threaded Rod cut to about ½ inch long. Use the Permanent Thread Locker here.
 Find as close to center of the piece as possible and drill all the way through with a drill bit that will allow a 10-32 screw to pass through it easily. If you drill the hole a little bigger it will compensate for being out of center just a smidge. That's what I did anyway. Your piece should look something like the piece above. Find as close to center of the piece as possible and drill all the way through with a drill bit that will allow a 10-32 screw to pass through it easily. If you drill the hole a little bigger it will compensate for being out of center just a smidge. That's what I did anyway. Your piece should look something like the piece above.
I don't have pictures of the next step and I hope my explanation will be enough.
Using the WWI you removed earlier and in reference to the second picture, you will have to file two sides of the 3/8-16 bolt to fit the configuration of the center elongated hole. I started by using my Rotary Tool and then finished with a hand file. It was not difficult and did not take very long.
 Once the 3/8-16 bolt has been filed and the WWI fits it snuggly, remove any material that protrudes above the WWI and slightly below the surface, otherwise there will be no clamping effect when the Window Winder is finally installed. You will also need a longer 10-32 screw. Your piece should now look something like this. Set your piece on the mechanism as above. If you did not remove the threads from the SWL earlier it is now that you will understand. It won't go on the mechanism without removing the threads. Tighten down the set screws and that's it. Once the 3/8-16 bolt has been filed and the WWI fits it snuggly, remove any material that protrudes above the WWI and slightly below the surface, otherwise there will be no clamping effect when the Window Winder is finally installed. You will also need a longer 10-32 screw. Your piece should now look something like this. Set your piece on the mechanism as above. If you did not remove the threads from the SWL earlier it is now that you will understand. It won't go on the mechanism without removing the threads. Tighten down the set screws and that's it.
 Another thing to consider Another thing to consider
When you use a door panel that is thicker than the original the door opener must be moved out by an appropriate amount. Otherwise it will be very difficult if not impossible to install the plastic trim pieces that go around it.
Unlike the Window Winder Extension, which can be what ever you want it to be, the door opener can only be moved out so far.
If you look at the straight edge I'm holding you can see that if the door opener is moved out any farther it simply will be pushing the panel out and not creating any more clearance.
Four Flat Washers seems to be maximum clearance and for me was enough.
I used ¼ inch panels and I can't imagine anyone using anything thicker. If they do they will have trouble in this area.
If you put new panels on that are just slightly thicker than the originals the trim pieces will be difficult, if not impossible to put on without breaking them. One or two washers maybe enough. The point is some adjustment is possible with a thicker panel and the trim pieces can go back on without breaking them.
 This is a finished ¼ inch, padded panel with the trim pieces installed. This is a finished ¼ inch, padded panel with the trim pieces installed.
If I've shown you anything here that you think may be helpful to others feel free to pass it on.
Mick & Susan


 New paragraph New paragraph
Carefully remove the Vinyl from your old Visors. You will use the Vinyl as a template. I used ¼" plywood but you may be able to find a thinner material that can be stapled. Draw around the template on plywood and cut it out using what ever means you have. I used a band saw.
 New paragraph New paragraph
 Once you have your first piece cut and have sanded the edges you will need the old Visor Frame. Once you have your first piece cut and have sanded the edges you will need the old Visor Frame.
 Lay the frame on the plywood so that the end of the metal is even with the end of the plywood on both ends. Trim the wood if you need to. Use that piece to draw 3 more plywood pieces. Lay the frame on the plywood so that the end of the metal is even with the end of the plywood on both ends. Trim the wood if you need to. Use that piece to draw 3 more plywood pieces.
Now lay the metal frame on the Plywood and draw around the wire portion as in the picture above. This makes it handed. It would be best, if at this time, you went ahead and layed out the plywood piece that will go on the other side. Instead of making two right handed Visors like I did.
The next step is really very simple and it won't take very long. You must rout between the lines deep enough for the wire to sit flush with the plywood. I used a Rotary Tool with a router bit.
The fuzzy stuff you see is batting that is not completely removed from an earlier, failed attempt. This is the only picture I have but it shows what I'm talking about.
 Lay the metal frame on the plywood with the wire inside the routed area and staple around it so that it is fixed in place. This will prevent any movement of the frame inside the Visor and make it have a more solid feel. The side you are looking at is the inside. You can now glue batting to the back side and upholster the entire piece. Don't be to concerned about how it looks on the inside. Another piece will lay on top of it and cover it up. Lay the metal frame on the plywood with the wire inside the routed area and staple around it so that it is fixed in place. This will prevent any movement of the frame inside the Visor and make it have a more solid feel. The side you are looking at is the inside. You can now glue batting to the back side and upholster the entire piece. Don't be to concerned about how it looks on the inside. Another piece will lay on top of it and cover it up.
 Lay the second piece of plywood on the completed first piece so that you can be sure you mark the correct side for batting. I use 5/8" batting and it compresses very nicely when the Vinyl is pulled tightly over it. You can now upholster the second piece. Lay the second piece of plywood on the completed first piece so that you can be sure you mark the correct side for batting. I use 5/8" batting and it compresses very nicely when the Vinyl is pulled tightly over it. You can now upholster the second piece.
 It's now time to make your piping. If you use ¼ to 5/16 cord the look will be complementary to your Visors. Make two 40 inch strips. That will be enough for both Visors. If you start with a piece of vinyl about 2 ½ to 3 inches wide, and then fold it in half around the cord, you will have plenty to work with when you attach it to the other pieces. If you need to know how to make piping I have written something up on that and can send it to you on request. You could also buy pre-made piping but I don't know where. It's now time to make your piping. If you use ¼ to 5/16 cord the look will be complementary to your Visors. Make two 40 inch strips. That will be enough for both Visors. If you start with a piece of vinyl about 2 ½ to 3 inches wide, and then fold it in half around the cord, you will have plenty to work with when you attach it to the other pieces. If you need to know how to make piping I have written something up on that and can send it to you on request. You could also buy pre-made piping but I don't know where.
 Attach the piping to the second upholstered piece.( The piece without the metal frame.) Begin on the side as shown in the picture above. Keep the piping tight against the piece and staple. Work the piping around the piece and trim excess material when you go around curves or corners. You will end up back where you started, near the middle. Cut the piping so that the ends are close together. DO NOT STAPLE YET. From your scrap vinyl cut a piece about 1 to 1 ½ inches wide and about 3 inches long. Lay it under the end pieces of the piping, wrap it around and staple. The next picture shows this but the Visor was already put together. I think you will get the idea. Attach the piping to the second upholstered piece.( The piece without the metal frame.) Begin on the side as shown in the picture above. Keep the piping tight against the piece and staple. Work the piping around the piece and trim excess material when you go around curves or corners. You will end up back where you started, near the middle. Cut the piping so that the ends are close together. DO NOT STAPLE YET. From your scrap vinyl cut a piece about 1 to 1 ½ inches wide and about 3 inches long. Lay it under the end pieces of the piping, wrap it around and staple. The next picture shows this but the Visor was already put together. I think you will get the idea.
 I'm just showing this picture so you can see the vinyl wrapped around the piping where the ends come together. I'm just showing this picture so you can see the vinyl wrapped around the piping where the ends come together.
 Now it's time to put the whole thing together. Lay the piece with the Visor Frame on the piece with the piping. Make sure the edges of both pieces line up. You will most likely have to push the piping out which is good. That means the piping will fit tightly against both pieces. I used a clamp with a soft pad to hold mine together and make small adjustments. Once the two pieces are just like you want them use a #8 X ¾ wood screw with a screw cover (see picture below) to secure the two pieces together. Center the screws and space them the way you like it. Do the same thing on the other side. (Two screws from one side and two screws from the other.) It should look something like the pictures below. Now it's time to put the whole thing together. Lay the piece with the Visor Frame on the piece with the piping. Make sure the edges of both pieces line up. You will most likely have to push the piping out which is good. That means the piping will fit tightly against both pieces. I used a clamp with a soft pad to hold mine together and make small adjustments. Once the two pieces are just like you want them use a #8 X ¾ wood screw with a screw cover (see picture below) to secure the two pieces together. Center the screws and space them the way you like it. Do the same thing on the other side. (Two screws from one side and two screws from the other.) It should look something like the pictures below.
 I hope you have fun with this project. I hope you have fun with this project.
Mick


 You must use a Zipper Foot which is included with most Sewing Machines. The Sewing Machine in this picture is an inexpensive machine that we bought several years ago at Wal-Mart. It is a "Brother LS 1217" and we did all of our upholstery sewing with it. My point is that you don't need a special or expensive Machine to do most upholstery jobs to include Piping. You must use a Zipper Foot which is included with most Sewing Machines. The Sewing Machine in this picture is an inexpensive machine that we bought several years ago at Wal-Mart. It is a "Brother LS 1217" and we did all of our upholstery sewing with it. My point is that you don't need a special or expensive Machine to do most upholstery jobs to include Piping.
When you sew Vinyl the feeder grabs the vinyl and pulls it through very nicely. The problem is that the top piece, holding the material down, is smooth and sticks to the vinyl. Not allowing a smooth feed. By adding a piece of paper under the foot the material slides along without a hiccup. Just insert your material, drop the foot down, then use the thing on the end of the machine that you can turn by hand and makes the needle go up and down. Make the needle go through the material. Then raise the foot just enough to slip the paper in till it touches the needle. Drop the foot back down and your ready to start sewing with no sticking or bunching of the material. That is the best kept secret of sewing Vinyl. If you're sewing on the fabric side of the Vinyl you won't have any problem and the paper will not be needed. The first few practice runs I sewed the paper in but it was easy to remove just by pulling it out and using a pair of tweezers a few times. Once you get the hang of it you won't sew the paper in at all.
 You can use all kinds of materials for the cord. In this case I used Weed Eater line because I wanted small piping to be used on the Center Console Arm Rest/Cover of my MGB Roadster. You can use all kinds of materials for the cord. In this case I used Weed Eater line because I wanted small piping to be used on the Center Console Arm Rest/Cover of my MGB Roadster.
 The Cord material for the door panel was bought from a Fabric Shop as Piping Cord. (I believe that is what it was called) The Cord material for the door panel was bought from a Fabric Shop as Piping Cord. (I believe that is what it was called)
 It worked fine but you can use just about anything. I like using Bungee Cord. It worked fine but you can use just about anything. I like using Bungee Cord.
If you're sewing a panel cover such as this make sure you leave enough material each side of the Piping so that it is easy to handle when sewing it in your piece. You can trim it back after it's sewn in. As a side note, the Piping, in this case, was sandwiched between the gray and black material creating four thicknesses of material and our machine handled it just fine.
 Pre-Made Piping may be hard to find since it is something that you would want to match the material you're sewing it into. Maybe not color but I would think at least grain. To stock Piping in all colors and all grains may be asking a lot. Especially when most shops would simply make it as they need it out of the material they are already using. The truth is, you can do this. It is one of the easier jobs of any Vinyl project. Pre-Made Piping may be hard to find since it is something that you would want to match the material you're sewing it into. Maybe not color but I would think at least grain. To stock Piping in all colors and all grains may be asking a lot. Especially when most shops would simply make it as they need it out of the material they are already using. The truth is, you can do this. It is one of the easier jobs of any Vinyl project.
I hope this will be helpful. Have fun with your project.
Mick McGuire
%%%%%%%%%%%%%%%%%%%%%%%%%%
*
*
*

The eBay Song by Weird Al : http://www.geoffellis.com/ebay.html
New paragraph
|