• The Roadster Factory Recovery Fund - Friends, as you may have heard, The Roadster Factory, a respected British Car Parts business in PA, suffered a total loss in a fire on Christmas Day. Read about it, discuss or ask questions >> HERE. The Triumph Register of America is sponsoring a fund raiser to help TRF get back on their feet. If you can help, vist >> their GoFundMe page.
  • Hey there Guest!
    If you enjoy BCF and find our forum a useful resource, if you appreciate not having ads pop up all over the place and you want to ensure we can stay online - Please consider supporting with an "optional" low-cost annual subscription.
    **Upgrade Now**
    (PS: Subscribers don't see this UGLY banner)
Tips
Tips

Rotisserie or Not?

jjscott

Senior Member
Offline
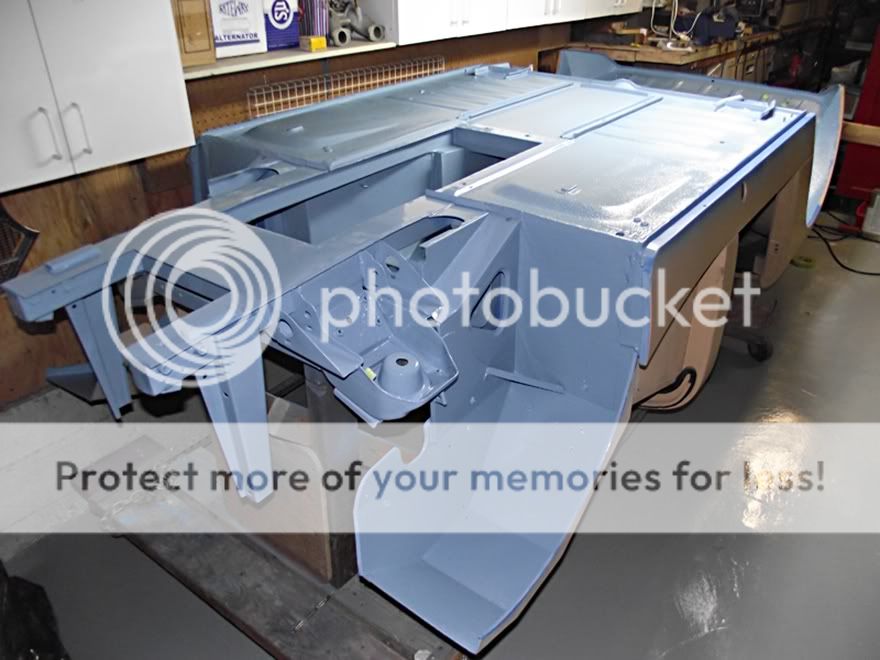
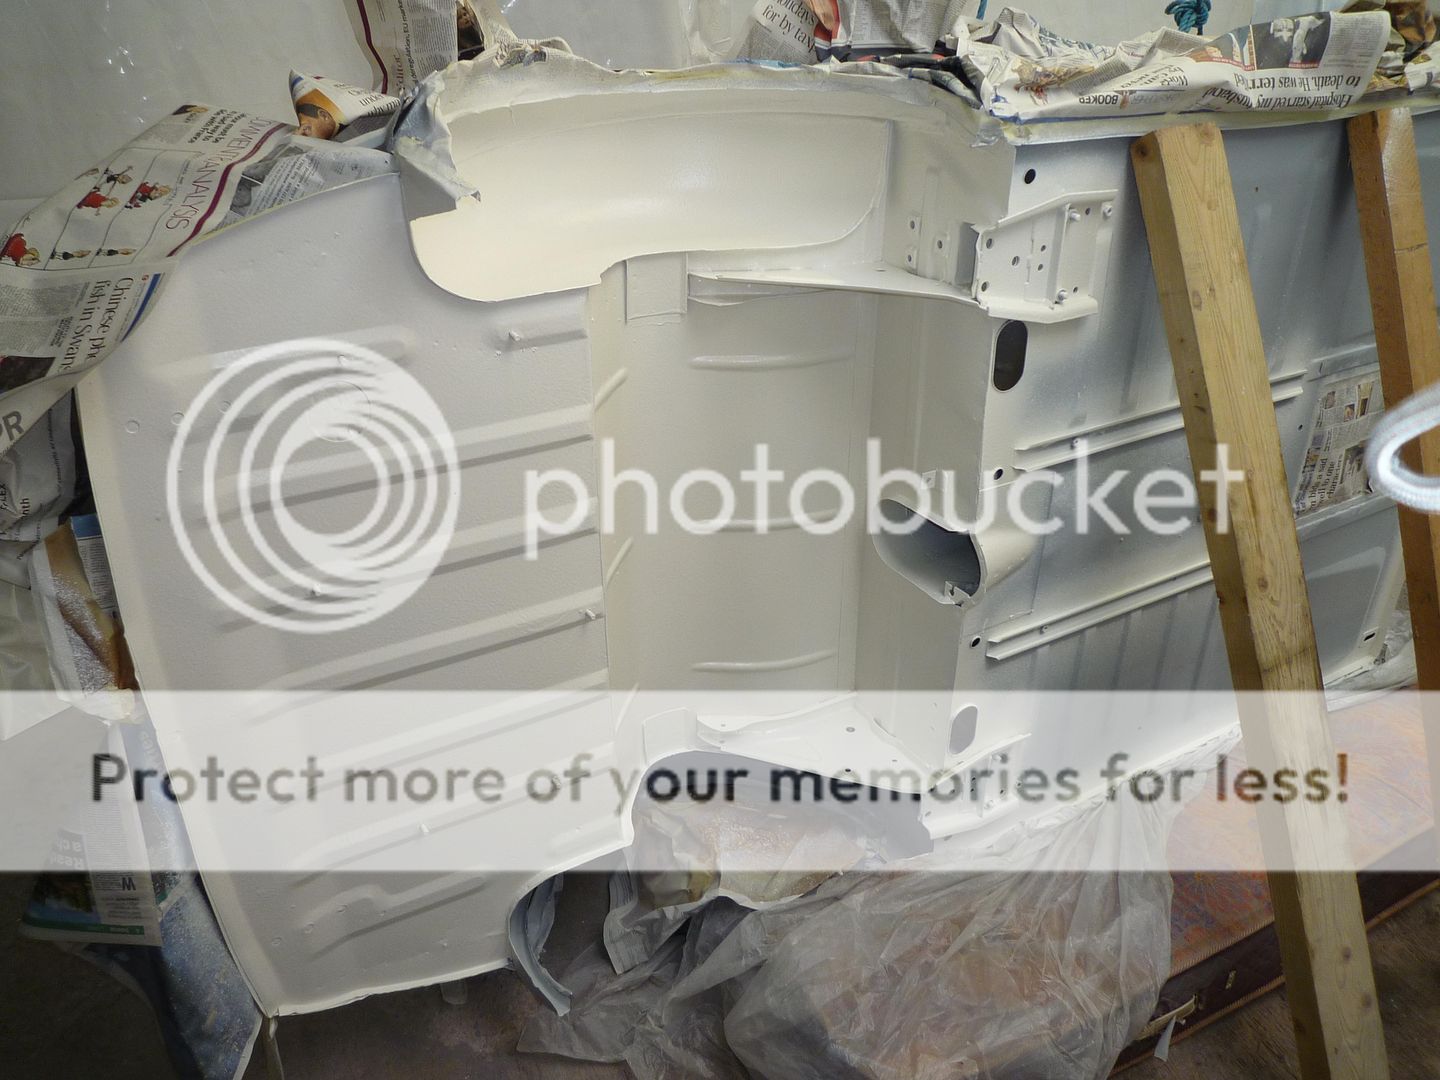
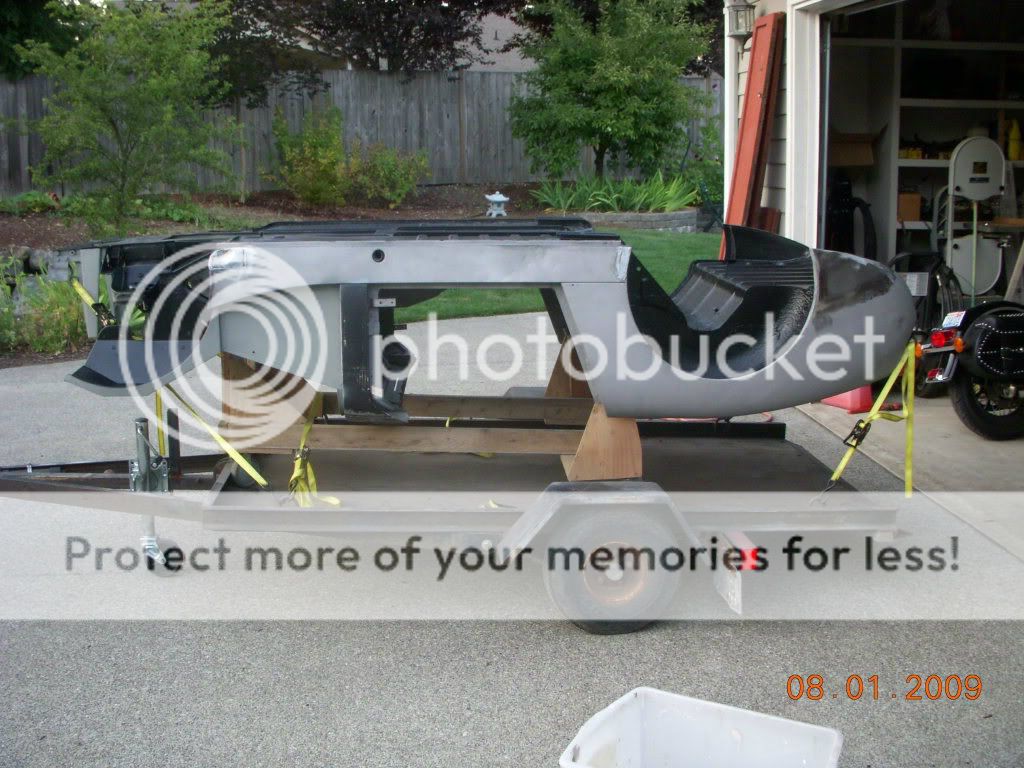
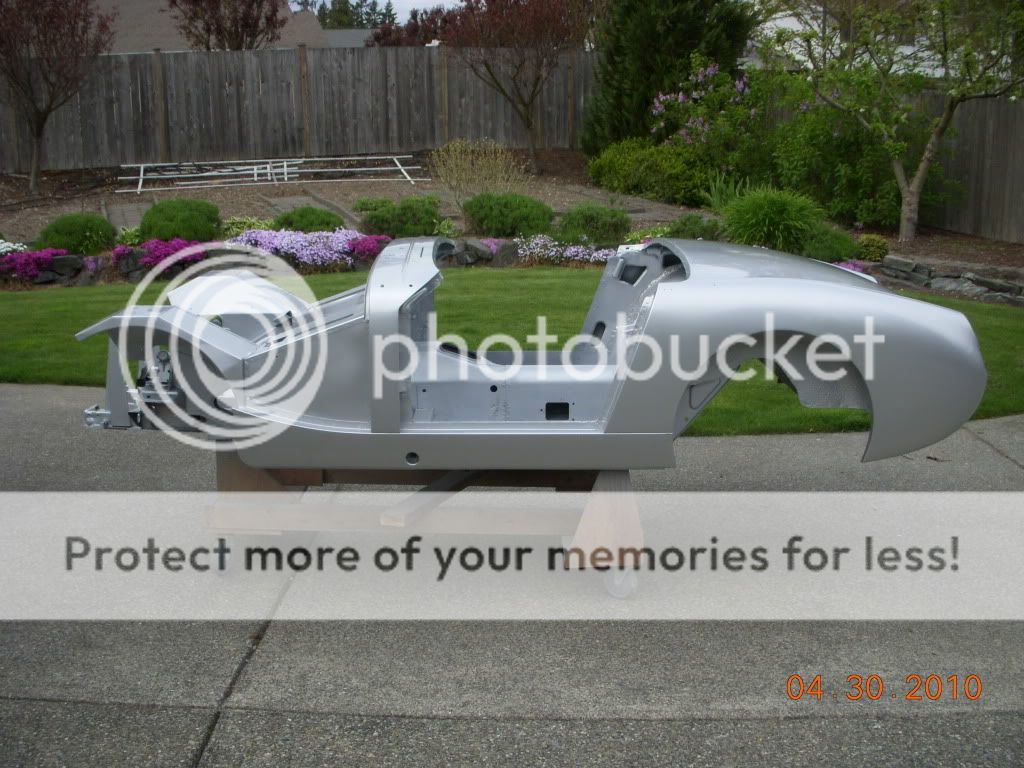
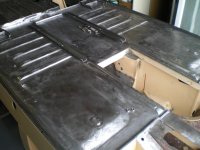
I bought a pair of ebay floor pans for my bugeye. The welds along the rocker panels are easily accessible from inside the car while it is upright. At the tunnel joint I'm not certain since the 2 piece installation is not stock. Maybe I'll have to weld from below.

It also seems I'll have to remove the lower spring plates and maybe the springs. If the springs are out, how do I hold up the back end of the car while it is upright? The floor pan rusting is not too bad; the spring boxes should be OK.

If there's a lot of welding from below is a rotisserie a better solution? Again, what's to hold up the back end -- are the bumperette brackets strong enough?

Thanks, Jim
 

apbos

Jedi Knight
Country flag
Offline
For about $40 this will do the job Gerard's Garage . Lots of info on this site about Rotisserie"s (just use the search function). It will give better access to everything and you need to do paint on the underside also.

Paul
 

rkep01

Jedi Trainee
Offline
The rollover frame is great, if you have the room. I didn't, as my little garage wouldn't allow me to rollover, let alone the car. I had to build my own rotisserie. Actually, it wasn't that difficult, and works great.
 

markberry

Jedi Trainee
Offline
Hi Jim,
I couldn't imagine changing out floor pans without flipping the car upside down. I must have flipped mine a hundred times while doing that job. I changed the spring boxes and shut plate/rear bulkhead panels also which adds to the problem. I was able to borrow a nice rotisserie for my project but I think if I hadn't and needed to come up with one, I'd copy rkep01's rotisserie. that thing is sweet!
Best of luck
Mark
 
OP
J

jjscott

Senior Member
Offline
OK, the rotisserie it is. Thanks for the plan ideas. Fortunately I have a home-made one. It's made from an old angle iron bed frame and a couple of pieces of tubing. Here is a picture with my M151 jeep on it. The M151 is about ready to paint; I've said by July 4. Then the bugeye can go on it.

The question remains how to mount the back end. The wood rotisserie goes through the wheel wells - OK I guess to work on the bottom but I'd have to make some long extensions to mate up with the rotisserie tube. Is there no way to go out the back?

Jim

m151onrotisserie.jpg
 

ghostgrunt

Freshman Member
Offline
Hey Jim,

Very nice 151. Did you find a one-piece body,or rejoin a demilled one? They're such nice jeeps--good ride,too. Are you keeping everything as it was,or swapping the engine/trans,etc? Great project;would love to see updates as you go.

Jim
 

smaceng

Jedi Knight
Country flag
Offline
Usual method to hold up the back is to attach to the taillight locations, with backing plates behind.
 

Gerard

Luke Skywalker
Country flag
Offline
Jim,

You could either attach a 2x4 (or a steel bar) with some large bolts and washers though the signal lamp holes. Add a pivot bolt in the middle. I've also seen people make up stand-off mounting plates to match the rear tail lamp plates. The other option is to use the bumper bracket holes, but those are kind of a pain since there isn't any easy access to the boot. It just depends on how involved you want to get.

I've also seen people just roll the car onto it's side, using an old mattress or some tires (not my cup of tea).

I have a simple setup to flip the car over and set it on rolling purpose built cart. This works great if you only need access to one side at a time and need to move it aside when not working on it.

DSCF5003Bugeye.jpg
 
OP
J

jjscott

Senior Member
Offline
I would have never thought hanging the body from the tail light or turn signal holes would be strong enough until I saw the picture in the link above. The experience of others shows it's possible. I'll be REAL careful.

That is a beautiful job so far Gerard. Mine won't be that good; I just want it rust free and serviceable. Do those spring brackets below the pan have to come off before the pan goes on? Or, are they bolted and removable?

As to the M151, it's been a long haul. I bought it in August 2003, worked on it for about 3 years, then let it sit for another 4. Last fall I started up again and got it to where it is in the picture. When my old bugeye dropped back into my life I knew I had to get the M151 done, but here I am, working on both.

The M151 is a very early one from the first production run, uncut, but was in deplorable condition when I bought it sight unseen over the internet. The rust was actually minimal and pretty much confined to the floor pans. Some kids used it for rock climbing and battered the body. It's a unit body just like the Sprite but has two sturdy frame members running front to back.

Unlike the Sprite, the M151 has no body panels available. An older gentleman in Maine did make the straight sections of the sides and the battery box floors. Another supplier tried a few years ago; nothing fit and he disappeared. I straightened a lot of the parts. Because of the metal gauge I ended up drilling out hundreds of spot welds to get the panels free so they could be straightened. The curved pieces I needed were hammer formed over wood bucks.

It will be stock throughout except for the wheels. I'll use the later steel wheels rather than the magnesium originals.

Sorry to clutter the forum with non-spridgets, but here is a sampling of photos.

Jim

asbought03.jpg

asbought05.jpg

asbought10.jpg

inprocess001.jpg

inprocess004sep2005.jpg
 

Gerard

Luke Skywalker
Country flag
Offline
Hi Jim,

The bare shell isn't that heavy and the body is only suspended for maybe a total of 15 minutes. I use two come-alongs hooked to the ceiling of my garage to raise the car up. I quick flip to invert it, and then let it back down on the dolly. I use a 6 foot 2x4, which is just slightly wider than the car, When I push it back towards the wall, it keeps me from bumping the body.

The spring hanger are welded in place. The floors are sandwiched between the spring hanger and the frame section. The floors on my Bugeye are all original and I've never replaced floors on any of the cars I've restored, so I don't have much personal experience or guidance for you in that capacity.

It looks like you did a great job on the M151!
 

Talonaer

Senior Member
Offline
Poor mans rotisserie:
P1030286-7-1.jpg


Had it over 180' on this mattress and caused no damage :smile:. (couldn't fit a spit in that barn unfortunately).

Note: we were only painting the bottom, no welding required.

When we did the mini we did burn some nice holes in that mattress......

THIS IS NOT ADVISED.
 
OP
J

jjscott

Senior Member
Offline
It's pretty common to do M151 bottoms with the shell sitting on its side and resting on two tires. The metal on those is pretty tough.

That bottom on your sprite is perfect as well Talonaer.

I've never been smart enough to buy a decent car to restore. Everything I drag home is pretty pathetic. I don't remember how bad the bugeye bottom was when I owned it in 1972-73. The paint was bad enough to require repainting. It was run for maybe another 10 years before being laid up. For a midwest car it's much better than most. There will be more issues exposed when I get into it. That is a guarantee.

So those bottom brackets need to be unwelded. Ah, well, time to buy some more bits for the spot weld cutter.

Another question. The floor pans I'm buying have no drain holes. Does anyone have a close up of what they look like and where located? On Gerard's car there appears to be a little stamping at the center of the depression in the pan; I don't see that on Talonaer's photo.

Jim
 

BillW103

Jedi Trainee
Offline
Jim,

I used a method similar to Gerard’s but I had some buds come over and turn it over. I designed it so I could complete the car on the cart. I could role it on to my trailer and go to the welding shop. It made the project very mobile. Almost too mobile I should have used locking casters I had to chase it down a few times.
Make sure you put some camber dampeners on the rear end of the M151. When they fazed out the M38A1 to the M151 a lot of the early ones ended up upside down.

DSCN3354-1.jpg


DSCN4758.jpg


DSCN5242.jpg
 

Gerard

Luke Skywalker
Country flag
Offline
Jim,

This pic should give you a better idea where the drain is. It covers a hole about 5/16" dia. and the cover is open towards the rear.
 

Attachments

  • 28518.jpg
    28518.jpg
    55.2 KB · Views: 351
OP
J

jjscott

Senior Member
Offline
Another neat cart; thanks for sharing.

And thanks for the bottom photo. I can make up a couple of those drain covers easily enough. The photo is also good for showing where the welds are and helps me visualize how to tackle the repair. The original depressed sections of my pans were replaced at one point with patch panels.

I did the floor on the M151 before I built the rotisserie, which was kind of dumb. It only required repair sections, not the whole pan. I made some large c-clamps out of 1" square tubing to act as pincers to hold the pan and channels together while welding. The throat was long enough to go from the outside of the car to the center. They sprung when tightened but did the job.

Jim
 

DRH

Senior Member
Country flag
Offline
Hi Guys....If the body is balanced on the rotisserie it will be easy to spin it around. The problem I had on my 'homemade' one was to keep raising the body on the mounts to finally get it balanced. I used a couple of blocklayer scaffold jacks with wheels to make mine. I added 'outriggers' facing inward with another caster at each end of the outriggers. The addition of a scaffold 'brace' tied each half together at the ends of the outriggers. Then a nice hefty beam to attach the body of the sprite to it crosses the two jack ends. There's more if anyone wants.... :smile: A rotissierie of any make really makes the difference when one is working on these short buggars.
 

JOeyKnapp

Jedi Hopeful
Offline
Any pics, DRH? I am deciding what I am going to do at this point. I am thinking of making the mounts for the car and then winching one end up from the ceiling and lifting the other end with an engine hoist, and then sliding in some A frames at each end. (I like the design I have seen with the 2" pipe and fittings threaded on and bolted to a plate bolted to the car..)

thanks..
 

histerical

Jedi Hopeful
Offline
I hung mine from the rafters (These things are not all that heavy) using a plywood plate attached to the radiator supports and a 2X4 bolted with sleeves through the tail light holes. A come-along at one end and a chain hoist at the other. Not only could I spin it but raise and lower it as well. I could also block the rear and undo the 2X4 for access. No framework obstacles around or under the body either.
 

DRH

Senior Member
Country flag
Offline
JOey....I have some taken just the other day but I gotta get them on the site. I'll work on that maybe tonight---if I can get out of watching a movie with the 'old lady'.....
 
Similar threads
Thread starter Title Forum Replies Date
B Rotisserie question Spridgets 4
M Mounting BJ8 Chassis on Rotisserie Austin Healey 8
Bayless The very simple rotisserie Spridgets 3
Bayless Rotisserie question? Spridgets 5
J pictures of a 3000 on a rotisserie ?? Austin Healey 5
I Chassis rotisserie..? Austin Healey 10
A Engine stand rotisserie plans Austin Healey 12
Jim_Gruber Rotisserie Pics and Lessons Learned Spridgets 1
T Healey rotisserie Austin Healey 12
J Best Rotisserie to work with Triumph 0
R I Need Rotisserie plans for midget Spridgets 18
luke44 TR2/3/3A TR3 rotisserie or body buck questions Triumph 24
A Rotisserie set up? Spridgets 17
S bj8 rotisserie Austin Healey 4
Gray_Cat Engine Stand Rotisserie Spridgets 4
PAUL161 Found a Rotisserie at a Good Price. Restoration & Tools 1
motofiaccone Rotisserie or Build Table Spridgets 12
John Moore Rotisserie Spridgets 22
M Restoration on a Rotisserie Triumph 15
jackq Rotisserie Restoration & Tools 22
SHG Some Thoughts on Rotisserie Restorations Austin Healey 49
JPSmit Home Made Rotisserie - I'm sooooo Happy Spridgets 15
S TR2/3/3A rotisserie on a tr3 Triumph 7
timbn2 BN-2 on a rotisserie - mounting points question?? Austin Healey 5
B Poor Mans Rotisserie Spridgets 3
mcguijo Auto Rotisserie Restoration & Tools 10
D TR6 Rotisserie for a TR6 restoration project Triumph 12
B Rotisserie for E Type Roadster Jaguar 7

Similar threads

Top