• Hi Guest!
    You can help ensure that British Car Forum (BCF) continues to provide a great place to engage in the British car hobby! If you find BCF a beneficial community, please consider supporting our efforts with a subscription.

    There are some perks with a member upgrade!
    **Upgrade Now**
    (PS: Subscribers don't see this gawd-aweful banner
Tips
Tips

Removing damaged bolts & screws

whit_iii

Member
Offline
Hello,

I have just started restoring an AH 100-6 and unfortunately have already stripped a few screws. I saw a couple of tools for this. Particularly "Craftsman 3 pc. Screw-Out™ Damaged Screw Remover Set" and "Craftsman 10 pc. Damaged Bolt/Nut Remover Set, Low Profile Bolt-Out". I am not sure how either of these work or if there are better products to help with this. Also, how can one try to prevent stripping the screws, etc. to begin with? From other postings I am worried about being able to find replacement parts.

Thanks for the help.
Don
 
I have a set of the Craftsman Bolt-Out removers, and they were certainly a lifesaver when I managed to round off a bolt on my steering knuckle. Basically the bolt-out is a socket that has sharp flutes cut in a counter clockwise pattern, so as you turn them counter clockwise they literally thread onto what's left of the bolt head. They are tapered so as it threads in it gets tighter and tighter. Bear in mind the bolt head is history after using this; this is what to use after the 6-point sockets and vice grips have failed. I've seen the screw-outs too, and they have a similar idea, except it's for screw heads. Those are more like a coarse drill bit that bite into the screw. As far as not rounding off bolts, I've invested in a set of 6-point sockets. The 12-point ones can still round things off, and I tend to avoid open ended wrenches unless I'm reasonable sure the bolt is already loose. As for screws... I have several different Craftsman screwdrivers and I just try to make sure it's secure. Once I had to make use of an impact driver, but that was on a large screw that I was pretty sure wouldn't be damaged by the impact.

-Dave
 
When working on one of my radio controled airplanes at a meet, I had a small broken bolt I could not remove or drill out. Nothing would drill it. I burnt the end of my titanium bit rendering it useless. I was about to give up. In a last dich effort with no reall hope I was going to get the bolt out, I tried drilling it with one of those "Roto" bits used for cutting (not used for drilling). Finds them in the hardware store in the tool section near the rotos (similar to the dremmel tool). That sucker drilled right through a hardened bolt and it's not even made for drilling.

Gary
 
The screw-outs are worthless in automotive applications (I've never had any luck with my set) But the bolt-outs are great. Those sockets with the twisty teeth inside work wonders. Snap-on sells the exact same set for 3x the price. I would definatly invest in the big set of Bolt-outs.
 
Don,

Penetrating oil (not WD40 but Kroil, PBlaster, etc) will help tremendously but it's best to apply it multiple times, days in advance if possible. I also like to tap on the fastener with hammer in an attempt to loosen it/allow the oil to penetrate better. Try tightening the fastener a little bit first before trying to remove. This will allow the threads to 'break free'. If the fastener will still not budge, I use a torch to heat it to cherry red and then quench it with a water soaked rag. This expand/contract sequence works great but you need to be careful of overheating surrounding areas. Once removed the fastener gets replaced. For larger screws you can get an impact screw driver which converts hammer blows on the end to rotational force. For smaller screws or more delicate assemblies you can use a screw driver with a square shaft and a cresent wrench on the shaft for leverage. Use a rag to pad the end of the screw driver handle, apply as much force as possible to push the screwdriver head into the fastener slot while applying turning force with the cresent wrench. If the phillips head is chewed up, you can cut or grind (dremel) a regular slot into the screw head. Good luck!!

Cheers,
John
 
Mark,

According to the Anderson/Moment book, BMC didn't start using Pozidriv screws until 1961 and only in some applications. By 1964 almost all screws (both machine and sheetmetal) were Pozidriv. In know on my 62 BJ7 that there is a mix of types but Don's '59 should not have any Pozidriv.
Cheers,
John
 
I am showing my ignorance, but can you explain to me how we can tell the difference between phillips and pozydrive. For that matter, what is the difference.

If only they had used Allan or Robertson /ubbthreads/images/graemlins/smile.gif
 
Hi Adrio,

There are 4 radial tic marks on the head of the Pozidriv screws that identify them. There are explinations and graphics at the following sites. I included the German site because the graphics are clearer.

https://www.mindrup.de/atos/online/9704/pozidriv.htm

https://www.justbrits.com/pozi/pozidriv.html

BTW, you should use the correct screwdriver for these two type of screws. The shapes of the screwdrivers are different and you can damage the heads by using the wrong type.

Cheers,
John
 
I've used them all including reversible drill bits and sometimes they work and sometime they don't. In the end you have to be prepared to drill them out. I would recommend you try Kroil penetrating oil first. Soak the part for a couple of hours or overnight. If that doesn't work prepare for the worst.
 
[ QUOTE ]
When working on one of my radio controled airplanes at a meet, I had a small broken bolt I could not remove or drill out. Nothing would drill it. I burnt the end of my titanium bit rendering it useless. I was about to give up. In a last dich effort with no reall hope I was going to get the bolt out, I tried drilling it with one of those "Roto" bits used for cutting (not used for drilling). Finds them in the hardware store in the tool section near the rotos (similar to the dremmel tool). That sucker drilled right through a hardened bolt and it's not even made for drilling.

Gary

[/ QUOTE ]


carbide is a wonderful thing.


mark
 
Re: Removing damaged bolts & screws: posidrive

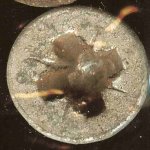
As I review your post again while trying to upload a picture, I am realizing that I do indeed have a posidrive screw. The bolts when scanned and blown up by 600% clearly have the 4 lines mentioned in the articles. Those articles were very helpful thank you. Ugh. I wish I had known to get the posidriv screwdriver head as I think I have ruined the heads. The detail required and tools is somewhat overwhelming. I wish there were manuals for the extreme novice like myself that could outline these nuances.
 

Attachments

  • 128399-screw3.JPG
    128399-screw3.JPG
    37.6 KB · Views: 170
Re: Removing damaged bolts & screws: posidrive

Well, I stand somewhat corrected. within the Austin Healey 100/100-6/3000 Restoration guide they have an appendix specifically addressing Posidrive screws. I wish that there were specific references within the door section within the book as well as the AH service manuals. I will need to re-read this book before continuing to see what else I have missed.
 
UGH! screw still stuck

Well. I bought the screw extract set from Sears for $50, and immediately broke one of them off inside the screw. I luckily was able to remove it. I used the next size and proceeded to break that off as well. I was lucky again and was able to remove it as well. The Drill-Out/Screw-Out (952156) from Craftsman seemingly is only good at breaking itself. I did bring it back to Sears for a replacement, but supposedly it is not covered by their warranty. They gave me a replacement anyway. I also bought a No. 3 & 4 Screw Extractor (952814) This didn't seem to do any good either. I have not applied the penetrating oil yet as I forgot to pick some up. I have liquid wrench, but that doesn't seem to do any good.

I have been able to remove the seats from the car and seem to be making progress, but I wish I could get the doors off. I have about 6 stuck screws ahead of me to remove... not very bright on my part.
 
Re: UGH! screw still stuck

I have never failed to get a screw or bolt out with a left hand drill bit set. Since the bit is putting an unscrew torque on the bolt it continuously tries to unscrew it. You can start with a small diameter & increase as needed. Sooner or later, the remaining wall section will be thin enough to relax & the remainder of the bolt will screw out. No damage to the threads at all. You do need a reversable drill.
D
 
Re: UGH! screw still stuck

Just letting you know we supply both pozidrive bits and thread repair kits in case you are thinking of drilling it out!
 
Finally. At least the door is off.

"The Drill-Out/Screw-Out (952156) from Craftsman seemingly is only good at breaking itself."
Well the replacement kit redeemed itself. I tried to use a #4 left hand screw bit with no success so I went back to the drill out kit. I used the third biggest size bit this time (not sure which measurement) and slowly ran the drill. My error before was running it at a faster RPM. With a slow drill the bit seemed to take more of a bite out of the screw and popped the head off. I still need to resolve the issue of taking the remaining screw from the thread, but at least the door is off. I think I will wait to address these screws until I get more of the body panels off. I am not sure if these bolts are securing part of the body or not. I was able to get two screws out, only two more to go. I don't think I have damaged the screw threads yet, but I am not sure how I will get them out.
Thanks for the advice. I will need to revisit how one removes a broken screw from a thread later.
 
Re: Finally. At least the door is off.

Any chance of using heat? Now that the heads are broken off you really can't do much damage to the bolt itself with heat.
Perhaps getting them red hot with a tiny torch then using vise grips if any bit of bolt can be grabbed????

Bruce
 
Re: Finally. At least the door is off.

Don,

The door hinge screws only hold the door hinge on .. they don't fasten anything else. On the body side the 4 screws go into a single plate which is pretty thick .. about a 1/4" I'd guess. This plate is captured between sheetmetal but floats to allow door adjustment. You will see all of this better if/when you take off the front fender.

Cheers,
John
 
Back
Top