• The Roadster Factory Recovery Fund - Friends, as you may have heard, The Roadster Factory, a respected British Car Parts business in PA, suffered a total loss in a fire on Christmas Day. Read about it, discuss or ask questions >> HERE. The Triumph Register of America is sponsoring a fund raiser to help TRF get back on their feet. If you can help, vist >> their GoFundMe page.
  • Hey there Guest!
    If you enjoy BCF and find our forum a useful resource, if you appreciate not having ads pop up all over the place and you want to ensure we can stay online - Please consider supporting with an "optional" low-cost annual subscription.
    **Upgrade Now**
    (PS: Subscribers don't see this UGLY banner)
Tips
Tips

One last distributor question

M

Member 10617

Guest
Guest
Offline
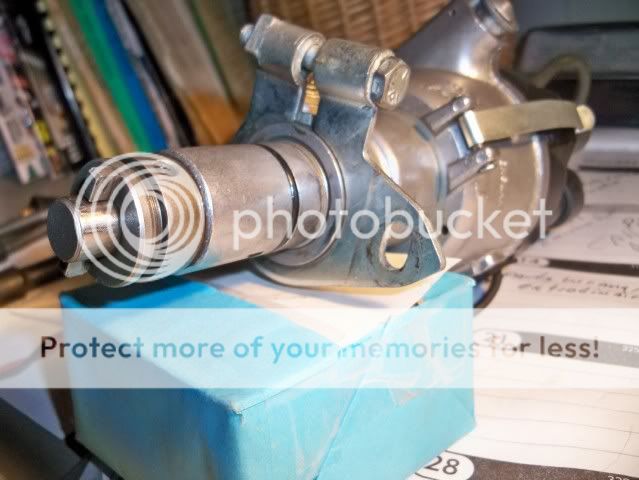
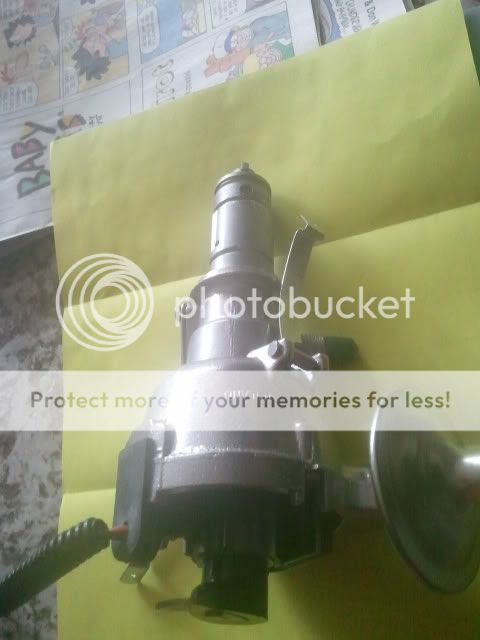
As I prepare to remove my differential for a rebuild, I have gotten much good guidance from the forum. Thanks to all. Sorry that my questins are pretty basic, if not to say "dumb," but I am learning.

One last question.

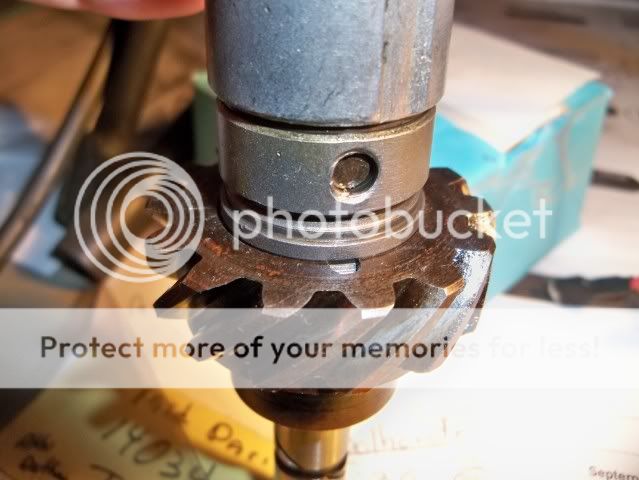
All say, and everything I've read says, that before removing the differential, I should aim the rotor to the number 1 cylinder for timimg purposes.

The firing sequence on my car has been modified so that the lead that normally connects to the #1 cylinder, now connects to the #3 cylinder, and the lead that normally goes to the #2 cylinder, now goes to the #1 cylinder. This seemed strange to me, bur the mechanic explained that it was done that way to give the vacuum advance a little more room. Anyway, the firing sequence is still 1-3-4-2.

My question is: when I remove the differential, should the rotor point to the number 1 cylinder (which would mean it is pointing to the #3 lead on the distributor cap) or to the present location of the #1 lead (where it is presently located on the distributor cap), which would mean it would be pointing at the #2 cylinder?
 

EV2239

Jedi Warrior
Offline
It will easier to refit and time if you remove it with no. 1 cylinder at TDC on the firing stroke and you can do this by rotating the engine until the rotor is pointing at the lead on the plug gap that goes to no. 1.

While you are in this position and using an inspection light you should be able to find the pointer a d timing marks (a little hole) in the fan pulley. You can line them up.

Having done all this, assembly is easier.

Best of luck

Ash
 
OP
M

Member 10617

Guest
Guest
Offline
Thanks, Ash. So, if I understand you correctly, the rotor should aim at the lead on the plug cap that goes to no. 1 cylinder and not in the direction of the no. 1 cylinder (which would point it to the #3 lead as things are now set up). That makes sense to me.

I failed to mention that I would start by lining up the timing mark (the little hole on the fan pulley) with the pointer for TDC.

I understand, too, that when the distributor comes back that I will have to recheck and probably reset the timing.
 

poolboy

Yoda
Country flag
Offline
You might want to edit your post . You're typing "differential" not distributor
It does not matter where the rotor points. The distributor can only go back in one way. It will not fit into place rotated a single degree fom the way it was removed. The reason is that the gear that turns the distribuor has an off center slot which has to mate with the offset"Driven Dog" at the bottom of the distributor's shaft. There should be an illustration in your Manual /
Remove the distributor cap and wire to the coil; tach cable, too if it's driven by the dizzy
Don't loosen the clamp around the dizzy. Leave the dizzy clamped tight, Just remove the fastener that holds the clamp onto the engine and pull the dizzy up and out..Simple.It really is fool proof. If you have doubt call Jeff as you are doing it. I bet he'll walk you thru it in real time..
 

DNK

Great Pumpkin
Country flag
Offline
Follow Ken's lead on this. Though we might want to post a pic of what he should loosen.
 
OP
M

Member 10617

Guest
Guest
Offline
Hi, Poolboy,

Oops... You are right... I meant distributor and not differential. Thanks for the reminder that the distributor can only go back in one way. I have seen this in my manuals. But all of them say "point the rotor in the direction of the no. 1 cylinder." That didn't make much sense to me, especially as my distributor has been re-aligned (mis-aligned?)..

The tach cable isn't driven by the dizzy, so I can leave that alone.

As for the clamp around the dizzy, Jeff has recommended that I leave it tightly in place and remove the clamp from the engine (two bolts hold it on). John Twist of University Motors, however, says "never take the clamp off the engine when removing the distributor (?). I sent him an email asking why, but I intend to follow Jeff's instructions.

Many thanks for your guidance. Very helpful, as usual.
 

poolboy

Yoda
Country flag
Offline
Here's one of my distributors ready to go back in my engine. It will be in the same timing as before I removed it. Why ? Because the clamp around the distributor was not loosened. You'll see the hole in the clamp. That hole is for the bolt that holds this whole thing onto the engine..
100_0336.jpg

The next picture shows the driven dog at the bottom of the sdistributor shaft, . It may not show it but the dog does not run thru the center of the shaft, It is slightly off center to mate with the also slightly off center slot (also shown here) that is in the top of the distributor drive gear. When you pull your distributor out you will see your very own distributor drive gear, still in the block with the gears engaging the camshaft.
100_0337.jpg

If you roll the car in gear the cam will rotate and turn this gear, but that's no matter, the slot is off set, the driven dog is off set, and the distributor will only be fully seated back in the block when the dog is back home in the slot, There is no way to mess this up.
 

poolboy

Yoda
Country flag
Offline
Look close and you'll see the dog in it's home.
TR6dogatHome.jpg

Yes you will need to fine tune the ignition timing, Depending on what was worn and what was replaced, you might be a few degrees off from the original clamped position, but not nearly as much as having to start from scratch as you would if you removed the dizzy from the clamp without making an index mark, like Jeff does.
 

HerronScott

Darth Vader
Offline
Ed,

Have you taken pictures of it currently installed that you can post?

Scott
 
OP
M

Member 10617

Guest
Guest
Offline
Poolboy,

A picture is worth a thousand words, as they say, and your pictures are worth much more to me. This is the first time I have seen the actual bottom end of the distributor. All other views have been fuzzy black and white photos in Haynes and line drawings. Many, many thanks.

The clamp on my distributor has two holes for two bolts holding it to the engine block. The clamp is also not nearly as substantial as the one in your picture. But it does the job.

It was Jeff who told me not to remove the clamp from the distributor, but leave it attached tightly. He said he would not move it, so I can replace it just as I will remove it. Nevertheless, I will take photos and make a scratch mark just to make sure.

My dizzy looks pretty shabby compared with yours. I hope Jeff can bring it back to life!

Now all I have to do is to decide that my driving season is over -- for the time being -- and muster the "courage" to attack the dizzy. I know in my mind that this is fairly "simple," but for a newby, this is a big step.
 

Geo Hahn

Yoda
Country flag
Offline
LexTR3 said:
...This seemed strange to me, bur the mechanic explained that it was done that way to give the vacuum advance a little more room...

Yeah, if I was the one who installed it wrong that's what I would say too.

LexTR3 said:
...I understand, too, that when the distributor comes back that I will have to recheck and probably reset the timing...

I would certainly recheck the timing and even consider adjusting it a bit after a road test. All Jeff can do is return it 'as before' which may or may not be exactly best for the rebuilt distributor. BTW - If the rebuilt stills has points, you always check/set the points gap before checking or setting the timing.

LexTR3 said:
...The tach cable isn't driven by the dizzy, so I can leave that alone...

Do you have an electronic tach or some other set-up?
 

TR3driver

Great Pumpkin - R.I.P
Offline
poolboy said:
You'll see the hole in the clamp. That hole is for the bolt that holds this whole thing onto the engine..
And I also see where that hole is not round but is actually a slot that allows for 10 degrees or more of movement.
 

TR3driver

Great Pumpkin - R.I.P
Offline
Geo Hahn said:
Do you have an electronic tach or some other set-up?
Even the stock TR2-4A setup does not have the tach cable connected to the distributor. Instead, it connects to the 'pedestal' below the distributor, which contains an angle drive.

But you knew that :laugh:
 

DNK

Great Pumpkin
Country flag
Offline
LexTR3 said:
Poolboy,...My dizzy looks pretty shabby compared with yours. I hope Jeff can bring it back to life!...

It will look just like this

RotorandDriveDogPosition.jpg
 

poolboy

Yoda
Country flag
Offline
TR3driver said:
poolboy said:
You'll see the hole in the clamp. That hole is for the bolt that holds this whole thing onto the engine..
And I also see where that hole is not round but is actually a slot that allows for 10 degrees or more of movement.
\
TR6dizzyclamp.jpg


10 degrees or more, you think ? If the installer is sharp enough he could see where the lock washer left its'mark; maybe he could narrow that down a bit.
I wonder if Lex's clamp with 2 holes would take some of the guess work out of his particular situation..What you say, Randy ?
 

Geo Hahn

Yoda
Country flag
Offline
TR3driver said:
Geo Hahn said:
Do you have an electronic tach or some other set-up?
Even the stock TR2-4A setup does not have the tach cable connected to the distributor. Instead, it connects to the 'pedestal' below the distributor, which contains an angle drive.

But you knew that :laugh:

Ooooh, I am so embarrassed.
 
OP
M

Member 10617

Guest
Guest
Offline
Hi, George,

Well... as for the modified distributor, since discovering the modification I have checked with a number of antique car guys (restorers, mechanics, etc.)hereabouts, and they confirm (a) that it makes sense to move the distributor so the advance is not pushed up against the block, and (b) when I mentioned this some time ago here on the forum, the general response was "that happens all the time, it doesn't make any difference...." I would have preferred the "correct" position, but am willing to live with it, as changing it would be a major operation.

Many thanks for the reminder about also resetting the points. I intend to do that, in addition to resetting the timing (timing first; points follow). In fact, I have read that points should be checked and reset periodically.

I may have misspoken. The tach does attached to the side of the housing that holds the distributor (the bottom of the distributor), so it is driven by the dizzy, but it doesn't appear to be "attached" to the distributor itself. Poolboy is the first, and only, to have mentioned removing the tach cable. This is new to me, easily done, but is it necessary? Just asking...

NOTE: TR3's posting appeared after I submitted this response. I assume by what has been said that I don't have to remove the tach cable???
 

poolboy

Yoda
Country flag
Offline
I said "if it's driven by the dizzy".
I said "if" because I wasn't sure about the TR3 and 4's. On the TR6 it obviously is.
Man, oh, man, this sure got complicated for such an easy task...
especially if you go all the way back to May.
https://www.britishcarforum.com/bcforum/u..._distributorand
And earlier this month:
https://www.britishcarforum.com/bcforum/ubbthreads.php/topics/810975/1
Plus an eMail to John Twist and who knows what to jeff Schlemmer
Just to remove 2 bolts and lift the distributor out...Lord please don't ever attempt to replace piston rings or something more complicated or we'll all be dead of old age before the first nut gets loosened at this rate.
BTW, if you do need to set your points do it BEFORE messing with your timing. But Jeff is pretty good about getting your distributor back to you ready to run....I doubt if you have to do much of anything other than put the darn thing back where it came from......
 

TR3driver

Great Pumpkin - R.I.P
Offline
poolboy said:
I doubt if you have to do much of anything other than put the darn thing back where it came from......
But, that presupposes that whatever Jeff does will not affect the timing. If, for example, he has to change or rebuild the vacuum advance module, that can move the static timing. Even just resetting the point gap will usually make a noticeable difference. And if there is actually something to be repaired (like a worn mechanical advance), that will likely change the static timing as well.

I just can't see the logic in leaving out such an easy, but important step. Yeah sure, it <span style="font-weight: bold">might </span>be right without being checked; but if I had gone to all that grief to get it right, I'd want to <span style="font-weight: bold">know</span> ...
 
Similar threads
Thread starter Title Forum Replies Date
Hamish Racing General TR At last a New Triumph Triumph 2
Got_All_4 TR6 TR6 Down Pipe How They Last Triumph 6
D Removing the last rust from pitted steel Restoration & Tools 11
steveg At last - inexpensive double crimp tool Restoration & Tools 4
CJD General TR Parts Just Don't Last Anymore Triumph 6
KVH TR4/4A One Last Light Problem in my Restoration Triumph 13
P T-Series Where's my last TD? MG 2
Trevor Jessie When was the last time you bled your brakes? Spridgets 4
D Lilly running #3 / since last we talked.... Austin Healey 7
S TR2/3/3A got this with my last project car Triumph 2
V Last few months in the UK Pictures TVR 5
T TR2/3/3A Is there a timing cover seal that will last more than a couple of year? Triumph 23
V Darling Buds show last weekend TVR 1
L At last 1:18. Scale 100S becoming available Austin Healey 2
HealeyRick Last Big Healey? Austin Healey 20
glemon Last BJ8 in the US? Austin Healey 6
Scot1966 TR2/3/3A Last ride of the year Triumph 6
leecreek Last Projects by 2091351 Spridgets 5
K TR2/3/3A How long should an SU damper top up last? Triumph 22
JPSmit Hyundai Stellar - when last did you see one? Other Cars 6
Tom74TR6 Off Topic Caffeine and Carburetors - Sunday Oct 18 - New Canaan CT - Last one of the year Triumph 1
R Last minute check before engine install Austin Healey 26
Rut MGB Last little bit MG 0
G TR6 Last CR TR6 Triumph 2
GTP1960 TR2/3/3A How long do leaf springs last? Triumph 8
drooartz Sold my last bike yesterday :[ British Motorbikes 8
David Townsend General MG Last of the MG TD and MGC Engine Prints MG 0
David Townsend General TR Last Call for Holiday Print Orders Triumph 6
britlover Nice fall drive in the BN1 last week Austin Healey 7
Boink Last Midget Made Spridgets 10
PC last couple of days Spotted 2
sd80mac7204 Spitfire Road trip to help a friend last weekend with surprising results Triumph 4
catfood Saw five iteresting vehicles on the way home last night.. Spotted 3
Johnny AH BJ8 seen on "Madmen" last Sunday Austin Healey 3
aeronca65t Last 12 Minutes of the Bathurst 12 Hour Racing 0
L The last cast iron 6 port head Austin Healey 9
angelfj1 General TR last run with the lady Triumph 19
John_Mc Pre-War Pre-war gathering in Banff, Canada last Sunday... Triumph 7
JPSmit Cruise Night last Night Spotted 5
aeronca65t Random cars in our hotel lot last night Spotted 4
Mickey Richaud Last Thursday Spotted 0
JPSmit When did you last see one? Spotted 57
MadMarx Memories of the last Nordschleife race with open top cars.... Triumph 4
J Last Step, Rear end: What is this one? Austin Healey 8
mcguijo Some progress at last Triumph 2
Morris AT LAST! Spridgets 8
JPSmit Dropped off the engine for the Vauxhall last week Spotted 3
J Went to a Jensen show this last weekend Other Cars 10
A TR2/3/3A TR-3A Apron letter at last Triumph 3
KVH TR4/4A TR4 OD Maybe Last Question Triumph 2

Similar threads

Top