 Hey there Guest!

 but were afraid to ask:
  STOP!! Never post your email address in open forums. Bots can "harvest" your email! If you must share your email use a Private Message or use the
  smilie in place of the real @
 Pretty Please - add it to our Events forum(s) and add to the calendar! >>
bthompson
Jedi Warrior
Offline
Now that I have my camera back, just thought I'd share some pics and thoughts 'bout my brand new zip-window hood!
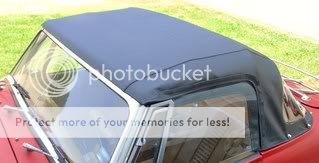
Here it is! It's wonderful, it's water-tight, and I want it to <span style="font-style: italic">stay </span>that way. Crystal-clear plastic, no rips, seams, tears, slices, patches, or seamsealing goop. I want (nay, <span style="font-style: italic">need</span>) this hood to last a good long time, so I spent a fair amount of brainpower determining how to avoid the problems my old hood had: stretching and ripping seams, twisting edges, and the windows tearing out at the weld lines. The inflexible width of the rear window zipper adds a layer of complexity too: if it wasn't for that, I'd be happy using the hood-folding method I used previously.
Here's what I've come up with to try to keep the top from bearing any stresses when folded up. I've posted it here to add to the forum's general Pot O' Knowledge, and frankly cuz I'm kinda bored this afternoon and this gives me something to do.
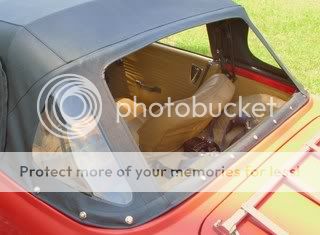
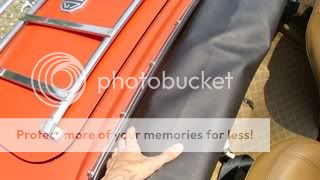
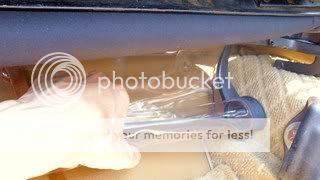
Notice my first big modification: I fastened the snap strip to the flange <span style="font-style: italic">under </span>the rear edge of the hood, and snapped the hood to it, instead of rigidly fastening it down as original. The reason for this will become clear later.

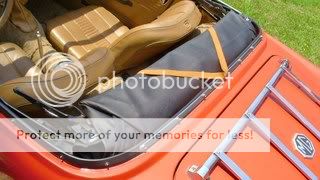
To fold the hood, I drop the zip window first, letting it drape inside the car.
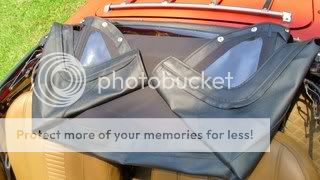
Pulling the bows back as usual, pull the hood free and rearward...
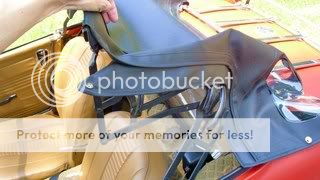
...drape the hood smoothly over the trunk without folding anything...
...and make very sure the bows are clear of the rear window.
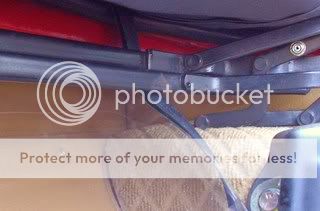
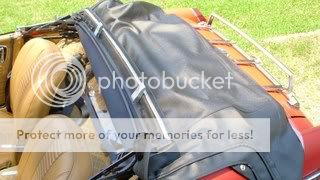
The raingutter seam at the leading edge of the hood can get stressed if the hood is not fully draped back over the boot. Make sure that point is laying easy...

...and then fold the raingutter completely under. This makes sure it doesn't twist and stretch over time as the hood folds, making it seal poorly as time goes by.

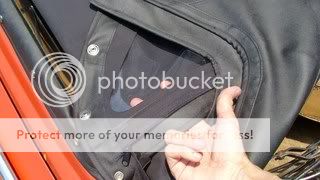
Flip the hood forward and over the seats. Since the raingutter is folded, the corner windows will flip in too. Notice how tight the turn is at the rear edge between the windows, along that zipper. No problem, since we fix it...

...by unfastening the end snaps, and folding the corner windows fully in without stressing the bottom edge!

Here it is! It's wonderful, it's water-tight, and I want it to <span style="font-style: italic">stay </span>that way. Crystal-clear plastic, no rips, seams, tears, slices, patches, or seamsealing goop. I want (nay, <span style="font-style: italic">need</span>) this hood to last a good long time, so I spent a fair amount of brainpower determining how to avoid the problems my old hood had: stretching and ripping seams, twisting edges, and the windows tearing out at the weld lines. The inflexible width of the rear window zipper adds a layer of complexity too: if it wasn't for that, I'd be happy using the hood-folding method I used previously.
Here's what I've come up with to try to keep the top from bearing any stresses when folded up. I've posted it here to add to the forum's general Pot O' Knowledge, and frankly cuz I'm kinda bored this afternoon and this gives me something to do.
Notice my first big modification: I fastened the snap strip to the flange <span style="font-style: italic">under </span>the rear edge of the hood, and snapped the hood to it, instead of rigidly fastening it down as original. The reason for this will become clear later.
To fold the hood, I drop the zip window first, letting it drape inside the car.
Pulling the bows back as usual, pull the hood free and rearward...
...drape the hood smoothly over the trunk without folding anything...
...and make very sure the bows are clear of the rear window.
The raingutter seam at the leading edge of the hood can get stressed if the hood is not fully draped back over the boot. Make sure that point is laying easy...
...and then fold the raingutter completely under. This makes sure it doesn't twist and stretch over time as the hood folds, making it seal poorly as time goes by.
Flip the hood forward and over the seats. Since the raingutter is folded, the corner windows will flip in too. Notice how tight the turn is at the rear edge between the windows, along that zipper. No problem, since we fix it...
...by unfastening the end snaps, and folding the corner windows fully in without stressing the bottom edge!


 A friendly reminder - be careful what links you click on here. If a link is posted by someone you don't know, or the URL looks fishy, DON'T CLICK. Spammers sometimes post links that lead to sites that can infect your computer, so be mindful what you click.