GTP1960
Jedi Knight
Offline
 Well, nursing some busted knuckles with a couple shock tops after I got the new moss "upgraded" motor mounts installed.
they must use the term "upgraded" loosely, because the baseplate of the mounts is 1/2 the thickness of the original ones....that's a problem; because when you mount these things, you really need a strong base plate that will not bend.
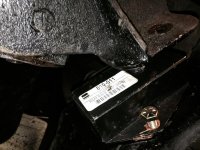
I'm no expert on this, but after looking it over & experimenting a couple different ways. I found the most logical protocol was to attach the mount, loosely to the engine, the lower the engine on to the frame shelf. In theory this worked pretty well. With a long, stout lever, I motivated the engine into the right position, to install the front bolts.(one would hope the rubber in the mount would absorb the angle without bending the plate)View attachment 35843
the weakness of the moss motor mounts manifested itself on the back wing of the motor mount plate. It was bent at about a 15 degree angle, from the force of the engine coming to rest on the frame.: making #2 bolt installation almost impossible.
i got some vice grips on the left side & after several tries, flattened it out.
But the right side remains with only one bolt until I can think of a better way.
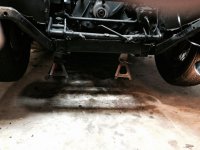
it is possibly that I created some of my own problem by having the front end jacked up 10". But I didn't note much difference in positioning when she was level.


 Hi Guest!

 smilie in place of the real @
 Pretty Please - add it to our Events forum(s) and add to the calendar! >>