 Hey there Guest!
 Hey - did you know if you click on the title of a thread it will take you to the first unread post since you last visited that thread?
 but were afraid to ask:
  STOP!! Never post your email address in open forums. Bots can "harvest" your email! If you must share your email use a Private Message or use the
  smilie in place of the real @
 Pretty Please - add it to our Events forum(s) and add to the calendar! >>

Offline
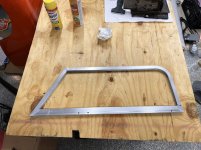
Looks great!
Looking up the stairs - does your garage open into the kitchen without a door? Or is that another 'outside' space.
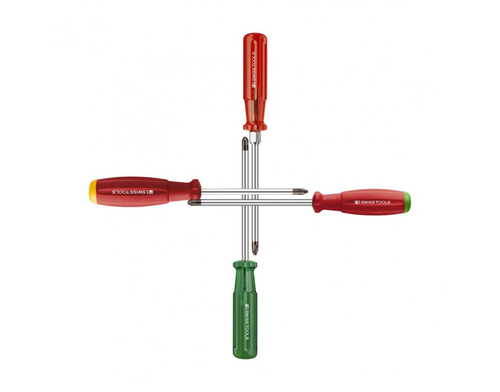
Slightly nerdy comment but, the screws aren't phillips they are pozi drive - almost the same but the pozi isn't tapered. The screwdrivers are almost interchageable but it you are going to be taking out frustrating screws you might want to get the right screwdrivers
 www.pbswisstools.com
Looking up the stairs - does your garage open into the kitchen without a door? Or is that another 'outside' space.
Slightly nerdy comment but, the screws aren't phillips they are pozi drive - almost the same but the pozi isn't tapered. The screwdrivers are almost interchageable but it you are going to be taking out frustrating screws you might want to get the right screwdrivers
Phillips and Pozidriv cross-head screws – explained in simple terms – PB Swiss Tools
In the first half of the twentieth century, the slotted screws proved to be increasingly problematic. The industrialization brought about more and more power-operated screwdrivers. Aligning the screwdriver to the slot in the screw took up too much time and laterally slipping off of the screw...
www.pbswisstools.com


 A friendly reminder - be careful what links you click on here. If a link is posted by someone you don't know, or the URL looks fishy, DON'T CLICK. Spammers sometimes post links that lead to sites that can infect your computer, so be mindful what you click.