• The Roadster Factory Recovery Fund - Friends, as you may have heard, The Roadster Factory, a respected British Car Parts business in PA, suffered a total loss in a fire on Christmas Day. Read about it, discuss or ask questions >> HERE. The Triumph Register of America is sponsoring a fund raiser to help TRF get back on their feet. If you can help, vist >> their GoFundMe page.
  • Hey there Guest!
    If you enjoy BCF and find our forum a useful resource, if you appreciate not having ads pop up all over the place and you want to ensure we can stay online - Please consider supporting with an "optional" low-cost annual subscription.
    **Upgrade Now**
    (PS: Subscribers don't see this UGLY banner)
Tips
Tips

Trim screws and cup washers

griff

Senior Member
Offline
Happy New Year to all!
I am in the process of installing door panels and have been disapponited by the very small trim screws purchased from TRF or Moss (don't remember which). They are so small it is difficult to get them in perfectly straight and flat. AND when not flat they tend to dig into the vinly. Has anyone opted to go a little bigger?

I think the look of the door-panel install would be a nicer finish with perhaps twice the head are for the cup washer and or screw.

If anyone has gone larger please advise on where to locate the large chrome screws and cup washers. I have found larger locally but all are phillips-head

regards,
Griff
 

DNK

Great Pumpkin
Country flag
Offline
If there is a marine store in your area ,stainless is a good choice. Depending on your trim color I went black I bought from my local fastener store. Check McMasters too if none of there fore mentioned is a choice for you.
 
D

DougF

Guest
Guest
Offline
There are trim screws available with smaller heads. So you could have for example, a #10 screw with a #8 head. It would give you more bite and maybe better control yet keeping a stock look.
 
OP
G

griff

Senior Member
Offline
DougF I don't have anything to measure but the trim screws shipped to me are far smaller than an 8. I would guess four-ish.

Dan- Thanks for the marine store idea.

Can anyone tell me what the standard size should be?

Thanks
Griff
 

DNK

Great Pumpkin
Country flag
Offline
I think most of them from TRF are a #4
 

Tinkerman

Darth Vader
Offline
Judging Standards and Restoration Guidelines calls for a #4 slotted screw. Thats what Moss and TRF ship.

Tinkerman
 

Moseso

Jedi Knight
Country flag
Offline
griff said:
Has anyone opted to go a little bigger?
I have seen panels affixed with larger screws than the stock #4 size. Looks OK to me. If you're planning to enter the car in originality competitions, then you're stuck with that size. I have to replace some panels this spring, and I am definitely planning to go with #6 Phillips-head stainless. It's 2010. I haven't used a slot-head screw for anything in YEARS. And, I'd much rather my car work, and be easy to work on, than that it be exactly like the day they rolled out of the factory doors.
 

ekamm

Jedi Warrior
Offline
This isn't the the exact subject, but I did decide to go with the #4 slotted. Should get my interior next week(Christmas Present}. How will you mark or create a template to know where to place screws. I assume that the panels won't be marked. My other thought is would it be easier to pre-drill and place screws in fresh holes to ensure that they go in straight?
 

Gordon_Dedrick

Jedi Trainee
Offline
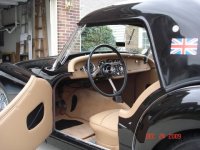
It's almost impossible to hit all the original holes in the doors. I just tried to space mine so they looked decent...I used the #4 from TRF by the way. Just be REAL careful when drilling the holes. Center punching is a MUST in order not to twist up the new cover and padding. Use LOTS of masking tape.
Gordon
 

Attachments

  • 19658.jpg
    19658.jpg
    51.8 KB · Views: 133

martx-5

Yoda
Country flag
Offline
I did mine essentially the same as Gordon. Be VERY careful drilling through the vinyl/leather. It's not the vinyl/leather that will cause the problems, but the padding inside. That stuff justs wants to spin around the drill bit and form a massive ball! What I did, was poke through the leather with a pick, and then kinda push the padding out of the way and then drill through.
 

angelfj1

Yoda
Country flag
Offline
martx-5 said:
I did mine essentially the same as Gordon. Be VERY careful drilling through the vinyl/leather. It's not the vinyl/leather that will cause the problems, but the padding inside. That stuff justs wants to spin around the drill bit and form a massive ball! What I did, was poke through the leather with a pick, and then kinda push the padding out of the way and then drill through.

I suggest that you <span style="font-weight: bold"><span style="text-decoration: underline">do not</span></span> drill the material. This is asking for trouble. Rather, mark the hole and use a small diameter punch. Select a hole size that is slightly larger than the screw.
 
Similar threads
Thread starter Title Forum Replies Date
jerrybny Trunk Trim Screws Triumph 5
O Jaguar rear window trim repair Jaguar 1
Overdrive45 BJ8 Interior Trim Austin Healey 8
Overdrive45 Trim Under Convertible Cap Austin Healey 11
T BJ7 Trim Recession (Convertible Top) Austin Healey 2
EWD For Sale ‘74 TR6 original wheel trim rings Triumph Classifieds 3
Michael Oritt Best Seat Trim Adhesive Austin Healey 8
P TR2/3/3A TR2 Headlight Trim Question: Triumph 8
J For Sale Triumph TR2 or TR3 elbow trim Triumph Classifieds 0
chicken BJ7 Chrome Trim Austin Healey 15
S TR2/3/3A tr2 and tr3 back trim above the back cover Triumph 0
Popeye Bojo trim tools Restoration & Tools 7
MGTF1250Dave T-Series Interior Trim Panel installation MG 12
S TR2/3/3A Rear turn signal lamp and trim installation Triumph 5
M TR6 Windshield Trim TR6 Triumph 14
EWD TR6 TR6 top dash trim paint Triumph 2
7 For Sale Stainless trim for Herald Convertible top. Triumph Classifieds 0
B BJ7 Boot Trim Austin Healey 7
chicken Inner Door Seal Trim Position Austin Healey 6
D BJ7 Underdash Trim Austin Healey 9
D BJ7 Rear rail trim Austin Healey 0
dbenichou289 TR2/3/3A Headlight outer trim ring Triumph 6
P For Sale Wheel trim rings Triumph Classifieds 5
T How do you secure your door rubber trim? Austin Healey 9
J Nut size for BJ8 center console trim piece Austin Healey 8
CharlesBN1 Wanted wanted to buy - sidescreen trim/strips for early BN1 Austin Healey Classifieds 5
S TR4/4A Vinal interior trim piece eaten by rodent Triumph 3
R Wanted Whish list: Wheel trim rings and... Triumph Classifieds 9
RAC68 Professional Trim and Upholstary Contact Cement Austin Healey 4
S TR2/3/3A trim to hold down the furflex Triumph 3
D TR2/3/3A Trim work Triumph 27
D TR2/3/3A Headlight Trim Triumph 17
T Wanted 1960 Jaguar MK2 front door wood trim, both right and left. Jaguar Classifieds 0
NutmegCT B&I Trim products Restoration & Tools 0
I TR6 Aluminum trim ring band removal Triumph 5
I Wanted TR6 OEM or NOS aluminum trim rings Triumph Classifieds 9
ckeithjordan TR2/3/3A Boot Trim Triumph 3
S TR4/4A Windsheild trim question Triumph 3
C MGB Trim molding removal MG 7
T TR4/4A Attaching headlight trim ring Triumph 6
K For Sale TR3 Cockpit Trim ...N/A at The Big 3 Triumph Classifieds 0
HealeyRick 100 Interior Trim Austin Healey 1
ckeithjordan TR2/3/3A Trim Hole Size Triumph 3
D TR2/3/3A My Trim journey. Triumph 16
S For Sale Austin Healey 100-4 Carpet Kit and Interior Panel and Trim Kit Austin Healey Classifieds 0
S TR4/4A windshield glazing rubberand trim fit Triumph 3
ckeithjordan TR2/3/3A New Interior Trim Re-Use Triumph 6
CJD TR2/3/3A Trim Caps Triumph 3
HighAltitudeTR3 Wanted Heater Core, Capping Trim, OD switch 1959 TR3 Triumph Classifieds 3
Griz Aluminum door trim Austin Healey 5

Similar threads

Top