• The Roadster Factory Recovery Fund - Friends, as you may have heard, The Roadster Factory, a respected British Car Parts business in PA, suffered a total loss in a fire on Christmas Day. Read about it, discuss or ask questions >> HERE. The Triumph Register of America is sponsoring a fund raiser to help TRF get back on their feet. If you can help, vist >> their GoFundMe page.
  • Hey there Guest!
    If you enjoy BCF and find our forum a useful resource, if you appreciate not having ads pop up all over the place and you want to ensure we can stay online - Please consider supporting with an "optional" low-cost annual subscription.
    **Upgrade Now**
    (PS: Subscribers don't see this UGLY banner)
Tips
Tips

TR2/3/3A starting scuttle repair

Frank Canale

Jedi Warrior
Silver
Country flag
Offline
Time to start the scuttle repair. The PO was not very kind to this area.
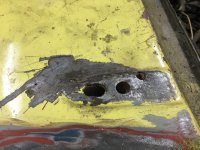
passenger plinth damage.jpg Passenger side raised plinth damage.

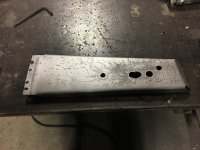
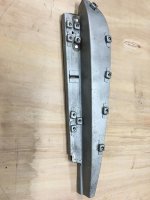
passenger side plinth support damage.jpg
This is the plinth support bracket. It needed to be removed to do all the repairs.
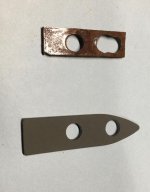
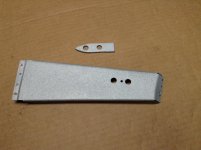
plinth filler  original and new filler piece (1).jpg
The raised plinth has a steel spacer between the plinth and the support bracket underneath. The spacer is 1/8" (.125") thick.
This shows the original and the one I made. I made the new one a little larger for additional support. Maybe I was over thinking this.
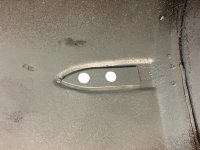
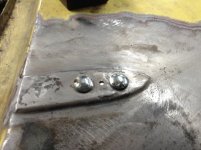
passenger side plinth reinforcement spot welded inside.jpg This picture is a little deceiving.This is the underside view. The new plinth spacer is plug welded in the recess of the plinth from above. This area has a coat of self etching primer and a coat of cold galvanizing primer before the support bracket gets welded in. Could not get rid of double picture.

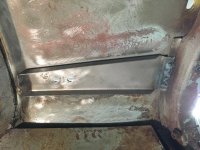
passenger side plinth reinforcement spot welded inside.jpgpassenger side scuttle support brace welded back in.jpg
The support bracket has been repaired and welded in. Between the bonnet hinge mounting holes is a plug weld to the plinth spacer just like the top side. Originally this was spot welded with a single spot weld between the mounting holes
I don't have a giant spot welder like they did so plug welds will do.
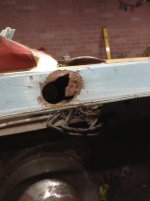
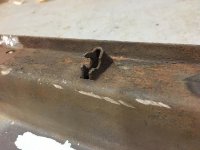
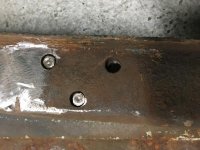
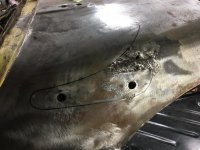
scuttle vent rod hole.jpg I got ahead of myself on this one. I needed to take a picture of the damage. The PO enlarged the scuttle vent rod hole with a chisel. I have no idea why. The damaged area has been pulled out. Access to the back side is limited to the hole behind the damage. the area was stretched so as I worked it back together I used a dremel cut off wheel to trim and work the pieces back together. Tack it together as it is worked back to the original shape. finish welded , hammered flat using a piece of rod from the back side to help flatten the area. The original hole needed a little filler metal welded to close up the hole diameter then used a rotary burr to bring it back to the correct size. blocked flat with some 100 grit sand paper and that is done. On to finishing driver side plinth repair today. Frank
 

sp53

Yoda
Country flag
Offline
Looking good Frank, when fiddling with one of those vents and the linkage, the destructive force made by the chisel is understandable. Many ways to turn the hands inside out there, it took me years, but now I put the linkage in by splitting the leakage into 2 piece half on each side then insert the clevis pin and snap ring at the center. Might drop a few snap rings, but with good plyers not too bad.

steve
 
OP
F

Frank Canale

Jedi Warrior
Silver
Country flag
Offline
driver plinth damage.jpg Driver side raised plinth damage.

driver plinth spacer plug weld.jpg Driver side raised plinth ready to plug weld spacer in place.

driver scuttle support bracket.jpg Driver side support bracket repaired.

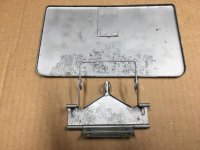
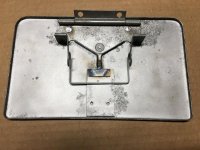
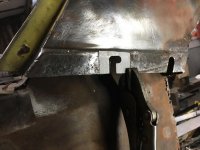
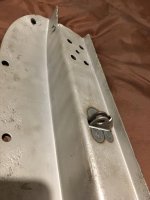
scuttle vent cover damage.jpg Scuttle vent cover with broken lift bracket.

scuttle vent cover repaired.jpg scuttle vent cover repaired. Frank
 
OP
F

Frank Canale

Jedi Warrior
Silver
Country flag
Offline
I have been putting off the repair to the driver side of the scuttle. A lot of second or maybe third rate repair work. a lot of built up weld metal, areas ground paper thin, and then covered up with bondo. I knew it was bad so no surprises. All but one bolt had to be drilled to get the door hinges off long ago. The bottom hinge was welded in place. Removing the A post was done just like the passenger side. I decided to try a new drill bit to drill the spot welds that the side wall attaches to the A post. I used a Milwaukee red helix titanium drill bit. Size is 7/32 closest the Ace hardware had to 3/16 and I was surprised at how good it worked.The bit cost $6.00 and well worth it.

driver side A post damage.jpgDriver side A post damage.

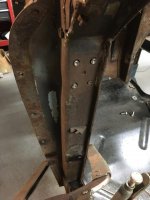
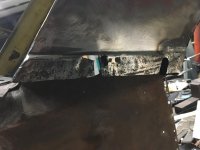
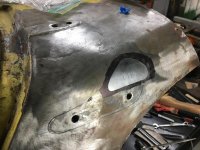
driver side lower scuttle damage.jpg Driver side lower scuttle damage. cracked from the middle of the back slot up to the radius and across to where the scuttle meets the A post. The front of the front slot has been ground paper thin.

driver side lower scuttle repair at the back slot.jpg The crack at the rear slot has been welded and the paper thin area at the front slot has been removed. This is the process to decide the repair method for the front slot. I believe I am going to reproduce the entire slot and cut the entire slot out and weld in the repair piece.

driver side check strap damage.jpg Check strap bracket damage. This is spot welded in and will be removed. A new one that I have already made will be spot welded in.

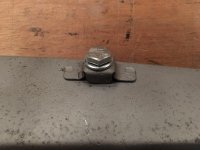
driver side upper hinge bolts.jpg upper hinge nuts to be replaced
driver side lower hinge bolts.jpg lower hinge nuts to be replaced. The shiny area is where the lower hinge was welded to the A post. Frank


Graham H

Jedi Warrior
Country flag
Offline
I found a lot of the spot welds holding the front of the scuttle to the fire wall had come apart so I drilled them out and plug welded them back together. I think this is where the condition scuttle shake originates from so its important this is area is secure. One other thing to look out for is where the rearview mirror mounts on the scuttle, I found when I went to refit the mirror that there were no captive nuts or threaded plate for the screws to thread into and I don't know what was in there originally whatever it was was long gone ?
I can't imagine what the previous owner of your beast was trying to achieve with the hinge mounts but you are getting on top of it good work.

Graham
 

CJD

Yoda
Country flag
Offline
Brings back memories...You start a new area and the thoughts are just, "Uuuhhgg". Then you get going one section at a time and it's done before you know it. You're doing great and we are enjoying following along!
 
OP
F

Frank Canale

Jedi Warrior
Silver
Country flag
Offline
Thank you John, sometimes I wonder if everybody gets tired of my post , welded patches on and on. Hopefully someone will find it useful working on their car as I have found your post and pictures very helpful.

driver side lower scuttle repair.jpg Driver side lower scuttle. L shaped slot cut out and ready to be welded.

driver lower scuttle repaired.jpg Driver side welded and finished.

driver side A post cage nuts removed.jpg Driver side A post with cage nuts removed. To remove the 2 inner cage nuts at the top you have to drill out one spot weld on each one to get the nuts out. The inner one at the bottom can be gotten out with a little fiddling to get the flap opened up but it does not have to be drilled. The check strap bracket has been removed. 4 spot welds get drilled from the back side.

IMG_0149.jpg This is my favorite bracket to form up so far. It is a difficult bracket to form due to its shape. I formed the new brackets out of a little heavier sheet metal. This is a difficult bracket to replace once the car is finished. Hope i never have to replace these.

driver side A post check strap bracket.jpg Check strap bracket spot welded, good as new.

cage nut forming process.jpg This is how I close up the cage nuts. Once the nut is in the cage I thread a bolt and washer in from the back side and tighten the bolt up. this supports the back of the cage as the flap is hammered down slightly then you can finish forming the flap with a pair of vice grips to form the cage around the nut. One thing to mention that modern day nuts are not as big as they used to be. I made all my new nuts to match the size of the originals. The originals are 1/2" x 1/2" x .200" thick. I cut mine out of 1/2" square stainless bar then drilled and tapped them. It may have been over kill at first but has payed off being able to keep the original cages.

driver side A post repaired new cage nuts installed.jpg Driver side A post repaired and ready to go back on the car.

I have clamped the A post back in place and taken some time to re check some measurements, the front wings have been on and off a couple of more times. I thought I had a problem with the driver side wing. Front to back location is very good the vertical fit is a little snug at the bottom but the bottom mounting flange is new and with a little adjustment I think it will loosen up like the passenger side. All and all I am encouraged that things are lining up well enough that as it starts to be tacked and welded I will be able to make minor adjustments with out having to rework parts. Frank
 

DavidApp

Yoda
Gold
Country flag
Offline
Looking good. Very nice work on the "A" post.

I did find the cages you get from the usual suppliers need some work so the nuts will not fall out. Wish I had made my own nuts when I was at that stage. SS is a good choice and the Next rebuilder in 2050 will thank you.

David
 

Graham H

Jedi Warrior
Country flag
Offline
Well done with the check strap bracket and the hinge mount captives, I purchased a replacement A pillar from Moss but I had to return it. It was so poorly made i couldn't even mount one hinge, no matter how hard I tried nothing would line up and the check strap mount didn't look anything like the original. I made a template for the check strap mount and repaired the rest of my original A pillar, keep up the good work

Graham
IMG_1867.jpg
 
OP
F

Frank Canale

Jedi Warrior
Silver
Country flag
Offline
Thank you, Graham. I thought it would be easy, I did exactly what you did. Flattened the original cut out a blank and then realized it is hard to hold and form. I struggled with the first one and wasn't happy with it so I made a forming die and made for good parts. Nice that you have included the dimensions for others to use in the future. Frank
 

CJD

Yoda
Country flag
Offline
If I had to do it again...I would go to you for the parts. I swear you are fabbing them from scrap much better than what is available out there! Also impressed with your speed. Once you get to work you really crank.
 
OP
F

Frank Canale

Jedi Warrior
Silver
Country flag
Offline
Just to be clear I did not remake the A post. I bead blasted the original removed the old rusted nuts replaced the nuts and replaced the check strap bracket that I already had made from the passenger side repair, so I had a little practice and this side has gone better. I have a scribe line on the A post and the spot welds that were drilled out to get the A post back in place and seems to line right back up. Making the decision to start cutting ids the hard part once the decision is made it goes pretty good. Frank
 

CJD

Yoda
Country flag
Offline
I understand...I was mainly impressed by the door strap brackets. As with all your parts, works of art.
 

sp53

Yoda
Country flag
Offline
Frank nice bead blasting, what brand beads do you use in your bead blaster? Around here sand has become a problem to get. They only sell marble sand and that is abrasive; it seems the little chunks are different
 

M_Pied_Lourd

Darth Vader
Country flag
Offline
Great work Frank...and don’t worry about posting too much stuff....we can’t get enough :wink-new:

Cheers,
Tush
 
OP
F

Frank Canale

Jedi Warrior
Silver
Country flag
Offline
Thanks Steve, It is harbor freight 80 grit glass beads, I don't really know what grit it is now because it is several years old and is sifted from time to time and is very fine. I don't use it for heavy rusted pieces because it is very slow but it leaves a very nice finish on painted pieces or parts with surface rust. I have a bag of black diamond coal slag that I got from tractor supply that i plan to use in a portable blaster to clean the rust from the rear closing area once the weather gets better. I plan on doing that outside then a coat of epoxy primer before closing that area in. Frank
 
OP
F

Frank Canale

Jedi Warrior
Silver
Country flag
Offline
5D3E53E5-D365-462F-8278-139BAE91F37F.jpg Driver side scuttle damage.

15CEF6C1-847B-4D24-A957-6D1170D4F85B.jpg Damage cut out, repair patch fitted ready to tack in place.

310EAD4D-43EA-4336-A39A-86976B060BA2.jpg Patch tacked ready to weld and finish.

AA250286-F518-4B1D-899A-6F6336D6B661.jpg Patch welded and finished. Still a little bit of hammer and dolly work as the repair is a touch low and will need to be stretched to raise it. This is slow because access is very limited to the back side. I had to make a dolly out of 1/4” bar to reach in between the scuttle and inner side wall. Frank
 

Snowkilts

Jedi Hopeful
Country flag
Offline
sometimes I wonder if everybody gets tired of my post , welded patches on and on. Hopefully someone will find it useful working on their car

I am another one who is watching with great interest, as the bottom 6 inches or so of my car can best be described as "ghastly". A PO made extensive use of fiberglass, plywood(!), and slapped-on bits of galvanized sheet metal. Rusted sills covered up and reinforced with angle iron. Frame covered in buzzed-on patches. Probably best to consider it a parts car although I do enjoy metal work and plan to get into it someday and I'm sure I will be poring over your posts when that time comes.

And in fairness to whoever did the work, it looks OK if you don't get too close, and I've been driving for 25 years without any real problems, knock on wood (which is in the footwells).
 

CJD

Yoda
Country flag
Offline
I think I had to pull back the inside to reach some of that area. You did great with limited access.
 

mctriumph

Jedi Warrior
Silver
Country flag
Offline
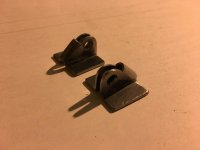
If there is any interest, I have a batch of freshly cut bits to build new lever mechanisms for the scuttle lift(assembly required).
As these are no longer available, DIY is an option
MD(mad dog)
 
Similar threads
Thread starter Title Forum Replies Date
K TR2/3/3A Pushing down the clutch pedal when starting the car? Triumph 13
angelfj1 TR5/TR250 TR250 - Lucas 4ST Starting Solenoid-Mounting Location/Details Triumph 2
angelfj1 TR5/TR250 TR250 Need Help identifying wires (2 - black) feeding starting solenoid Triumph 6
bigjones TR2/3/3A Starting up an engine that hasn't ran for a while. Triumph 39
S TR2/3/3A TR3 Hard Starting Triumph 4
H MGB Starting Problems MG 3
J TR4/4A 1964 Triumph TR4 - Not Starting/Running Triumph 3
angelfj1 TR5/TR250 Starting a TR250 that's been sitting for 10 years Triumph 12
T TR6 Continuous Starting and Ignition Issues Triumph 6
M TR6 Just starting out… Triumph 16
RichB4493 TR2/3/3A TR3 not starting - Slow/Weak Starter Triumph 33
M TR2/3/3A 1958 TR 3 , crankshaft nut for hand starting Triumph 7
P Wedge Starting problems TR8 Triumph 3
K TR6 tr6 not starting Triumph 11
Jim_Stevens TR2/3/3A Intermittent starting Triumph 14
R TR2/3/3A Starting car for 1st time after rebuild. Triumph 13
jdubois GT6 After over two years stalled at the body shop, my GT6 is starting come back to life! Triumph 5
R TR2/3/3A Starting TR-2 for first time after restoration Triumph 58
D Wanted TR3A starting handle Triumph Classifieds 0
D Starting After Carbs Rebuilt Austin Healey 30
Got_All_4 TR6 Starting my frame restoration Triumph 32
Jayplum TR2/3/3A Starting from scratch what color Triumph 25
sundown TR6 Starting Triumph 43
F TR2/3/3A I'm stuck... alternator/wiring/starting/? Triumph 2
F TR2/3/3A 1960 TR3A starting chassis work Triumph 81
J TR2/3/3A Starting my TR3 A restoration Triumph 8
F TR2/3/3A Starting Triumph 4
N Hesitant starting Austin Healey 16
Got_All_4 TR6 Starting The Tear Down Of MY 1969 TR6 Triumph 6
G TR4/4A Starting without Transmission attached Triumph 9
P BN4 Hesitates on Starting Austin Healey 12
D Hard Starting Austin Healey 14
mgedit TR2/3/3A 56 TR3 Starting Issue Triumph 9
M Starting from cold Austin Healey 2
R Very Difficult cold weather starting problems! Austin Healey 21
R TR4/4A Starting TR4A after 30 years Triumph 12
R winter hard starting BJ7 Austin Healey 16
P Jump starting a positive ground BJ8 Austin Healey 4
W starting motor Jaguar 0
D TR2/3/3A Starting my Bodywork journey. Triumph 166
P TR6 Quick starting Triumph 2
Joe Reed General Tech Starting a screw in a tight location... MG 9
P TR6 TR6 hard starting Triumph 24
Q Just Starting Restoration Of 1967 E Type Jaguar OTS Jaguar 13
stretchit2 Starting Issue Austin Healey 6
M TR6 Intermittant starting problems Triumph 4
Willie_P TR4/4A Starting long dormant TR engine..start up procedures? Triumph 10
S Hard starting on Webers from cold Austin Healey 12
T TR4/4A Weird starting issue with my TR-4 Triumph 15
M '61 BN-7 Progressively Harder Starting . . . Now Won't Start Austin Healey 9

Similar threads

Top