• The Roadster Factory Recovery Fund - Friends, as you may have heard, The Roadster Factory, a respected British Car Parts business in PA, suffered a total loss in a fire on Christmas Day. Read about it, discuss or ask questions >> HERE. The Triumph Register of America is sponsoring a fund raiser to help TRF get back on their feet. If you can help, vist >> their GoFundMe page.
  • Hey there Guest!
    If you enjoy BCF and find our forum a useful resource, if you appreciate not having ads pop up all over the place and you want to ensure we can stay online - Please consider supporting with an "optional" low-cost annual subscription.
    **Upgrade Now**
    (PS: Subscribers don't see this UGLY banner)
Tips
Tips

TR2/3/3A Mid section repairs

Frank Canale

Jedi Warrior
Silver
Country flag
Offline
I am trying to keep my post a little more organized, tho I am not an organized person. I tend to skip around. These repairs are still on the back of the car but more to the middle.
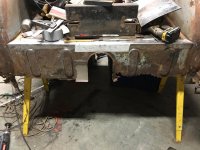
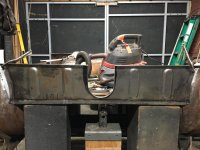
Front of mid section damage.jpg Front vertical panel damage. Started repair and decided to make new panel.
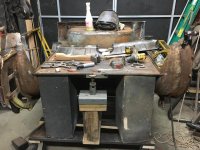
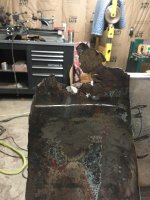
Front mid section vertical panel removed.jpgDamaged panel removed, Car is upside down.
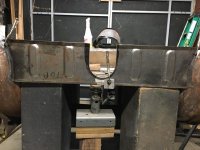
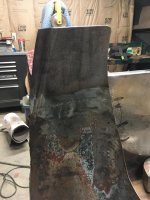
Front mid section repair panel ready to tack.jpgnew hammer formed panel ready to be tacked.
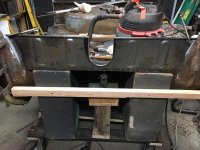
Front mid section repair panel tacked.jpgnew panel tacked ready to be welded.
Front mid section repair panel welded and finished.jpgnew panel welded and weld finished.

On to the front fuel tank support and nuts for the fuel tank straps.
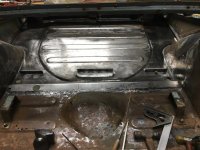
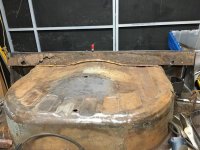
new boot floor.jpgThis shows the damage where the fuel tank support weld to the floor. the square blocks the driver side damage.
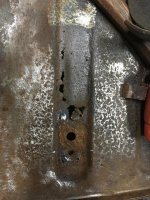
Passenger side fuel tank floor damage, reinforcement removed.jpgPassenger side damage with the reinforcement removed.
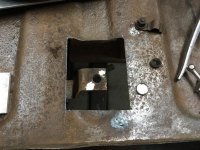
Driver side fuel tank support repair.jpg Driver side floor repair, damaged area removed.
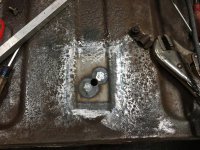
Driver side fuel tank floor repair.jpg Driver side floor repaired and welded to fuel tank support.
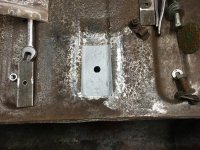
Driver side floor repair zink primer.jpg Repaired area zink primed before reinforcement welded.
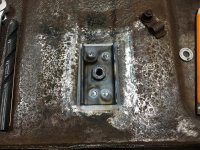
Driver side front fuel tank reinfocement.jpg New reinforcement with original crimp nut, Good as new. Process is same for passenger side.
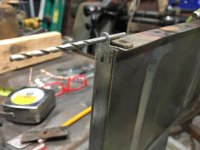
anti rattle tab ready to spot weld.jpg Anti rattle spring tab ready to be spot welded.
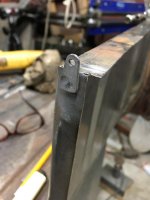
new anti rattle spring tab.jpg Anti rattle spring tab spot welded in place.
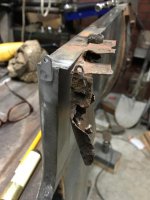
anti rattle spring tab new and old.jpg New and old anti rattle spring tab.
 

sp53

Yoda
Country flag
Offline
Nice work Frank getting the work done is what I like to feel. It looks like you made the piece, wow. Restoration keeps us fit—keep moving--- the car is right behind you.
 
OP
F

Frank Canale

Jedi Warrior
Silver
Country flag
Offline
Thank you, Steve. Yes I made the repair panel and it turned to be the right decision rather than try and do multiple patches. Progress is slow but I am very happy with how it is turning out. Frank
 

charleyf

Luke Skywalker
Country flag
Offline
Hats off to you Frank for undertaking such a monumental job on this car. It reminds me of a car I know of that was taken to a high end restoration shop. The shop told him that he would be better off trying to find a better car to restore as the car was described as "most of the bottom 10 to 12 inches of the body was missing". The car meant something special to the guy. The car got restored and was beautiful. I overheard the shop owner making the remark that he put over 1,000 hours in on that car. That was back when he was charging $80 per hour. So the guy now has an $80,000+(parts) TR3. And he is happy. So happy is what really counts.
Frank your work is beautiful and hacks like me are really envious of your talent and patience.
 
OP
F

Frank Canale

Jedi Warrior
Silver
Country flag
Offline
Thank you for the kind words. This is a labor of love. I love the car and I definitely love the challenge to bring this car back with all the emotional highs and lows that metal working brings. I learn something with every piece I repair and every part I make. There is the added benefit to the friendships formed on the forum. I have no idea how many hours I have in it so far or how many it will take to complete this project. John brought his back and his work has been a tremendous help that I reference as I work on my car. My goal is to finish this project and not get discouraged as a lot of people do and end up selling an unfinished car. That would be the worst, lost money spent on project, lost labor , and no car. I stay positive in hopes of having a fun beautiful car some day. Frank
 

Jim_Stevens

Jedi Warrior
Gold
Country flag
Offline
Hats off to you Frank for undertaking such a monumental job on this car. It reminds me of a car I know of that was taken to a high end restoration shop. The shop told him that he would be better off trying to find a better car to restore as the car was described as "most of the bottom 10 to 12 inches of the body was missing". The car meant something special to the guy. The car got restored and was beautiful. I overheard the shop owner making the remark that he put over 1,000 hours in on that car. That was back when he was charging $80 per hour. So the guy now has an $80,000+(parts) TR3. And he is happy. So happy is what really counts.
Frank your work is beautiful and hacks like me are really envious of your talent and patience.
Boy, THAT sounds familiar!
 

DavidApp

Yoda
Gold
Country flag
Offline
Looking at the first photo I thought Where is the rest of the car?

You have taken on a monumental challenge there. The new panel looks great. I need to try to get my hand in TIG welding. So far it has not been to successful.

Following along with interest.

David
 
OP
F

Frank Canale

Jedi Warrior
Silver
Country flag
Offline
I guess I should have mentioned that my car did not have much holding it together so yes it is in two sections. The chassis has been repaired and is my foundation to putting it all back together. The chassis is back to factory drawing specifications.The front is on the chassis but I need to work on the driver side body mounts and will probably move back to it in order to take a brake from the back section. The best videos to help with your welding , both welder setup and techniques is Jody on welding tips and tricks. He has the best thru the lens view as to what it should look like while he is welding. Frank


www.weldingtipsandtricks.com


CJD

Yoda
Country flag
Offline
Frank, you are much more organized than you give yourself credit for. Still love the way you are hammering out panels better than British Heritage!
 
OP
F

Frank Canale

Jedi Warrior
Silver
Country flag
Offline
Wow! Thank you for the complement.I owe a lot to you and Lionel. My car was in worse shape than I bought when I started on it, but reading thru the documentation of your journey and seeing a finished beautiful car has kept me going. Seeing Lionels incredible rear apron and wings showed me that it can be done by amateurs in there home shops with ordinary tools. Frank
 

CJD

Yoda
Country flag
Offline
By far the rear section is the most complicated to work on. I think you are almost to the point where repairs start to move much faster. It won't be long before you see the end of the project in your windscreen!
 

M_Pied_Lourd

Darth Vader
Country flag
Offline
Really looking great Frank.

Cheers,
Tush
 
OP
F

Frank Canale

Jedi Warrior
Silver
Country flag
Offline
Thank you, Tush. Winter weather may have brought the rear of the car repairs to a halt . I think I could get the rear closing area sand blasted but to get the back half warm enough to paint and keep it at temperature would be difficult. The driver side inner wing has already been repaired, so I finished up the passenger side.

Passenger inner wing with damage.jpgBottom of the rear inner wing.

Passenger rear inner wing after repair.jpgrear inner wing after repair

There was not much left of the bottom of the inner wings. sheetmetal patches sealed with tar and pop rivets is the kind of stuff that makes me shake my head but I guess the PO did the best he could. I am looking forward to transitioning back to the front and continue work on that . Frank
 

M_Pied_Lourd

Darth Vader
Country flag
Offline
I hear you Frank, I’m struggling up here as well with temperature at the moment...I need to paint but it’s -20 outside ��

Cheers,
Tush
 

Graham H

Jedi Warrior
Country flag
Offline
Wow -20 we are at the other end down here +42c on Friday a bit cooler today forcast 33 overcast and humid. I found the best temp for painting was 26 and dry usually first thing in the morning.

Graham
 
OP
F

Frank Canale

Jedi Warrior
Silver
Country flag
Offline
Pretty cold in the shop last few days so not a lot of progress. The sheetmetal parts are the last to warm up so hands don't warm up either. These closing panels were made a few months ago and just now getting to start final fitting.
original lower rear closing panel.jpgoriginal lower rear closing panel.
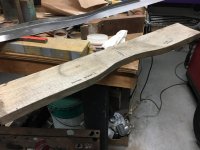
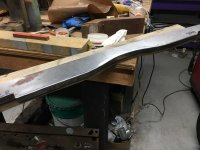
lower closing panel form.jpgHammer form for the lower rear closing panel. I made a template that matched the spare tire pan. used it to make a hammer form out of a piece of oak from an old shipping pallet.
lower closing panel flanges formed.jpg clamp the sheet metal to the hammer form and start forming the flanges. The curved flange takes a little time as that flange has to be shrunk as it is formed. The 90 degree flanges are pretty easy , you have to pay attention on this panel because flanges go in different directions so it is marked on the hammer form so I don't get confused.
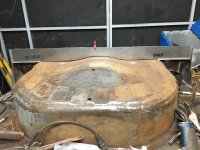
lower closing panel fitted.jpglower rear closing panel in place. I am very happy with this panel as it fits the spare tire pan and is under no stress to hold it in place. Once the closing panels are all fitted this will have to wait so the inside of this area can be sand blasted and primed before all the panels are spot welded, closing in this area for ever and ever. Frank
 
Last edited:
Similar threads
Thread starter Title Forum Replies Date
SteveTheBrewer Spitfire Project Tanker Mid-Summer Update Triumph 0
S Spridget Mountain Driving Tour : Mid-Atlantic Spridgets 8
H VMD at Mid Ohio British Motorbikes 0
Dave Richards MId Winter Jaunt Austin Healey 7
A SCCA OVR Autumn Classic from Mid-Ohio Racing 3
A SCCA races from mid ohio Racing 4
A SCCA Majors 30-May thru 1-Jun Mid Ohio Racing 4
Michael Oritt SVRA Mid-Ohio Racing 1
C V8 Healeys in the mid 1960s Austin Healey 7
Z TVR Tuscan Spin Mid Ohio 2012 Racing 0
Got_All_4 Mid Ohio vintage race weekend Triumph day 6/23/12 Triumph 0
Z Mid Ohio TVR / Watkins Glen GT40 Racing 15
apbos TR2/3/3A Ok you mid-west guys here is a $100 TR3 Triumph 3
Trevor Jessie Decent buy in the Mid-Atlantic on early Midget Spridgets 11
angelfj1 Mid Rise Pad Lift Restoration & Tools 3
B mid-lift jack advice requested Restoration & Tools 2
Michael Oritt SVRA Mid-Ohio Grand Prix Racing 3
VelodromeRacer Rain+Bugeye+Mid Ohio Racing 2
D Photos from mid-50's Jaguar 1
M Just returned from Mid Tenn AH Show Spridgets 6
VelodromeRacer Mid-Ohio Group 1 race from bugeye Racing 9
VelodromeRacer Sprite Feature race/Mid-Ohio Racing 3
G Changing Horses in Mid Stream.... Triumph 47
H What mods can be done - mid 60's sprite Racing 5
S SCCA results from Vineland and Mid-America Racing 0
tomshobby What to use for exhaust mid pipes? Triumph 10
P Mid-Life Crisis? Spridgets 16
pa297pass Could this be considered a mid-life crisis? Triumph 18
R Mid seventies miget Spridgets 9
jerryrosa A Mid-Winter's Day Rant MG 31
S Sports Car Forum at SVRA''s Mid-Ohio Vintage GP Sunbeam (Rootes) 5
R Mid engined Jaguar Jaguar 19
J Suspension Repair in Mid-west Sunbeam (Rootes) 4
J Will the New F type Jaguar be mid engined or front engined..the last report was..... Jaguar 2
C Mid engine F-Type ? Jaguar 5
J Wanted MGA Coupe rear window glass center section MG Classifieds 0
R TR2/3/3A Leaking O.D. section of Transmission Triumph 43
B Wanted I need a small section of a bugeye bonnet Spridgets Classified 5
BJ8Healeys For Sale Midget/Sprite nose section - used [Moss Motors P/N 455-145] Spridgets Classified 0
vette To Johnny who has posted an Article in the Articles Section about his German Exported Austin Healey 9
S TR2/3/3A Aluminum tail pipe section Triumph 3
TomMull I posted this in the "other cars" section by mistake Other British Cars 5
H Third Member - Differential - Carrier Housing - Center Section - Gear Set Cleaning Spridgets 4
abarth69 Should I remove this section Spridgets 8
A Chassis front 'H-section' Mk1 Spridgets 5
Boink Portland ABFM Bugeye section... Spridgets 4
jfarris TR2/3/3A Wanted - TR3 Monza Muffler - Rear Section Only Triumph 1
J Protecting new wiring harness under car section-Use clear shrink tubing? Austin Healey 4
PHerder ? about the rear section of the cockpit on a 1966 Sprite MkIII Spridgets 9
DNK Posted this in the TR section Racing 0

Similar threads

Top