• The Roadster Factory Recovery Fund - Friends, as you may have heard, The Roadster Factory, a respected British Car Parts business in PA, suffered a total loss in a fire on Christmas Day. Read about it, discuss or ask questions >> HERE. The Triumph Register of America is sponsoring a fund raiser to help TRF get back on their feet. If you can help, vist >> their GoFundMe page.
  • Hey there Guest!
    If you enjoy BCF and find our forum a useful resource, if you appreciate not having ads pop up all over the place and you want to ensure we can stay online - Please consider supporting with an "optional" low-cost annual subscription.
    **Upgrade Now**
    (PS: Subscribers don't see this UGLY banner)
Tips
Tips

TR2/3/3A front Apron fitting

Dr_Mike

Jedi Hopeful
Country flag
Offline
Body work was originally assembled on a different frame (which was foolishly discarded for other reasons and has been the cause of much extra work!). It is all painted.
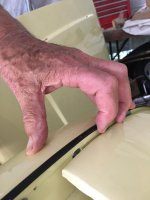
The wings are on (less one bolt with is persistently out of place), but the apron sits at least a quarter of an inch lower than the wings. I can see no reason for this unless the inner wheel well is a bit out of shape and the crosspiece sits too low. The only solution I can see is to bolt the apron to the fenders so they are flush and then ream out the holes for the bolts that attach the crosspiece to the inner wheel well and bolt them up tight--very tight! The bonnet should be flush too if the apron is correct.

Any suggestions or comments are very welcome

If possible I will get some pics and post them before I start.

Afterthought. Would extra packing under the front body mount ( on the front crosspiece) raise the apron? I could loosen it easily enough to see if it sprang up. Ah the fiddling!
 

Attachments

  • IMG_1515.jpg
    IMG_1515.jpg
    42.1 KB · Views: 90
Last edited:

charleyf

Luke Skywalker
Country flag
Offline
Dr. Mike,
I am currently working on pretty much the same issue. I am working on a "basket case " car that came in pieces. Much of the body sheet metal has been replaced with used from other cars. So it is basically a diverse set of parts. I have determined that what counts is getting the exterior of the body to fit and look correct. I have been able to get the fenders, apron and bonnet to fit together and look reasonably good. What does not fit is the cross piece under the rear portion of the apron. I looked at some of the possibilities that you mention and decided that changing the mounting of the inner fenders to the frame would not alter the situation at the top to my advantage. So I am currently undertaking adapting the brackets that hold the cross piece under the apron to fit the apron. On one side I determined that I needed to raise the bracket about 5/8". So I made up a extender /splint to make up the difference in height. I am still working on the passenger side where the bracket and cross piece miss each other by 1/8" in the forward position and the holes in the cross piece do not match the bracket holes but do match the holes all of the way across that cross piece. I am luckier than you as my car is still unpainted. I decided to make sure the panels matched up before proceeding with any painting.
 

sp53

Yoda
Country flag
Offline
A couple of things I would mention are the fit of the front fenders at the door A post and the 3 bolts on the bottom of the fender. I suggest a sequence of bolting the fender and do not worry about those 4 bolts on the apron until the fender is bolted at the bottom and A post because the whole nose will move. For the sequence, I put the top bolt in the fender at the A post so the front fender is push forward all the way and work down on those bolts then make sure the bottom of the front fender bolts go in a little to help pull the nose down and back. Those 2 places will alter the fit of the nose of the car a lot. Plus the fenders need to be loose to get apron in with the beading. A couple of dry fits with the beading not in place gives a clearer picture of the actual angle of the nose of the car and the alignment of those 4 bolts through the tie piece. And yes I have had to slot those 4 bolts before especially if the car has been damaged or you are using a post 60K fender on an early car and the opposite is also true. In addition, I have left the tie piece completely off before and bolted the fender to the apron to see where it did not fit. Moreover, it can be A Real Pain just showing what I have done in the pas!t
 

CJD

Yoda
Country flag
Offline
If you follow my saga, you will see that I had to re-locate the apron cross brace mounts to make everything line up. And that was on a car that all the parts were originally on.

Before altering the cross brace, though, temporarily fit the bonnet to see how the front and rear gaps look. If they are large, then re-locating the brace is the way to go. If the bonnet gaps for and aft are small, then moving the brace is going to compound the problem.
 

DavidApp

Yoda
Gold
Country flag
Offline
I ended up slotting the holes across the apron so that I could pull the apron down to match the bonnet. The car was all original as far as I know.

Don't know how they would have got it to align before with the holes as they were.

David
 

charleyf

Luke Skywalker
Country flag
Offline
After the trouble you others have had getting an unmolested car back together, I do not feel very bad at all. The car I am working on was in a roll over accident. It apparently did have a roll bar that was bolted to the rear deck behind the seats, not the frame. So that area took a bit of straightening. The car came without a windshield ( I understand why) and I have had to correct some other areas in the body that got "tweaked". If this car comes out looking good, I will almost feel like a magician.
My update is that I used a splice to extend vertically the bracket for the cross piece on the drivers side and then enlarged the holes in the passenger side bracket. Looks like it will all fit now. My big concern is that when I again take the body off of the frame to get it painted the panel alignments will all be off again. Interesting to hear the situation about using a post 60000 fender on early car. Yes I have that situation also. That explains a few things that I was curious about.
Sp53 I appreciate your detailed listing of the order you used to reassemble the car.
 
Similar threads
Thread starter Title Forum Replies Date
M TR2/3/3A Fitting front apron TR3 Triumph 12
mctriumph For Sale front apron 57 Tr3 Triumph Classifieds 0
J TR2/3/3A Front apron position Triumph 9
F TR2/3/3A Tie member[front apron support tube] Triumph 11
R TR2/3/3A Removal of Small Mouth Front Apron Triumph 4
S TR2/3/3A tr3 front apron body work Triumph 9
K TR2/3/3A The "air vent"on the lower part of the front apron below the grille.... Triumph 5
toysrrus TR2/3/3A "WANTED": TR3 Small Mouth Front Apron Medallian Triumph 14
D Front apron panel on BJ8 Austin Healey 4
J TR2/3/3A Hood lift to front apron, what size are the screws that go from bottom up? Triumph 10
J One of you guys had great pictures of front apron Triumph 20
M_Pied_Lourd TR2/3/3A 3A Front Apron Question Triumph 17
B TR2/3/3A Need TR3B front and rear apron, sidescreens Triumph 19
K TR2/3/3A Mounting TR3 Body to frame with front apron on? Triumph 4
M TR2/3/3A TR-3A - Front Apron Medallion Triumph 2
L TR2/3/3A TR3A - Front Apron/Air Duct Triumph 3
L TR2/3/3A TR3A - Front Apron/Bonnet Prop-Assembly Logistics Triumph 4
R TR4/4A TR4A Front lower Apron Triumph 2
luke44 TR2/3/3A TR3A Front Apron - Lower Area Triumph 3
A removing front apron Triumph 10
tlthorne T-Series TD front apron MG 3
T TR2/3/3A TR3 front apron Triumph 6
mountainman TR2/3/3A Tr3 Front Apron Triumph 17
Tinkerman TR2/3/3A TR3A Front Apron Assembly Installation Triumph 1
T TR2/3/3A TR3 front apron removal - tips and suggestions Triumph 11
H TR2/3/3A TR3 Front Apron Removal Help Triumph 26
A TR2/3/3A TR-3 Front Nose Apron Wanted Triumph 4
C Front apron to shroud clearance Austin Healey 21
PeterK TR2/3/3A Just removed the 3A front apron Triumph 23
gsalt57tr3 TR2/3/3A TR2 vs TR3 front apron Triumph 4
56HealeyDan 100-4 Front Crankshaft Seal Austin Healey 2
AngliaGT 1997 Miata - Anyone Have a Picture on How to Mount the Front License Plate Bracket? Other Cars 12
71TR6 TR2/3/3A TR3A Front Bumper Mount Triumph 11
1 TR2/3/3A Rimmer Brothers Replacement Front Wing Quality? Triumph 8
Carlbanan56 MGB Front hub MG 4
F For Sale E Type Series II front and rear bumpers good condition Jaguar Classifieds 0
J MGB Front Wheel Bearings. Re-grease or replace? MG 19
scottkilpatrick TR4/4A Front Brakes - Basics for Pads Triumph 11
C MGB-GT MGB-GT Front Ride Height MG 0
C MGB-GT Front Ride Height MG 0
J For Sale Bilstein Front Shocks for Jaguar E-Type 727-498-6493 Jaguar Classifieds 0
J TR2/3/3A Mystery knocking sounds at front wheel Triumph 11
E Wanted 1963 Healey 300 mark 2 front grille wanted Austin Healey Classifieds 0
K TR2/3/3A Front brake hub removal to access Vertical Link bolts(screws) Attached pictures. Triumph 1
K TR2/3/3A How to remove the front brake hub from the brake disc? Triumph 11
AUSMHLY Front Wheel Spin Drag Austin Healey 6
T TR2/3/3A Looking for a TR3A front bumper Triumph 6
mctriumph TR2/3/3A Front Suspension upgrades for the 59 Triumph 10
vpanza Wanted TR3 FRONT backplates needed Triumph Classifieds 2
K TR2/3/3A Rear tire pressure when there is an anti roll bar at the front of the car? Triumph 1

Similar threads

Top