• The Roadster Factory Recovery Fund - Friends, as you may have heard, The Roadster Factory, a respected British Car Parts business in PA, suffered a total loss in a fire on Christmas Day. Read about it, discuss or ask questions >> HERE. The Triumph Register of America is sponsoring a fund raiser to help TRF get back on their feet. If you can help, vist >> their GoFundMe page.
  • Hey there Guest!
    If you enjoy BCF and find our forum a useful resource, if you appreciate not having ads pop up all over the place and you want to ensure we can stay online - Please consider supporting with an "optional" low-cost annual subscription.
    **Upgrade Now**
    (PS: Subscribers don't see this UGLY banner)
Tips
Tips

GT6 Zero acceleration power / Car’s RPMs surge when you get in it.

UmmYeahOk

Jedi Warrior
Offline
So, I have zero experience with this, so forgive me if the answer is completely obvious to you, but the car had no acceleration. If I floor it, I’m good to get 100-200 more RPMs out of it in neutral. Also, when I get into the car while the engine is running, the cars idle will surge from 600 RPMs to 1200 RPMs, then back down to 600.

Anyone familiar with my experience with this car may know that I was able to drive it to a destination fine, only to have it flood on me, leaving me stranded. I previously had a float issue, so all I did was readjust it a little, and it seems fine.

Dianosing the carbs, I noticed that the carb next to the battery does not suck as much air as the one by the radiator. The only way to match it is to turn the idle screw on the battery side way too high. The radiator side cannot be dialed down because the screw is no longer touching it anyway.
 

dklawson

Yoda
Offline
I feel your pain. Our GT6 is also giving me running problems at this time. Ours are also fuel related.

I suspect that there is still an issue with your car's float level and that the carbs need to go through balancing and mixture tweaking. However, in your other thread Wayne mentioned making sure that all the carb gaskets be placed on in their correct orientation. Make sure there is a hole in the front flange gasket for each hole on the carb's air cleaner flange. (i.e. The gaskets should not be blanking off any holes on the carb flanges.)

Your carbs and mine should be the same, early Stromberg 150CD. The factory manual says to remove and invert the carb with the float bowl removed. The small paddle on the float assembly is bent as needed to set the high point of the big end of the float 18mm above the carb body (with no gasket). Start by making that adjustment for both carbs.

The nominal "start" position for freshly rebuilt carbs is to tighten the jet adjuster screws "up" until the jet is just felt to touch the underside of the carb piston. From that point, back the jet adjuster "out"/"down" three full turns. Paint or Sharpie marks are very helpful with keeping track of this.

Put the carbs on the manifold but do not tighten the linkages between them. On the rear carb you MAY have two idle adjust screws, one near the linkage from the pedal, the other close to the linkage going to the front carb. Loosen both off fully. Now tighten the back adjuster screw until it just touches the carb body. Turn 1-1/2 more full turns in. Don't do anything with the front idle adjuster if present.

On the front carb you should only find one adjusting screw on its front. Adjust it as above... fully out, then in to touch and 1-1/2 more full turns in.

If you have not done so yet, loosen the starter bar linkage like you did the throttle linkage.

This will give you a rough starting position. Start the engine and let it idle for a while until it is warm. Use a flow meter (I never mastered listening to tubing) to measure the airflow into the rear carb then repeat on the front carb. For whichever is reading lower, turn its idle adjust screw in a bit and repeat the airflow measurement. Repeat the airflow measurement and adjustment (adjusting only the one carb) until the airflow in both carbs are equal. Now tighten the linkage between them.

With the linkage tightened, adjust BOTH idle speed screws in or out a equal amounts until you get the idle speed you want. With the idle speed set it is time to check and adjust the mixture. In an ideal world you would make equal adjustments to both carbs to set the mixture. My car is not cooperating with regard to the mixture so I'll stop here and let other correct my steps above and add their own comments on adjusting the mixture.

For those about to post, UmmYeah's car has EARLY 150CD Stromberg carbs. Like HS series SUs, the mixture is adjusted from below with a jet adjusting screw. These carbs do NOT use the adjustable needle that later carbs have.
 

Hoodat

Freshman Member
Country flag
Offline
Another suggestion, as I had similar symptoms several years ago: check the diaphragms in the carbs. I was able to get my GT6+ to run on regular fuel (another story), and I think the alcohol in regular gasoline softened the diaphragms.
HTH,
Hoodat
 

trrdster2000

Luke Skywalker
Country flag
Offline
Doug has it as good as can be explained for a starting point. Hoodat is right on the diaphragms, even if not split, the tabs on the rubber need to be lined up with the depression on the piston and carb body, one for each place. That gets the vacuum points of the piston in the correct position.
Here is what I've found on the fuel mixture. Look at the inner part of the jet, either lifting the piston with the carb on the car or taking the top off and piston out. Adjust the inner part of the jet down below the outside one about 1/16 inch below the surface of the outer one. That gives you the same fuel mixture on both, as wear and tear on these 50 year old parts can give you a fit trying to get a screw in/out adjustment to be the same is impossible.
This is all assuming the needles are the same and someone hasn't screwed around with them. Centering the jet is something we can discuss later and only if your piston doesn't go click when pushed up and let go, do we need to get involved with that. Don't fix what ain't broke.
Umm, if you PM me and give me a time and number you are going to work on the car, I'll try to spend some time with you on the phone, no guarantee, but might help explain what you are looking at. It would be after 3 your time today or anytime this weekend.
 
OP
UmmYeahOk

UmmYeahOk

Jedi Warrior
Offline
As suggested, I raised the jets till the were level/flush and then unscrewed it 3 full turns. I adjusted the idle screw to barely touching, the screwed them in 1.5 turns. I was able to balance them by turning the linkage. Not sure how they became so out of sync. Using the hose listening method, they are more or less balanced now.

Previously not ever mentioned in this thread, a certain member on here who shall remain nameless (for the time being anyway) messed with the diaphragm dashpot area. The carb by the battery had loose screws. They were so loose that I was able to easily notice the piston remaining still while the piston in the carb by the radiator would shake, and not knowing why.

Because of the mentioning of a possible diaphragm issue, I decided to check both. This made sense, as I was sure that I, at least, had some power, which quickly was lost completely while running it with loose screws. The one by the radiator looked fine, but the one by the battery which had loose screws was out of alignment. I don’t know if that was like that before messing with it though, as I may have accidentally spun it myself while removing the inner piston screws, not the nameless other person.

Aligning the diaphragms, screwing down everything, and balancing I now have power, though not optimum. In neutral, pedal to the floor, I can only get about 2200 RPMs out of it, but at least it does something finally. This is, of course, after I tighten up the jet several quarter turns on both. I noticed the carb by the battery had its jet lightly covered in gas after this. Should I have screwed them down, not up?

The car also still surges when I get in it. I feel that if I can figure out why a suddenly weight change can cause that, I may have my answer.
 

trrdster2000

Luke Skywalker
Country flag
Offline
Umm, You are not going to like what I'm about to say. If you see gas in the jet, your needle and seat are leaking or out of adjustment, meaning the float if too high as a possibility. It gets confusing when I say too high because you have the carb upside down when making the adjustment. I'm going with needle and seat not doing it's job. If your fuel pump has the primer handle and you take the float bowl off, lightly push up on the float while hubby uses the lever on the pump. If gas comes by the needle then there is one of the big problems. Of course if you push the float up hard by hand it will stop the flow, but that doesn't happen with the small quantity of fluid in the bowl, so a good needle and seat is essential.
Other than that, sure sounds like you are on your way to getting them right. Good job.
 

dklawson

Yoda
Offline
This is a footnote regarding balancing. As I mentioned, I have never been able to balance with the tube to the ear. If you have trouble doing this by ear and don't have (or want) a flow meter there is another option that you can even make at home from bent coat hangers. See the link below:
https://thosbryant.wordpress.com/2015/10/04/su-carburetor-tuning/

Basically you remove the screw in dampers from the top of each carb and insert the pieces of coat hanger bent into "L" shapes. Align the horizontal part of the "L"s so they are pointing at each other and level with each other (point to point at the tips of the wires and colinear if possible). Now start the engine. The carb that is flowing less air will have the tip of its wire "lower" than the wire in the other carb. Turn the low carb's linkage until the tips of the wires are once again point-to-point and tighten the linkage between the carbs.

The height of the carb pistons is an indication of the amount of air flow. When the tips of the "L" wires are point to point the pistons are at the same height and therefore the airflow is more or less equal. Again, it's just an alternative to listening tubes and flow meters.

UmmYeah, hang in there. I am currently trying to sort out problems with our GT6's carbs. I believe we are also having problems with at least one of the float valves as Wayne suggested. I am going to be doing some carb bench testing over the next week to try and sort out our problem. It sounds like you have already made significant progress on your car. Keep us posted.
 
OP
UmmYeahOk

UmmYeahOk

Jedi Warrior
Offline
Well I decided to take a look at it again, thinking that the only thing I haven’t tried was screwing the jet down the other way. (I said that I had screwed it up, but today noticed that causes the needle to get lower) When I began to attempt this, I noticed that the piston was stuck. It could go up, but wouldn’t fall down all the way. This is the battery side carb that had loose screws, and such. So I unscrewed the top and the piston falls back down. I then noticed a piece missing from the diaphragm. I don’t believe it was like that or even damaged slightly when I first took a look at it. I guess I’m stuck until I can get a new one.

Update:

Where do I go about getting a new diaphragm for a 150 CD zenith Stromberg carb? Like the floats, all I can find are for the Mk2 and 3s
 

Attachments

  • 15524DAD-9B35-4C37-B623-30B8011FB1DF.jpg
    15524DAD-9B35-4C37-B623-30B8011FB1DF.jpg
    61.6 KB · Views: 62

trrdster2000

Luke Skywalker
Country flag
Offline
The 150 diaphragms will work from any of the carbs. All have the tabs that fit in the slots.
Good find, may solve at least some of the problems.
 
Last edited:

dklawson

Yoda
Offline
Sorry: Extremely lengthy post to follow. Most of it covers carb adjustments for the early carbs. If I could find a succinct summary online I would have posted a link instead. I considered a PM to UmmYeal but this information may prove useful to others someday.

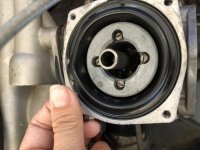
UmmYeah, I only recently saw that there is supposed to be a difference between the early 150CD diaphragms and those used in the later carbs. Like Wayne says, the later diaphragms will fit the early carbs. Just get diaphragms for 150CD carbs from a good source. You may pay more but give Joe Curto a call and he can supply what you need and the parts will be high quality. I assume Joe can also provide the three o-rings needed during the carb rebuild. From the picture I assume this is yet another place the local shop cut corners or didn't know what needed to be done. Some of the steps below wouldn't normally be necessary since your carbs were just serviced but I have questions about what that local shop may or may not have done.

I didn't really want to go on and on about the tuning of the 150CD carbs but it may be necessary. The problem you experienced with the sticking carb will have to be addressed when you get the replacement diaphragms.

Let's start with the basics.
Take the carbs off the car and separate them from each other (disconnect the linkages).
Remove their float bowls.
Use a wrench to remove the big brass hex body that is normally below the float bowl.
Remove the jet, jet bushing, spring, aluminum washer, and brass washer that the brass hex body was holding in place.
Inspect the hole in the center of the jet. It should be 0.090" in diameter, its hole should NOT appear oval. You may get some measurements with vernier calipers but checking the inside diameter with pin gauges would be better (but who has them at home?).
If the hole in the jet is at all oval, has any raised burrs or apparent scratches... replace the jets and needles with new. (again... Joe Curto).

Remove the 4 screws that hold the suction chamber (top of carb) onto the body.
Remove the suction chamber, the spring, and the air piston with the diaphragm.
Look at the needle. Is its shoulder flush with the underside of the piston? If not, loosen the screw on the side of the piston's bottom and adjust the needle until its shoulder is flush then retighten the screw. (A small steel ruler can be helpful to make sure the needle shoulder is flush with the bottom of the piston).
At the other end of the piston, remove the four Fillister head screws that secure the collar holding the diaphragm in place.
Remove the collar and the diaphragm.
Clean the carb body, air piston, and suction chamber if they are not already clean.
Look at the picture linked below, then look at your carbs' diaphragm and the top of the piston.
http://images.lotuselan.net/lel/55381/1/diaphragm.jpg
NOTE THE TABS on the diaphragm. You will find mating recessed slots on both the carb body and the top of the air piston.
Put a diaphragm on the air piston so the tab goes into the slot on the piston.
Refit the collar and four Fillister head screws and tighten the screws.
Place the piston back in the carb body making sure to align the diaphragm's remaining tab with the corresponding recessed slot at the top of the carb body.
Place the carb spring in the air piston.
Spray a little WD-40 on the center of the air piston and the hole in the center of the suction chamber.
Refit the suction chamber and its four securing screws. Tighten the screws.
Do NOT fit the damper back to the carb yet. Remove it if already installed.

Continue with the next steps to center the jet.
Lubricate and place a new o-ring in the jet bushing.
Refit the jet components to the carb body in the following order: Aluminum washer, jet bushing with o-ring, brass washer, heavy spring, jet, hex body (with lubed new o-ring installed), jet adjusting screw (with new lubed o-ring installed).
Tighten the hex body until it is fully seated then back it out 1 turn.
Tighten the jet adjusting screw (the sort of knurled brass knob on the bottom of the carb) all the way in or at least until you see the tip of the jet above the bridge (flat surface in the carb throat).
Hold the carb in its normal upright orientation. Remove the damper if installed.
Lift the air piston using your finger through the carb throat.
Drop the piston. It should fall to the bridge with a click. If it doesn't, lift and drop the air piston over and over again until it does fall sharply with a click.
Once the piston seems to be falling sharply to the bottom, use a wrench to start tightening the brass hex body.
Tighten the hex by one wrench flat at a time and each time repeat the piston lifting and dropping. Keep this up until the hex has been fully tightened AND the piston continues to fall sharply to the bridge. You may have to repeat this a couple of times to get the hang of it.

The jet is now centered and it is secured by your tightening of the hex.
Back the jet adjusting screw "down"/ "out" until the jet is just flush with the bridge (use a straight edge like a small stainless ruler to make sure it is flush).
At this point I make small paint marks to indicate the position of the jet adjusting screw relative to the hex body. This is clearly optional but it helps me keep track of turns during adjustment.
The factory manual says that from this position you should back the jet adjusting screw down/out 3 complete turns.
You can now refit the damper but wait to fill the piston with oil until the carbs are installed on the car.

The steps above will have assured that:
1) The jet and needle are OK (not worn oval, no burrs, no scratches).
2) The needle is correctly positioned on/in the air piston (needle shoulder flush with the piston bottom).
3) The diaphragm is correctly oriented with the carb body and the air piston (the tabs and recessed slots are aligned).
4) The jet is centered (the lifting and dropping of the piston results in a sharp click).
5) The jet has been adjusted down to the initial "start the engine" position from which the mixture can/must be tuned.

That's enough for one post. We can talk about the rest of the tuning sequence later. Again, I recommend Joe Curto for the parts.
 

poolboy

Yoda
Country flag
Offline
I don't think Joe will charge you any more than anyone else and I doubt you'll find anyone who charges less for shipping.
 

dklawson

Yoda
Offline
Agreed. I have never compared Joe's prices to other vendors. Regardless, I trust him to only sell quality parts.
 
OP
UmmYeahOk

UmmYeahOk

Jedi Warrior
Offline
Pick up the phone and call Joe...tell him what you want.
http://joecurto.com/contact

You mean this handheld device that I’m viewing this forum on? It can make calls? How retro! Gonna hafta try this!

I considered a PM to UmmYeal but this information may prove useful to others someday.

Thanks a bunch, really appreciate it. I post stuff all the time for future readers. Search engines spider crawl everything. I’m still finding 20yo posts/websites for various topics. There may be a time when all of us are gone, and the only way for future generations to keep these cars alive are posts like this. ...so Basil, no pressure, but keep these servers going!

I don't think Joe will charge you any more than anyone else and I doubt you'll find anyone who charges less for shipping.

found this:
https://www.bpnorthwest.com/diaphragm-zenith-stromberg-cd150-carbs-high-quality-german-made.html
shipping is like $12-15 for a $3 part, but that’s probably the same for all these places sadly, even joe, but I haven’t yet attempted this repeated suggestion.
 

dklawson

Yoda
Offline
I buy some parts from BPNW. Yes, they sell their carb diaphragms inexpensively. However, with the work involved in replacement do you want to assume the cheap one is OK? Joe's 150CD diaphragms are $5.50 but he also states that they are made in the USA. (I ordered some within the past month).

Before buying any parts be sure to inspect the needles, jets, and the float valves. Replace those if suspect.

I recommend buying the additional items below as you prepare for this rebuild.

Bowl gaskets. Like the floats, these are unique to the early carbs. It's good to have new ones for a rebuild and a couple of spares. Not all vendors have them. Joe does. Be sure to let him know you have early 150CDs and need the gaskets with the tabs.
You may want some of the mounting and air filter flange gaskets. I typically cut my own from gasket paper but you may want to save that time by buying some.
New O-rings. There are three o-rings that typically should be replaced. You do not need to buy a $50 kit to get them. These are inch sized o-rings that you can buy at most car parts stores, hardware stores and industrial supply houses. Inch o-rings conform to an industry standard called "AS568A". The o-rings start with the AS568A prefix followed by a "dash" and three digits. The three digits specify the size. For these carbs you want:
AS568A-114 for the hex body, AS568A-011 for the jet adjusting screw, and AS568A-010 for the inside of the jet bushing. The common material is Buna-N (aka Nitrile). That will work fine. However, ask the clerk if they are available in Viton which is a little more chemical and heat resistant. If the clerk cannot handle the AS568A part numbers... visit McMaster.com online, search for o-rings, and select the dash numbers above. The resulting screens will tell you the nominal and actual size of the o-rings.

I typically don't buy rebuild kits since they have a bunch of gaskets I don't use and they often do NOT include items like float valves, jets and needles that I may want.
 

trrdster2000

Luke Skywalker
Country flag
Offline
Doug, great write up and should give Umm the tools to get her carbs in proper working order.
Don't know if anything needs to be added on the rebuild other that the linkage. You need to make sure the movement of one is mirrored by the other.
No play in the shafts or the clamps at the rear couplings. Not as easy as it sounds.
 

trrdster2000

Luke Skywalker
Country flag
Offline
Ummm, Did some work on the carbs and getting the linkage where I could get full throttle. not a easy task with cable operated pedal. What I did discover was a reason I couldn't get the idle down when I first got the car. I did have the next generation carb with the vacuum hole on the back of the facing. The gaskets listed for the purpose on the early ones are used in many cases and they just don't cover the slot in the insulator. Close but no cigar.CIMG0440.jpg So if you are in there have a look to make sure the right gasket is installed.
I use one for the front, between the filter case and carb. Turned the right way it does the job.

Wayne
 
OP
UmmYeahOk

UmmYeahOk

Jedi Warrior
Offline
So I made my own L shaped coat hanger bits to align with, and I tried testing them out with the damaged diaphragm and couldn’t get the damaged one to raise much higher to match the other carb. I got a replacement diaphragm, installed it, and got that carb to actually sound better than before (using the tube hearing method), but when I try to pull the damper out, to use the coat hanger, the engine dies. Even with the engine warmed up, it will die every time. I can remove the one out of the carb on the radiator side, and it doesn’t mind at all. What gives? I also noticed the new diaphragm feels thicker/sturdier than the “older” one. Not sure if that matters. Car also still surges when I get in it.
 
Similar threads
Thread starter Title Forum Replies Date
2 TR2/3/3A Can't get zero on speedometer 60K tr3A Triumph 6
J Zero oil pressure at 4000 RPM Austin Healey 24
K Zero oil pressure Austin Healey 36
Bob Claffie Tiger project , phaze zero Sunbeam (Rootes) 17
H POR-15 is BAD use Zero-Rust instead Triumph 60
4aKen zero to 60 Triumph 6
Mark_Barton Oil Pressure Gauge not returning to zero Triumph 11
H Loss of Power Upon Acceleration Austin Healey 8
J MGB 73 getting loud squeal with acceleration MG 11
D Acceleration Problem Austin Healey 4
P TR2/3/3A Hesitation on acceleration, wants to stall at corners Triumph 5
D Acceleration problem. Austin Healey 15
J TR6 Chirp or squeak on acceleration Triumph 11
M TR2/3/3A Engine rough on acceleration Triumph 19
GTP1960 TR2/3/3A Hesitation during acceleration Triumph 13
KVH General TR Power Issue on Acceleration Triumph 13
J TR2/3/3A TR3a stalls on hard acceleration Triumph 4
JAV stumbling on acceleration Austin Healey 14
T power under acceleration Austin Healey 15
bighealeysource BN2 missing on acceleration Austin Healey 11
W pops out of second gear on acceleration Austin Healey 12
R Sprite misses during acceleration Spridgets 7
Rob Glasgow Stumble on Acceleration Austin Healey 28
D Carburetor Backfire on acceleration at low speed Austin Healey 18
D Acceleration problem Austin Healey 4
Jim_Newman Unintended acceleration Austin Healey 3
R TR4/4A tr4a irs clunking rear end on fast acceleration Triumph 7
blackdog in gear acceleration Austin Healey 2
Stewart Machine gunning on acceleration, loss of spark MG 8
JPSmit Always something - acceleration question Spridgets 6
D Acceleration and Hot Start Issues Spridgets 7
S car veers on acceleration Austin Healey 5
Tim Tucker Running Lean after hard acceleration... Triumph 7
emann miss under acceleration after warming Spridgets 9
Baz Acceleration.. Spridgets 14
Aldwyn Hesitation at Acceleration Triumph 21
M Acceleration Fixed MG 1
A Acceleration issue Triumph 5
A Poor acceleration when hot Triumph 5
Webb Sledge Coughing Under Acceleration Triumph 4
KLUTZ Wedge TR7- Spitting & Caughing at quick acceleration ?? Triumph 9
C Stumble in acceleration... easy fix? Triumph 11
C Hesitation under acceleration and at 3k? Triumph 8
T USB and Auxiliary Power Connections Austin Healey 6
RJS TR4/4A Power (+) Sources Triumph 7
Guido36 Electric Power Steering Austin Healey 2
Racer-X- Frame mounted power brake pedal/booster/master cylinder kits for RHD cars? Restoration & Tools 1
Eeffoc TR4/4A Out of the blue - started to loose power Triumph 17
C Wanted 1970 XKE power steering pump. Or substitute? Jaguar Classifieds 1
JPSmit Power Pack Restoration & Tools 9

Similar threads

Top