• The Roadster Factory Recovery Fund - Friends, as you may have heard, The Roadster Factory, a respected British Car Parts business in PA, suffered a total loss in a fire on Christmas Day. Read about it, discuss or ask questions >> HERE. The Triumph Register of America is sponsoring a fund raiser to help TRF get back on their feet. If you can help, vist >> their GoFundMe page.
  • Hey there Guest!
    If you enjoy BCF and find our forum a useful resource, if you appreciate not having ads pop up all over the place and you want to ensure we can stay online - Please consider supporting with an "optional" low-cost annual subscription.
    **Upgrade Now**
    (PS: Subscribers don't see this UGLY banner)
Tips
Tips

TR2/3/3A painting the body tub “inside”

sp53

Yoda
Country flag
Offline
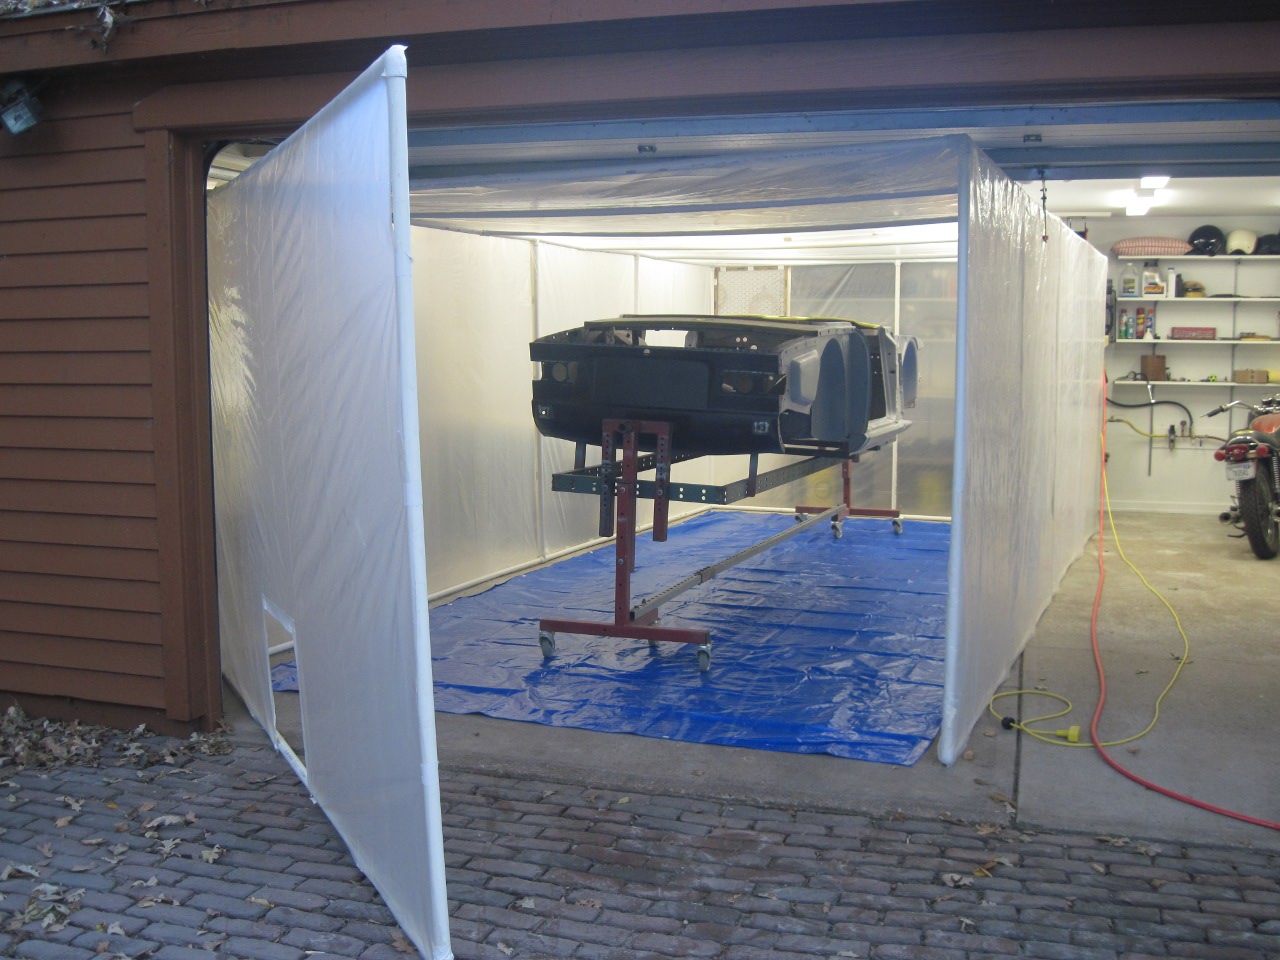
Well I am going to put some gray regular primer over the epoxy primmer on the body tub “inside” the one room garage with a vaulted ceiling that is attached to the house. I hope the smell and fumes are not too much, for I might be moving when my wife finds out. Anyways the guys at the shop wanted me to sand the car with 150 and scuff up the epoxy, so I am doing that, and it sounds like I did not really need the epoxy after all, but they were happy to sell it to me, so again I am not sure about these guys, But I did ask them for the epoxy because I wanted to sound like I knew something. Now I guess they are going to discontinue the epoxy because of the expense. They did say it will seal the underside good, so maybe the $$$$ is not for not.

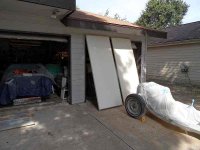
When I am done sanding, I was going to wipe the car with damp paper towels and then wipe with some dry. I wrapped the one car garage with plastic and plan to primmer soon. I purchased throw away respirator and a cheap paint suit and plan to just kinda go for it, so if anyone has some suggestions, I need them. I was thinking about putting a draw fan in to pull air out, but maybe I can just paint quickly and get out. One concern I have is that paint spry is going to be too dense in the small garage, but I am thinking one coat at time and it is just the tub then see the imperfections and fix those. Then later do the fenders and stuff one at a time with the car out.

steve
 

CJD

Yoda
Country flag
Offline
I used to do all my painting in the sealed garage, with plastic and fans and all that stuff. As you foresee, vision AND breathing are issues when you spray in a closed area. Also not great for your compressor...assuming it's trying to breath the same air in the garage. (I honestly used to wonder at what point the compressor would ignite the paint fumes.)

I eventually got tired of having every tool I owned covered with paint overspray. I now do 90% of my spraying in the driveway...outside of the garage. You have to spray on a day that the wind cooperates, and you have to plan around the daily "bug" routines. It's not perfect, but it works until I can afford to build a shop with a real paint booth in it.

The results speak for themselves...the only flaw in this driveway paint job is when I hit it with our other car door while it was still soft...


trrdster2000

Luke Skywalker
Country flag
Offline
What John said, especially for just primer, maybe in the garage for the final with the door mostly open and wet the floors in the garage and outside. Have the car on jack stands or a jack to ground it, helps static dust off.

Wayne
 

mallard

Luke Skywalker
Country flag
Offline
You may use water and paper to get the sanding dust off the car but don't stop there. You need to find a paint prep cleaner and lint free towels to do the final clean. The water and paper will leave to much crap behind. I myself would not use the water and paper at all, just the proper paint prep and lint free towels. Before I did any of that I would use compressed air to remove all the sanding dust trapped in nooks and crevices that will come out when you spray the car. I also would not go cheap on your health meaning cheap respirator. You will need it again later when you prime all the bolt on parts. and then do the final painting.
 

ed_h

Jedi Hopeful
Country flag
Offline
I did my epoxy primer outside on a calm day, but for the color coat on the tub, I built a temporary spray booth with a box fan to draw air out. It worked really well to keep the air clear.

Ed

IMG_0789a.JPG
 
Country flag
Offline
For spraying the tub, push it out side. I use epoxy primer on everything. I just sprayed the A/H tub this week. Did epoxy primer, let it sit for 30 and then put down color. You don't have to sand between coats. Finish coat, many layers of primer then color. Which all can be done outside, then take to paint shop and let them do finish coat.

Marvimage.jpg
 

PeterK

Yoda
Offline
You could always get a cheap screen house and paint in it outside. I picked up a 10x13 on clearance for ~$20 but haven't tried it yet. And also I agree on the best respirator to protect your lungs. New paints can get nasty if you inhale them and they harden in your lungs.
 

trrdster2000

Luke Skywalker
Country flag
Offline
No one has mentioned a tack cloth yet, my favorite tool when painting. It will remove lots of dust before you start. Just don't apply much pressure or it will leave a sticky film.

Wayne
 
OP
S

sp53

Yoda
Country flag
Offline
I am probably going with painting inside because of moving the car around and keeping the car up 3 feet, so I do not have to bend too low and can get underneath a little. I went and got some of those towels and cleaner Keith suggested, and know he is correct with this stuff, but my distress is I am cheap and figured the stuff was alcohol or turpentine or some mix of something that I could buy much cheaper, and I was save with water. Plus I went out and blew a bunch of air in those tight spots, and that was a good idea also. Tomorrow, I will keep after the tub with the cleaner and try and get closer to primmer and post some pictures.

Wayne I like the idea of stopping and static charge and those tack rags sound smart. Ed that is the quintessential paint booth; Mine is more utilitarian with 16 foot 5/4 x2 trim boards and lath pinching in the plastic-- then sitting on plywood hangers that I roll up and down. John has got me thinking about my last days on earth and the explosion. Marv and Peter have me back outside which is a good idea, but I do not have the help to move stuff around. I like Peter’s ideas with the screens. I kinda do that now, but after assembling the car the pieces are getting too big.. Marv is correct about having it done after the bulk work, but the painting has become personal. This car is fitting back and giving in sometimes plus the car has become a projection of my limited skills and I cannot let if off the hook so easy.
 
Last edited:

CJD

Yoda
Country flag
Offline
Definitely don't use turpentine for cleaning! Anything oil based like that or Kerosene or mineral spirits or the like will leave fish-eye's when you spray. Water will clean, but unless you are using a water based paint, you have to wait quite a while to make sure the water has evaporated. Any cravaces that water is trapped in will not take the paint and you end up with a "bubble".

When I clean for the prep work, I use the cheap (although it's hard to call it cheap anymore) laquer thinner from walmart/lowes/etc. The laquer thinner is very fast drying, regardless of the humidity. It is also the base for most color base coats these days, so no chance of fish-eyes or bubbling. Like I said, unless you are in an area that has forced water based paint on you.
 
OP
S

sp53

Yoda
Country flag
Offline
I did not mean to put Keith on the spot. I took his advice and purchased some lint free towels and the product the auto body store sells for cleaning in between coats. They called it wax and grease remover. I am sure it is fine it evaporates fast and cleans well.
 

TexasKnucklehead

Jedi Knight
Country flag
Offline
I painted my tub in my 2 car garage with the doors open and a couple panels set against the opening to keep large bugs from flying in. I added an exhaust fan to pull air from the front, and out the rear of the garage. I used tack cloths to wipe down before painting and avoided any other chemicals not purchased from the paint shop (aside from lacquer thinner). I did have a problem on one fender with fish-eyes when I tried to use a less expensive cleaner that I picked up at a local car parts store. I ended up re-sanding and painting that fender a few times -proving to me that not all products are compatible and "cheaper" is not always "less expensive". I purchased a cartridge type respirator because the fumes, even in an open garage, get intense. I also kept the bare skin of my arms covered (cut up old nylon knee-length socks) because over exposure can be deadly. (After a few days of cleaning over-spray off my arms, my skin was over sensitized.) I think I used a box of plastic gloves.

I tried to get everything ready the night before, so I could "shoot paint" first thing in the morning while it was cool. It took a while, because like your plan, I painted incrementally. The inside tub, the outside tub, the doors, the apron, the fenders... each takes a couple days. I had to shoot a base coat of (epoxy) white (after filler-primer) because when I did the inside of the tub, I found the light color (yellow) wasn't dark enough and the grey primer could be seen through several layers of base coat. I always did at least 2 coats of base, and 3 clear (being sure to follow the directions from the manufacturer on mixing, waiting between coats etc). -Before I started painting, my neighbor insisted I first block sand with dry-guide to be sure I had a good surface to start. After a month or so of painting, I wet (or ultra-fine) sanded for another month. It's a lot of work, but if I have to do it again, I'll do it the same way. My paint job would have costed much more than I could afford -as it was I spent a few thousand.

After 18,000 miles and a couple years, it still turns heads and stands up to close examinations. I never used a paint gun before I started on this car. Take your time, research what you're doing and it will come out fine. Be safe and have fun.
 

Attachments

  • 2paint.jpg
    2paint.jpg
    33 KB · Views: 69
  • Fire3.jpg
    Fire3.jpg
    93.3 KB · Views: 71

glemon

Yoda
Country flag
Offline
it sounds like I did not really need the epoxy after all, but they were happy to sell it to me, so again I am not sure about these guys, But I did ask them for the epoxy because I wanted to sound like I knew something.
steve

I don't know if you "needed" it, and it can be a little expensive depending on brand, but I have painted a few cars now and, with the exception of my first, a rusty MGB in the early 80s, I have always used the stuff. It provides a nice hard well stuck on base against the bare metal or old paint you are covering up. Long term I think it helps prevent any crazing or lifting of the new paint, and also prevents rust. Money well spent if you ask me, especially if you are planning on keeping your car a long time.
 

CJD

Yoda
Country flag
Offline
Early in my painting career I bought a gallon of the degreaser/dewaxer, cleaner. It caused some problems as it does not dry as fast as thinner. I still have 90% of the gallon left...35 years later! Lacquer thinner is cheaper and "does it all". Cleans/ removes wax, tar/removes silicone/ evaporates in 10 minutes from all crevices.

Comes in handy for thinning cheaper paints, removing adhesives, and removing paint. Toluene is the perfect chemical...even causes cancer! Love that stuff.
 

Darrell_Walker

Jedi Knight
Silver
Country flag
Offline
What do you use to clean the spray gun when you have finished painting for the day?

I use two things. Lacquer thinner for the bulk of the cleaning, and aerosol injected cleaner from Eastwood for the final cleanup and getting in the smaller passages.
 

CJD

Yoda
Country flag
Offline
What do you use to clean the spray gun when you have finished painting for the day?


David

The cheap laquer thinner...$10 a gallon. Not the expensive PPG, at $65 a gallon. I also ordered a cheap cleaning kit, that has a selection of brushes, toothpicks and lubricant. The steps become second nature, so you don't even have to think:

1. Remove the cup and spray until nothing comes out.

2. Poor cheap thinner in the cup hole and spray until nothing comes out. Do this 4-5 times, until the spray is clear.

3. Add about 3" of cheap thinner to a small cup. Remove the spray tip, paint needle, and all the little parts and throw them in the thinner cup.

4. Take a brush, dip it in the cup and brush the holes where the paint feeds through the gun.

5. Brush and blow off the little parts, checking that the tiny air orifices are clear. And reassemble. Add a touch of lube to the needle before it goes back in.

That's it. When you get the routine down, you can clean the gun in 3 minutes.
 
OP
S

sp53

Yoda
Country flag
Offline
Well I applied some primmer in my little plastic cover and it worked ok, but now I have a bunch of questions for the painters. I used 3, 12 ounce cups and almost covered the whole tub evenly. Some areas did not get as much primmer and some got more. I could see through the primmer in most areas and went over some areas twice. After 24hr, I went and started fixing some deep scratches and blemishes with some 220 paper and then thought about curing time and making a bunch more dust, and wondered should I cover the car completely with primmer before I do any more work, or can I fix the little bad spots and fill in the other areas that could use a little more primmer as I go, like up under the dash in those little spots. Do I also need to wipe down the car between each coat of primmer or can I just fix a small area and blow the area off good and apply more primmer. Or should I go over the entire car fixing blemishes and then wipe the whole car down and do a total respray over the whole car once I think I have the blemishes out?
I am thinking now that there are few spots here and there that could get primmer with the extra primmer left over from fixing the small things and some spots that probably have enough??? What would you do???

Also would most painters make up a large batch of 36 ounces???? I tried making a new batch between sprays, but the gun got a little clogged, so basically had to clean the gun between coats. If so, what do they mix the large volume in and how would they store the primmer between coats.

I also used a maker pin for some reference points and that is bleeding through. Will the color coats hide that?
 
Similar threads
Thread starter Title Forum Replies Date
S TR2/3/3A Painting the body tub exposed parts again Triumph 19
B Final painting of all body panels - with panels on or off car? Pros and Cons? Austin Healey 7
bighealeysource Anyway to fix very slight dent in body without painting ? Restoration & Tools 7
wangdango inner body panel painting/welding/etc Austin Healey 3
M Painting / Body work DVD Recommendations? Restoration & Tools 6
Z Body work/painting process questions Spridgets 7
Moose33 body painting question MG 1
N painting body panels Austin Healey 5
timsgolf Center Dash Switch Plate Painting Austin Healey 5
LAW75 Painting the Grille Surround Austin Healey 12
J Shroud Painting ["Finally done with these"] Austin Healey 3
GeorgeC Painting the Battery Austin Healey 0
J Painting Underside of Shrouds Austin Healey 13
J Painting a Frame and Substructure Austin Healey 12
Jim_Gruber Bugsy IV - Painting, Cutting, Buffing is done Spridgets 20
S TR2/3/3A painting the floors of my tr3. Triumph 2
S Painting a BJ8 Radiator - any advice? Austin Healey 17
J TR2/3/3A Painting floor pans Triumph 2
J TR2/3/3A Painting Triumph 11
S TR2/3/3A how to position pieces when painting Triumph 7
T TR4/4A Painting front hubs Triumph 2
S TR2/3/3A tr3 painting --spraying: vertical, horizontal ect... Triumph 8
69MGC T-Series MGTA Digital Painting 2 MG 0
B TR6 TR6 Painting/Restoration Triumph 2
69MGC MGC MGC Digital Painting MG 0
69MGC AH 3000 Digital Painting Austin Healey 0
69MGC Newest Digital Painting Aston Martin Other British Cars 0
B TR6 Painting a '74 TR6 Triumph 1
H Healey 100 Painting Austin Healey 5
KVH General Tech Questions About Painting Triumph 6
kennypinkerton General MG Rostyles. Painting question. MG 2
KVH General TR Painting the Engine Compartment with Spray Can Triumph 3
B Painting the Car - Corner Bead Advice Austin Healey 21
S TR2/3/3A I hate painting Triumph 8
J Final painting detail questions Austin Healey 16
dcoplan Suggestions for painting letters on dash knobs? Spridgets 6
Bob Claffie MGB Painting rubber bumpers MG 4
T TR6 Painting the car with the fenders on Triumph 7
B Painting underside of front and rear shroud - Original prep and color? Austin Healey 3
madhouse Painting Wheel Wells of my 100-6 Austin Healey 8
drooartz General Tech Painting my Rostyle wheels MG 7
R TR4/4A Painting engine in the car Triumph 7
Lbp TR2/3/3A Painting Help Needed for Restored Steering Wheel Triumph 5
J Painting transmission Austin Healey 7
glemon New Painting Method Restoration & Tools 2
J Painting the car Austin Healey 8
Jim_Gruber Painting inside a BE Boot Spridgets 8
Brinkerhoff Painting or dyeing to change interior color? Restoration & Tools 2
D Live and learn… then learn some more… [painting] Spridgets 28
D Wheel painting frustration Spridgets 25

Similar threads

Top