• The Roadster Factory Recovery Fund - Friends, as you may have heard, The Roadster Factory, a respected British Car Parts business in PA, suffered a total loss in a fire on Christmas Day. Read about it, discuss or ask questions >> HERE. The Triumph Register of America is sponsoring a fund raiser to help TRF get back on their feet. If you can help, vist >> their GoFundMe page.
  • Hey there Guest!
    If you enjoy BCF and find our forum a useful resource, if you appreciate not having ads pop up all over the place and you want to ensure we can stay online - Please consider supporting with an "optional" low-cost annual subscription.
    **Upgrade Now**
    (PS: Subscribers don't see this UGLY banner)
Tips
Tips

General Tech TR2/3 Gearbox Rebuild

CJD

Yoda
Country flag
Offline
This thread will be another one of my long drawn out "How to's". Again, I'm not trying to replace the manual, just adding pictures to the dull verbiage. Anybody feel free to jump in with other tips and tricks as you see fit. Gearbox inspection and assembly is a bit of an art, and no tip can be ignored.

I bought my first car when I was 15. It was an ex-Border Patrol IH Scout. What a deal at $500! After putting everything I had into it, it dropped the countershaft in week two of ownership. Bummer. So, at age 15 and 2 weeks I had to learn how to rebuild a gearbox and transfer case. I remember working an auto manual for my first time, and it was more of a guide than a manual. You get it all torn down and all it says is "inspect" all parts and replace as necessary. What? That's it? Huh?? What about...???

Every time you miss a shift over the 100k+ mile lifetime of a gearbox, you are wearing the gears. Unless you have unlimited pockets...which was not me at 15, and still not to this day...you have to figure out how much wear is acceptable, and how much is worthy of replacing the gear. Well, after more than 40 years and several dozen gearbox rebuilds, I can definitively say what will work and what is going to "P you O" every time you shift! This stuff is not in books. I learned it by rebuilding my Muncy 6 times for bad blocker rings, and cussing at a stop light when the light is green and the TR3 tranny won't stick 1st gear with everyone honking at me.

So, here goes...be sure to add anything you think will help others as we go...
 
OP
CJD

CJD

Yoda
Country flag
Offline
Gear inspection.

Once all is torn down, clean it up and start looking it over closely. The worst of the issues will be obvious. If a tooth is broken, the gear is toast. If you are lucky, it falls to the bottom of the case and gets caught in the sludge there. If you are not lucky, it takes out a half dozen other gears as it gets caught on the way down. All of this will be painfully obvious.

Here is a 3rd gear with a broken dog tooth. If the gear is reasonably available, this one is toast. But, if there are few or very expensive replacements, this gear would actually be operable. The synchro teeth engage all at the same time, so one tooth missing will not affect the operation at all. But, look it over very closely for ancillary damage. Gears are case hardened. The outer few thousandths of an inch is very hard compared to the inside of the gear. Cracks can spread when a tooth is broken like this...any additional crack is grounds for trashing it.


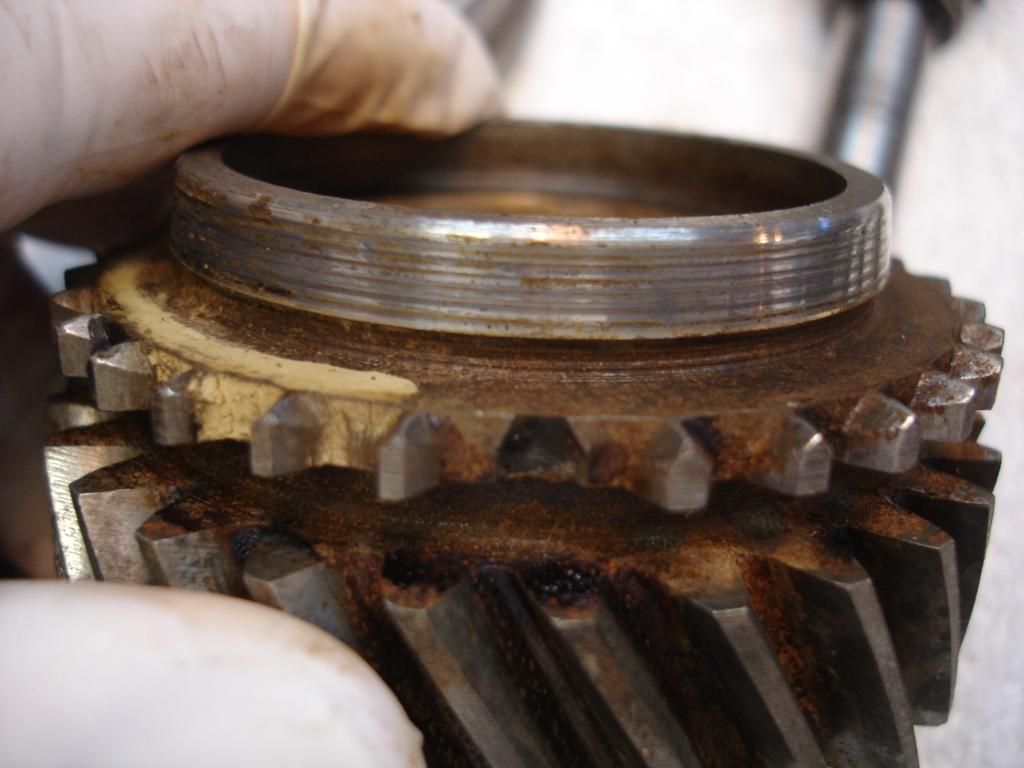
Here is another view of the broken tooth next to a good used 3rd gear. One thing on the broken gear that does concern me are the ridges seen on the blocker ring cone. The blocker ring is brass and grooved. These grooves are pushed onto the steel gear cone for every shift to synch the gear speeds. The brass wears much quicker than the steel, but the steel does wear slowly. I would take 400 grit emery and spin the gear to see if the notches seen in the pic clean up. If they do not...the gear is toast for that reason alone. If there are ridges, a new blocker ring will not seat well...and I guarantee the old one is worn out after making these ridges in steel.


If the ridges are left as is, the blocker ring will not seat and the 3rd gear will have to be babied on every shift to prevent the old "braaaat" sound as the dog clutch engages off speed.

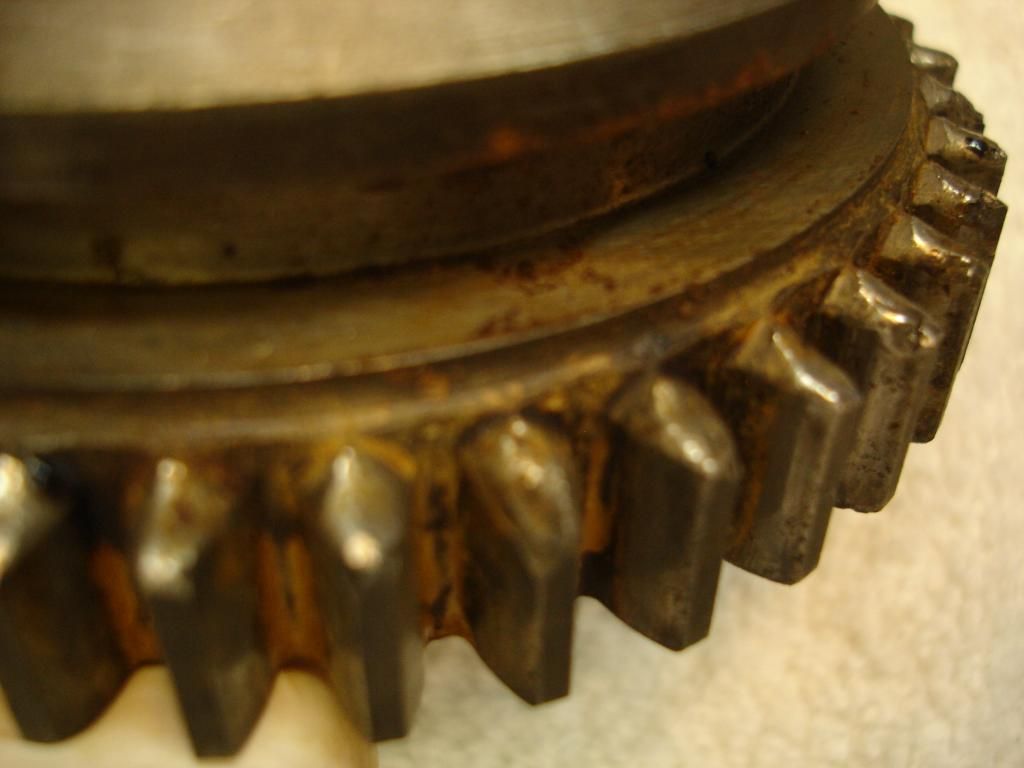
You will also note the rust on the gear. This amount does not concern me. If all else were good...this very slight rust will wear off in the first minute of driving and be fine for 100k miles. This next pic shows an amount of rust that does concern me...


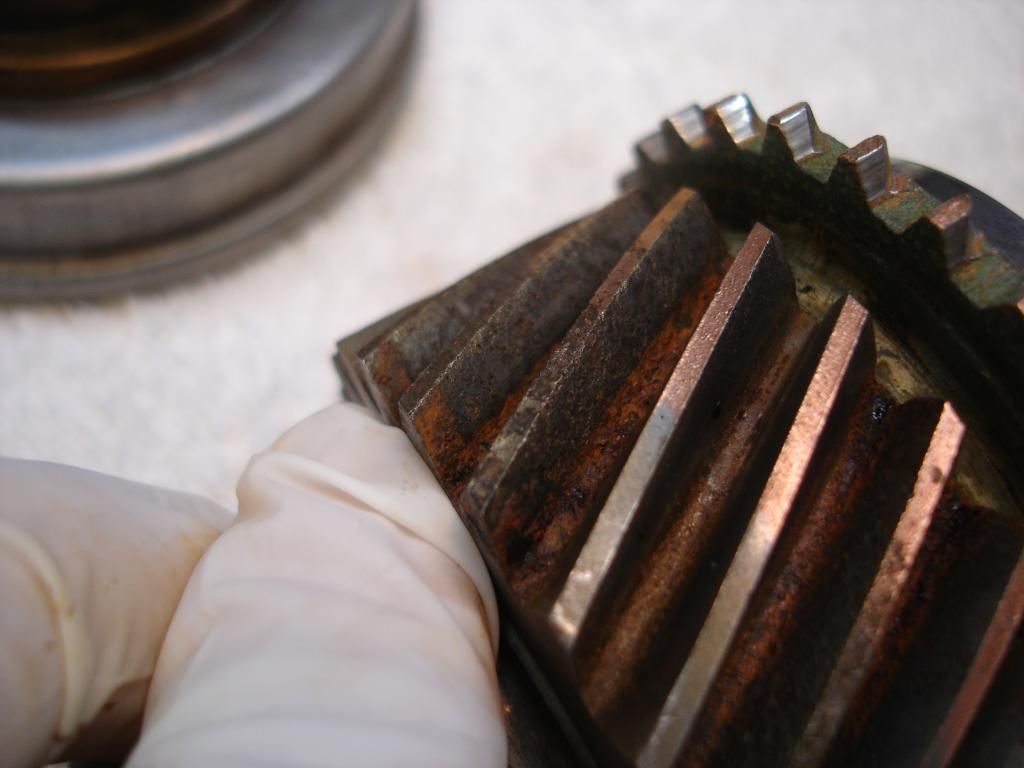
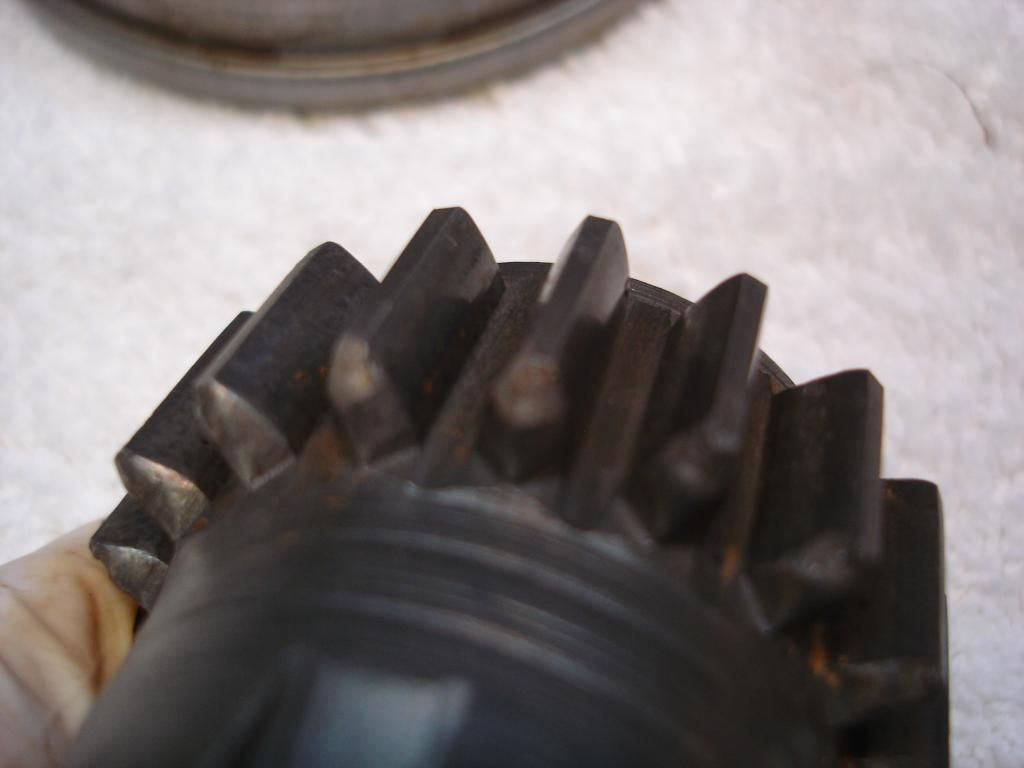
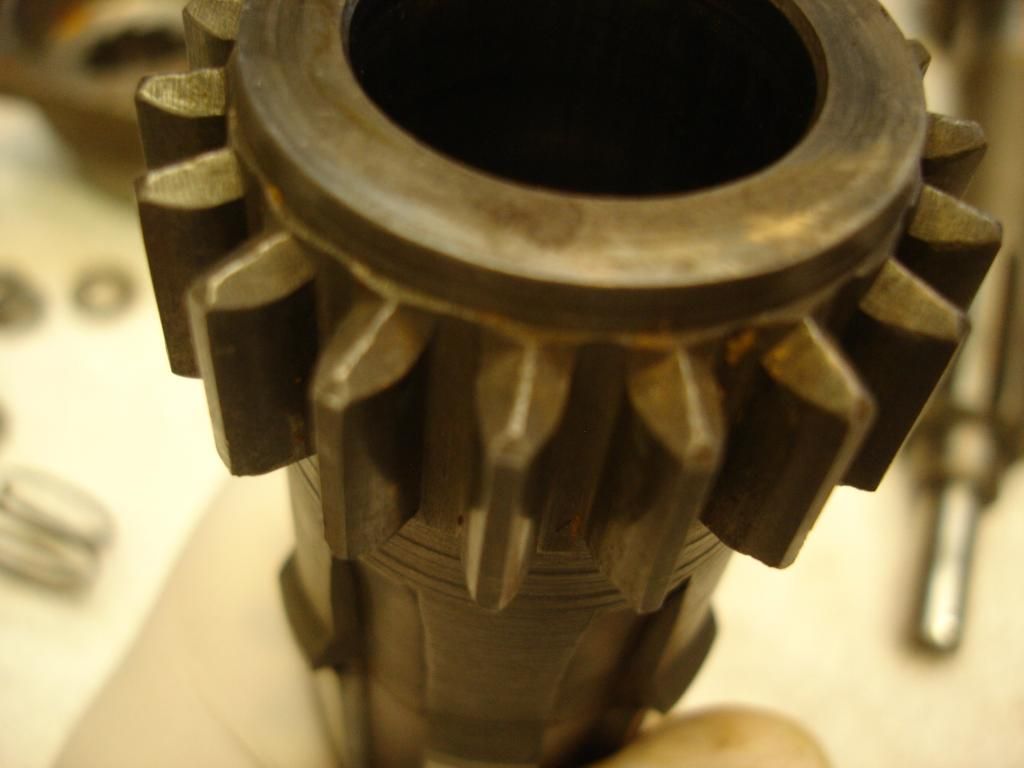
The pic is of the "constant pinion" shaft in a TR2 box. I always called it the input shaft, but, whatever!?! On this gear, if you look closely, the rust has completely entered the grain of the metal. Metallurgically anything you do to harden a metal also decreases corrosion resistance. In this gear all the hardened surface is gone. If you ran this as is, it would work fine for several hundred miles. Then, you would begin to hear a whine under load, in all gears except 4th. In fourth the gear is unloaded. Once the noise starts, the gear has already taken out the counter gear because it does not mesh correctly and stresses that gear. After a couple thousand miles you will start to loose teeth in the box. This gear is toast for corrosion.
 
Last edited:
OP
CJD

CJD

Yoda
Country flag
Offline
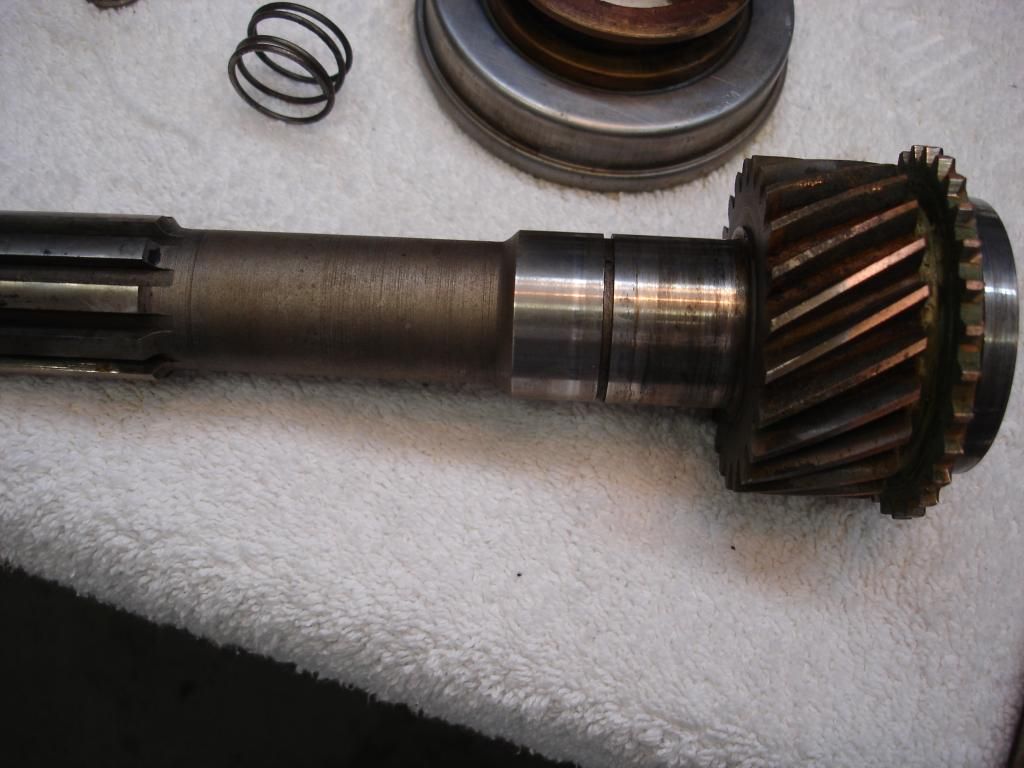
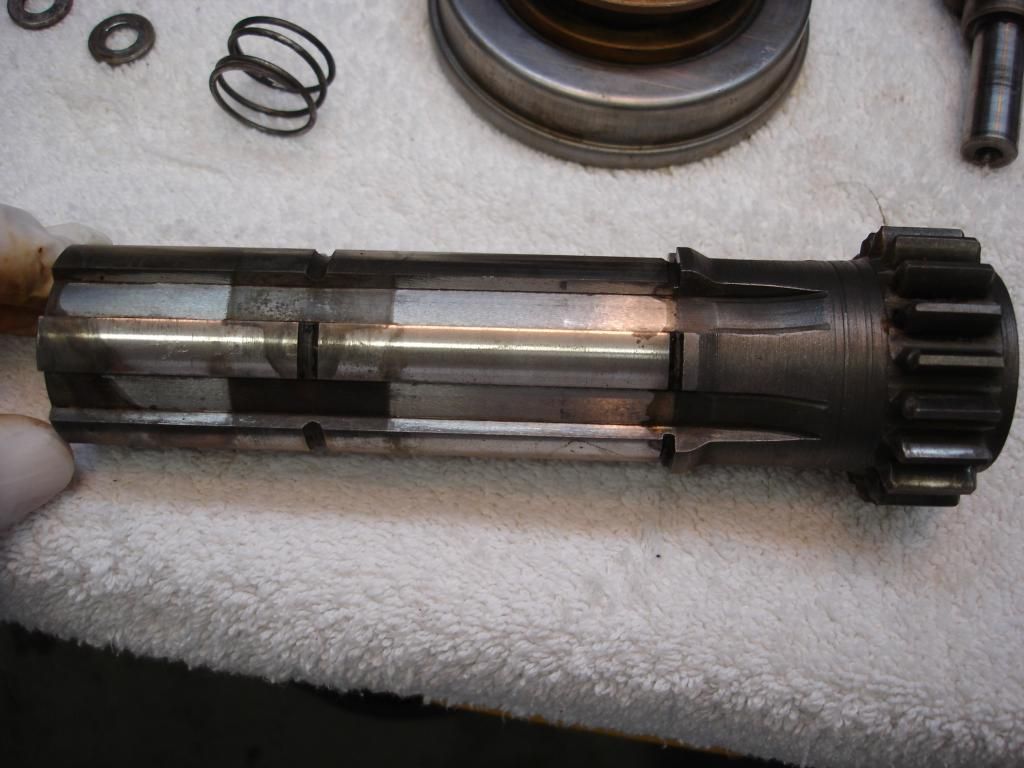
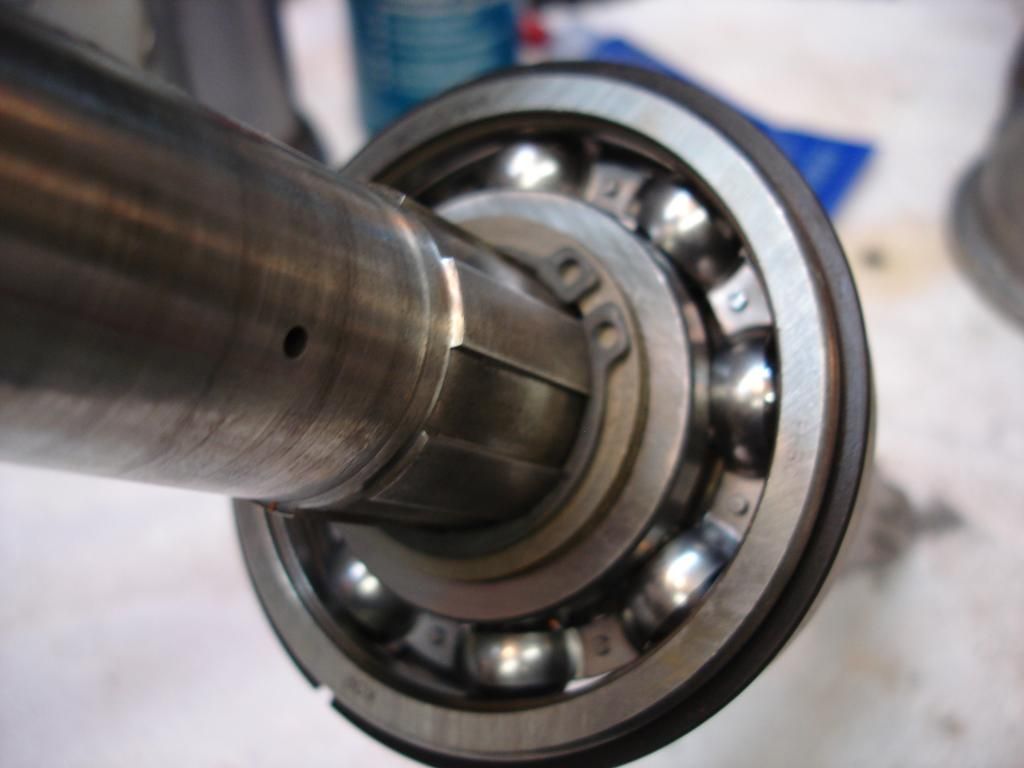
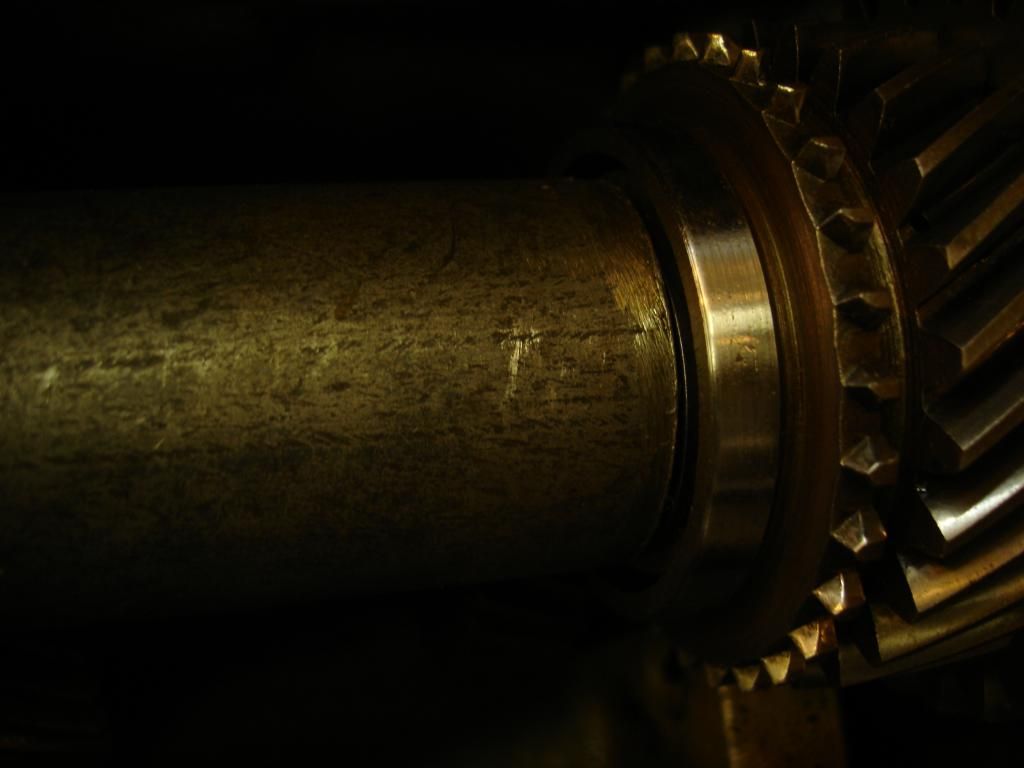
This is another view of the input shaft. Something that is easy to forget when all the parts a separate is that a seal has to ride on the shaft. In this pic, the ground surface to the left of the gear is for the input bearing, the snap ring groove to hold the gear, and then the smooth ground area where the seal rides. This one looks good. If there is a ridge worn, you have 2 choices...replace the shaft - or - try to seat the seal farther out on the shaft. The first choice is preferable, but nothing wrong with the second if you're in a bind.


Of course, the splines at the far left of the pic must be immaculate. The clutch disc keys into these splines. The disc must be able to slide completely freely...and it only moves 1/16" inch or so when it does slide. Any grooving or visible wear on the input shaft splines is cause for concern. If used with grooving, the clutch will always drag just a smidge. Everything works fine for several thousand miles, but then your synchros start to act up from the extra strain put on them.
 

TR3driver

Great Pumpkin - R.I.P
Offline
cussing at a stop light when the light is green and the TR3 tranny won't stick 1st gear with everyone honking at me.
Just thought I would mention that there is a trick to avoid that. First, don't sit at the light with the clutch held down but shift into neutral and let the clutch out. Then, when the light turns green (or better yet when the light for the cross traffic turns yellow), push in the clutch and pull back on the gearshift just enough to touch the synchro in 2nd gear, then hit first gear. Works almost every time, even with a badly worn gear. But if it doesn't, just repeat the process: shift to neutral, let out the clutch then push it in again, touch 2nd gear and hit first. I never had to do it more than twice (and my first gear was in sad shape). You don't want to actually shift into 2nd gear, just touch the synchro (or blocker ring as John called it).

Of course, this only applies to the TR2-3 gearbox with non-synchro first gear; and it probably does tend to wear out the 2nd gear synchro ring a little bit faster. But the synchro ring is a lot cheaper to replace every 100,000 miles than doing the gear every 20,000 miles.
 
OP
CJD

CJD

Yoda
Country flag
Offline
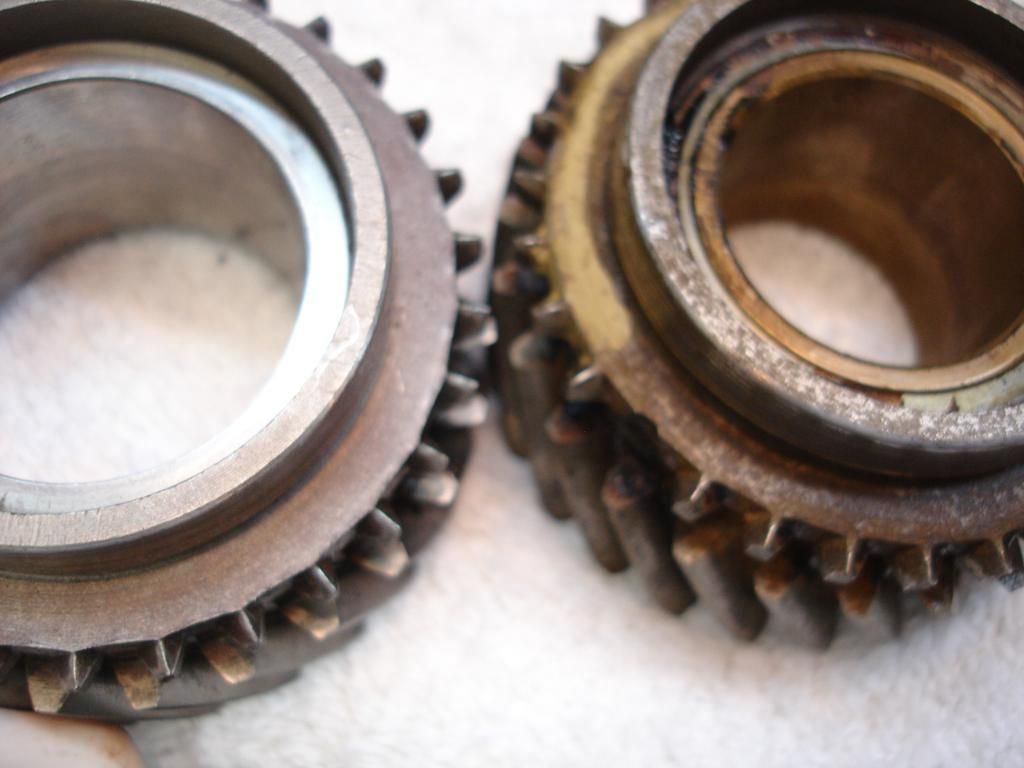
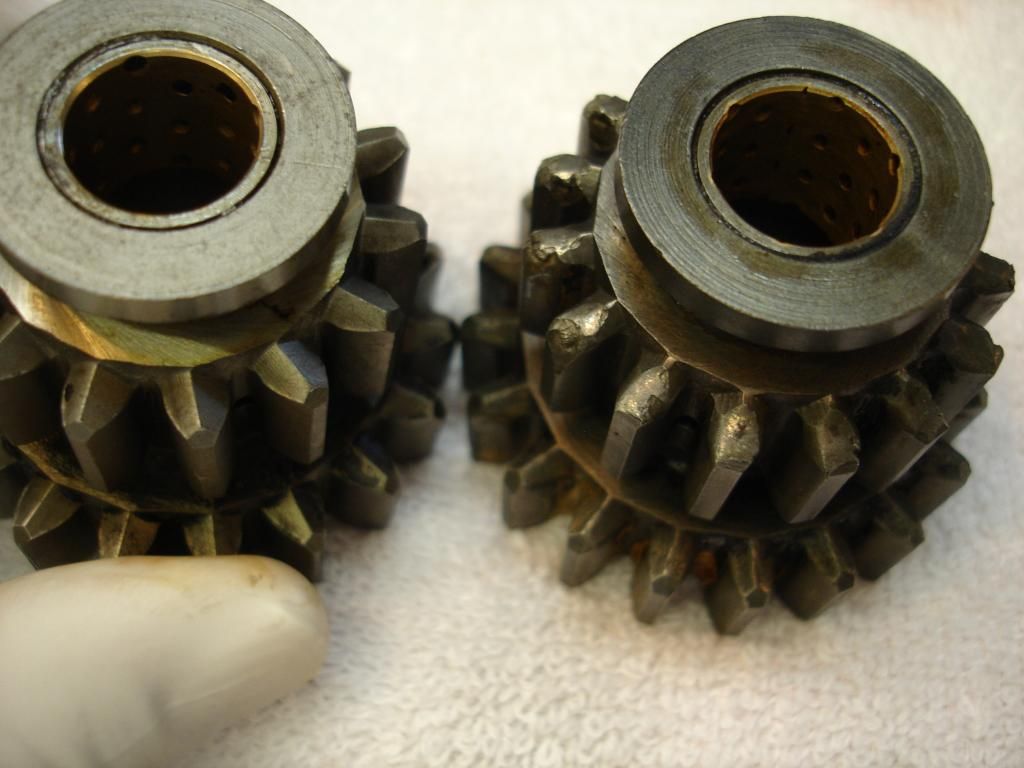
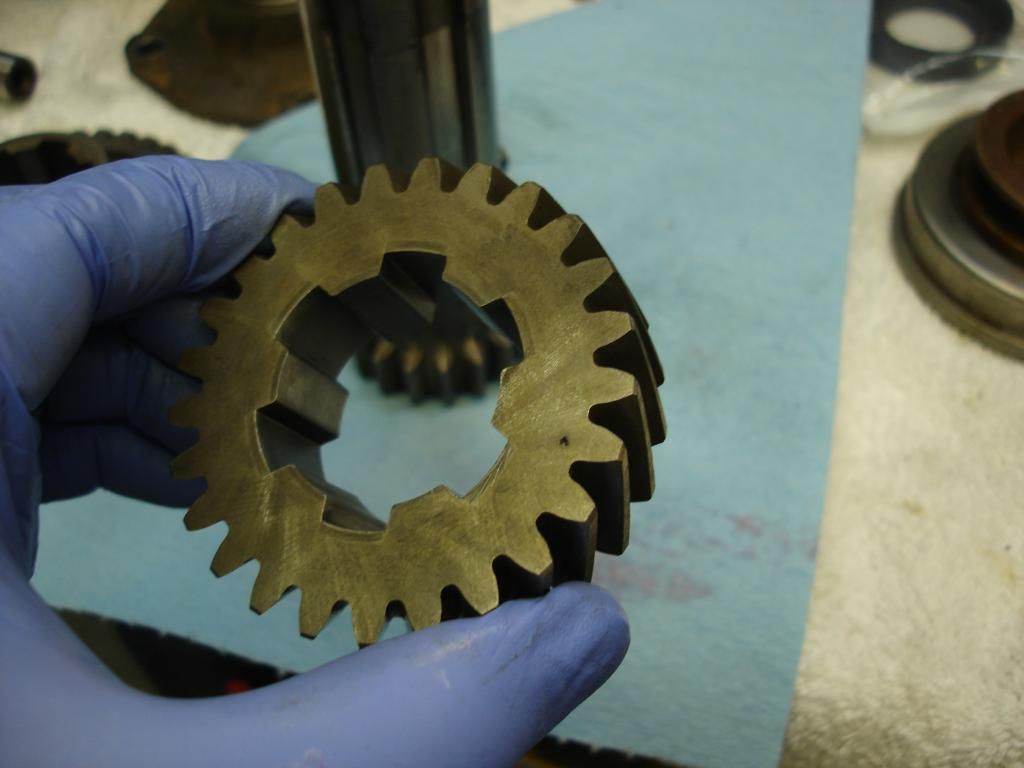
So, most think the occasional jam into non- synchroed reverse or 1st gear is alright? Of course not. Here is a pic of a good reverse gear adjacent to one driven by ham fist. This gear slides over to engage both the large first gear on the mainshaft, and the reverse side of the countershaft gear.


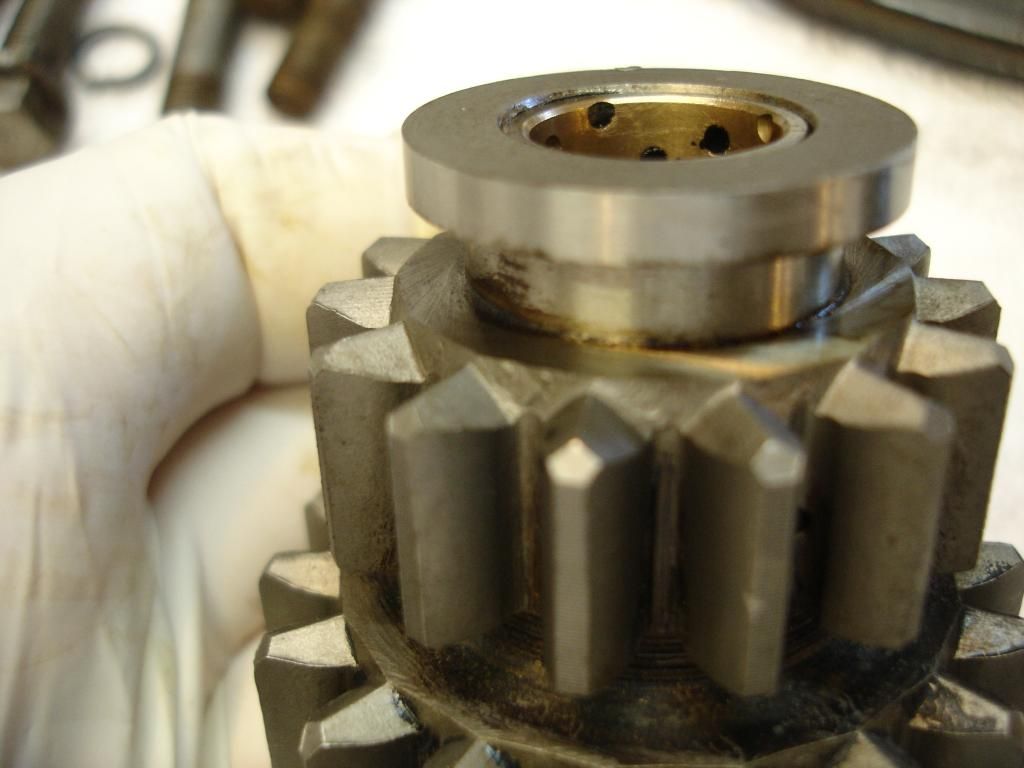
First, study the left gear closely. That is brand new out of the box. The sides of the teeth are sharp. This is so the gears will always slide into each other easily. There is no chance of the gear lining up just right so 2 edges lock together, preventing them from sliding. I get teared up just looking at a new gear it's so beautiful!

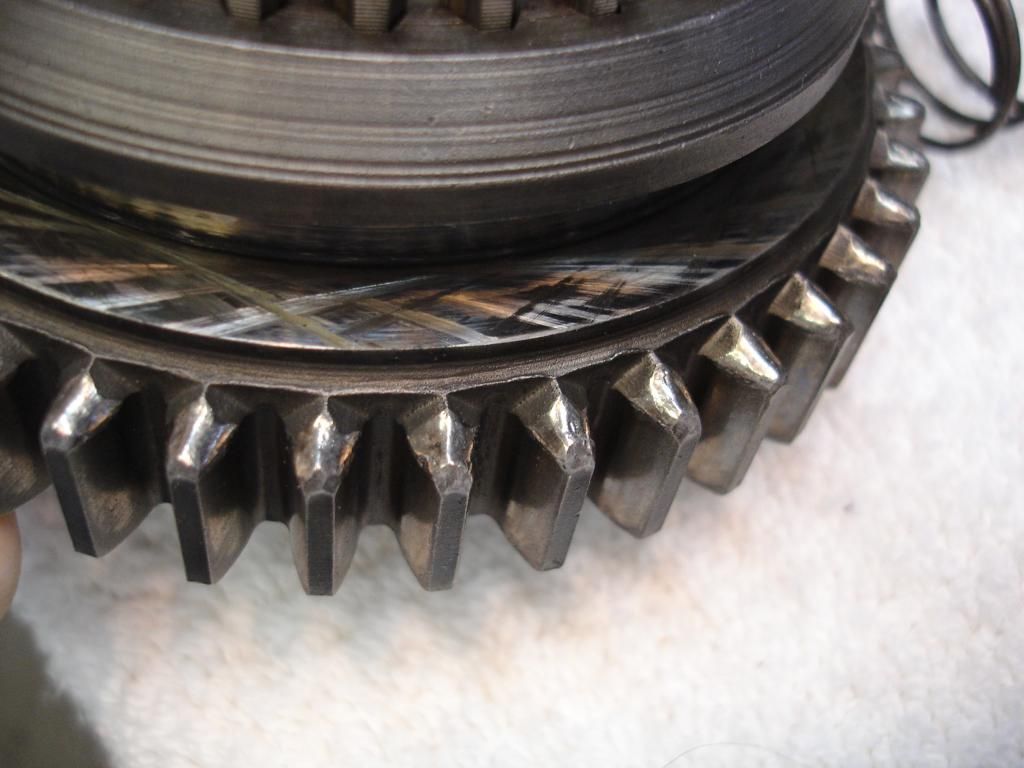
Now study the old gear. First, the edges of the gear show a combination of rounding and chipping. When you lightly miss a shift into reverse, the edges wear rounded and smoothly. An example of this is whenever I let someone unfamiliar with my TR3 drive it, they all seem to miss the 3-4 shift and put it into reverse. I don't get it...but it happens. The sound is best described as a "burrrr". Of course it does not go into reverse when the car is under speed in 3rd gear. The result, though is the edges of the teeth will wear into a perfect rounded shape. This is actually not so bad. Two rounded edge gears will still slip easily past each other. But, occasionally the round will just happen to line up right opposite each other. The result...the shifter locks just short of the car going into reverse. You have to shift to another gear first to realign all the gears on the counter shaft...or, cycle the clutch and try again.

So, rounded gear edges not good...but not terrible. You will lock out a shift every month or so of driving.


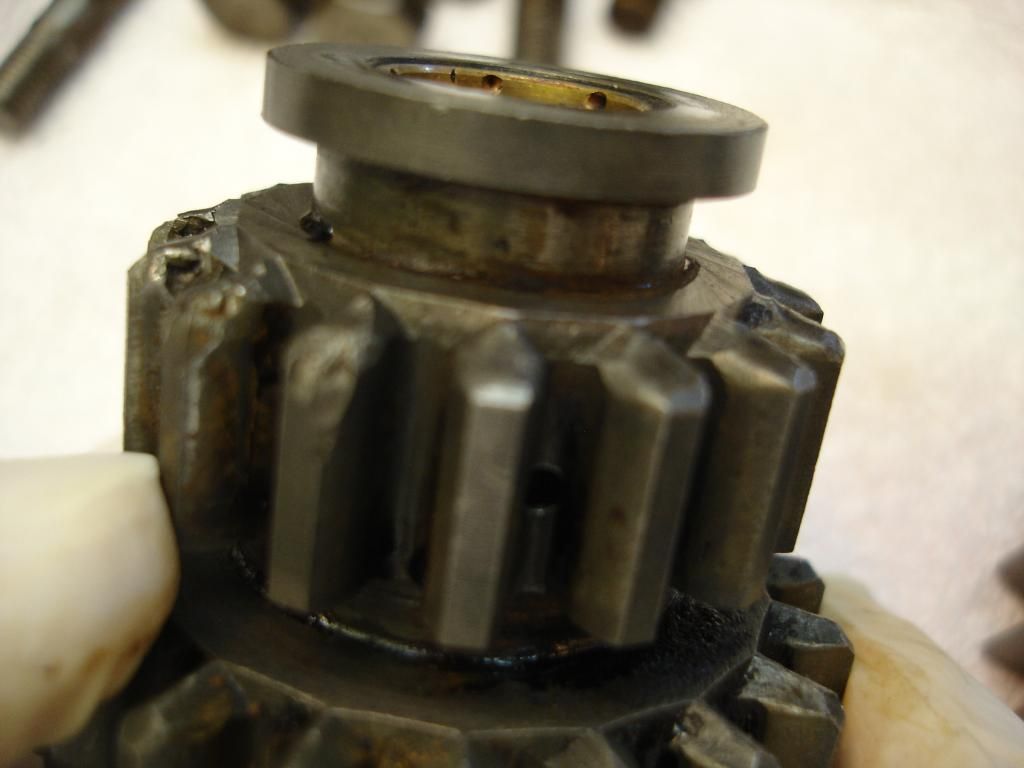
Now, some of the teeth in the right pic are chipped. This is caused by the guy who likes to ram the shifter into reverse at slow speeds...or who doesn't take the "burrrr" as a warning and just jams harder...or who already rounded the teeth and now decides more force is in order for that once a month missed shift. Naturally, chipped teeth are bad. The gear can no longer slide past it's mate, but rather now frequently gets hung up. For the gear shown, I would expect a locked shift attempt roughly once every outing. If the first gear looked the same, I'd expect 1st to lock every dozen shifts.

What to do...I would not reuse the gear on the right as it sits in the pic. In this case, I got the new gear...sorry, need a minute as i'm tearing up again...for about $60. I thought that was a deal and chose that route. If the one on the left were a $300 gear, I would instead dress the old gear and reuse it. I will get into dressing later.

This is the first gear that mated to the old reverse shown above. As expected, combination of rounding and chips.


And here is a lightly used 1st gear. Notice there is rounding on the edges, but it is minimal. I would have no problem installing this gear as is. I would expect a locked shift to be a rare event, although it may happen once a year or so.


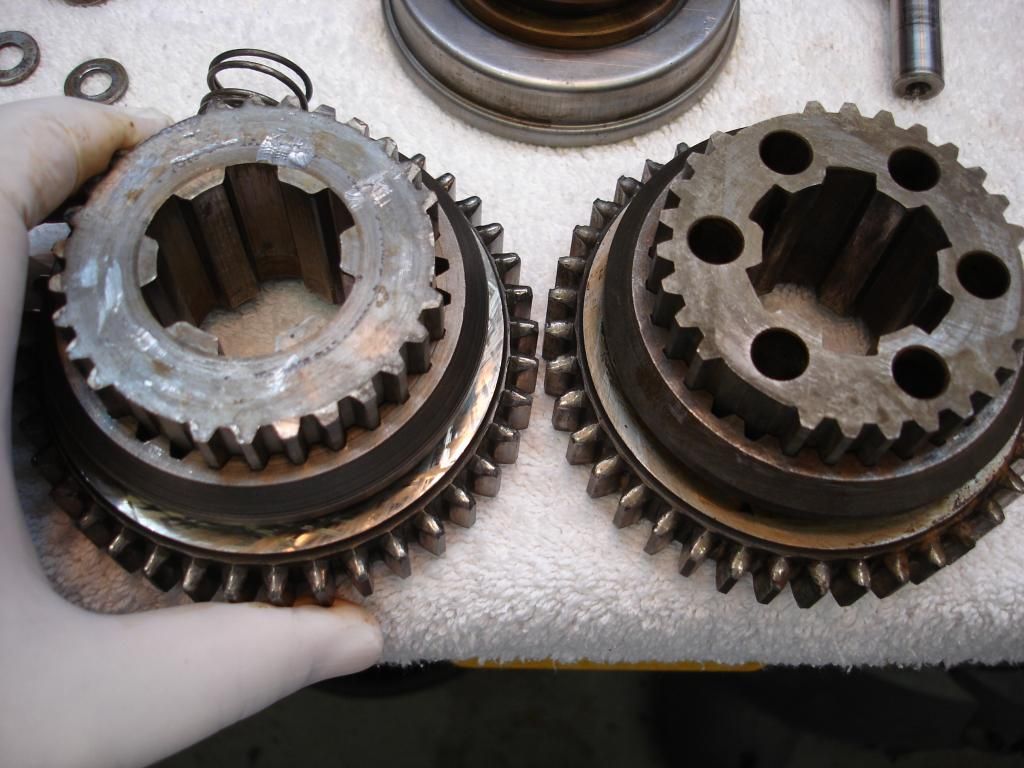
These are 2 complete 1st gears, with the slider and 2nd gear synchro hub. They are both used, but the one on the left is good, the one on the right is just waiting to frustrate someone at every stop.

 
OP
CJD

CJD

Yoda
Country flag
Offline
This is a TR2/3 counter gear (Or cluster gear...I apologize for non-British terms). On the right is the 1st/reverse gear. The reverse gear engages from the far right side of the gear in the pic, and 1st engages from the other side. Naturally, it is obvious that the driver rushed the 1st gear shifts much more frequently than the reverse shifts. That's only natural, but it does take a toll on the gear edges.


This is a fuzzy pic of the first gear side of the countergear. This is actually not so bad. Rounding, but no chipping. I dressed this gear and re-used it.


And, the same gear viewed from the reverse side. Still sharp and like new. With the new reverse gear shown above, this tranny would never lock out of reverse...ever!


TR3driver

Great Pumpkin - R.I.P
Offline
So, most think the occasional jam into non- synchroed reverse or 1st gear is alright?
The technique I outlined above, done properly, won't round the gears off as there is no grinding at all. The point is to have the input shaft almost entirely stopped, just a tiny bit of motion so it stops when it is lined up. The gearbox in my previous TR3A was already well worn when it came to me, and I had no time or money at the time to overhaul it. It only went another 150,000 miles or so under my ownership; before I pulled it because the OD quit working. And I always let the clutch out at stop lights.
 
OP
CJD

CJD

Yoda
Country flag
Offline
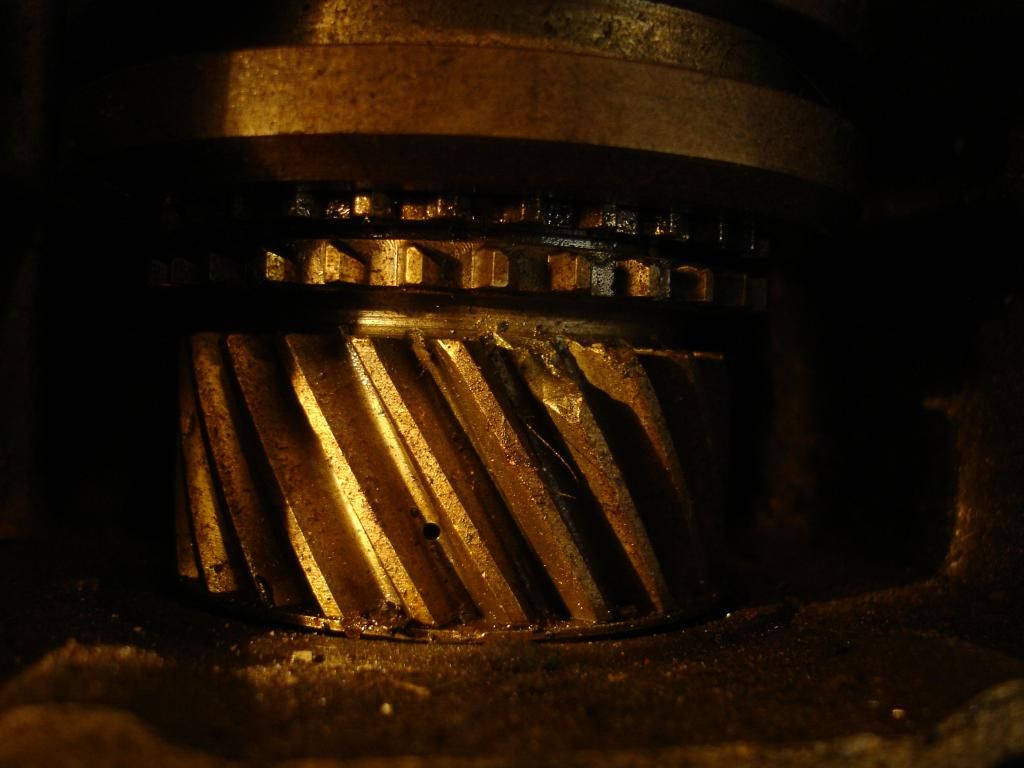
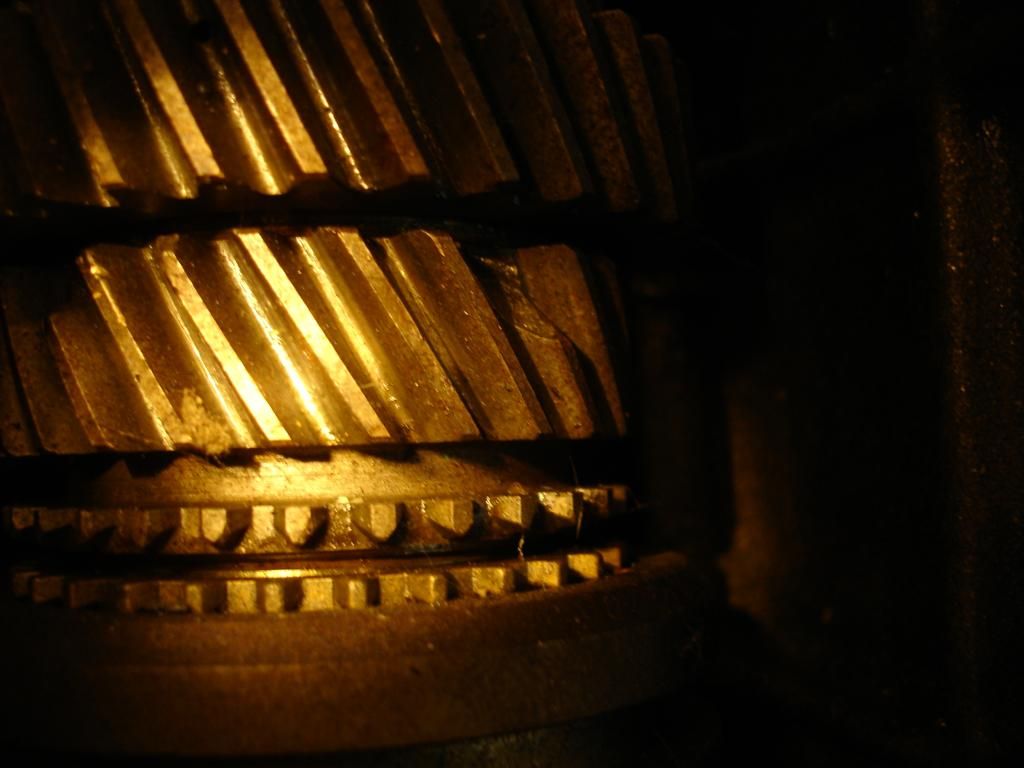
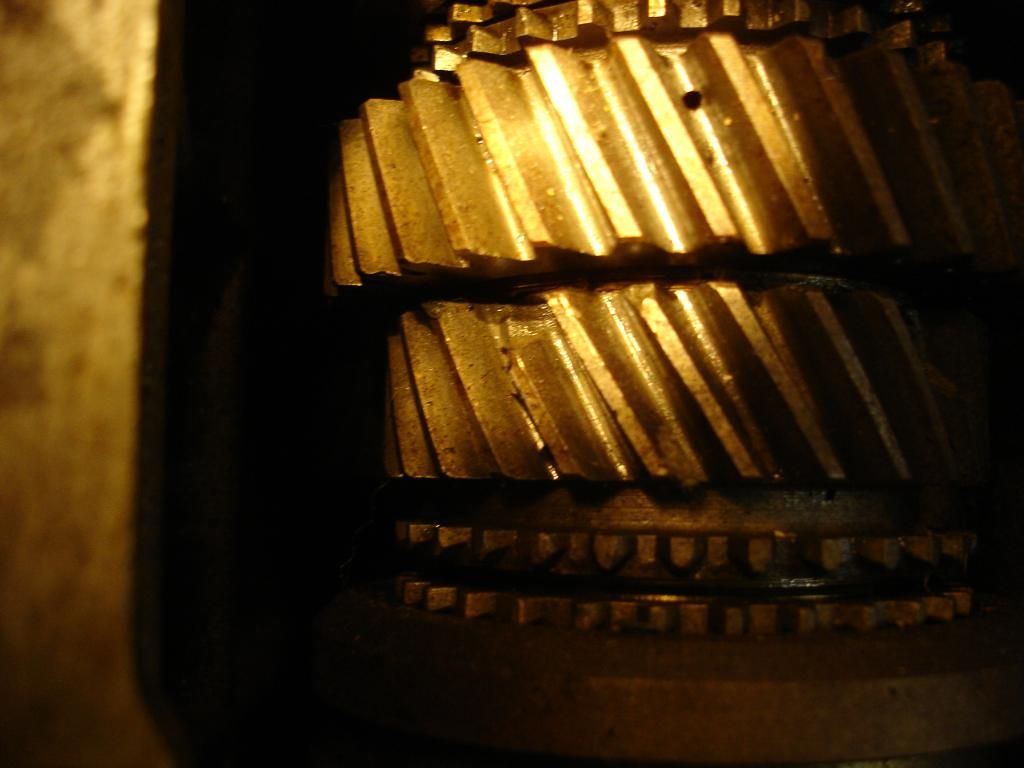
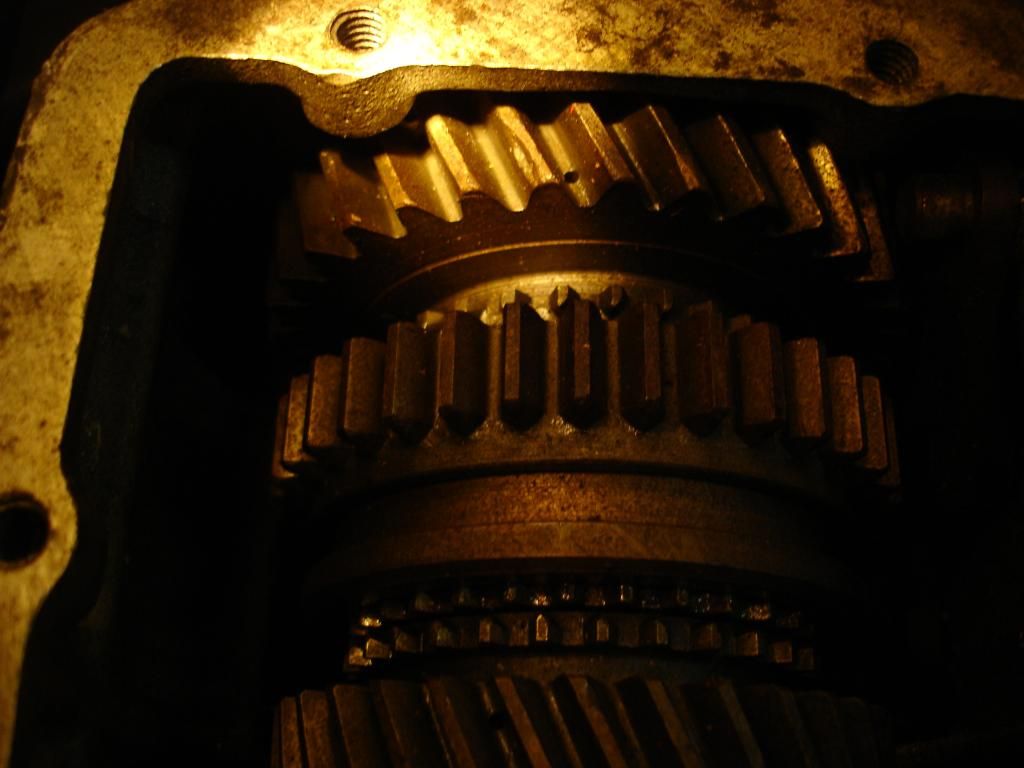
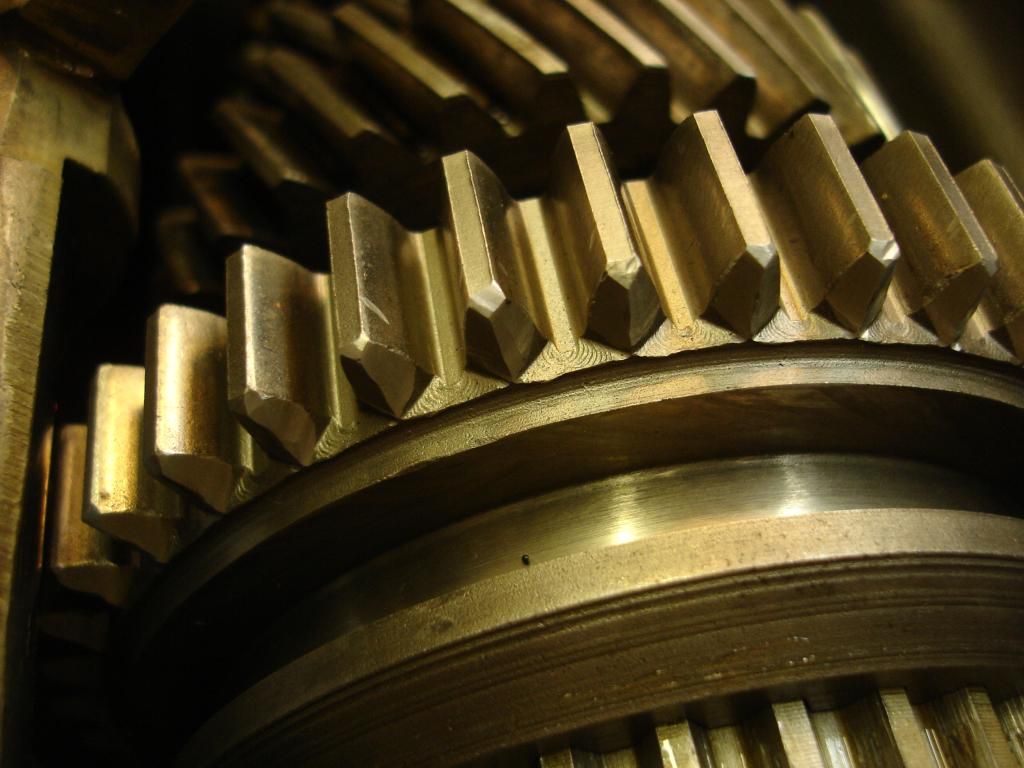
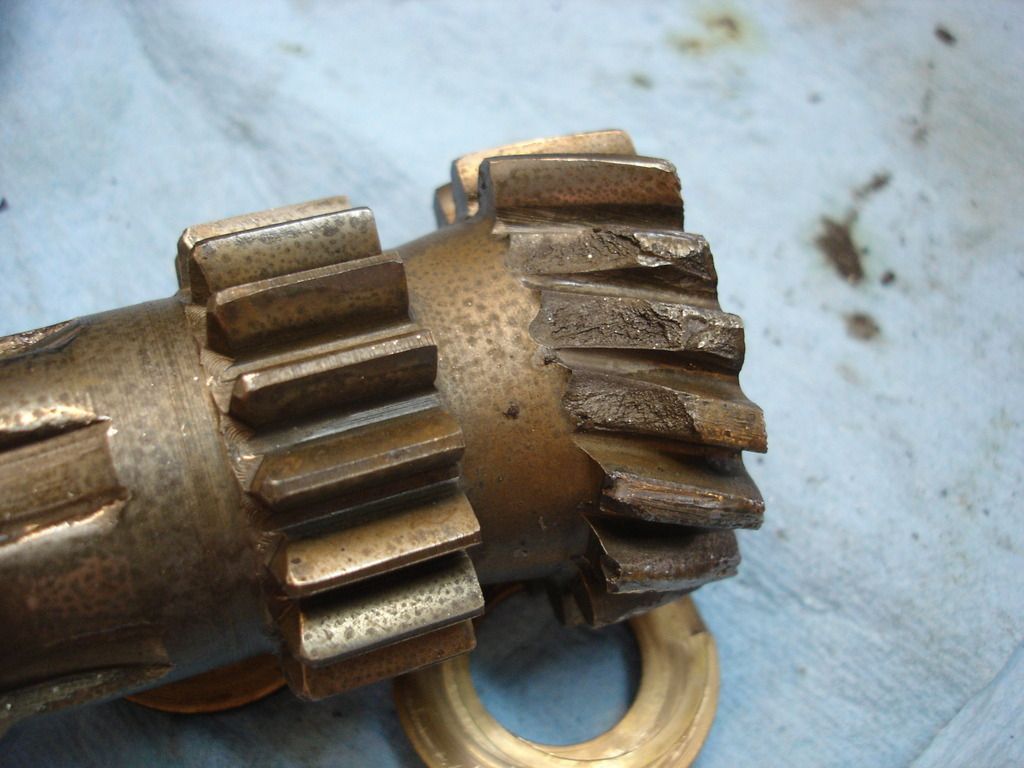
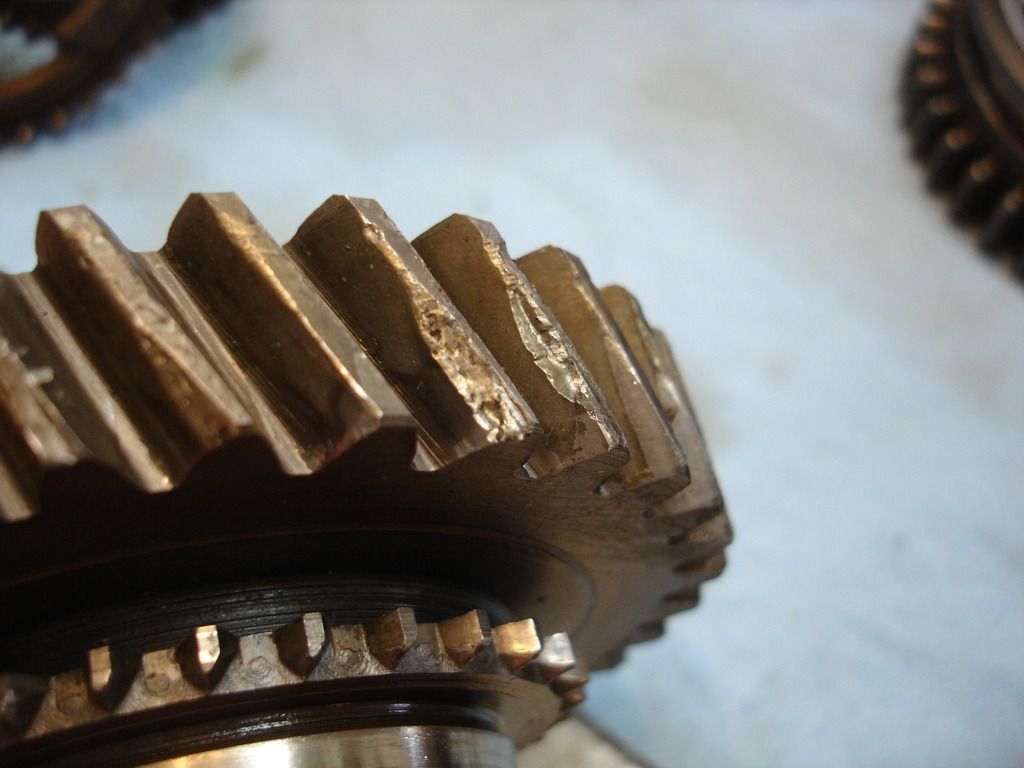
Had a short stint stuck in the snow, but I'm back for the next installment. Most tranny issues are obvious when you simply pop the top cover off. These shots are of a TR4 tranny that lost a tooth, which then jammed and took out several other teeth. This box is in need of a serious number of new gears.

First, here is the "constant speed gear", or input shaft gear.


3rd gear lost a couple teeth and has significant gouging, so it's toast too.


And 1st and reverse gears at the back. Even though the teeth are intact, there is significant gouging of the tooth faces.


The symptom for this failure would be a horrendous crunching sound. In all likelihood, the countershaft is broken, allowing the counter gears to drop and loose good contact, so after the initial crunching, there would be a typical missed-shift grinding sound, even when not shifting...and the car will not move. With this particular gearbox, all the broken parts dropped to the bottom after the initial grinding, so the tranny continued to work, but made a constant bearing hiss accompanied by a rythmic crunching sound.

This box is a throw-away. It would be cheaper to replace the box than try to replace all the damaged parts.
 
OP
CJD

CJD

Yoda
Country flag
Offline
I mentioned blending to fix mildly rounded gear teeth. Here is an example of a blended gear. Very carefully the contacting edge of the rounded teeth can be ground with a dremel or die grinder with a small grinding wheel. The small chips and rounded edges are carefully worked back sharp.

Here is a reverse/1st gear after blending. No chips, no rounded edges, and this gear will never catch and lock a shift at a stop light.


As a guide, I would not blend the edge of any gear more than about 5-10% back from the original edge. Doing more than that weakens the tooth and could lead to a gear that wants to pop out under load
 
OP
CJD

CJD

Yoda
Country flag
Offline
Alright, now let's move into the TR3 gearbox reassembly. Again, I have no intention of replacing the service manual, I just want to give you guys some pictures so you can relate what you will see inside the gearbox. So, here we go, pretty much in the same order as the manual...

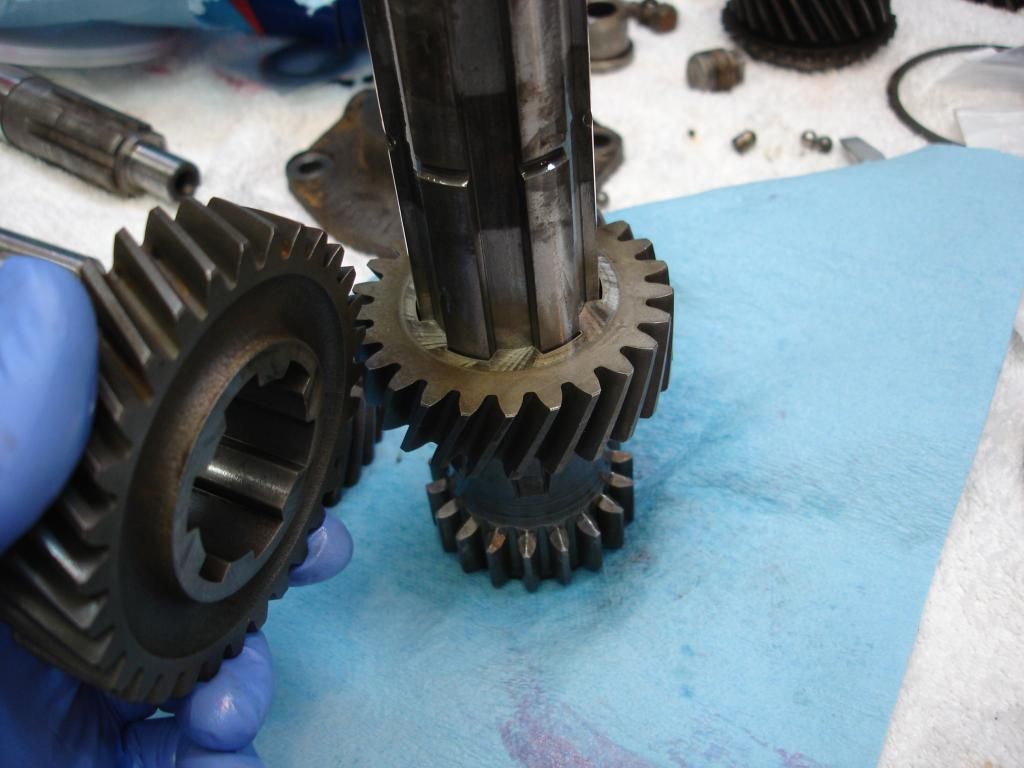
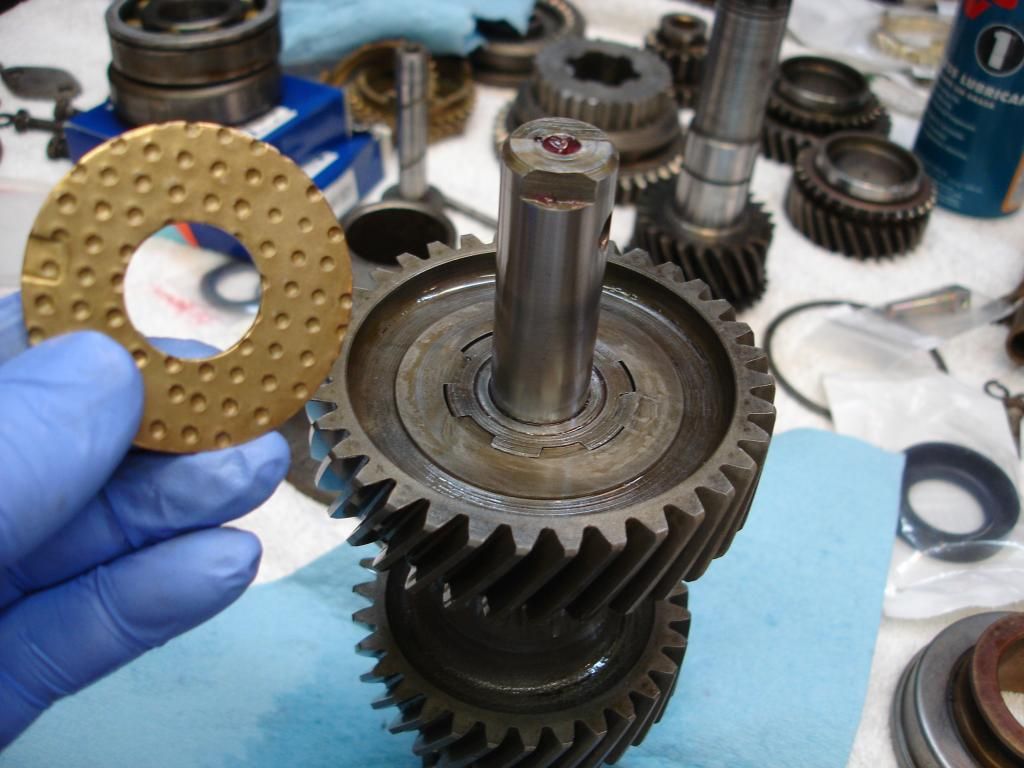
First, we have to build up the counter gears...sorry, the "cluster gear" in British. The first step is to insert the 4 press fit washers. One goes inside each end of the center gear, and presses in until they set against a ridge inside the gear. The outer 2 washers press just flush with the edges of the gear. Once these are in place, install 24 rollers in each end, using plenty of sticky grease to hold them in place.


When all 48 rollers are stuck good, grease the counter shaft and push it into the gear. At tranny shops they use a spare, cut off shaft, to hold the rollers in place while the tranny is being assembled. If you have an old shaft, that's a great idea. The short shaft can be pushed out using the real countershaft once the Cluster assembly is in it's final place. I didn't have a spare shaft. I had no trouble keeping the rollers in place, and neither will you, so long as you don't jar the cluster assembly without the shaft being inside.


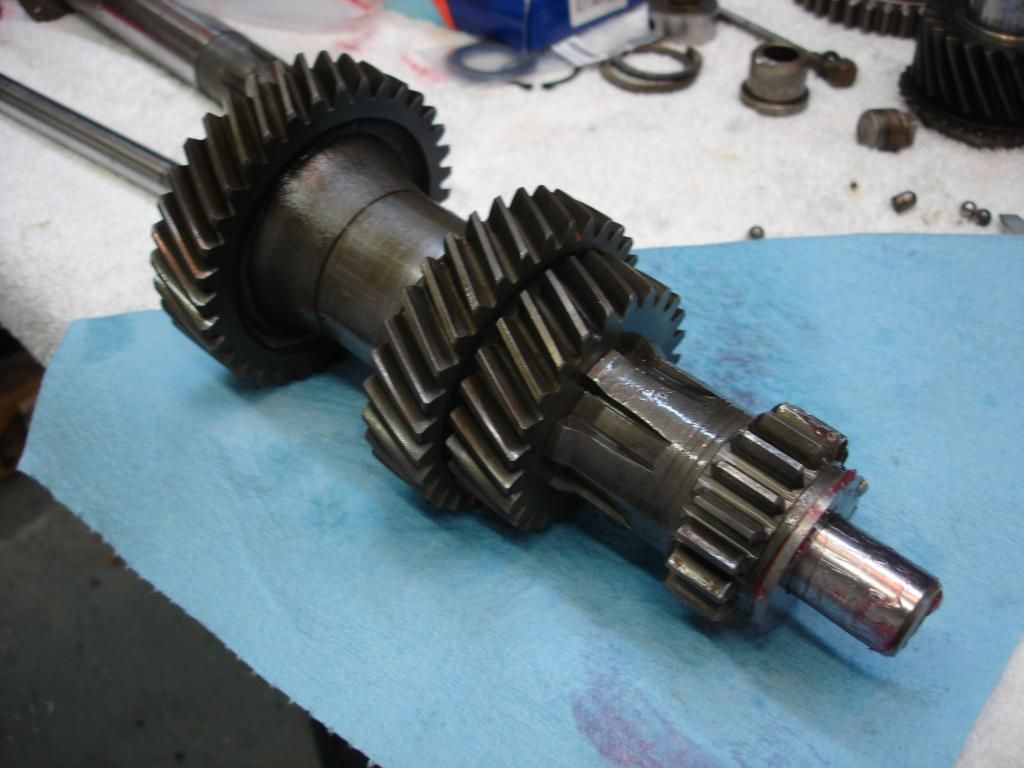
Now, we start stacking the gears. The 1st/reverse gear is cut into the shaft. Next comes the 2nd gear, then 3rd, followed by a spacer...and finally the largest "constant speed" gear. Now, a couple of the gears are directional...the manual tells you which side goes which way, so just follow the manual.


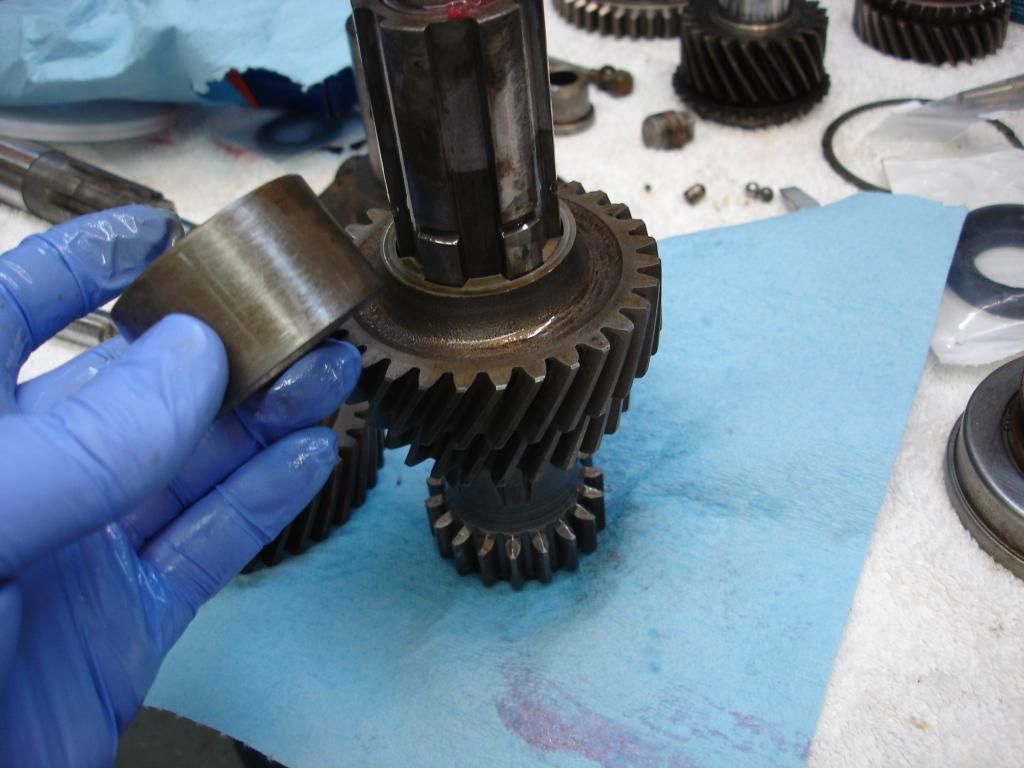
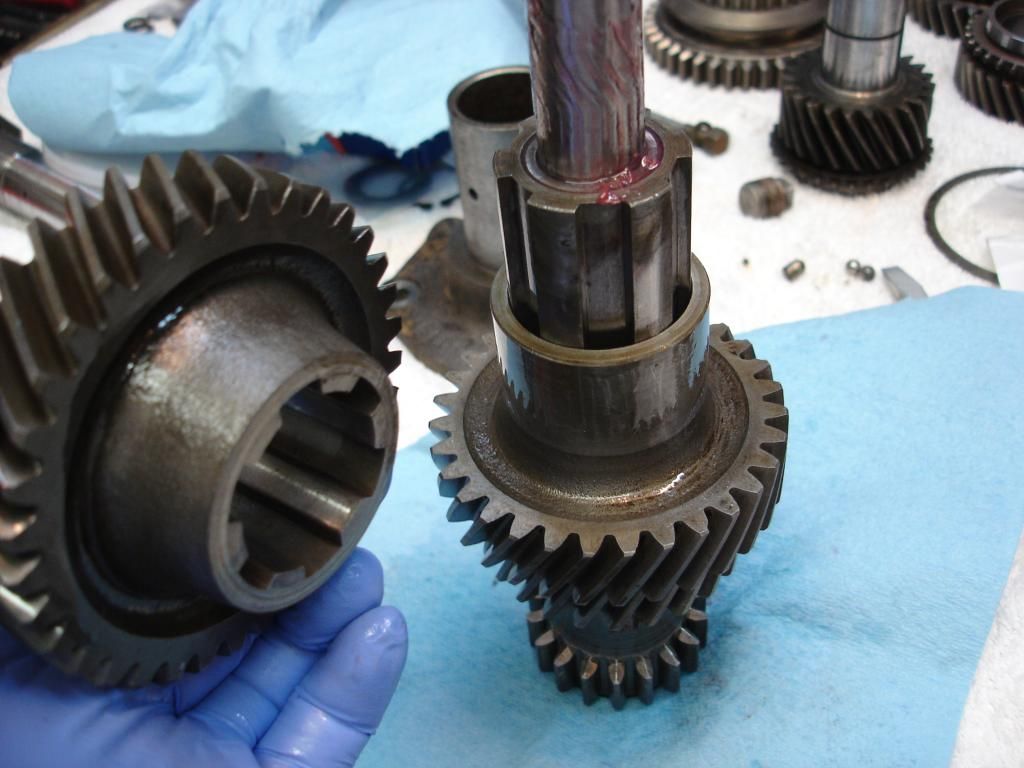
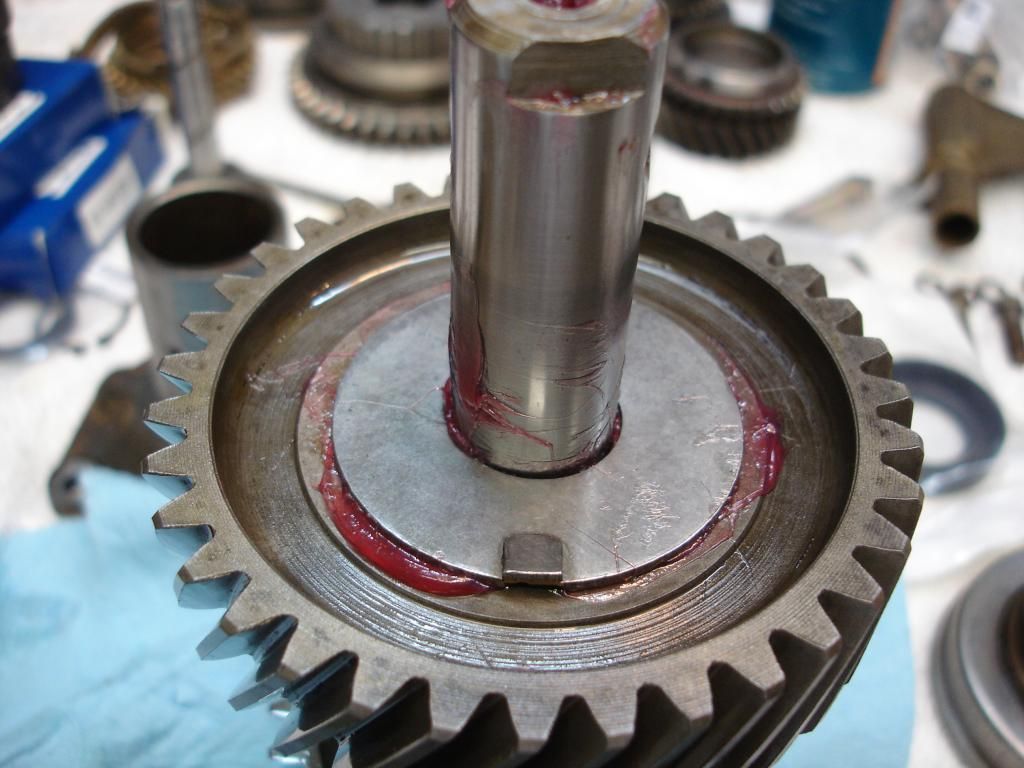
Now, each side of the cluster gets a thrust washer. The gears are cut at an angle to make them quiet. A side effect of the angle cut, however, is that the gears do put an axial load on the shafts. I always use new washers, as they are only about $5 each. I would not have an issue reusing most washers I have seen removed from trannys, though, as they do not wear very fast. Note that I hold the washers on the ends of the cluster with more grease. This keeps them from falling off as you install the cluster gear.


And, here is the final cluster gear, ready to drop into the case.
 
OP
CJD

CJD

Yoda
Country flag
Offline
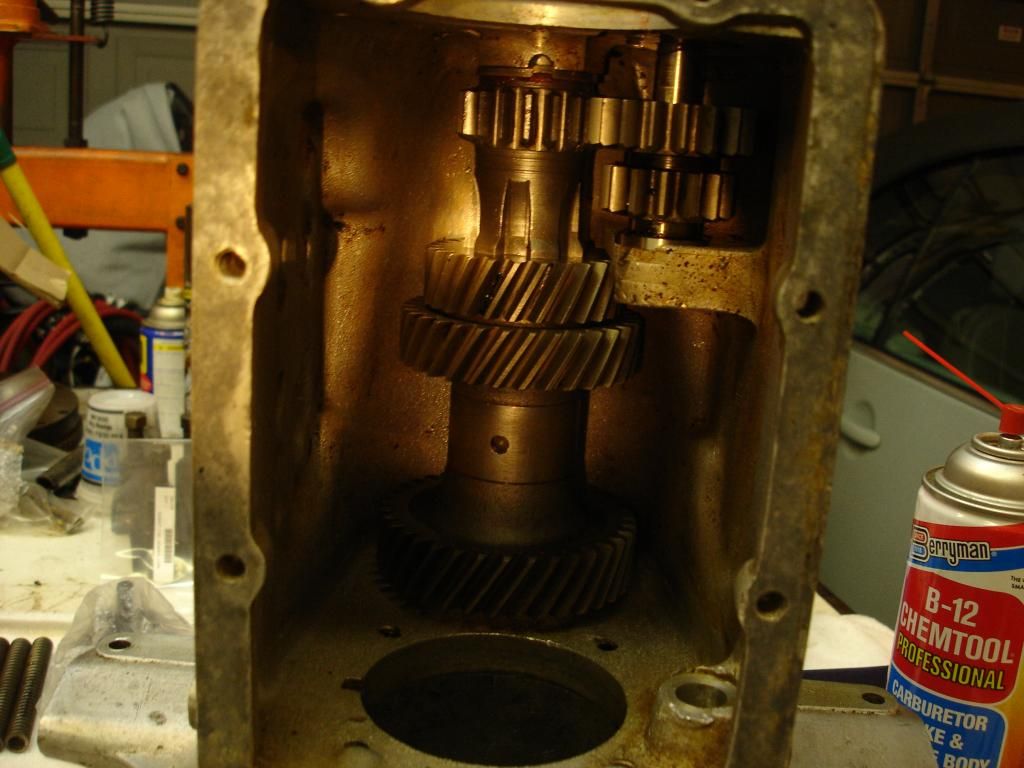
Now, we set the completed cluster into the bottom of the case. Do not install the shaft at this time. We need the cluster to stay down in the bottom of the case and out of the way while we install the top gears. The shaft comes later. But....before you move on, check the end play of the cluster assembly inside the case. I have never had the end play be out of tolerance, especially with new thrust washers, but it is possible when you are dealing with cases that have seen a lot of miles. Once the end play is verified, leave the cluster in the bottom of the case sitting free, and we'll move on to the reverse gear.


Here is a pic with the reverse and cluster inside the case. Notice the order of assembly is very important. You cannot change the order of assembly or some gears won't fit!


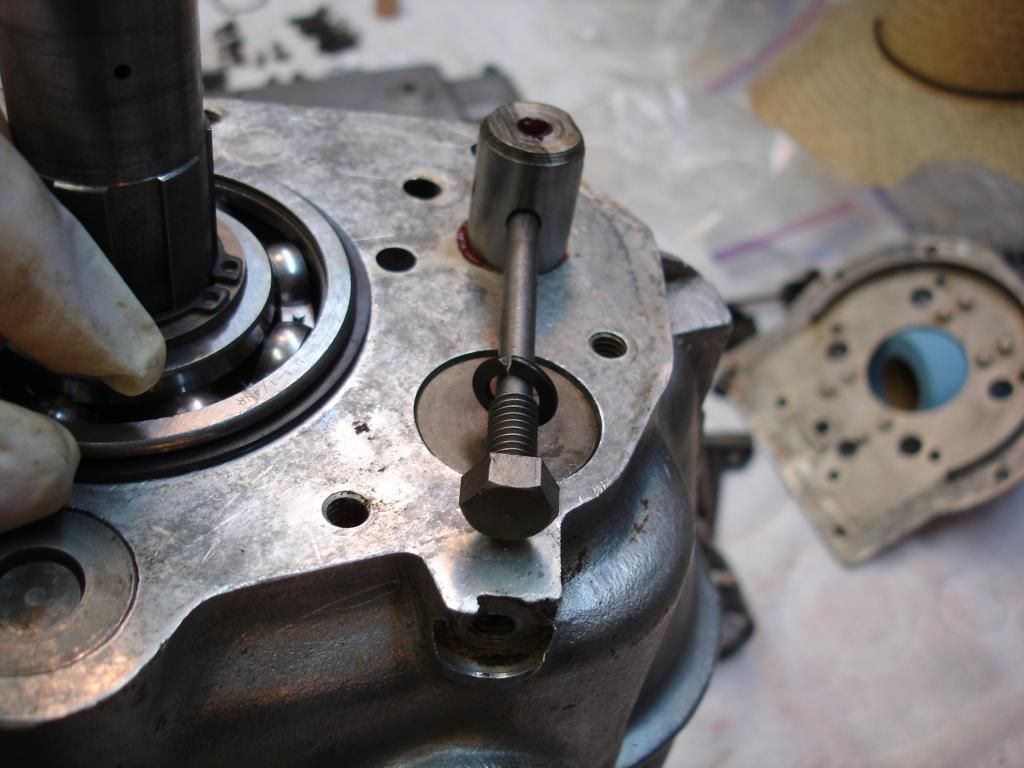
Poor pic here, but you can just make out the bolt that has the Looong shaft on the end to hold the reverse gear in place. This bolt starts outside the rear of the case and skures the reverse gear shaft, exiting the opposite side of that shaft. It then continues inside the case to stab the counter shaft. We have not put the counter shaft in yet, so the bolt is just loose to keep the reverse shaft in place. We will see this bolt later...


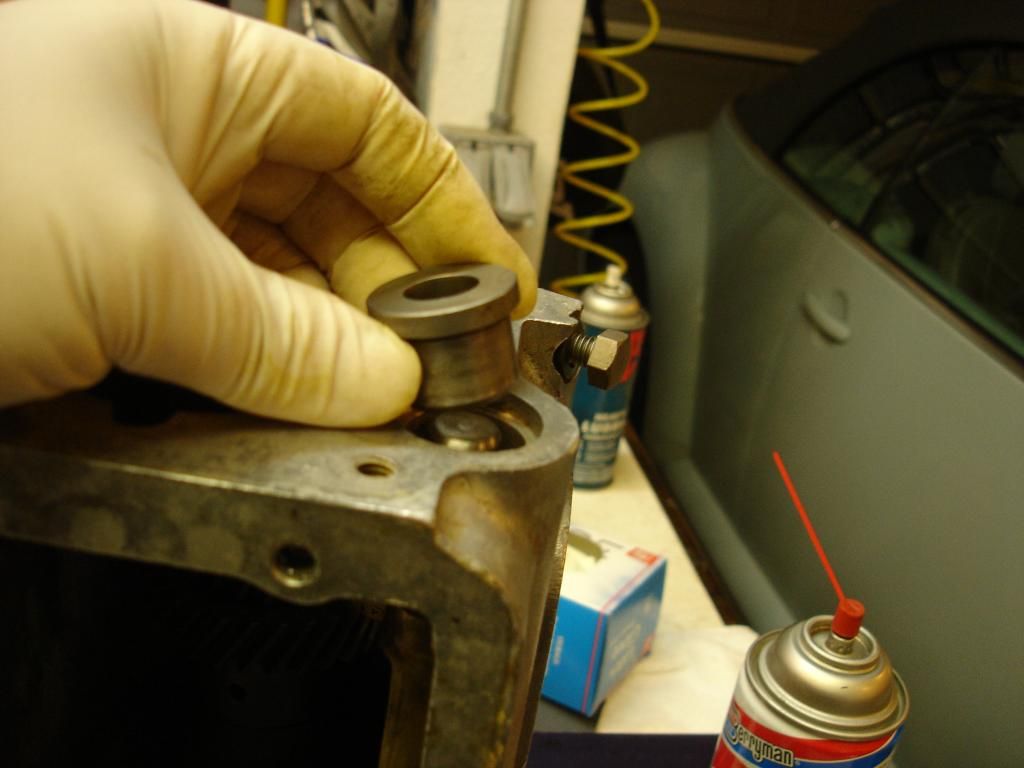
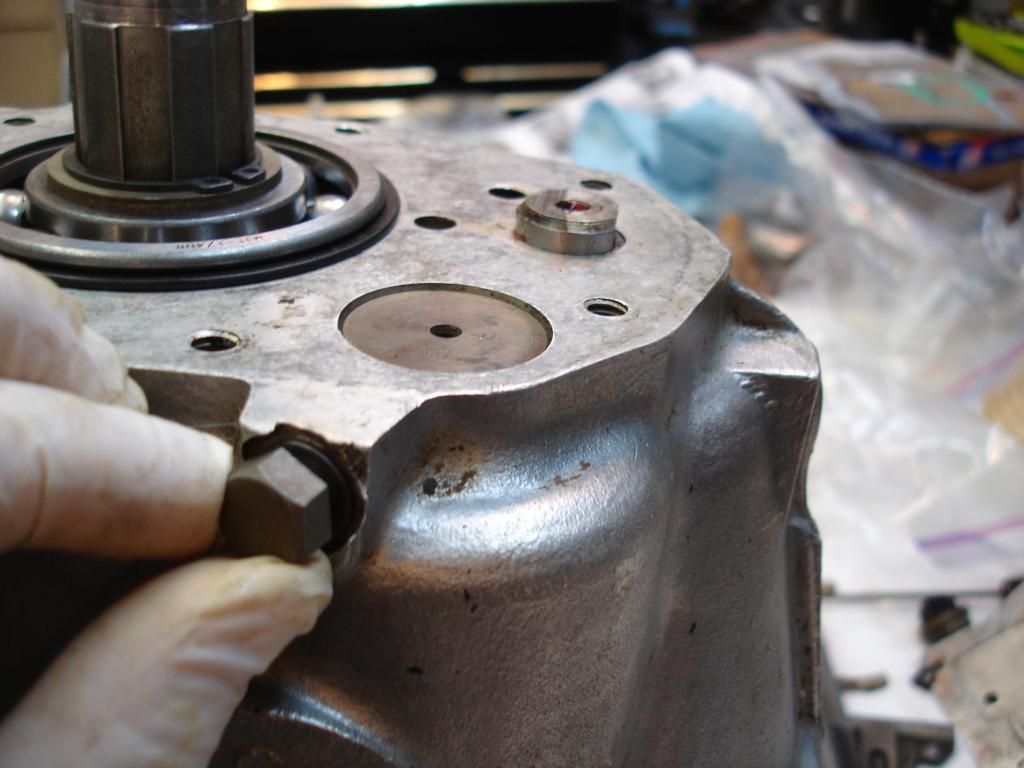
This is the reverse transfer shaft. It keys into the reverse gear, allowing the shift fork in the cover to slide the reverse gear fore and aft. This shaft is retained by a set screw that inters the case near the front, and stabs the transfer shaft. Use thread sealant on this screw, as it enters the wet portion of the tranny. Notice it has a lock nut. That implies that you should not cinch this bolt down. Snug is good, then lock with the nut.


The rear of the transfer shaft has a steel bushing to hold it securely in the case.

 
OP
CJD

CJD

Yoda
Country flag
Offline
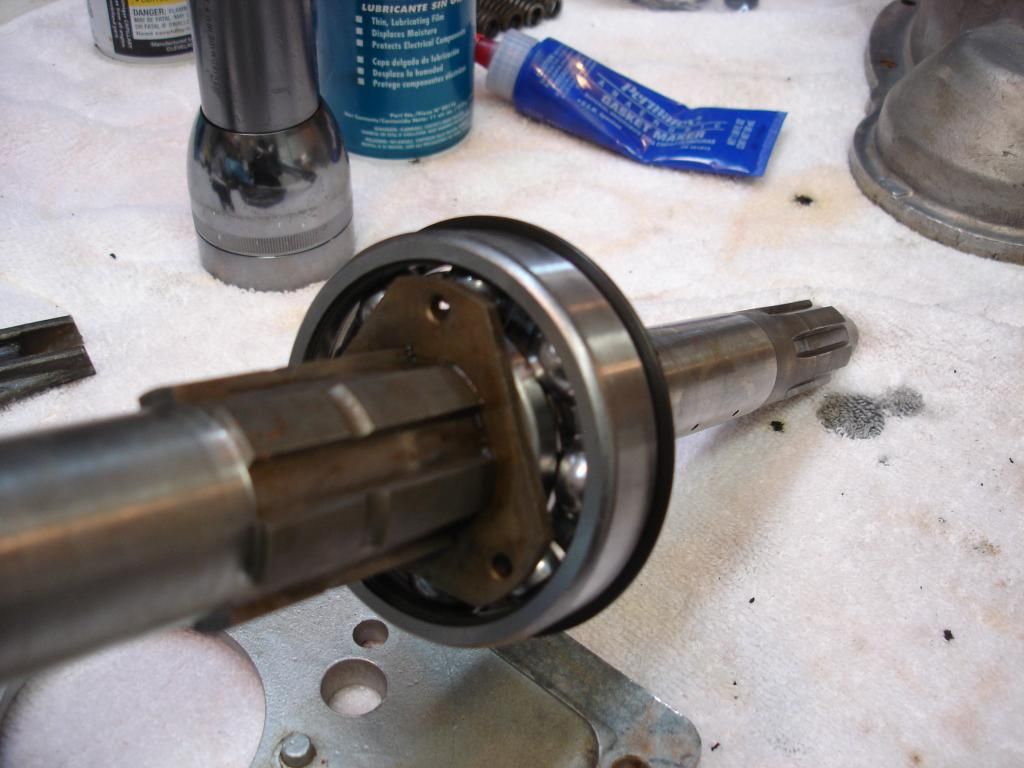
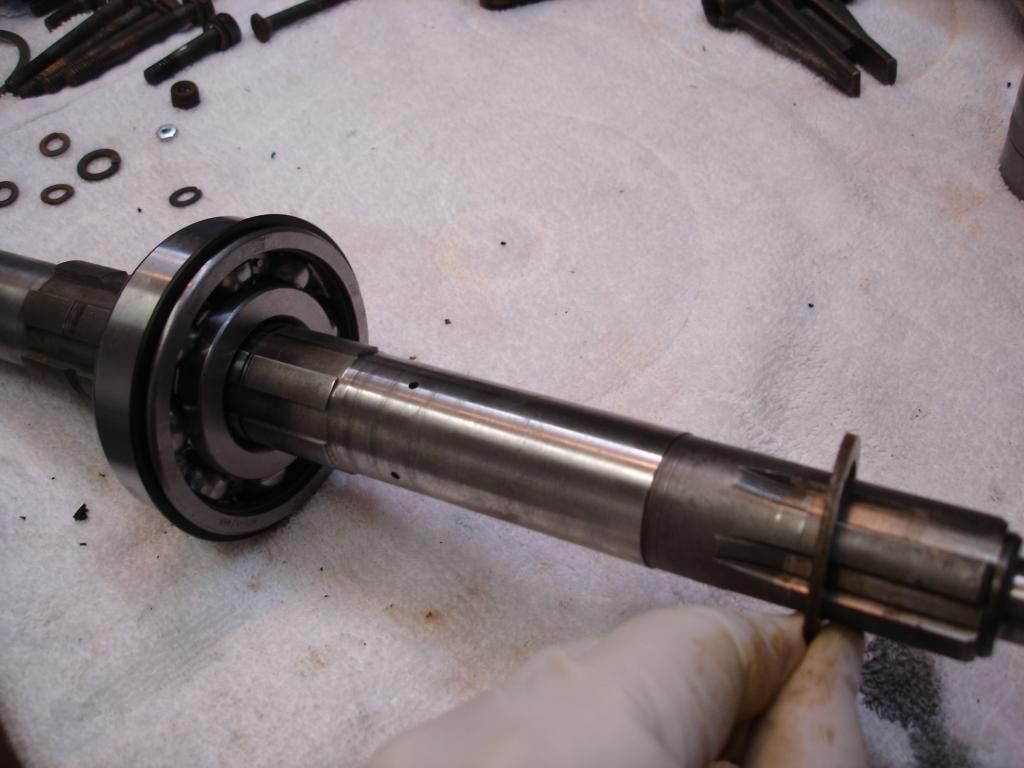
Time to build up the main shaft. This shaft is for an OD tranny. The gearbox portion (front) is identical for both an OD and non-OD box. The gears are identical too. Start with the little triangular washer, keyed on from the rear of the shaft, followed by the center bearing. The bearing is a tight fit on the shaft, so lube the shaft and tap or press only on the inner race of the bearing until it sits hard against the triangular washer. Notice there is a snap ring that holds the center bearing outer race in the case. This snap ring goes toward the rear of the shaft. Then a washer, followed by a snap ring to hold the bearing on the shaft.


Next, we have to build up the gears from the front...but there is a catch! The very large 1st gear will not fit through the bearing hole in the casing. This means you must gently lay the case horizontal, without disturbing the loose cluster gear. Then, stick the mainshaft through the case bearing hole...and add the gears from inside the top of the box. It gets a bit tight towards the end, but it is possible and necessary to build it this way.

Before you start the build, though, you once again need to check the end play of the gear bushings. The second and 3rd gears ride on bronze bushings. You must remove the bushings from the gears and build up the main shaft using the bare bushings. Check the end play with a feeler gage, then take it back apart and start the build for earnest. It goes in this order...

1st gear, with the fork slot to the rear of the box...


Special keyed washer...


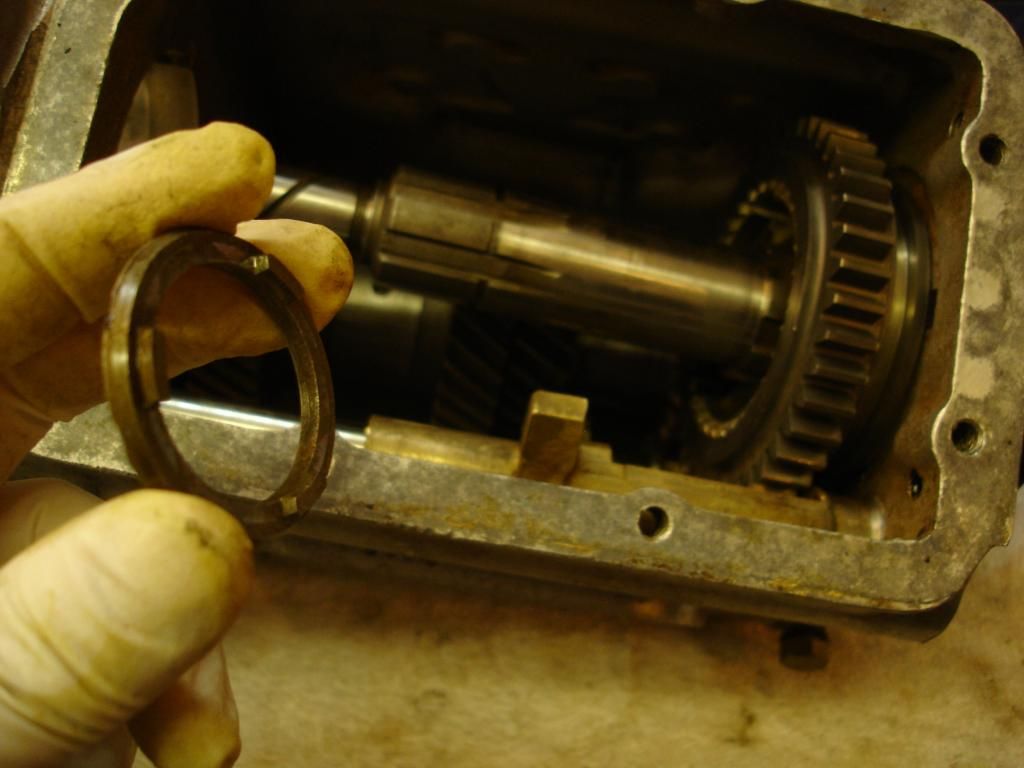
Now, brass synchronizer blocking ring with 2nd gear And their bronze bushing. It'll be obvious if you forgot the bushing! Then 3rd gear, with it's blocker ring and bushing...


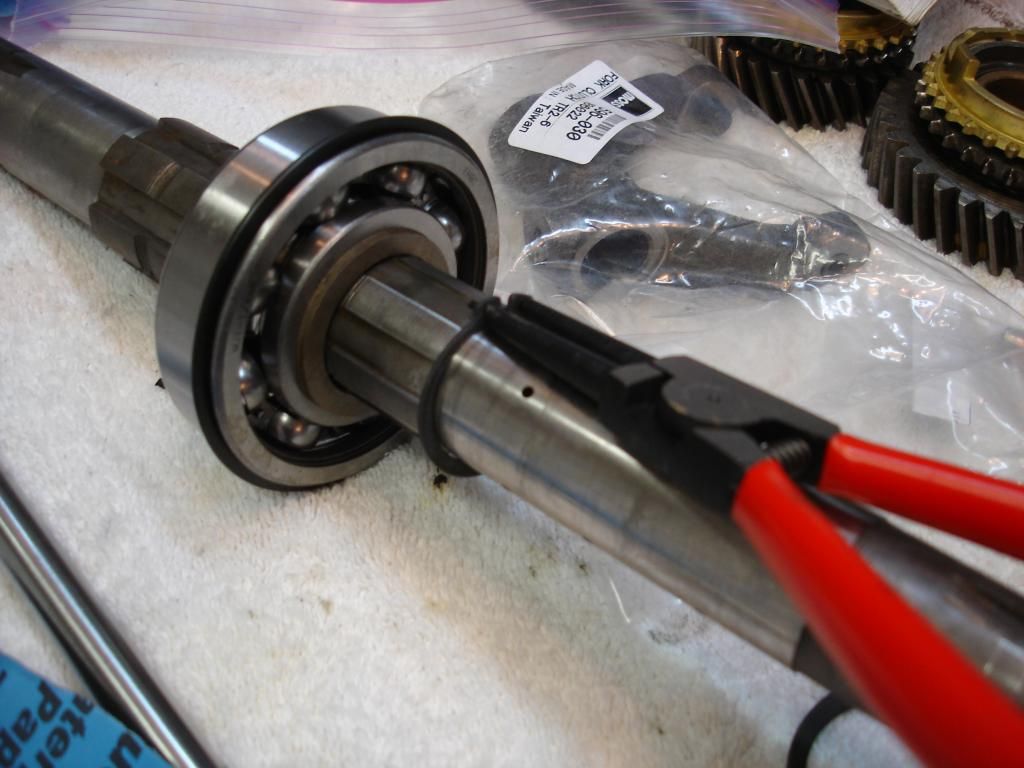
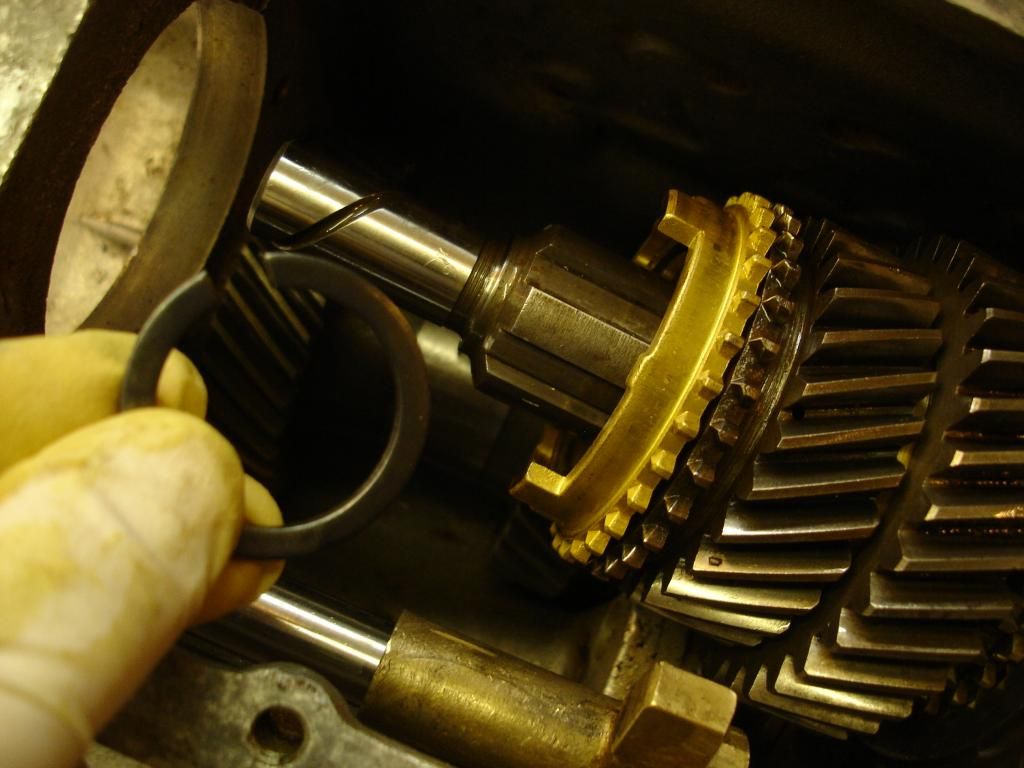
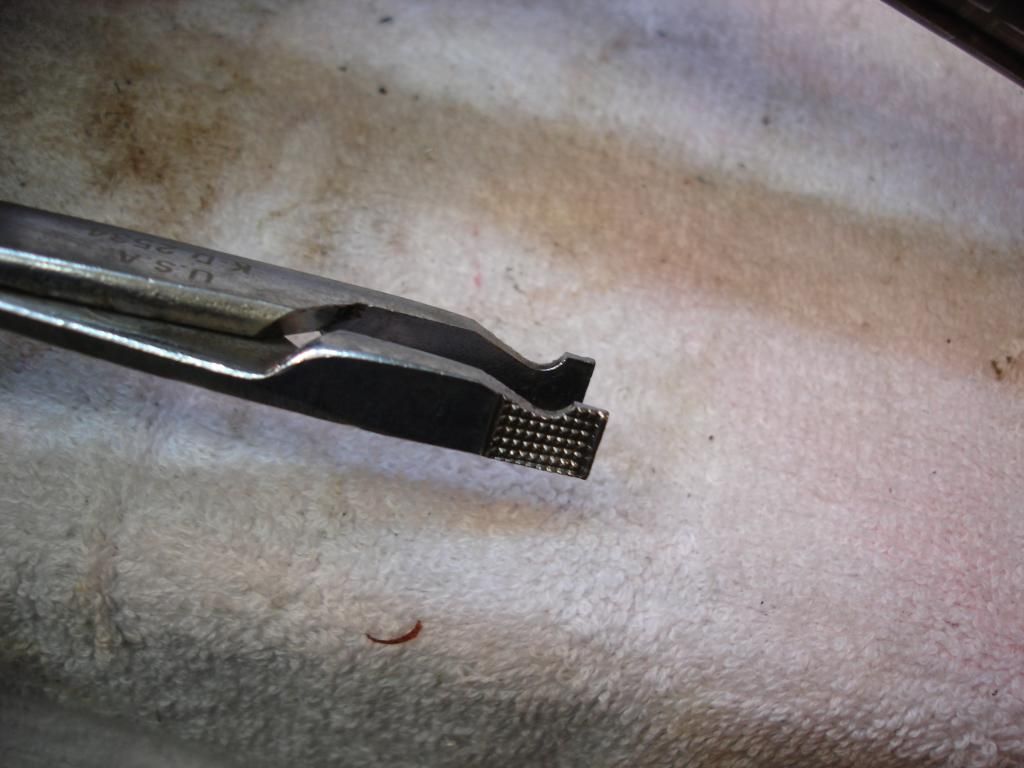
Now for the snap ring I truly despise. It is not that hard, but you are trying to work with little or no room. Do not spread the ring too far, or it will not "snap back" to size. Do not spread too little, or you will score the main shaft. I ground my snap ring pliers just to work with this one blasted snap ring. It helps, but still not easy. Good luck and godspeed john glenn!


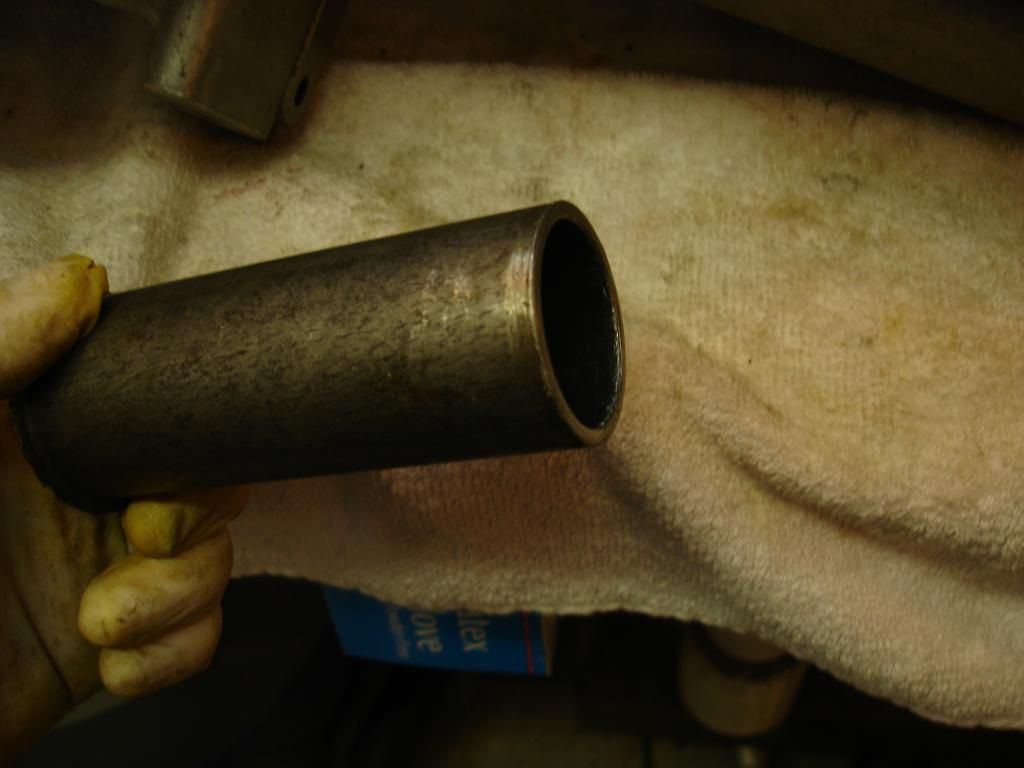
On this particular build, I tried a new technique on the ring. I got the ring as close to the slot as I could with the pliers, then I used this pipe to tap it home. It seemed to work. I now buy 3 rings for each job. If I spread the ring so it doesn't feel right, I toss it and start with another...


Finally, the 3-4 dog clutch goes on the end...and actually has nothing holding it, believe it or not! It can't go anywhere because of the close proximity of the input shaft. In this next pic I have all the gears where they belong, and the center bearing is ready to press into the case. I use a press. You could tap it gently, but not hard as you can brinnel the bearing if jarred too much. Always press bearings if at all possible. Remember the counter shaft is still loose in the bottom of the case while you carry the assembly to the press and back.

 
OP
CJD

CJD

Yoda
Country flag
Offline
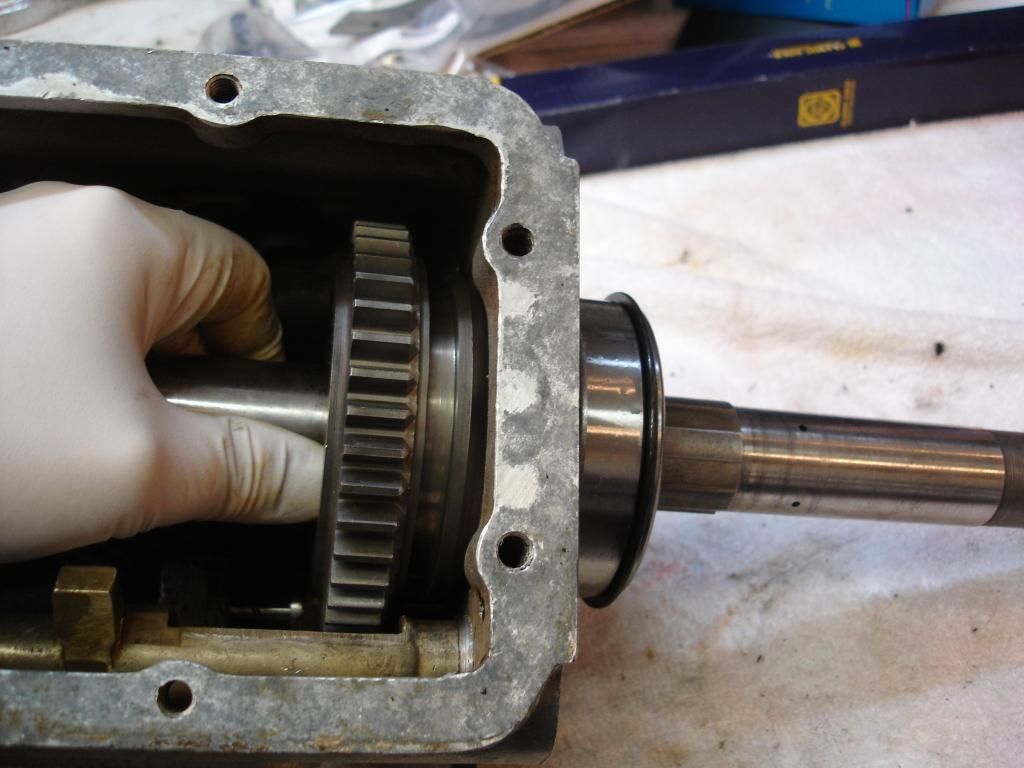
Now, install the input shaft. Put on the oil slinger washer and press on the bearing, this time with the snap ring on the outer race towards the front. Then a washer and inner race snap ring. This then gets tapped or pressed into the front of the case.


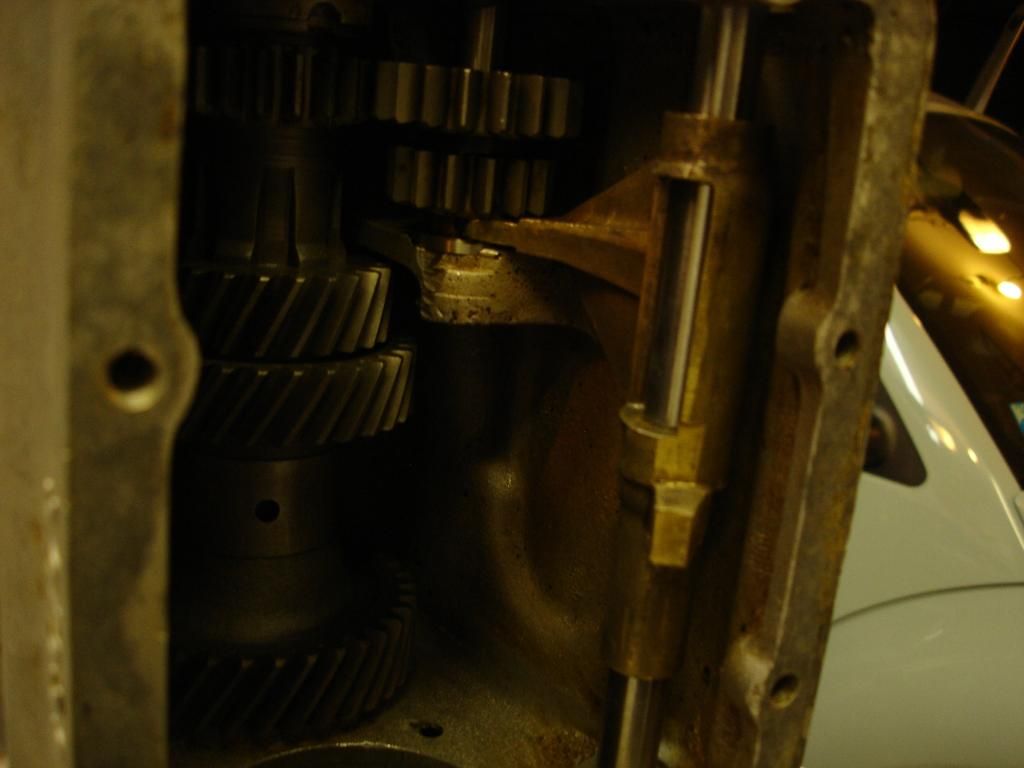
Now all the upper gears are in place, so we can reach around the top gears and pull the cluster gear up into position...and install the counter shaft. Here is a picture of the pin that holds the cluster and reverse shafts in place...


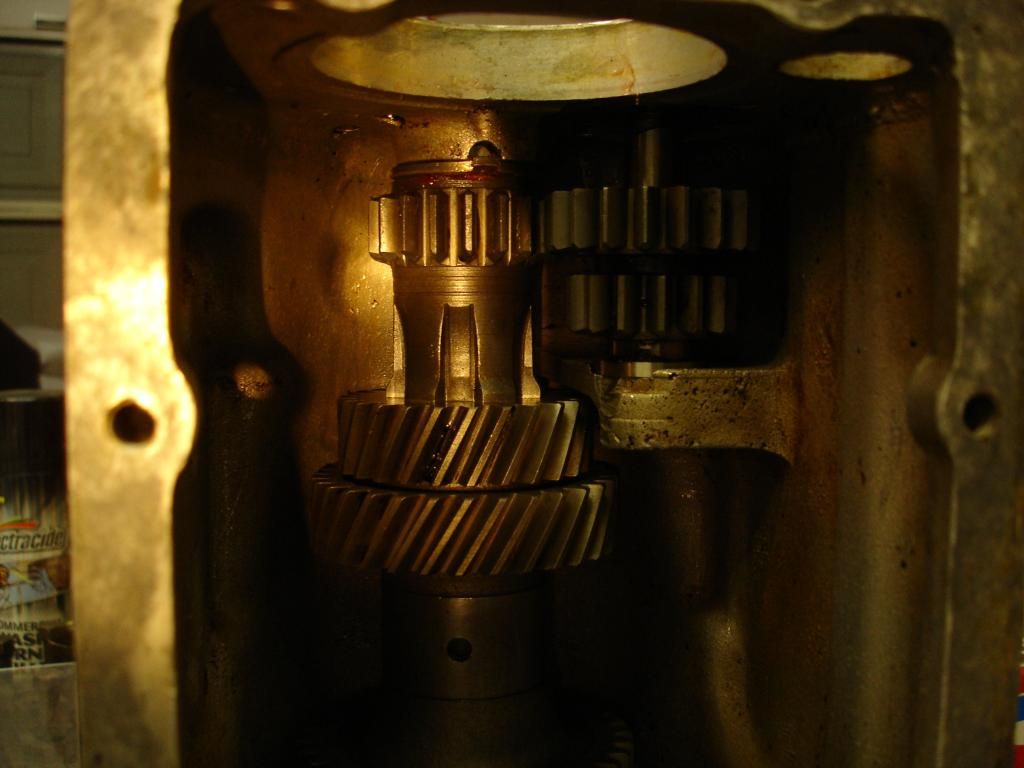
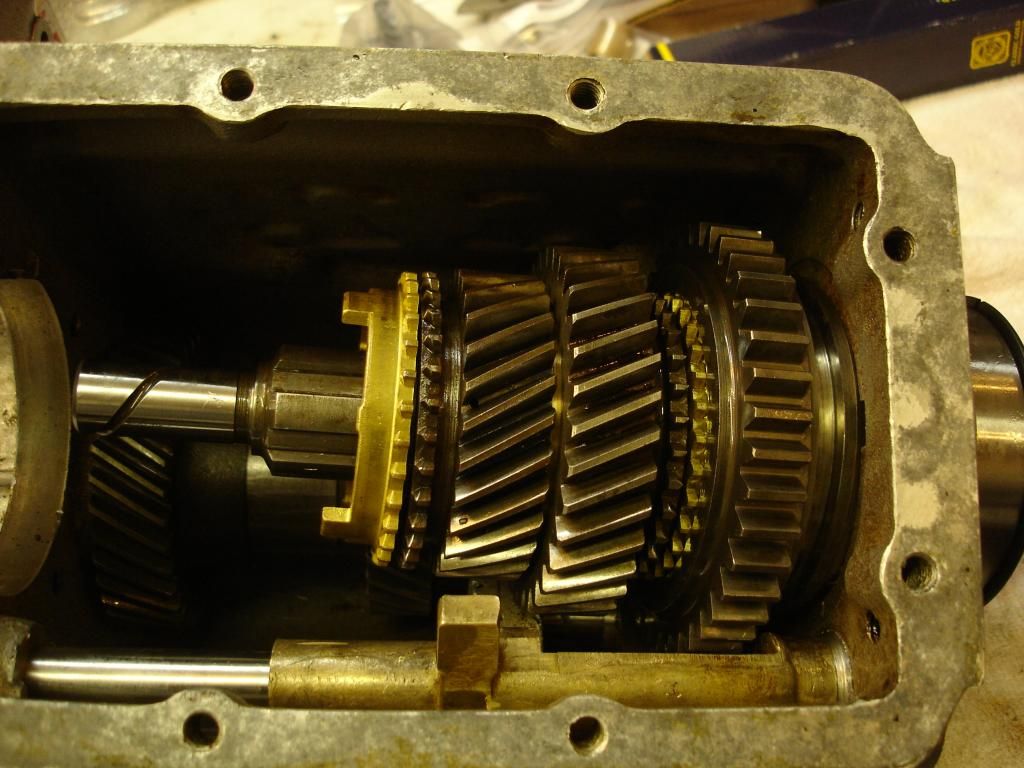
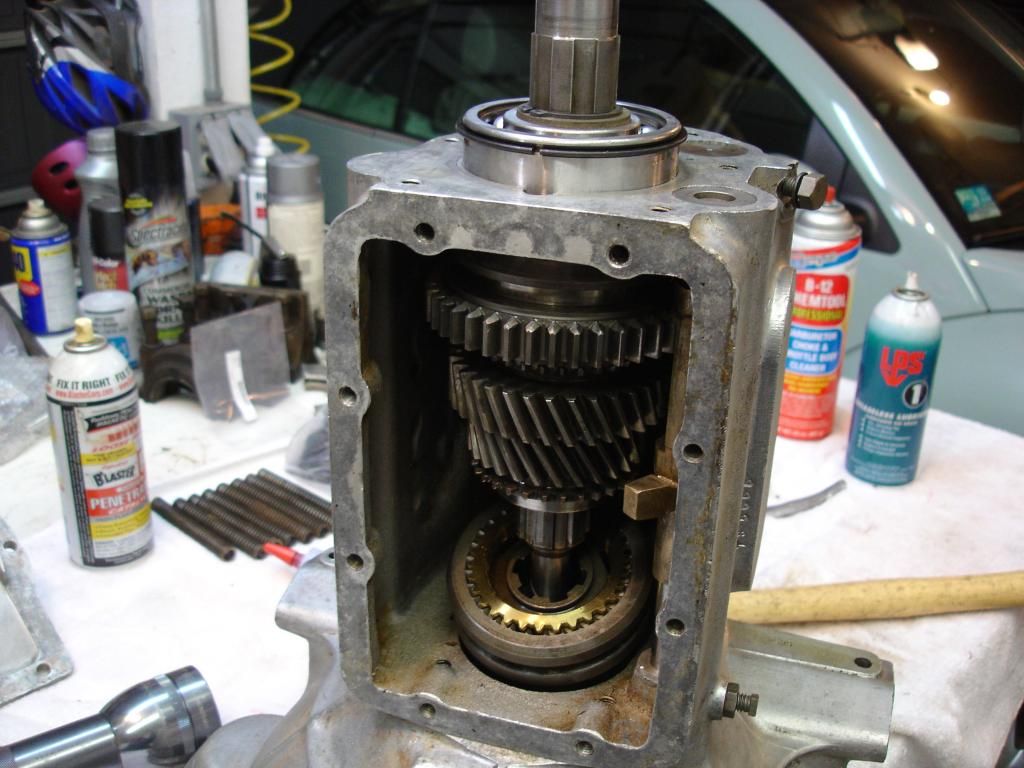
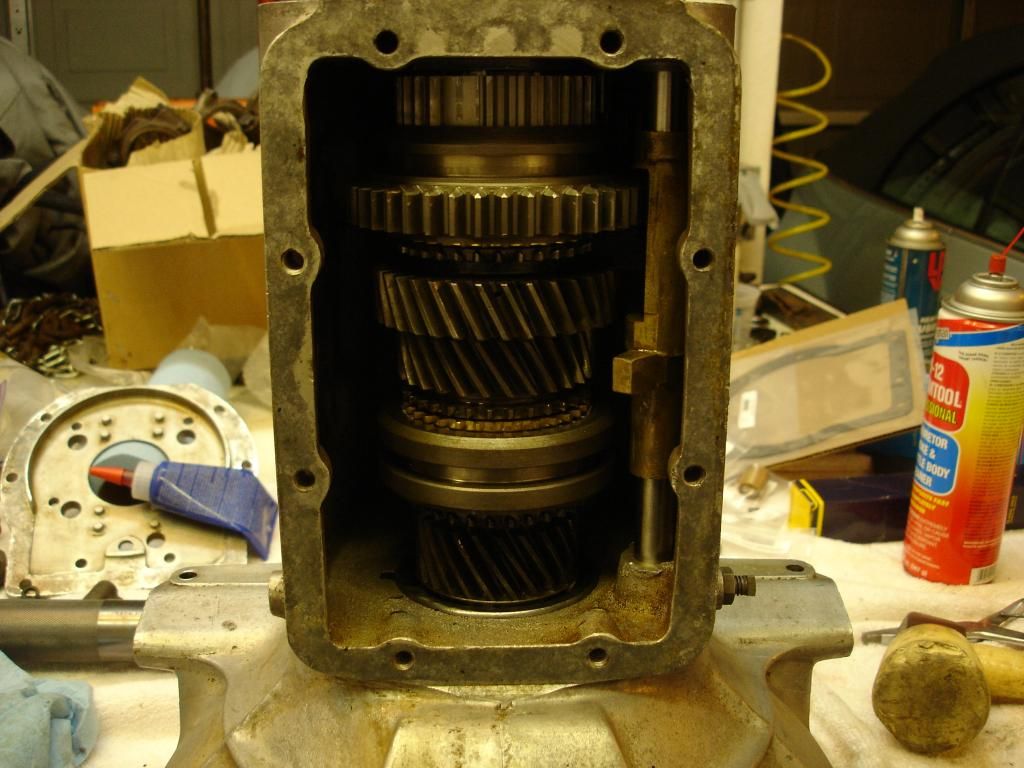
And this is what you are now looking at. The guts are complete...


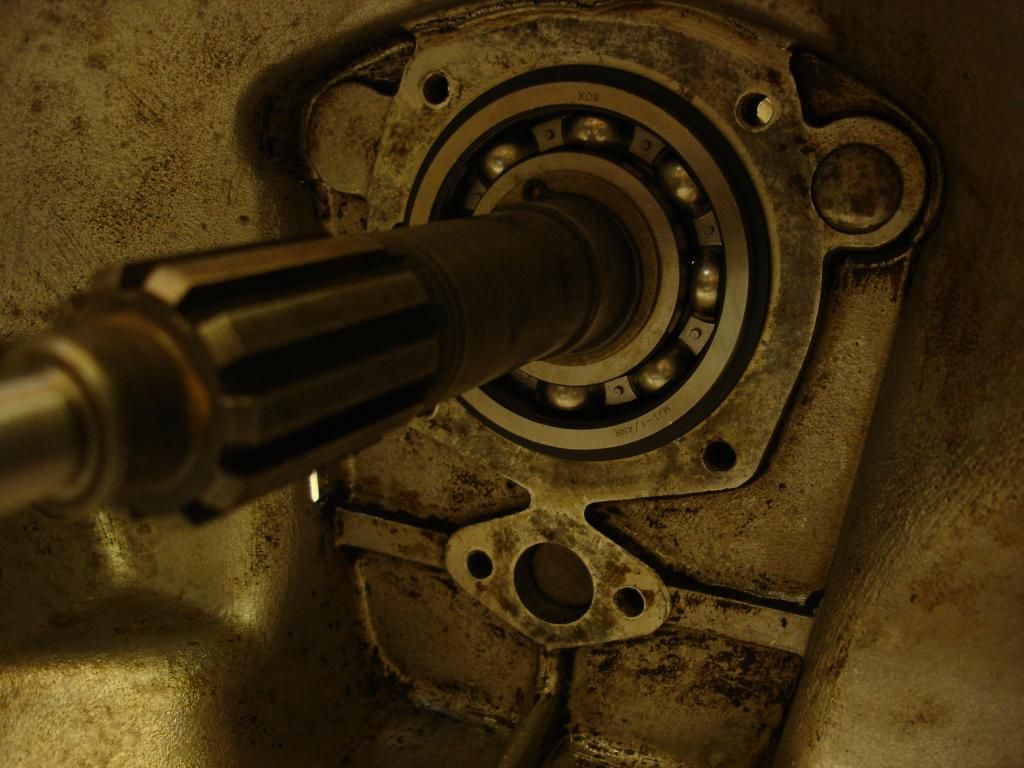
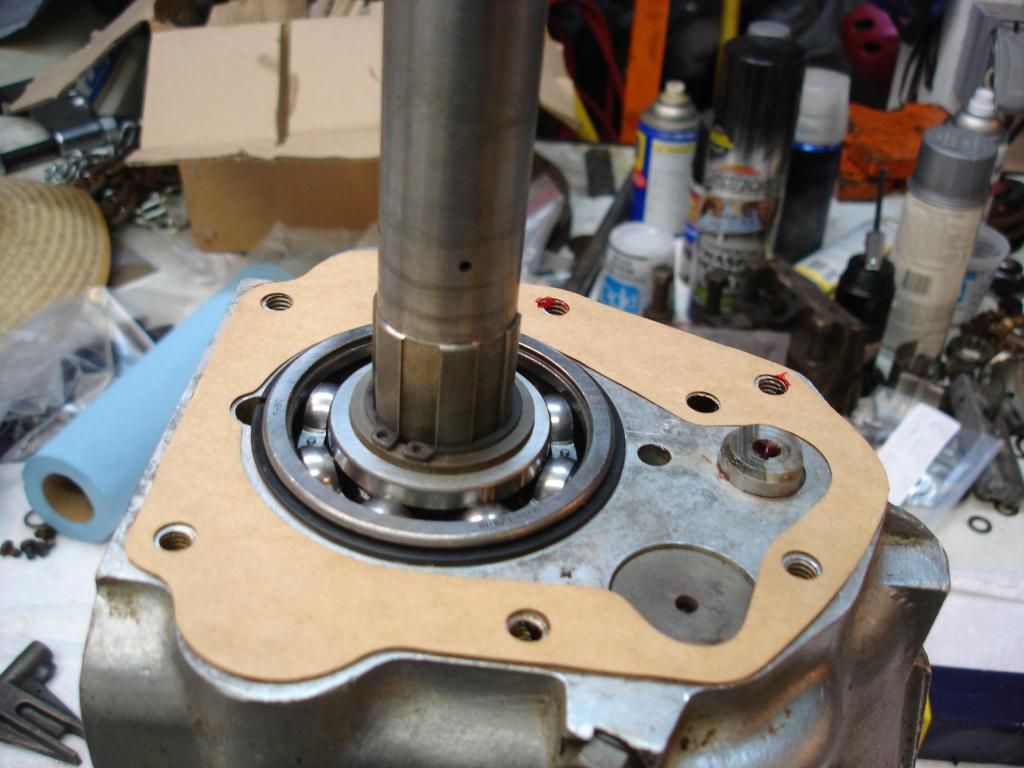
Here is the back end. This tranny will be installed onto the OD. Most trannys will get the exact same gasket, but it will bolt to the tail housing instead. The tail housing has a bearing and seal...perhaps someone can add a pic of how they go on...

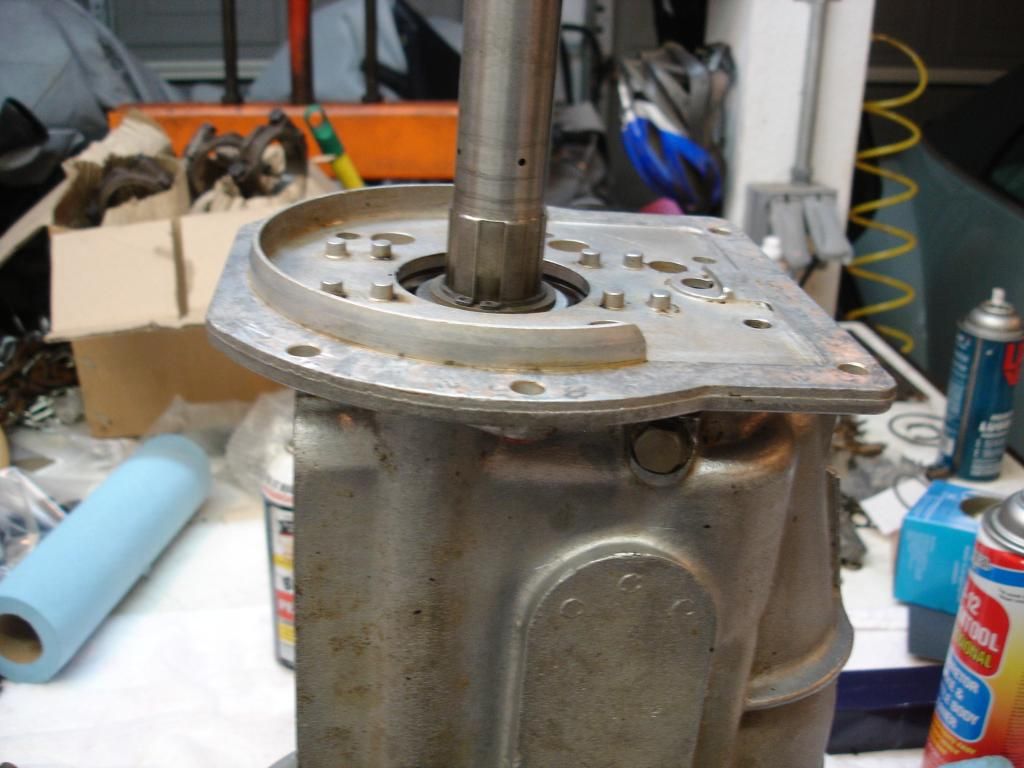
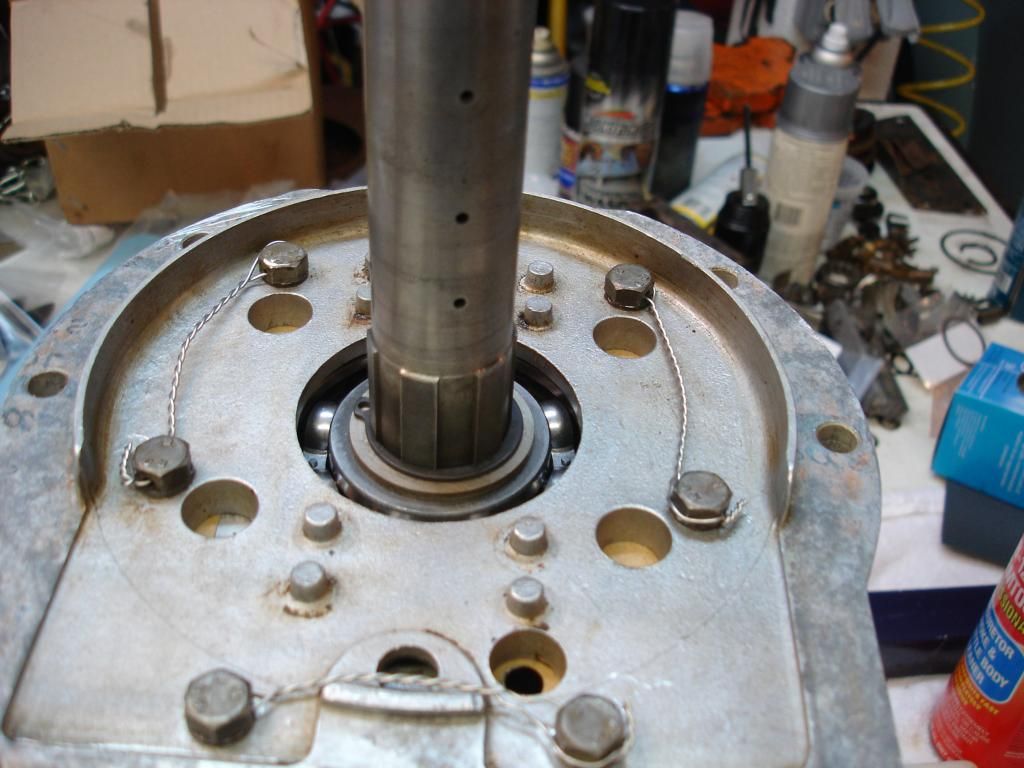
Anyway, back to the OD tranny. This is a series of pics showing how the adapter plate for the OD goes on. It uses special small-head bolts with lock wires to hold them. The lock wires must be installed as shown to clear the OD internals.


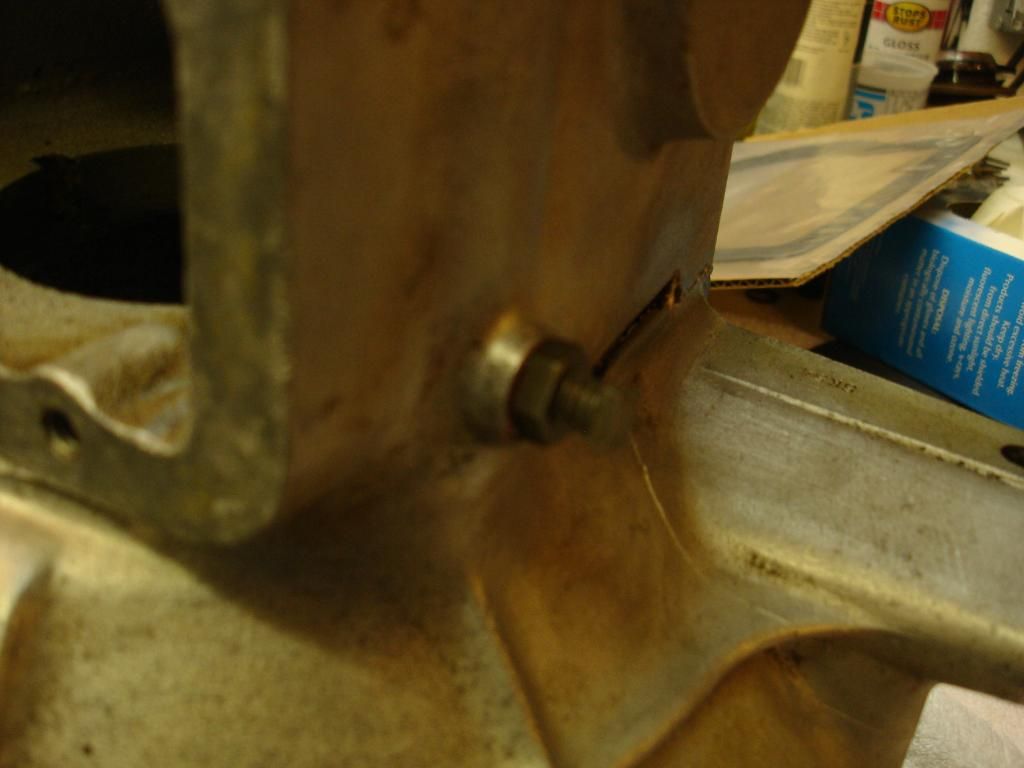
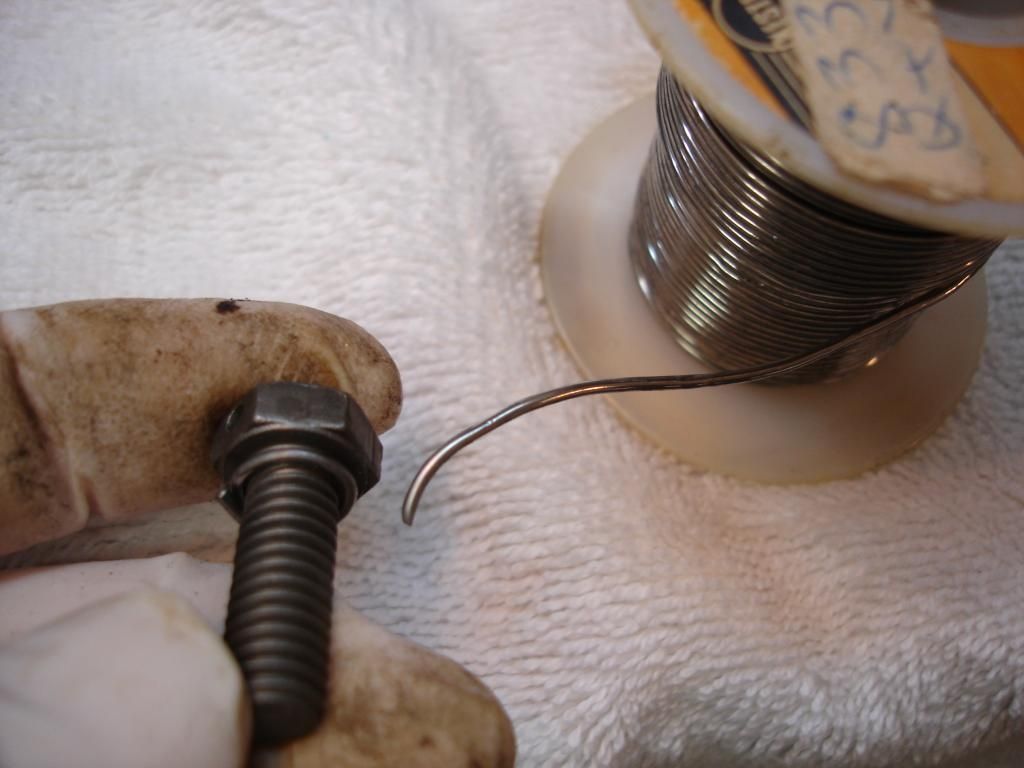
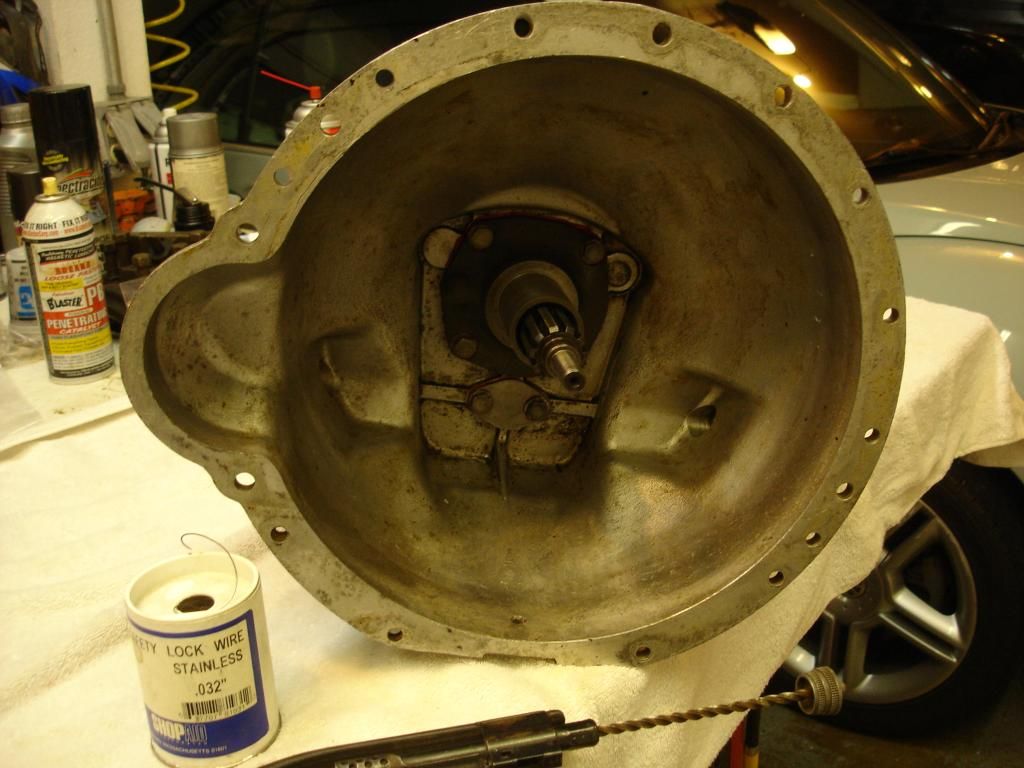
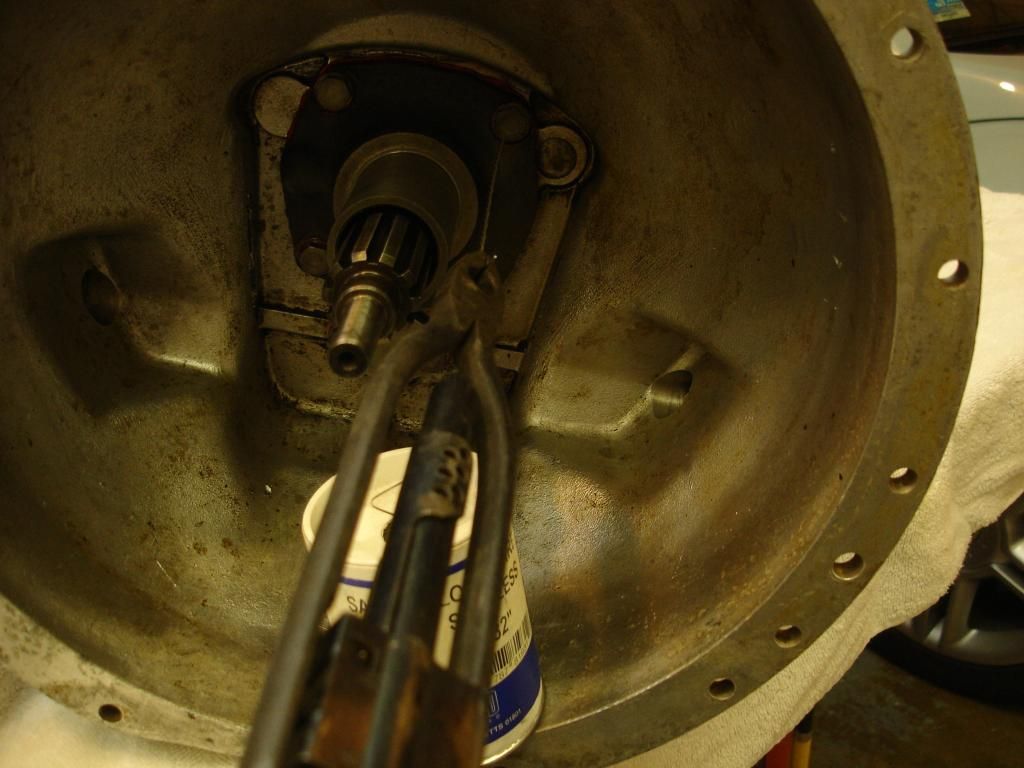
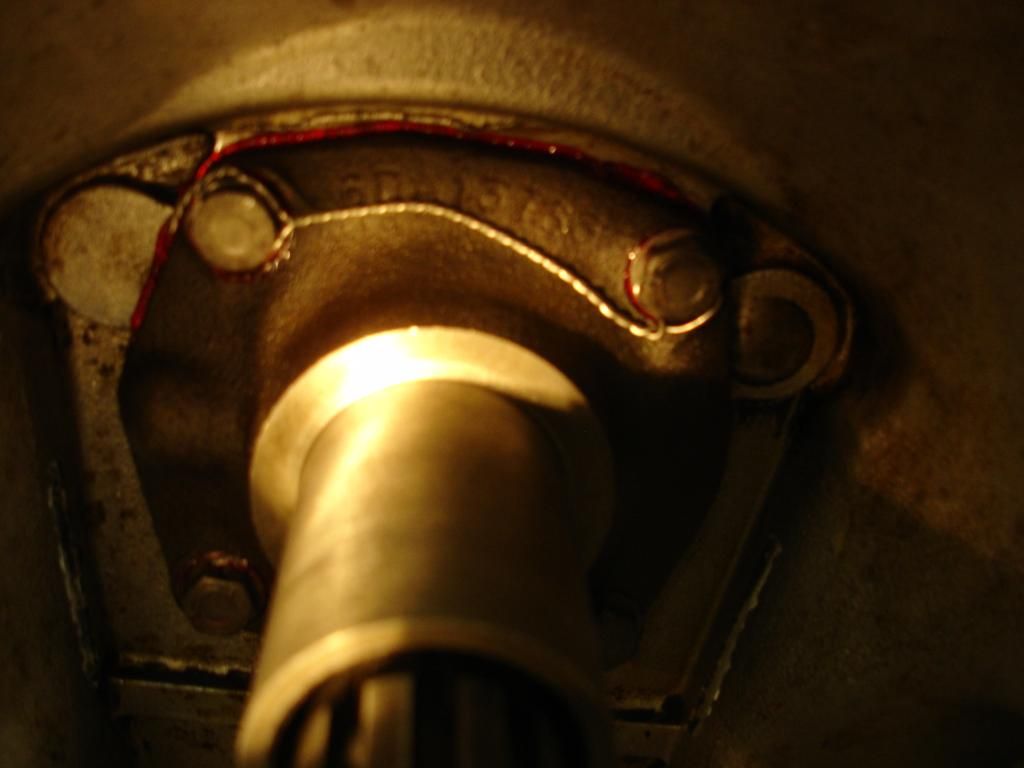
Now we install the counter shaft cap and clutch throwout sleeve. We need some odd tools for this. the TR2 tranny used lock wire and lead seals for the bolts. Later cars use copper washers. The main point is, these go through the case to the wet part, so they must be sealed in some way. Here is my selection...Stainless lock wire and lead solder...


And, with that I need another break from the computer. To come...top cover and how synchronizers work...
 

KVH

Darth Vader
Country flag
Offline
Great thread for posterity. For the next big project. For the kids one day. How different is this whole exercise than for a TR4? I can't imagine much. Just the first gear?
 
OP
CJD

CJD

Yoda
Country flag
Offline
Funny you should mention that! I am about to tear apart a TR4 tranny to rebuild for the TR3. ( I'm tired of everyone who drives it grinding 1st gear.) So, it'll be posted here at some point. As you can tell this is my "when things get slow" thread. Right now the forum is moving along pretty good, so I'm waiting for a slow point to add this for filler...!
 
OP
CJD

CJD

Yoda
Country flag
Offline
I have finally gotten around to the TR4 box. This will document the most common cause and progression of a gearbox failure. Assuming you know how to shift properly, at least most of the time, transmissions should last the life of the car without any issues. The most common cause of the tranny failing, though, is actually the clutch! If the MC or slave cylinder get weak, or the clutch is mis-adjusted, the synchros have to work overtime on every shift. Eventually, you start to hear the "brrrraaaattt" during shifts. Usually one synchro ring wears faster, so the bad shift starts with only that gear.

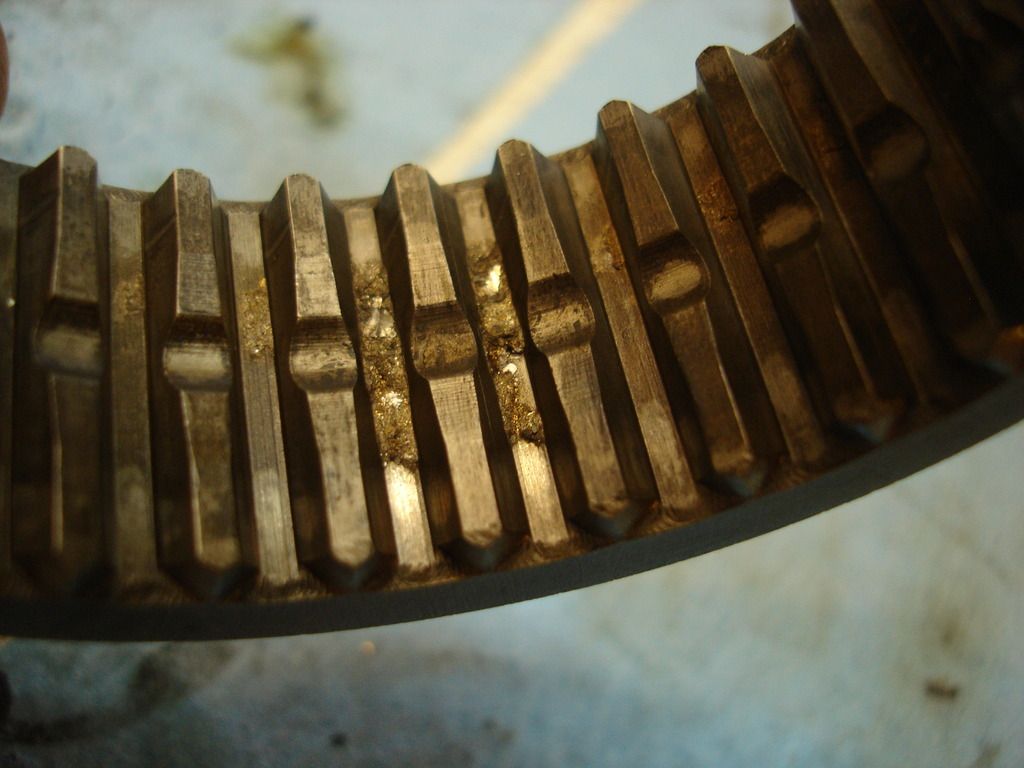
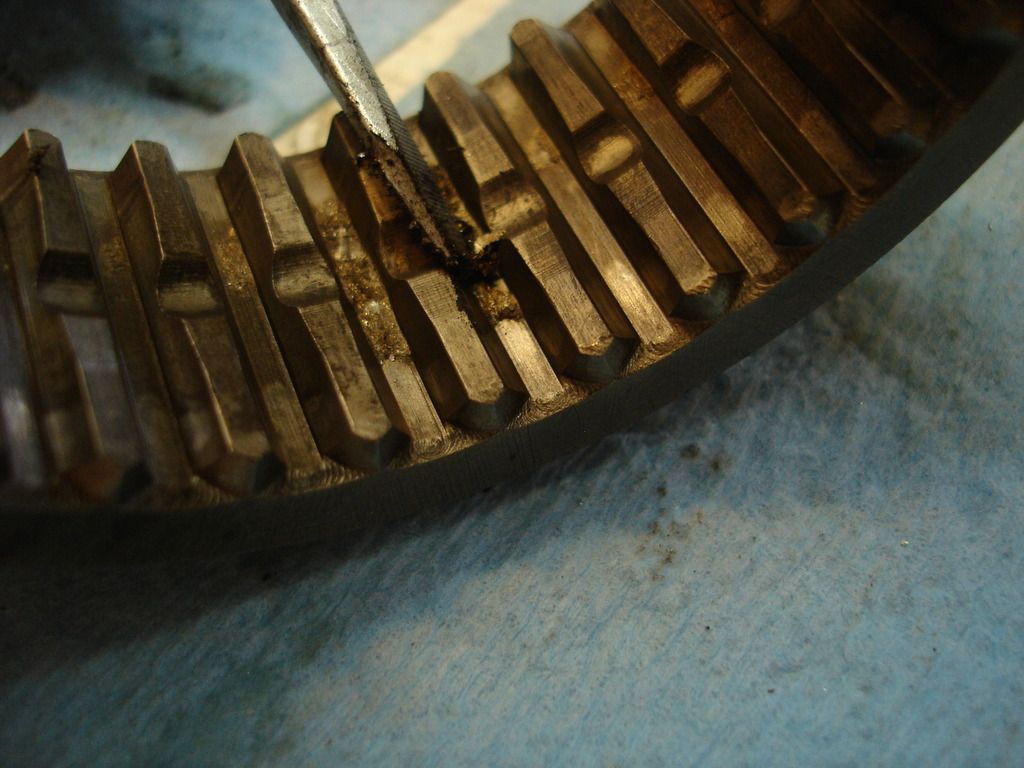
When you grind the gears on a shift, you are wearing and/or breaking metal from the dog clutch fingers. The metal circulates through the tranny, and gets caught in the sludge at the bottom of the case and within the dog clutch itself. The clutch spins, so the metal is trapped...

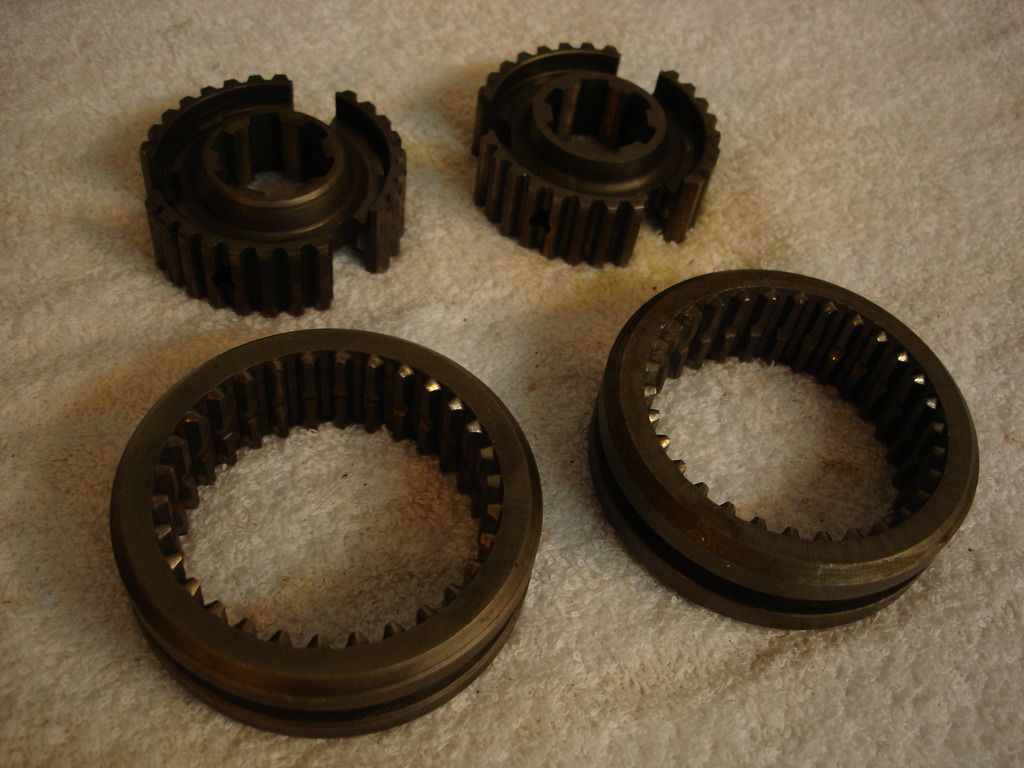
Here is a picture of a couple 3/4 dog clutches from a TR4. The TR3 is identical. The outer ring slips on the inner ring, which is fixed to the output shaft. When the outer ring slides during a shift, the teeth engage the 3rd or 4th gear.


Here are a couple shots showing the metal that gets trapped inside the outer teeth during missed shifts.


OP
CJD

CJD

Yoda
Country flag
Offline
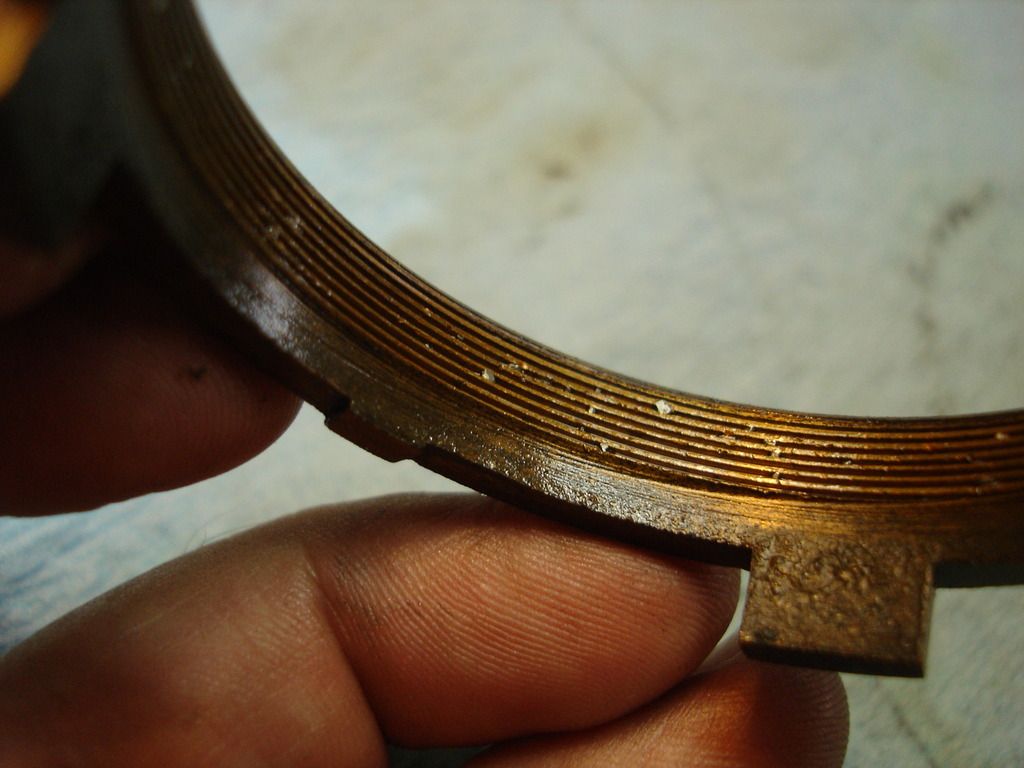
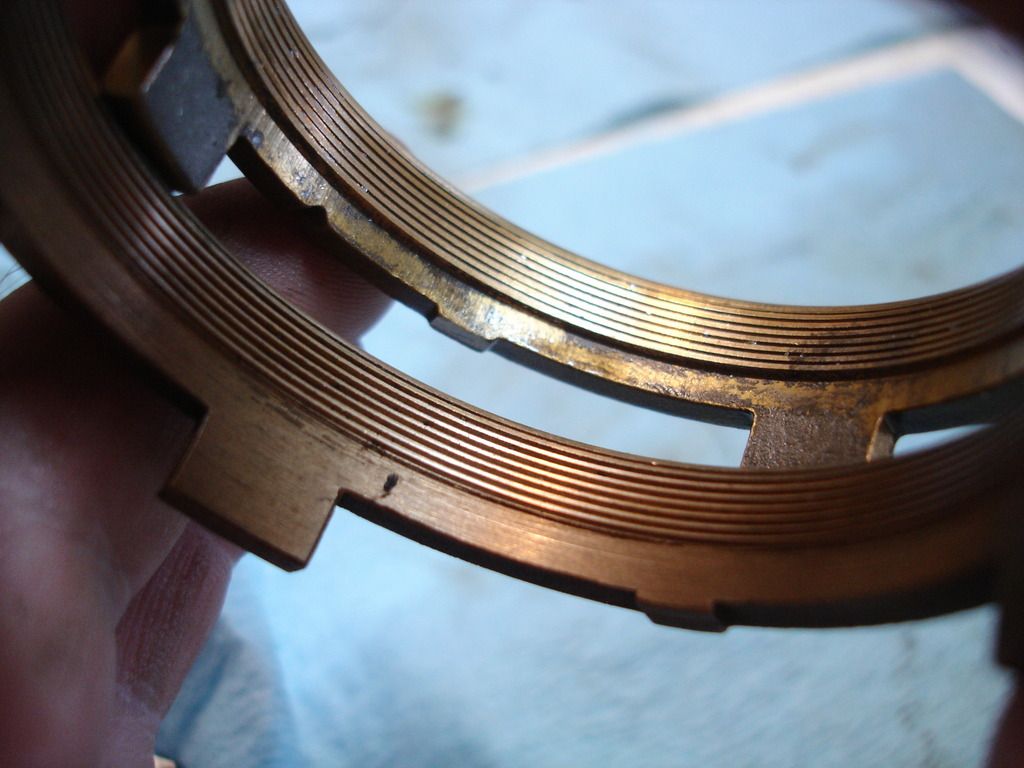
As the metal accumulates, it eventually gets caught in the synchro blocker-rings. These rings must tightly engage the cones on the gears to bring the gears to the same speed. If there is metal trapped between the ring and the gear cone, the ring cannot function. Here is a pic of metal caught in the blocker ring grooves...


This next picture shows a fairly new synchro ring in the front, with a very worn one in the back. A brand new ring would have knife sharp ridges to engage the steel cone on the gear. So, even if metal does not cause the rings to fail, the drag from a bad engine clutch is still slowly destroying the synchronizers ability to synch the gears during a shift...


Blocker rings should be a priority in any rebuild. For the pain and suffering it takes getting to them, they are cheap in comparison. Also, do not scrimp on cheap blocker rings. I rebuilt that muncie 6 times...each time with new rings, and each time a different gear would grind. I finally learned Chevy was selling warped blocker rings.

To test a blocker ring, press it lightly against the cone on the gear and try to twist it. It should lock so tight you can not twist it, and it will be difficult to remove. If you can twist it without trouble...it is shot!
 
Last edited:
OP
CJD

CJD

Yoda
Country flag
Offline
On to our slowly failing box.

We now have worn synchro blocker rings and a bad engine clutch. If we fix the engine clutch about now, we can continue life having fun with out TR. One gear may be a bit weak, so you have to shift just a tad slower for that one, but otherwise all is well.

Remember, there is already a lot of metal in the box. Most of it is tied up in the sludge at the bottom (if you, like most, never change the oil in the case). If you change your tranny oil regularly, there is a chance you can keep it sludge free, and all that metal will come out during the changes.

But...if your box has never had an oil change, now is not the time to give it one. With a weak synchro the natural thought is to change the oil, right? Fresh oil will loosen the sludge, allowing the metal to begin circulating...all at once! It may have taken months or years for the metal to accumulate, but now it will all circulate at one time. So, one of the biggest no-no's with a manual tranny is...

Change your oil frequently or not at all!

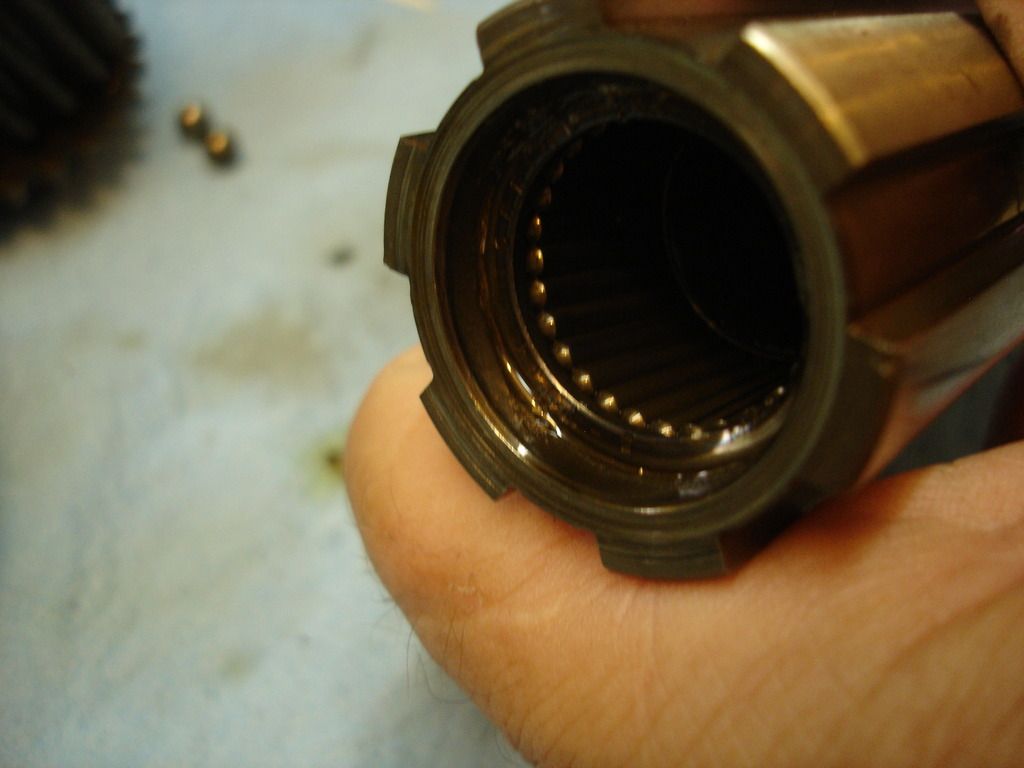
So, what happens if you inadvertently changed your oil and released the sludge, or you still neglect to fix the dragging engine clutch? Well, all that metal starts finding it's way into the roller and needle bearings.

The large input bearing, the middle bearing, and the tail shaft bearing are large ball bearings. When metal gets caught in these, they start to make noise. Normally it is most noticeable in idle at a stop light, with the tranny in neutral and engine clutch release. It is a hissing sound. In gear, and once the big bearings get really bad, it will make a rumble when in gear...but I don't think it will ever make it that far.

The most sensitive bearings in the tranny are the small needle bearings in the constant speed, or counter shaft...


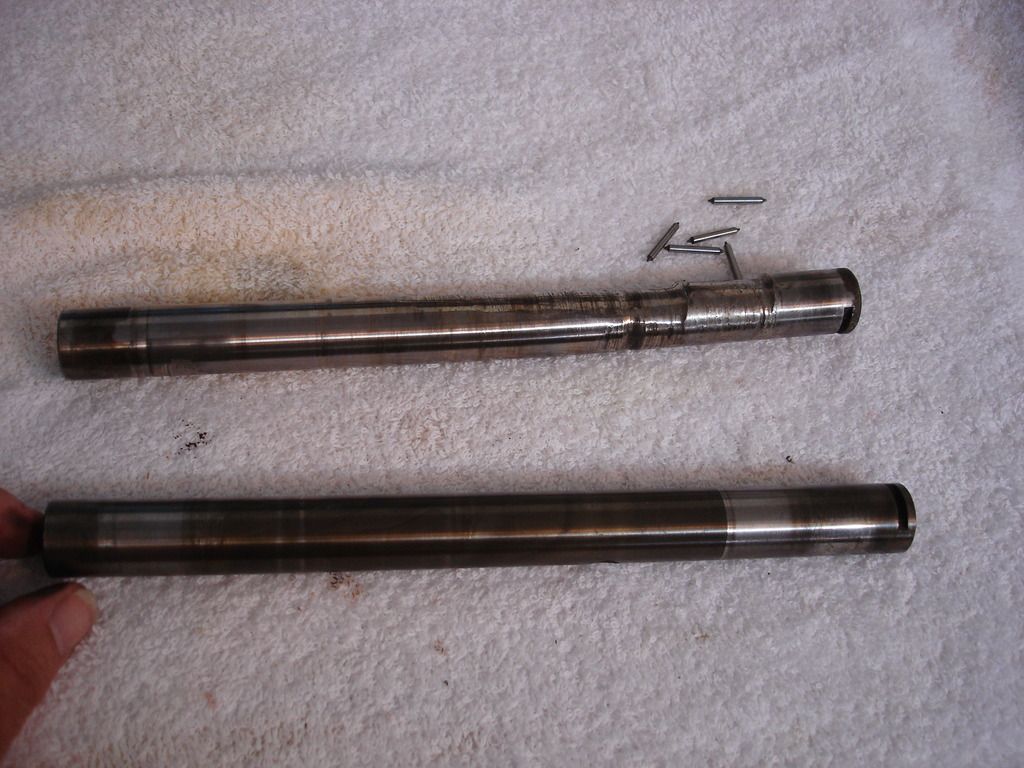
A word about how the counter shaft is lubed. It has small holes in the gears, so centrifugal force tends to expell the oil inside the shaft outward to the gears. It has to be replaced, and that comes from the bushings on each end. So, oil is sucked in at the ends, and expelled out the middle. It goes through the tiny needle bearings on its route.

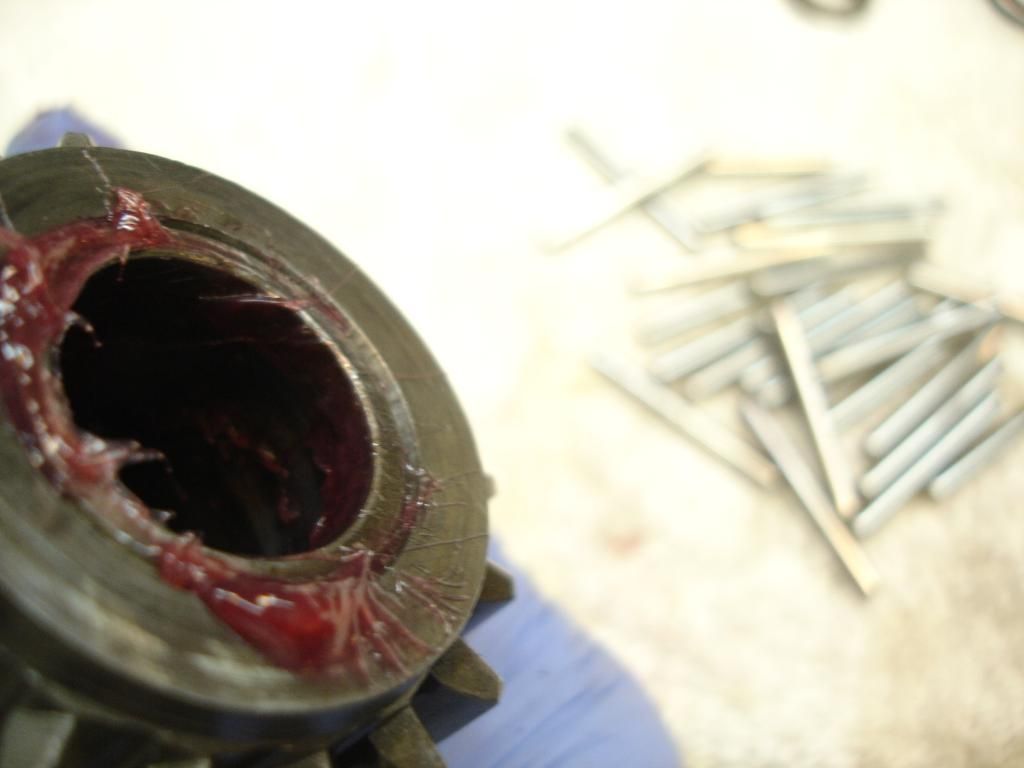
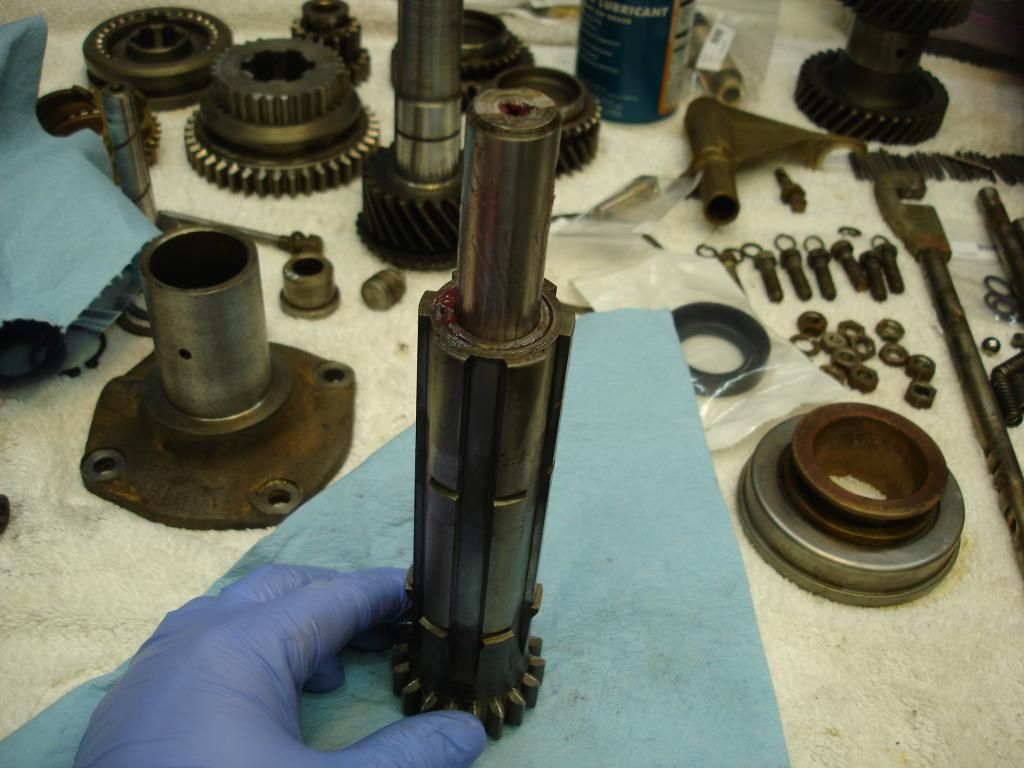
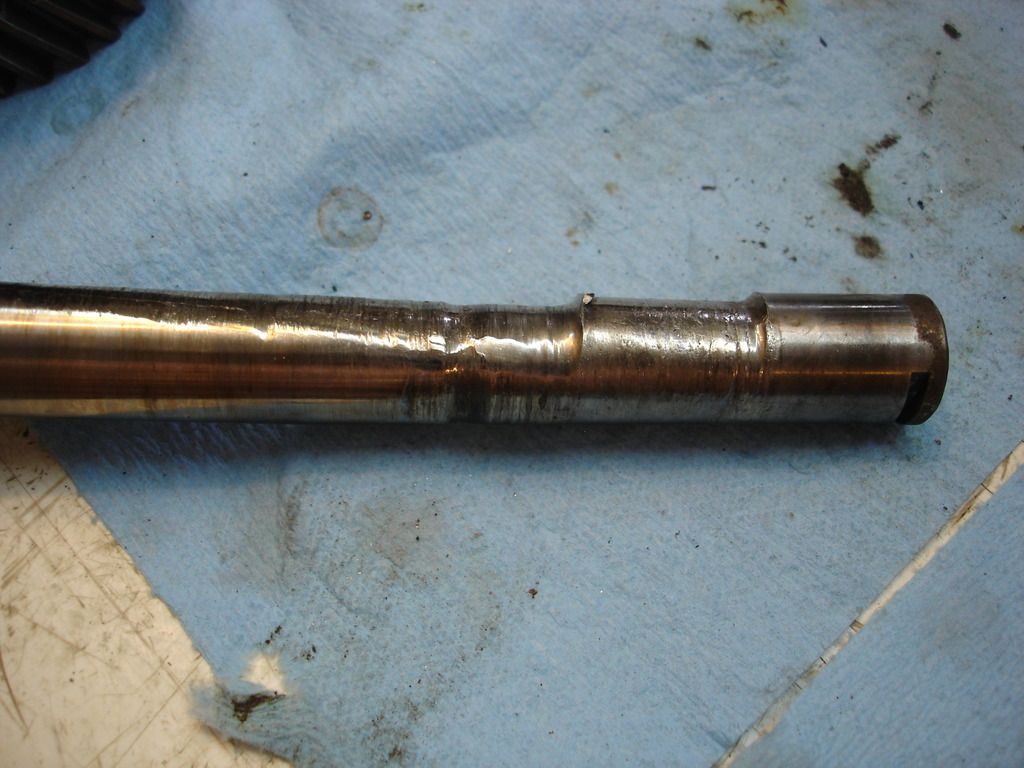
It's a matter of time before the needle bearings start to grind the metal flakes into the counter shaft. Remember the countershaft is the lowest part in the case, and the bottom of the case is where all the metal accumulates. Here is what eventually happens...


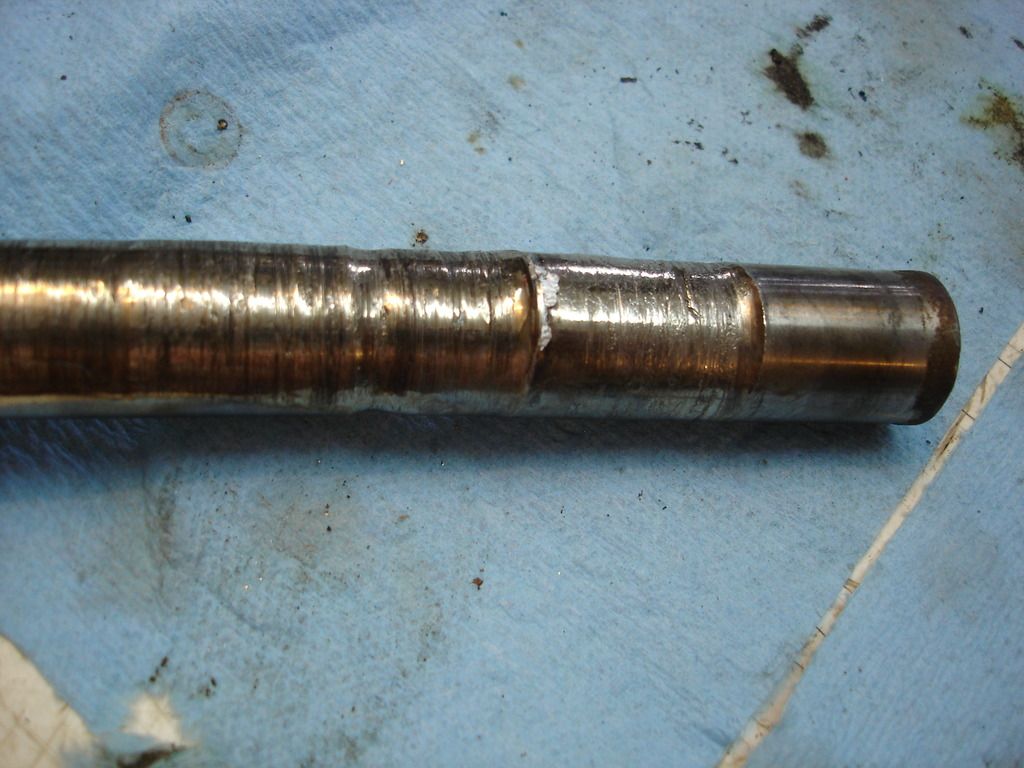
And, for comparison, the bad shaft next to a good one...

 
Last edited:

TR3driver

Great Pumpkin - R.I.P
Offline
A brand new ring would have knife sharp ridges to engage the steel cone on the gear.
I disagree. The rings as supplied from the factory had lands very similar to your front ring.

As you said (more or less), that surface (the flat top of the grooves) is a tiny clutch, which slides and grabs every time you shift into a gear. It has to have some surface area to carry the load of decelerating the input and counter shafts.
 
OP
CJD

CJD

Yoda
Country flag
Offline
Once the countershaft bearings go, the countershaft begins to wear. As that happens, the gears on the countershaft start to move away from the gears on the mainshaft. Eventually they move far enough that the gears no longer mesh, but rather they jam against each other and wedge the 2 shafts farther apart. By this time the weaker countershaft gives way. It fails in one of 2 modes, either it shears in half, or it bends as the one in the photo above did. Here is some of the results...


Similar threads
Thread starter Title Forum Replies Date
Nanhook TR2/3/3A TR2 shoes Triumph 2
CJD TR2/3/3A TR2 Annual Triumph 2
1 TR2/3/3A TR2/3 Oil Leak Where Oil Sending Pipe Connects to the Block Triumph 4
S TR2/3/3A WTB a tr2 original grill Triumph 0
S TR2/3/3A differential hubs early tr3 and tr2 Triumph 22
P TR2/3/3A TR2 Horn Mounts Triumph 7
S TR2/3/3A Tr2 and early tr3 differential. Triumph 10
mctriumph For Sale Tr2/3 scuttle mechanism Triumph Classifieds 7
S Wanted tr2 original grill Triumph Classifieds 10
J TR2/3/3A TR2 Fitting/mounting rear wing Triumph 11
A TR2 Transmission overhaul Restoration & Tools 0
D TR2/3/3A TR2 Flying Mile question Triumph 11
S TR2/3/3A tr2 muffler clamp Triumph 10
Southwarks TR2/3/3A TR2 door help! Triumph 2
G For Sale NEW PHOTOS: Triumph TR3 Chassis Frame + Front Suspension, Fits TR2,TR3,TR3A,TR3B Triumph Classifieds 1
P TR2/3/3A TR2 Headlight Trim Question: Triumph 8
A Wanted Girling Axle for TR2 Triumph Classifieds 5
J For Sale Triumph TR2 or TR3 elbow trim Triumph Classifieds 0
S TR2/3/3A tr2 and tr3 back trim above the back cover Triumph 0
KVH General Tech Heater and Vent Control Cables--TR2 thru TR4, and more . . . Triumph 3
S TR2/3/3A early tr3 and tr2 kick panels Triumph 3
S TR2/3/3A TR2 and early TR3 wipers Triumph 7
S TR2/3/3A tr2 Triumph 18
newmexTR3 For Sale TR2-4 performance valve springs, collars, exhaust seats, cotters Triumph Classifieds 0
J For Sale Triumph Tr2/3 seat foams Triumph Classifieds 1
J For Sale Triumph TR2, TR3, TR4 CAM SHAFT FOR SALE Triumph Classifieds 0
K For Sale TR2-TR4 Camshaft Sprockets...New...1/2 Price Triumph Classifieds 0
C TR2/3/3A TR2 Axle/wheel bearing removal Triumph 2
T For Sale TR2 - TR3 Gas Cap for sale Triumph Classifieds 1
71TR6 Set of 4 TR2/3/4 Connecting Rods Triumph Classifieds 0
P New member TR2 carpets Triumph 7
S TR2/3/3A Tr2 hood Triumph 8
W TR2/3/3A TR2 wiper motor mount Triumph 1
TRopic6 For Sale TR2/3 Brass Fuel Shutoff Tap [for parts] Triumph Classifieds 0
J For Sale Triumph TR2 TR3 TR3A New Moss Motors Black Karvel Style Carpet Kit Triumph Classifieds 0
S For Sale Triumph TR2/TR3/TR3A/TR3B Workshop on CCD/ROMManual – 1953 - 1962 Models Triumph Classifieds 0
Leatherman Wanted Red and black TR2 / 3 front emblem Triumph Classifieds 6
Jim_Stevens For Sale New TR2-3A inner sill assemblies Triumph Classifieds 3
C TR2/3/3A TR2 Chassis Clips Triumph 4
B For Sale TR2-3 Door Top Wood Rail Triumph Classifieds 1
T Wanted WTB TR2/TR3 Hood/Bonnet Latch Assembly with Prop Rod Triumph Classifieds 0
P TR2/3/3A TR2 color questions Triumph 23
C TR2/3/3A Triumph Tr2 Down Under Triumph 2
T TR2/3/3A About to strat a full restoration TR2 / TR3 ? Triumph 66
CJD TR2/3/3A TR2/3 Guru Final Exam Triumph 59
R TR2/3/3A TR2 Scam Triumph 13
SASSAMON Wanted WTB Early Sidescreens and mounting hardware for TR2/3 Triumph Classifieds 4
JFS TR2/3/3A TR2 Rear Plate Lite on TR3A Triumph 10
M General Tech TR2 Slave cylinder Triumph 0
K TR2/3/3A Moss Europe has restored the Jabbeke TR2 Triumph 0

Similar threads

Top