• The Roadster Factory Recovery Fund - Friends, as you may have heard, The Roadster Factory, a respected British Car Parts business in PA, suffered a total loss in a fire on Christmas Day. Read about it, discuss or ask questions >> HERE. The Triumph Register of America is sponsoring a fund raiser to help TRF get back on their feet. If you can help, vist >> their GoFundMe page.
  • Hey there Guest!
    If you enjoy BCF and find our forum a useful resource, if you appreciate not having ads pop up all over the place and you want to ensure we can stay online - Please consider supporting with an "optional" low-cost annual subscription.
    **Upgrade Now**
    (PS: Subscribers don't see this UGLY banner)
Tips
Tips

Removal and Refinishing BJ8 Wood Dashboard

pkmh

Jedi Warrior
Country flag
Offline
Dear Forum,

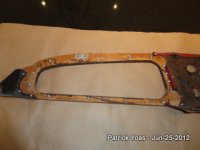
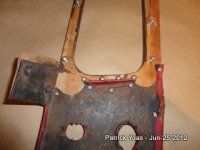
I am interested in removing and restoring my existing BJ8 Walnut Burl Dash for the purposes of refinishing using polyurethane. I am presently gathering a lot of information on the subject and would like to share here at a later time before actually doing.

With disassembling though, I have removed the glove box door and all hardware. I even went further to successfully removing the existing lacquer finish using a dull safety blade with no damage to the veneer at all. Wasn't easy on my fingers and knuckles but wasn't impossible.

But in terms of removing the wood door surround, I went far as to remove some screws, a bolt connection to the side next to the door frame/bulkhead. But somehow, I believe it might be necessary to remove the entire fascia (which includes the light switches, etc.).

In trying to learn more about the removal process, I have ventured here on older posts but to no avail, or have not found stored pictures or text on the subject.

If anyone can offer info on what is needed to finish removing all wood pieces or even inform me as to reference material out there in the form of sites, books, etc., I would much appreciate it.

Otherwise, I must assume I will have to remove that center fascia panel, including all those switches and the radio console as well.

Is there an easier process? Any advise or recommendations?

Please offer if possible.

Thanks so much,

Paul
 

Keoke

Great Pumpkin
Country flag
Offline
I must assume I will have to remove that center fascia panel, including all those switches and the radio console as well.

No
Very simply you will only be required to remove all the instruments to gain access to the panel fasteners as well as removing the panel physicaly.

A good book will be rquired on preparing and refinishing the panels it is quite involved and a relatively long slow process.

One product you needIMOP is Lac-a-Frenxh---French laquer it is old world but fantastic product.
 

dougsmarkIII

Senior Member
Offline
Go to your nearest Hobby Lobby or Michaels and purchase a "Pour-On" epoxy HIGH GLOSS FINISH BY EnviroTex Lite. Several owners have used this product on their dashes including me and it's a great finish. It's a one-time process without requiring applications of several coats such as a varnish.

Just follow the directions on the box.

Doug
 
OP
pkmh

pkmh

Jedi Warrior
Country flag
Offline
Keoke,

Thanks about the driver side wood panel. That seems easy enough.

I still am not quite sure the process involved in removing the passenger side panel and that is where I am most stuck on.

There is that glove box compartment, made of blackened cardboard that doesn't seem to just come out. I was able to remove a row of screws at its lower portion but that's about it, plus some of the wood screws to the panel as it is secured to the metal sides. The enclosure seems loose enough but still not sure what the trick is in removing the glove box's surrounding panel or the glove box enclosure, if that is the case. Maybe the enclosure gets "pushed" through toward the engine bulkhead for removal? I say that because the door slider hardware mounted on a fixed peg on the side has a slit in the cardboard enclosure. Maybe this serves as a push through. Any Advise?

As for finishes mentioned, someone I met with mentioned using "White Bond Poly". Any thoughts about using this as a finish? This "HIGH GLOSS FINISH" by EnviroTex mentioned above sounds easy and I will look into the "Lac-a-Frenxh". Can the EnviroTex be lightly sanded and mechanically buffed out to look perfectly mirror-like and glossy?

So far, I've asked several people about finishes and received several different solutions. I see this can get quite involved. I know what I want is a clear, high gloss finish bringing out the most in the existing wood grain. I am not sure if I need to stain the veneer or just leave natural after I've clean and prep it for the clear coat. I have very lightly sanded the veneer and been using an "After Wash", thus far. Did the factory ever stain their panels or were they left natural? I ask this because as I am using the after wash, the wood veneer is becoming slightly more bright or lighter in appearance.

I did actually purchased a new wood panel set for the BJ8 from someone on eBay but returned for the gap was too great between the glove box door and frame. It would of looked like a mistake after the hardware was installed. Otherwise, the finish was mirror-like and professional. So this is why I am going to attempt to salvage and do myself. The grain on mine is actually nicer, more dramatic, too.

Once I can remove the glove box door's panel, I will post photos of the door in progress with the existing surrounding panel and ask for further advise or opinions about staining vs. no staining.

Thanks again in advance.

Paul
 

RAC68

Darth Vader
Offline
Paul,

Your will have to remove the console to get access to the screws securing the wood panels to t he vinyl-covered upper center dash. Although you may be able to access the securing screws once the instruments are extracted, it is definitely necessary take out the passenger dash. Since the other attachments (corner brackets to door-side cockpit wall, support brackets) are reasonable accessible. One last point, the passenger dash comes out as a unit and is easily disassembled once out.

To refinish the dash, you will first have to thoroughly remove all original industrial finish. Although you indicated scraping the finish off, I would chose a quality stripper and take a number of passes and time. I would also recommend a light sanding of the veneer and a stain to enrich the color.

Although a number of coatings have been suggested, I prefer multiple coats of a good varnish being sure to allow thorough drying and rub-out between coats. I completed the buildup once the coating allowed a slight indication around each of the major gnarls to keep the indication of true wood (furniture) and not plastic. A final rubout with a fine compound exposed the deep shine.

100_0268.jpg


Ray (64BJ8P1)
 

Patrick67BJ8

Obi Wan
Silver
Country flag
Offline
pkmh said:
Keoke,

Thanks about the driver side wood panel. That seems easy enough.

I still am not quite sure the process involved in removing the passenger side panel and that is where I am most stuck on.

There is that glove box compartment, made of blackened cardboard that doesn't seem to just come out. I was able to remove a row of screws at its lower portion but that's about it, plus some of the wood screws to the panel as it is secured to the metal sides. The enclosure seems loose enough but still not sure what the trick is in removing the glove box's surrounding panel or the glove box enclosure, if that is the case. Maybe the enclosure gets "pushed" through toward the engine bulkhead for removal? I say that because the door slider hardware mounted on a fixed peg on the side has a slit in the cardboard enclosure. Maybe this serves as a push through. Any Advise?

As for finishes mentioned, someone I met with mentioned using "White Bond Poly". Any thoughts about using this as a finish? This "HIGH GLOSS FINISH" by EnviroTex mentioned above sounds easy and I will look into the "Lac-a-Frenxh". Can the EnviroTex be lightly sanded and mechanically buffed out to look perfectly mirror-like and glossy?

So far, I've asked several people about finishes and received several different solutions. I see this can get quite involved. I know what I want is a clear, high gloss finish bringing out the most in the existing wood grain. I am not sure if I need to stain the veneer or just leave natural after I've clean and prep it for the clear coat. I have very lightly sanded the veneer and been using an "After Wash", thus far. Did the factory ever stain their panels or were they left natural? I ask this because as I am using the after wash, the wood veneer is becoming slightly more bright or lighter in appearance.

I did actually purchased a new wood panel set for the BJ8 from someone on eBay but returned for the gap was too great between the glove box door and frame. It would of looked like a mistake after the hardware was installed. Otherwise, the finish was mirror-like and professional. So this is why I am going to attempt to salvage and do myself. The grain on mine is actually nicer, more dramatic, too.

Once I can remove the glove box door's panel, I will post photos of the door in progress with the existing surrounding panel and ask for further advise or opinions about staining vs. no staining.

Thanks again in advance.

Paul
The Glovebox side is a litle trickier than the drivers side. I'v had better luck leaving the glove box attached and removing the 5 screws that attach the Glovebox dash to the center "switch" panel.
*Remove the 5 screws that attach the Switch panel to the Dash.
*Remove the "nut" on the highest part of the backside of the Dash.
*Remove the bolts that attach the dash black bracket to the chassis.
*Remove the screws that attach the rear of the Glovebox to the chassis.

I usually remove the seat cushion and lay on a pillow to do this job. Be sure you have a screwdriver with an excellent tip. This is not a difficult job but it takes patience.
 

Attachments

  • 28953.jpg
    28953.jpg
    46 KB · Views: 652
  • 28954.jpg
    28954.jpg
    43.9 KB · Views: 647

Keoke

Great Pumpkin
Country flag
Offline
The Glovebox side is a litle trickier than the drivers side. I'v had better luck leaving the glove box attached and removing the 5 screws that attach the Glovebox dash to the center "switch" panel.

:iagree:
 

Patrick67BJ8

Obi Wan
Silver
Country flag
Offline
Keoke said:
The Glovebox side is a litle trickier than the drivers side. I'v had better luck leaving the glove box attached and removing the 5 screws that attach the Glovebox dash to the center "switch" panel.

:iagree:
I believe that's what I said? I didn't say to remove the glovebox or any screws attaching the glovebox to the dash. (maybe it's Monday?)
 

RAC68

Darth Vader
Offline
Patrick,

I think we are all saying the same thing. The passenger dash should be taken out as one unit and not dismantled while still installed. Your picture of the 5 screws shows how difficult it would be to get to those screws with the console still installed.

Ray (64BJ8P1)
 

Keoke

Great Pumpkin
Country flag
Offline
Patrick67BJ8 said:
pkmh said:
Keoke,

Thanks about the driver side wood panel. That seems easy enough.

I still am not quite sure the process involved in removing the passenger side panel and that is where I am most stuck on.

There is that glove box compartment, made of blackened cardboard that doesn't seem to just come out. I was able to remove a row of screws at its lower portion but that's about it, plus some of the wood screws to the panel as it is secured to the metal sides. The enclosure seems loose enough but still not sure what the trick is in removing the glove box's surrounding panel or the glove box enclosure, if that is the case. Maybe the enclosure gets "pushed" through toward the engine bulkhead for removal? I say that because the door slider hardware mounted on a fixed peg on the side has a slit in the cardboard enclosure. Maybe this serves as a push through. Any Advise?

As for finishes mentioned, someone I met with mentioned using "White Bond Poly". Any thoughts about using this as a finish? This "HIGH GLOSS FINISH" by EnviroTex mentioned above sounds easy and I will look into the "Lac-a-Frenxh". Can the EnviroTex be lightly sanded and mechanically buffed out to look perfectly mirror-like and glossy?

So far, I've asked several people about finishes and received several different solutions. I see this can get quite involved. I know what I want is a clear, high gloss finish bringing out the most in the existing wood grain. I am not sure if I need to stain the veneer or just leave natural after I've clean and prep it for the clear coat. I have very lightly sanded the veneer and been using an "After Wash", thus far. Did the factory ever stain their panels or were they left natural? I ask this because as I am using the after wash, the wood veneer is becoming slightly more bright or lighter in appearance.

I did actually purchased a new wood panel set for the BJ8 from someone on eBay but returned for the gap was too great between the glove box door and frame. It would of looked like a mistake after the hardware was installed. Otherwise, the finish was mirror-like and professional. So this is why I am going to attempt to salvage and do myself. The grain on mine is actually nicer, more dramatic, too.

Once I can remove the glove box door's panel, I will post photos of the door in progress with the existing surrounding panel and ask for further advise or opinions about staining vs. no staining.

Thanks again in advance.

Paul
The Glovebox side is a litle trickier than the drivers side. I'v had better luck leaving the glove box attached and removing the 5 screws that attach the Glovebox dash to the center "switch" panel.
*Remove the 5 screws that attach the Switch panel to the Dash.
*Remove the "nut" on the highest part of the backside of the Dash.
*Remove the bolts that attach the dash black bracket to the chassis.
*Remove the screws that attach the rear of the Glovebox to the chassis.

I usually remove the seat cushion and lay on a pillow to do this job. Be sure you have a screwdriver with an excellent tip. This is not a difficult job but it takes patience.


Yeah these Mondays can be tough-- :lol:
 

dancrim

Jedi Hopeful
Offline
I did my own a few years ago and it still looks beautiful. I used the pour on
Enviro Tex (available at some hardware stores). I found sanding the old finish off , and you have to remove the old veneer is the best bet. Then re-veneer and finish. If your interested I have enough burl walnut veneer to do a set and
also set of original wood panels all sanded flat and ready to veneer. I made a veneer press and can send you directions. The burl walnut I have looks great and is flat.
 
OP
pkmh

pkmh

Jedi Warrior
Country flag
Offline
dancrim said:
I did my own a few years ago and it still looks beautiful. I used the pour on
Enviro Tex (available at some hardware stores). I found sanding the old finish off , and you have to remove the old veneer is the best bet. Then re-veneer and finish. If your interested I have enough burl walnut veneer to do a set and
also set of original wood panels all sanded flat and ready to veneer. I made a veneer press and can send you directions. The burl walnut I have looks great and is flat.

Thanks for the tip and offer. I am really going to try to keep my existing veneer since there is really nothing major wrong with it, except for a little burnishing along raised linear areas, and that's not much, at least not yet. Evrything else is adhering quite well. Only the existing lacquer needs to be removed and redone.

Hopefully this week or next I will have the pieces removed and will post photos here for viewing.

Thanks for the help and I'll let you know.

Paul
 
OP
pkmh

pkmh

Jedi Warrior
Country flag
Offline
Keoke said:
Patrick67BJ8 said:
pkmh said:
Keoke,

Thanks about the driver side wood panel. That seems easy enough.

I still am not quite sure the process involved in removing the passenger side panel and that is where I am most stuck on.

There is that glove box compartment, made of blackened cardboard that doesn't seem to just come out. I was able to remove a row of screws at its lower portion but that's about it, plus some of the wood screws to the panel as it is secured to the metal sides. The enclosure seems loose enough but still not sure what the trick is in removing the glove box's surrounding panel or the glove box enclosure, if that is the case. Maybe the enclosure gets "pushed" through toward the engine bulkhead for removal? I say that because the door slider hardware mounted on a fixed peg on the side has a slit in the cardboard enclosure. Maybe this serves as a push through. Any Advise?

As for finishes mentioned, someone I met with mentioned using "White Bond Poly". Any thoughts about using this as a finish? This "HIGH GLOSS FINISH" by EnviroTex mentioned above sounds easy and I will look into the "Lac-a-Frenxh". Can the EnviroTex be lightly sanded and mechanically buffed out to look perfectly mirror-like and glossy?

So far, I've asked several people about finishes and received several different solutions. I see this can get quite involved. I know what I want is a clear, high gloss finish bringing out the most in the existing wood grain. I am not sure if I need to stain the veneer or just leave natural after I've clean and prep it for the clear coat. I have very lightly sanded the veneer and been using an "After Wash", thus far. Did the factory ever stain their panels or were they left natural? I ask this because as I am using the after wash, the wood veneer is becoming slightly more bright or lighter in appearance.

I did actually purchased a new wood panel set for the BJ8 from someone on eBay but returned for the gap was too great between the glove box door and frame. It would of looked like a mistake after the hardware was installed. Otherwise, the finish was mirror-like and professional. So this is why I am going to attempt to salvage and do myself. The grain on mine is actually nicer, more dramatic, too.

Once I can remove the glove box door's panel, I will post photos of the door in progress with the existing surrounding panel and ask for further advise or opinions about staining vs. no staining.

Thanks again in advance.

Paul
The Glovebox side is a litle trickier than the drivers side. I'v had better luck leaving the glove box attached and removing the 5 screws that attach the Glovebox dash to the center "switch" panel.
*Remove the 5 screws that attach the Switch panel to the Dash.
*Remove the "nut" on the highest part of the backside of the Dash.
*Remove the bolts that attach the dash black bracket to the chassis.
*Remove the screws that attach the rear of the Glovebox to the chassis.

I usually remove the seat cushion and lay on a pillow to do this job. Be sure you have a screwdriver with an excellent tip. This is not a difficult job but it takes patience.


Yeah these Mondays can be tough-- :lol:

Well, for this Monday, I decided to take a little snooze. Tomorrow is another day.
 
OP
pkmh

pkmh

Jedi Warrior
Country flag
Offline
Thanks Ray and everyone for the insight,

I will eventually go forward with this. Going to be a bit of work, especially with the driver side panel. Have to remove all those gauges, not that that's a big deal, but the oil/temp gauge has me worried--don't really want to create any new headaches with the existing oil and water connections possibly not working properly when reconnecting). So with that, I will attempt to remove the glass bezel from the gauge and leave the gauge connected. I did this routine when the tach was out but had problems removing the bezel from the housing. That was a job in itself.

Paul
 

dphilippo

Senior Member
Offline
There is an article on John Sims Healey6.com website under tech articles/interior about refinishing the dash. It originated on Jim Werner's healey site. It describes in detail the use of Envirotex and I found it very useful in refinishing my dash. The envirotex finish is great, looks original, and seven years and 20,000 miles later still looks great.
Drew,
65 BJ8
 
OP
pkmh

pkmh

Jedi Warrior
Country flag
Offline
Thanks Drew. I will look into this envirotex. Hearing favorable responses. Any negative responses regarding this "White Bond Poly?" I will also look into the French Lacquer as advised. That too, seems to be interesting.

Started removing the driver side dash. Besides the few remaining screws to remove, the only other gauge to remove is the oil/temp gauge. Thought I could leave that more or less in place but the housing also has a lip like all the other gauges so I will have to disconnect and or those rigid lines and I guess it makes sense to do so from the engine than trying from behind the gauge, if that makes sense.

I remember reading about properly reconnecting so their readings are accurate once reconnected. I guess when it comes to reconnecting, I'll discover if the readings are as they were.

Paul
 

dphilippo

Senior Member
Offline
Paul,
Just a heads up, the oil/temp gauge and tube are not made to be taken apart. Don't try to separate the sensor and tube from the back of the gauge. It has to be removed from the engine block and then threaded back through the firewall and the dash. Hit it with PB Blaster ahead of time to loosen it up and be careful as it's an expensive piece to break. There are many posts in the forum on removing this and creating special tools to do so. I took a box wrench and cut a slot to fit around the tube and didn't have too much trouble with mine but there are a lot of folks who end up fighting to get it out.
Thanks,
Drew
 
OP
pkmh

pkmh

Jedi Warrior
Country flag
Offline
Thanks again Drew,

I also got the same heads-up about the oil/temp gauge earlier today from another Healey fellow. Luckily, I didn't tackle this yet, so no harm done. I will use the PB Plaster and go from there.

Again, thanks for the warning and good advise!

Paul
 
OP
pkmh

pkmh

Jedi Warrior
Country flag
Offline
dphilippo said:
Paul,
Just a heads up, the oil/temp gauge and tube are not made to be taken apart. Don't try to separate the sensor and tube from the back of the gauge. It has to be removed from the engine block and then threaded back through the firewall and the dash. Hit it with PB Blaster ahead of time to loosen it up and be careful as it's an expensive piece to break. There are many posts in the forum on removing this and creating special tools to do so. I took a box wrench and cut a slot to fit around the tube and didn't have too much trouble with mine but there are a lot of folks who end up fighting to get it out.
Thanks,
Drew

Drew and Forum,

Don't know if I should show the following as a new post but I am looking at this as a following up, so here goes...

One last obstacle in order to successfully remove the driver side wood dash...the temperature gauge. Specifically, the sensor part at the engine.

For the last few days, I have attempted to remove the temperature gauge sensor at the engine block. I fully appreciate your words regarding the difficulty in removing this part. I've constantly been doucing with PB Blaster, used opened ended wrenches, used a little flame on the nut (hopefully, away enough from the sensor), even one of those "crows foot" open ended box wrenches (made by no other than Snap-on). Still, even that would slip around the hex nut. It is on tight! I must now abbandom further efforts to use open ended box wrenches in fear I will round off the hex edges.

Biggest problem I see, no room for leverage, unless I remove the radiator, which is the next step now. Not the end of the world. Draining, unscrew some bolts and two hose connections to be undone. Already done that before so no challenge there.

I see Moss has a new gauge listed as a replacement, just in case, with exception to some slight differences. Has anybody replaced theirs and what are these slight differences??

I may have to cut the sensor's line in order to place a socket over to remove, but that will be my last resort.
For now I see no other recourse than to remove the radiator as my next step. Any other thoughts or ideas, please chime in (but by that time, I will probably have removed the radiator).

Paul

PS. The oil connection was easy to remove from behind the gauge and I see no other way to have removed that from anywhere else. So I believe I did that procedure correctly.
 

rjc157

Jedi Warrior
Country flag
Offline
Paul what you have to do is get a socket i think its 5/8 and cut a wedge out of one side large enough for the wire to pass through
 
Similar threads
Thread starter Title Forum Replies Date
K TR2/3/3A Cylinder head removal and valve adjustment Triumph 2
scottkilpatrick TR4/4A TR4 Rear Brake Drum Removal - Basic Question Triumph 16
BoyRacer Door Skin Removal Austin Healey 6
K TR2/3/3A Front brake hub removal to access Vertical Link bolts(screws) Attached pictures. Triumph 1
C MGB Rubber Bumper cover removal MG 5
kodpkd Antenna Removal Austin Healey 9
B General MG Crankshaft Nut Removal MG 4
BN6_2197 Gearbox/Overdrive Removal Austin Healey 25
W BN1 Steering Box Removal Austin Healey 11
S TR2/3/3A engine removal Triumph 12
S TR2/3/3A Steering wheel removal. Triumph 4
D Clutch Fork Pin Removal Austin Healey 4
A 78 MG MIDGET EMMISIONS REMOVAL Spridgets 1
C MGA Dash removal MG 0
Darrell_Walker TR4/4A Speedo Drive removal (non-OD) Triumph 8
AUSMHLY Spigot Bush, Pilot Bushing Removal Austin Healey 4
R TR2/3/3A Steering wheel hub removal Triumph 11
MadRiver TR5/TR250 Water pump housing removal advice Triumph 0
V 1969 Sunbeam Alpine coupe glovebox lock removal Sunbeam (Rootes) 0
newmexTR3 TR2/3/3A TR3 outer wishbone bushing removal Triumph 5
D Heater knob removal Spridgets 6
S 1275 oil pan removal Spridgets 30
K TR2/3/3A The grease gun brake caliper piston removal trick..... Triumph 6
E austin van heater removal Other British Cars 0
C TR2/3/3A TR2 Axle/wheel bearing removal Triumph 2
nevets Water Pump Removal Austin Healey 6
M TR2/3/3A Crankshaft Sludge Plug Removal Triumph 6
F Interior Door Handle Removal Austin Healey 2
Z Front Springs Removal Austin Healey 3
R Oil Filter Removal Austin Healey 1
Joel Lester TR2/3/3A Looking for helpful hints for door hinge screw removal Triumph 17
C MGA R/H tail lamp removal on a 1962 MG 5
K TR2/3/3A Removal of tie rod end? Triumph 7
J Ignition Key Cylinder Removal Austin Healey 3
J Planetary Gear Removal Austin Healey 3
Walter74 Adjustable steering wheel removal Austin Healey 4
E MGB 1965 mgb fuel pump removal MG 2
J Crankshaft dog nut and timing chain cover removal advice Austin Healey 30
T BJ8 Drain Channel Removal Austin Healey 2
D TR2/3/3A Facia removal steps Triumph 3
M TR2/3/3A Brake Line Removal From the Left Frame Rail Triumph 14
S TR2/3/3A Generator Pulley Bolt Removal Triumph 12
T Spin-On Oil Filter Removal [BJ7] Austin Healey 12
pkmh Front Spring Removal For BJ8 Austin Healey 8
M Spitfire Triumph spit flange/hub removal Triumph 13
L TR2/3/3A Engine removal questions Triumph 8
7 paintless dent removal tools? Restoration & Tools 8
dbenichou289 TR2/3/3A headlight switch removal Triumph 10
UltimateQuestion GT6 GT6 Mk3 rear wing removal Triumph 3
Got_All_4 TR6 Differential ID year & output shaft removal Triumph 11

Similar threads

Top