• The Roadster Factory Recovery Fund - Friends, as you may have heard, The Roadster Factory, a respected British Car Parts business in PA, suffered a total loss in a fire on Christmas Day. Read about it, discuss or ask questions >> HERE. The Triumph Register of America is sponsoring a fund raiser to help TRF get back on their feet. If you can help, vist >> their GoFundMe page.
  • Hey there Guest!
    If you enjoy BCF and find our forum a useful resource, if you appreciate not having ads pop up all over the place and you want to ensure we can stay online - Please consider supporting with an "optional" low-cost annual subscription.
    **Upgrade Now**
    (PS: Subscribers don't see this UGLY banner)
Tips
Tips

TR2/3/3A Buffing out paint.

sp53

Yoda
Country flag
Offline
Buffing out paint. John gave an excellent over view of how to buff out paint, but I did not want it to stop there. My problem is I am getting cold feet when I think about putting sand paper on this new paint or going after it with a buffer, so please tell me some stories and maybe I can synthesize more knowledge and stop being so chicken. I plan on starting on the wheel wells of the tub that I painted last year to get the feel for it. At HF they had those foam pads in 3 different textures(not cheap for there); the body shop had these wool buffers made of wool, but no cotton. Some had padding on both sides with an arbor and there was also a single sided wool Velcro so I bought one. I think it would be better to buy John a plane ticket.

If I do the inside of the tub, should I put some compound on the paint or the buffer and how would I get water in there without making a huge mess. There is probably no way of not making a mess. The u-tube videos are informative but I have gotten some bad ideas from there also. I am probably over thinking this again, but I need a push sometimes.
Pease out
 

CJD

Yoda
Country flag
Online
Wool is good! See, my memory is going bad, as they look like cotton, but are wool! Sorry about that. I always use the double sided. They are not cheap, but a pad will last a couple cars, and even some other projects in between. Last month we buffed our marble tile with the hand buffer getting the house ready to sell. Funny thing is that, after trying all those fancy polishes for floors, the automotive polish was the best.

Buffing enlvolves a subtle tilting of the buffer as you continually move it in a back and forth motion. If you watch a floor buffer in operation, you will see the guy tilting it just enough that the pad spin aides in moving it in the direction desired. The tilt helps you buff, instead of making you fight the buffer. The tilting also helps change the direction of the swirls, so they average out.

You can practice your initial buffing on an old panel...or even a primed one. It only takes a few minutes to get the feel, and after that it’s like riding a bike. It can be a challenge until you understand how to tilt it, with you fighting to get it going where you want...but as soon as you master the tilt it is a no-brainer from then on.

Finally, after the initial “touch down”, when you try to prevent the polish from spraying all over, I normally lock the trigger on high as I buff. It’s just one less thing to think about when the speed is constant. The only hard fast rule is to keep the buffer moving. If you stop it will start to dig into the paint...so always moving until you either stop the spin or lift it off.
 
OP
S

sp53

Yoda
Country flag
Offline
Ok John and thanks for taking some of the edge off, I really appreciate you taking the time to write. Let’s say for example, I start on these wheel wells. Should I use a spongy to get them wet or is the liquid solution in the compound enough; it looks very liquidly. Should I apply the compound to the buffer dry? How much compound should I put on? The videos use just a little. The area I am going to start on is going to be hidden, but my inexperience has me at a loss.
 

CJD

Yoda
Country flag
Online
Buffing is done dry. The only moisture is from the polish, and even then only about a nickel sized drop will last a couple minutes of buffing. I have never used sponge pads...and off-hand I think they would be too coarse for what we are doing. If you finish sand with 1000-2000grit wet, then a sponge would be going backwards. Of course there may be someone out there with experience with sponge pads??

If the pad gets too wet, then the little “wool!!” threads start to cake together. You want them to be free to move for the most part. So if they get caked together, then that is when you flip the buffer over on a table, lock it on high speed and run the screw driver tip back and forth to “comb” the little threads back apart.

Keep a dry, clean towel nearby to clear off the buffing residue, dust, and wool that flings off. When you think you are about done, wipe dry with the towel to be able to see clearly...and decide where and how much it needs to be buffed.

I just apologize that I never got a chance to post buffing on my project. Most of the panels came out well...but I do need to buff the boot lid and parts of the rear scuttle.

Last thought...how long will you need to spend on a panel?? If you use the sanding technique to prep before the buffing, you should be able to complete a boot lid in about 5 minutes. If you have a bad spot, then re-sand just that area wet, and then dry it back off and start over with the buffer and polish. The sanding just reduces the time you have to buff. Also, if you try to buff too much (i.e too deeply), the buffer tends to leave waves in the work. Sanding is less likely to leave any waviness, so repeat the sanding until you like the area...or you think you are getting thin.
 
OP
S

sp53

Yoda
Country flag
Offline
Thanks again John, what I have mostly is orange peel and a few dull spots, but there is one run on a rear fender plus that is the one with only 2 coats. The paint I chose was enamel with 8 to 1 hardener. It was the least expensive, but for me it looks more original. I went to this car museum in Montana or Wyoming and they had all these old 1950 cars with original paint. Looking at one of those just took me back to a time of 2 tone paint jobs that looked strong and durable. The paint guys told me it will fade quickly, but the paint I chose will have more of that look.

When I get to the run, I will be asking more questions. My gut tells me to wet sand with 500 to get the bulk of the extra paint off and then try and feather it in with the buffer, but only a guess. Thanks again for the time it should take to do a panel. It is those little things that people with experience sometimes forget to share. That is why I keep track of the amount of paint I mix, so maybe someone can use that knowledge because this is my first time and I was very concerned with that. I might try the refrigerator idea sometime also.
peace out
 

PC

Obi Wan
Country flag
Offline
Forgive me, but this thread reads like there’s already been a whole lot of discussion that I missed. So I don’t know what’s been said, what hasn’t, and where I might be of some help. So If I say something way off base I apologize.

If I’m reading this right, it sounds like you have a single stage finish. Not that it would change how you approach the sand, cut and buff process verses a base/clear finish. But single stage finishes do tend to be more forgiving.

I don’t know what products you already have or what you have readily available so I’ll just assume nothing.

Be sure the runs are cured before you try removing them. They are thick and can still be gummy even after the rest of the finish has hardened.

When it comes to sanding, always use abrasives that are specifically designed for paint finishing. You will save yourself a whole lot of work and produce vastly better results. Ordinary abrasives leave a very inconsistent scratch pattern that is nearly impossible to buff out completely. Specialized abrasives like Meguiar’s Uni-grit, 3M Trizact, Mirka Abralon, etc. cost more up front but save you in long run. They last longer and finish out with much less work.

Your paint’s manufacturer probably has specific recommendations for abrasive grades. I would be surprised if they recommend anything coarser than #800.

Machine sanding (with a short throw DA sander designed for finish work) always leaves a finer scratch that’s easier to buff than hand sanding.

Buffing pads are just like any other tools. There are good ones and not so good ones. I would recommend sticking with name brands like Meguiar’s, 3M or Lake Country.

Wool pads cut faster than foam. They also build up less heat so they’re a bit more forgiving of technique. They’re usually the first choice for removing sanding scratch. As a noobie you’re guaranteed to get heavy swirling. Even experienced operators will get at least some swirling with wool. So if you want the best possible finish you’ll want to follow with foam. And to be absolutely swirl free, that last foam step is often best done with a DA buffer.

Note: this is why body shops almost always do terrible polish work. Most use rotary/wool exclusively just because it’s faster.


about 40 seconds into this clip, Autogeek's Mike Phillips shows how to pick up a bead of compound without splatter:
 

M_Pied_Lourd

Darth Vader
Country flag
Offline
For some reason, I have never had much success with a da buffer/polisher. I have a porter cable one but can never get as good a finish as I get with my Milwaukee 7" polisher and foam pads.

The da buffer polishers are definitely much safer to use for novices as improper/over aggressive use of the regular polisher can lead to heavy swirls and burn through on flat surfaces and particularily unprotected edges...

Cheers
Tush
 

PC

Obi Wan
Country flag
Offline
The older, shorter throw, lower powered DA's like the Porter-Cable 7424 are somewhat limited in their capacity, especially with harder urethane finishes. To remove defects you may have to shrink your working area, use smaller pads and slow your hand speed. You really have to use the right pads, too. The white, screw-in pad that Porter-Cable supplies is completely worthless.

The capability of those DA's can be extended considerably by using the current crop of microfiber pads.

The newer, longer throw, higher powered DA's are much more capable. A lot of guys rarely use their rotaries any more.
 

TomMull

Darth Vader
Silver
Country flag
Offline
For some reason, I have never had much success with a da buffer/polisher. I have a porter cable one but can never get as good a finish as I get with my Milwaukee 7" polisher and foam pads.

The da buffer polishers are definitely much safer to use for novices as improper/over aggressive use of the regular polisher can lead to heavy swirls and burn through on flat surfaces and particularily unprotected edges...

Cheers
Tush

There is a bit of a learning curve to buffing so sp53 is wise to start where it doesn't show as much. If you are confident with the tool you have used in the past by all means use it. Of course there are lots of places on our LBCs where the big Milwaukee won't go. Also the pad can make as much of difference as the tool. I'm starting to like the bumpy foam things for the da. (Probably been around for decades but I just got some.)
polishpads.jpg
Tom
 

M_Pied_Lourd

Darth Vader
Country flag
Offline
The older, shorter throw, lower powered DA's like the Porter-Cable 7424 are somewhat limited in their capacity, especially with harder urethane finishes. To remove defects you may have to shrink your working area, use smaller pads and slow your hand speed. You really have to use the right pads, too. The white, screw-in pad that Porter-Cable supplies is completely worthless.

The capability of those DA's can be extended considerably by using the current crop of microfiber pads.

The newer, longer throw, higher powered DA's are much more capable. A lot of guys rarely use their rotaries any more.

Agreed. Be been using the "chemical guys " foam pads...the porter cable ones are garbage.

Cheers
Tush
 
OP
S

sp53

Yoda
Country flag
Offline
Well I gave the buffing a go, but not happy with the results. I am going to take one of the doors down to the body shop and ask what product they suggest. The stuff I have is too watery. I ask them about the 3M finesse product, but they would have to order it. They did say 3M was the best and I should use the best. I am still chicken, but did try and knock down a couple of the paint cruds, so I am warming up to it. Thanks for the video with the 10:00 o clock idea because what I was able to do good was throw the polishing solution all over.
Pease out
 

PC

Obi Wan
Country flag
Offline
…. The stuff I have is too watery….
Exactly what did you use? What were you trying to accomplish? What was the result?


…. I ask them about the 3M finesse product, but they would have to order it. …
I find that rather odd. In this industry 3M products are about as common as air. What do they keep on hand?


…. They did say 3M was the best and I should use the best.…
I’ll agree with the second part. The first part is entirely a matter of opinion.

Not saying it’s wrong, just that everybody in the biz has their own opinion. And you know what they say about opinions.


… but did try and knock down a couple of the paint cruds, so I am warming up to it. …
What kind of paint defects? Runs? Blobs? Fisheyes? The buffer is the wrong tool for those. They need to be sanded or scraped off before buffing.
 
OP
S

sp53

Yoda
Country flag
Offline
I probably made these 3 posts confusing by compartmentalizing them into individual posts: like- over spray, compressor crud, and buffing out paint. What I am trying accomplish in this post is to get the orange peel off and remove some very small little cruds that came out of the paint gun when spraying. My best guess on those cruds are unstrained paint. I took a small piece of wet 500 and very very carefully by hand knock them down to just about the plane surface of the paint job. They were maybe 1/32to 1/16 around. My concern was they would fly out leaving a small crater behind.

steve
 

CJD

Yoda
Country flag
Online
When I was in the AF I took my prized ‘67 Camaro to be painted by Tonti Body and Fender in New Orleans. They had repaired cars for my family for a couple generations, and were almost like part of the family. The Camaro was painted in straight enamel, so needed at least a couple months to harden before buffing. I begged Kenny to buff it early, as I didn’t have much time off to come back and get the car...being based in Mississsippi. I told him I would help. He finally relented, so I got to watch pros buff a car. I tried a little with the buffer, and was warned to stay away from the edges. Of course I goofed and went right through one edge in a flash!!

Anyway...Kenny used the Finesse, and that is what I always used afterward. It takes so little that a bottle usually lasts me a decade or more. I have tried other compounds, but never found any better...as I said, it even beat the best floor products for buffing our tile! One bottle I bought was FinesseIII. I think it was less abrasive, and still worked, but not quite as fast as the straight Finesse.

If you have the panel lightly trued-up and worked down to the 1500-2000 grit, then the buffer with wool will almost finish the job with no compound. It takes very little. Over the 5 minutes or so it takes to buff a door, you might put about 3 dime to nickel sized drops of compound. You will likely have to clean the pad once, before doing the final light buff to bring the panel to perfect shine.

I wouldn’t worry about the dirt breaking out. By the time the dirt sits in the paint and goes through the gun it will be tinted throughout! You may see a very small color difference once it is sanded down and buffed. An interesting thing about the human eye...unless a spot is obviously a flaw, everyone that sees a very small spec IN the paint will naturally assume it is just dirt ON the paint. It will bother you more than anyone looking at the car.
 

PC

Obi Wan
Country flag
Offline
…. was warned to stay away from the edges. Of course I goofed and went right through one edge in a flash!!...
Excellent point.

Steve, when buffing the flat areas it’s best to avoid the edges completely. Some guys even mask them off. Then, when it’s time to do them, slow the buffer speed down, pay very, very close attention and tilt the buffer slightly so that you always buff off the edge. Never buff into the egde.


…I wouldn’t worry about the dirt breaking out. ….

Ditto.

Steve, If you have air filters in your lines and you work with clean tools you shouldn’t get any dirt in your paint. Dust nibs occur when a speck of dirt lands on the wet paint and warps the surface tension of the wet film. The dirt will still be on top but there will be a slight bump around it. Dust nibs can be removed with de-nibbing tools or abrasives.


…. I took a small piece of wet 500 …
I would caution against using #500. You’re just making more work for yourself. Since you’re concentrating all your energy a very tiny area you can typically work blemishes out with #1000 or #1500. That leaves only #1000 scratch to buff out.


attachment.php


Holy Jurassic Park, Batman! You can still get that stuff?

Seriously, I was cleaning out my parents’ garage a couple years back and found my 30+ year old of bottle of it. I posted pix on another car forum and got laughs form a couple of other geezers and dazed confusion from the youg’uns.

As the saying goes, “Well, there’s your problem.

Not saying that it’s a bad product, only that you need to understand why it exists and what its capabilities are. I’m pretty sure it was created during the Bronze Age to polish lacquer on Trojan chariots.

Let’s take a step back and try to get a little perspective on what you’re trying to accomplish.

Basically, you’re trying to smooth out your paint to the point where surface imperfections are imperceptible. You have a variety of tools, chemical and mechanical, of varying capabilities at your disposal. As with any tool, you’ll get the best results by matching the tool and technique to the task at hand. Some of those tools will remove larger imperfections quickly but leave telltale imperfections of their own. Others can remove very small imperfections.

This analogy may not be exactly to scale mathematically, but I think you’ll get the idea:

Think of your paint as if it were your garden. And you want it really flat and smooth so you can install a putting green. You’ve brought in loads of new, clean soil and it’s piled up and lumpy. You need to grade it out.

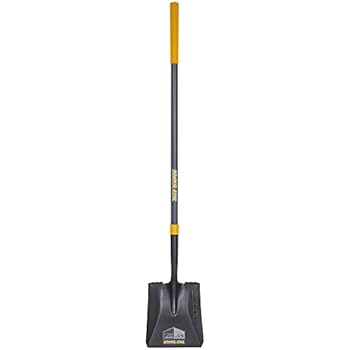
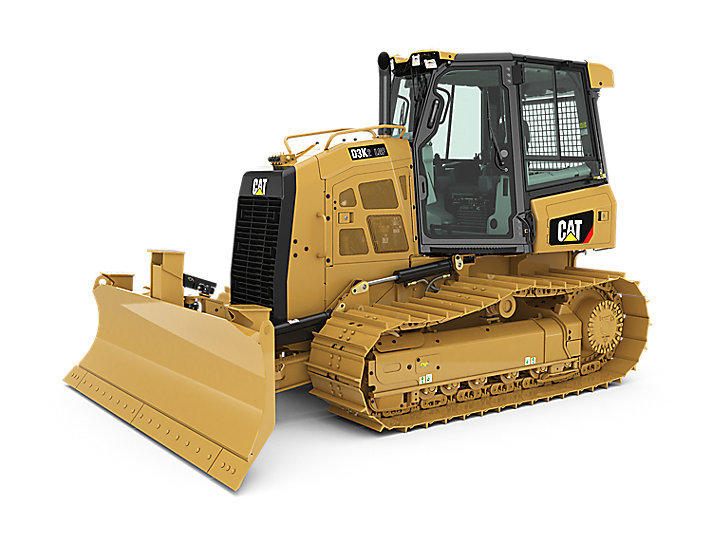
Blemishes like runs and dust nibs are like dirt piles about the size of your house. You could theoretically smooth them out with one of these.
31BH%2BbvOciL._SL500_AC_SS350_.jpg


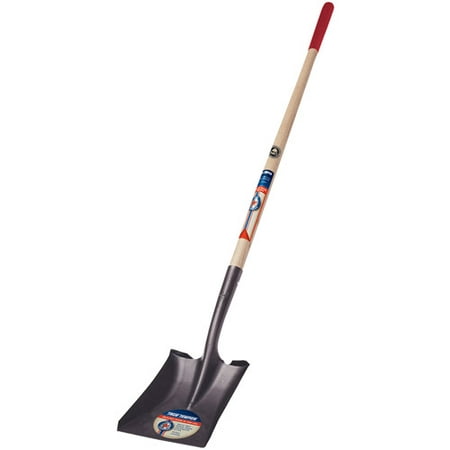
But really, you should probably use one of these:

hqdefault.jpg
or
C10337180


These are the equivalent of say #800 sandpaper.


Orange peel is about the size of a shed. Good tools for this would be:

bobcat_t300_track_loader1.gif
or
hqdefault.jpg


These would be about #1000 to #1500 sandpaper.

Now that you have the piles flattened out it’s time to smooth the surface with very fine abrasives, compounds and polishes. They would be more like:

b2af42ea-8c6d-4326-8c8c-eb9f03fb79b0_1.fdb36fb7d51f181158c4cb79159de7f5.jpeg
and
51WYcm77TiL._SX355_.jpg


Liquid Ebony is a product called a glaze. Glazes aren’t really meant to remove defects. They’re intended to be sort of a final accent to an already defect-free finish. In our lawn analogy they would be about like this:


KENT_POCKETCOMB_FOT_amended.jpg
 
OP
S

sp53

Yoda
Country flag
Offline
Well that is funny I enjoyed it. Thankfully I never used any of Ebony stuff. I got it from a guy who painted car for me years ago. I have been looking into the 3M products and the 3M polishing solution has changed at some point and is still evolving. I have been looking at the “3M finesse 11” on line and can get pint for 25.00 at a shop in town. This is the black bottle with white a label. The shop I have been doing business carries a “3M Perfect- It” in a purple bottle for 60.00 a quart, and they used to have the black bottle 3M . The purple stuff is on line also for more money and shipping. They tell me that the old 3M Finesse is now the improved purple “3M Perfect it” I am totally cool with getting the pint in the black bottle because that is probably all I will need, but it is the number 3M Finesse 11, so does the number 2 stuff sound correct?
 

bnw

Jedi Warrior
Country flag
Offline
Back in 1992, I painted my TR6 with Centari enamel with hardener. I had some orange peel on the bonnet but what aggravated me the most was the dust I got on the horizontal surfaces in spite of my home made ventilated booth. I too, was afraid to wet sand my glossy but flawed finish. I waited a year before I went after it. Not sure what products I used but the end result was spectacular. What I lost, was the built in gloss and had to wax/polish at least once a year. It was well worth it. and, stay away from the edges!
 

PC

Obi Wan
Country flag
Offline
Steve,

I don't have personal experience with 3M compounds and polishes so I can't make specific recommendations about them.

What I can say is that you need to be very careful to be very, very specific about what you buy, how it's intended to be used and what you expect to accomplish with it. 3M's product branding and naming conventions are very confusing and people in the body and collision industry are notoriously cavalier about the accuracy of the names they throw around when making product recommendations.

If someone says to get a bottle of Finesse-It or Perfect-It they are basically giving you no useful information. Those are brands, entire product lines, not specific products. In liquids alone, within Perfect-It you have EX Rubbing Compound, EX Machine Polish, Machine Polish, Finishing material, EX Ultrafine Machine Polish and Denibbing Polish. And Finesse-It has SRC Machine Polish, Purple, Finishing Material, Extra Fine, K211, Final Finish, and Ultra Fine.

It's all too easy to pick up the wrong product and/or wrong advice for you're doing. You need to be clear and concise when communicating with people.
 
OP
S

sp53

Yoda
Country flag
Offline
I took the worst of the fenders, the one with the run to experiment and get a feel for the buffer. My fear is the fender is going to need a re-spray anyway because the there is a small section at the very rear that looks like there is no paint only gray primmer.

Anyways, I sanded the run with some very wet 1000, and the run came right out no problem, so then I sanded the dull areas also with 1000 wet and they came out, and it looked like things were going good, so I started to buff with the 3M Finesse ll to see where I was at. The problem I am having now is the orange peel looks to be very deep and is not coming out. However, at the run area where the orange peel was just as deep and I sanded more it looks like more of the orange peel came out. I am not sure what the problem is, but my gut tells me to wet sand the fender more with 500 or 1000 a lot more then go the buffer. I do not have any 2000 or 1500 and will get some Monday when the store opens to work on the pieces that are not as bad; the pictures are from the same spot.

steve
 

CJD

Yoda
Country flag
Online
If the buffer seems to “add” orange peel, then the paint may need more time to cure before buffing. If it is soft, the heat from the buffer can actually move the paint around, making waves on the surface.

If you think the paint is solid, and well past the recommended curing time, then “yes”, you may need to go a tad deeper with the paper.

500 grit is on the rough side for buffing...but you can make it work by rubbing two sheets against each other to smooth out the grit...and then using the paper for a long time. You know how it is...old 500 grit is closer to fresh 800 grit...so you can make it work.

The pros I watched only used 600 grit, and then went right to the buffer. I’ve tried that, and it does work, but you have to spend more time and more compound to remove the 600 grit swirls. Working through 600 to 1000, 1500, etc. is just a technique I started picking up to reduce the buffing time.

You are doing great...it’ll start to come together and make sense as you do it more!
 
Similar threads
Thread starter Title Forum Replies Date
HealeyPassion Sanding and buffing new paint...Latest Austin Healey 8
bighealeysource sanding and buffing of paint job Restoration & Tools 12
NutmegCT Paint buffing Triumph 24
Jim_Gruber Bugsy IV - Painting, Cutting, Buffing is done Spridgets 20
I TR6 I will not be buffing out -opinions? Triumph 4
RickB AC resection and rotator 'buffing' Spridgets 13
tomshobby color sanding done and first stage buffing Spridgets 4
1 Windshield Buffing Spridgets 11
L A little time spent at the buffing wheel Spridgets 6
Tr4dude slow buffing progress Triumph 8
regularman Whew, been polishing and buffing all day Spridgets 15
B Buffing the Grill Bars Austin Healey 8
E TR6 Topaz (84) Paint. 84. Triumph 3
B Cove Paint Color Ideas Austin Healey 10
L Removing Master Cylinder Without Paint Damage Austin Healey 27
1 TR2/3/3A British Racing Green Paint Codes Triumph 6
R TR2/3/3A Does anyone know the paint Code for british Racing Green for a 1954 TR-2? Triumph 12
vpanza Wanted Salvado blue paint sample Triumph Classifieds 8
B 1977 Midget - Sandglow Paint Restoration & Tools 3
B TR6 Help with color and color code / paint recommendation Triumph 4
HealeyPassion Finally, paint on chassis Austin Healey 17
Fanch00 Does it make sense to just paint the panels? Austin Healey 3
K TR6 Need help with Mimosa Yellow Paint Triumph 1
C Alternative to Moss's BMC Green Engine Paint Austin Healey 10
PatPink TR6 Hello, I am new to the site and want to post some photos of my 1973 TR 6. I have done all mods to this car except body and paint. Triumph 10
Bayless A Sprite gets some paint finally Spridgets 2
D Body/Paint Shop Recommendations Austin Healey 1
BoyRacer Rattle can Healey Blue paint Austin Healey 2
Bayless More Paint Other British Cars 3
algot1901 Paint Other British Cars 15
BobHaskell "paint" thickness tester? Restoration & Tools 9
algot1901 1950 Ford Prefect Paint Other British Cars 5
Joel Lester TR2/3/3A DIY paint job? vs leave it to the professionals? Triumph 27
EWD TR6 TR6 top dash trim paint Triumph 2
somewhatspritely The black paint on replacement panels. Restoration & Tools 7
GeorgeC OK to paint battery? Spridgets 9
J Opalescent Silver Blue paint code Jaguar 0
Vargus TR2/3/3A what primer / paint ? Triumph 9
T TR4/4A Fenders off the car for paint? Triumph 8
B TR4/4A Wheel Paint Triumph 17
B TR6 what paint to use? Triumph 7
R TR2/3/3A OEM Paint color Number for 54 TR-2 british Racing Green Triumph 5
D TR6 Valve cover paint Triumph 5
TomMull Paint over galvanized parts? Restoration & Tools 8
Sopwith_Camel MGB-GT lick of paint 1 2 3 MG 2
Rut MGB Pale Primrose touch up paint MG 4
J Paint code Spridgets 0
J 1960 Bugeye Paint Codes Austin Healey 1
J Paint code Austin Healey 4
M Old English White Paint Code for early BE Spridgets 1

Similar threads

Top